
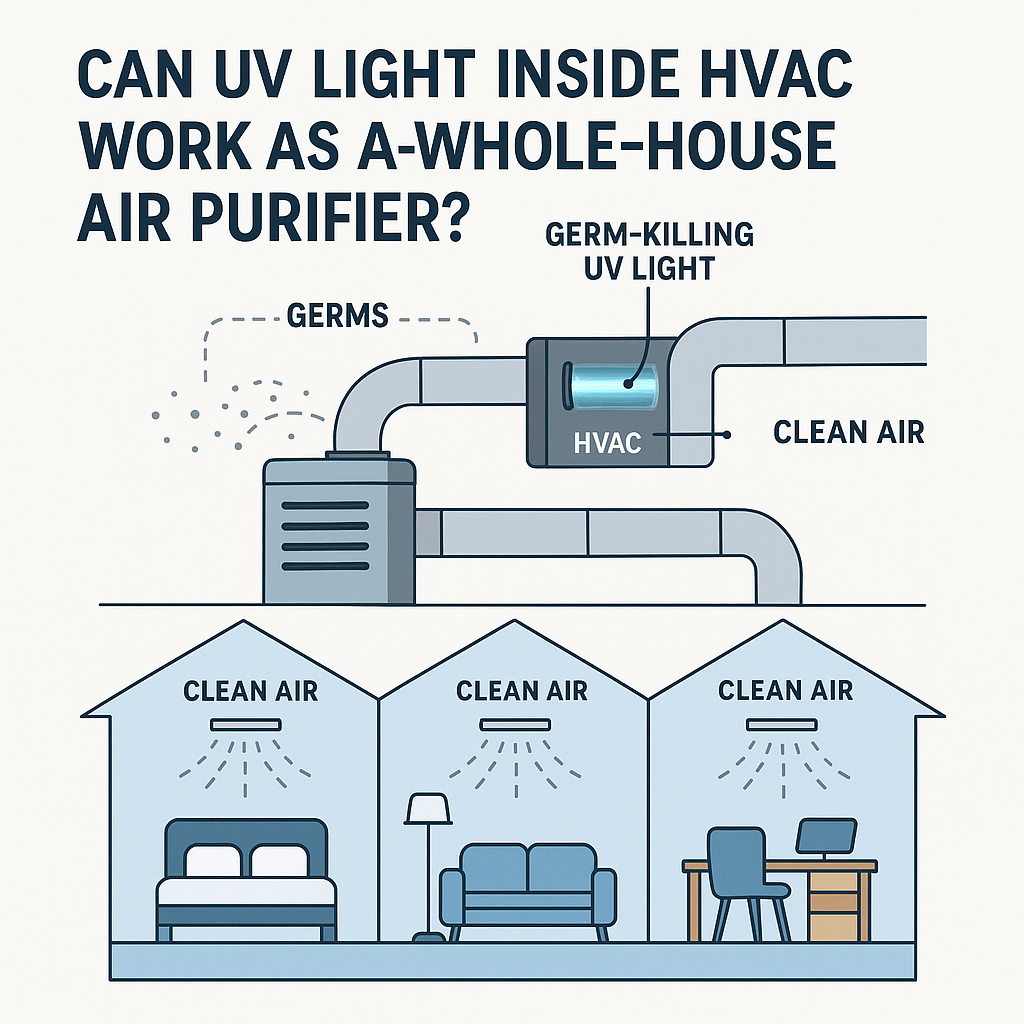
Is UV Light in HVAC Worth It?
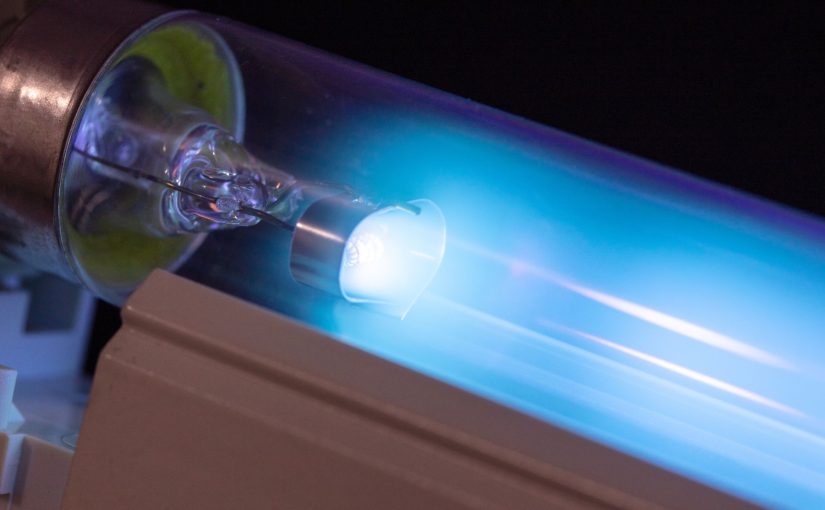
Yes — UV light in an HVAC system is mainly used to reduce microbial growth (like mold and bacteria) inside the equipment. It won’t filter dust or pet hair, but it can support whole-home air hygiene through your vents.
New to UV for HVAC? Start with the basics: does UV actually kill mold on coils? If you’re choosing between a coil light and a whole-home purifier, see UV lights vs. UV air purifiers. Not sure you even need one? Use this quick decision guide.
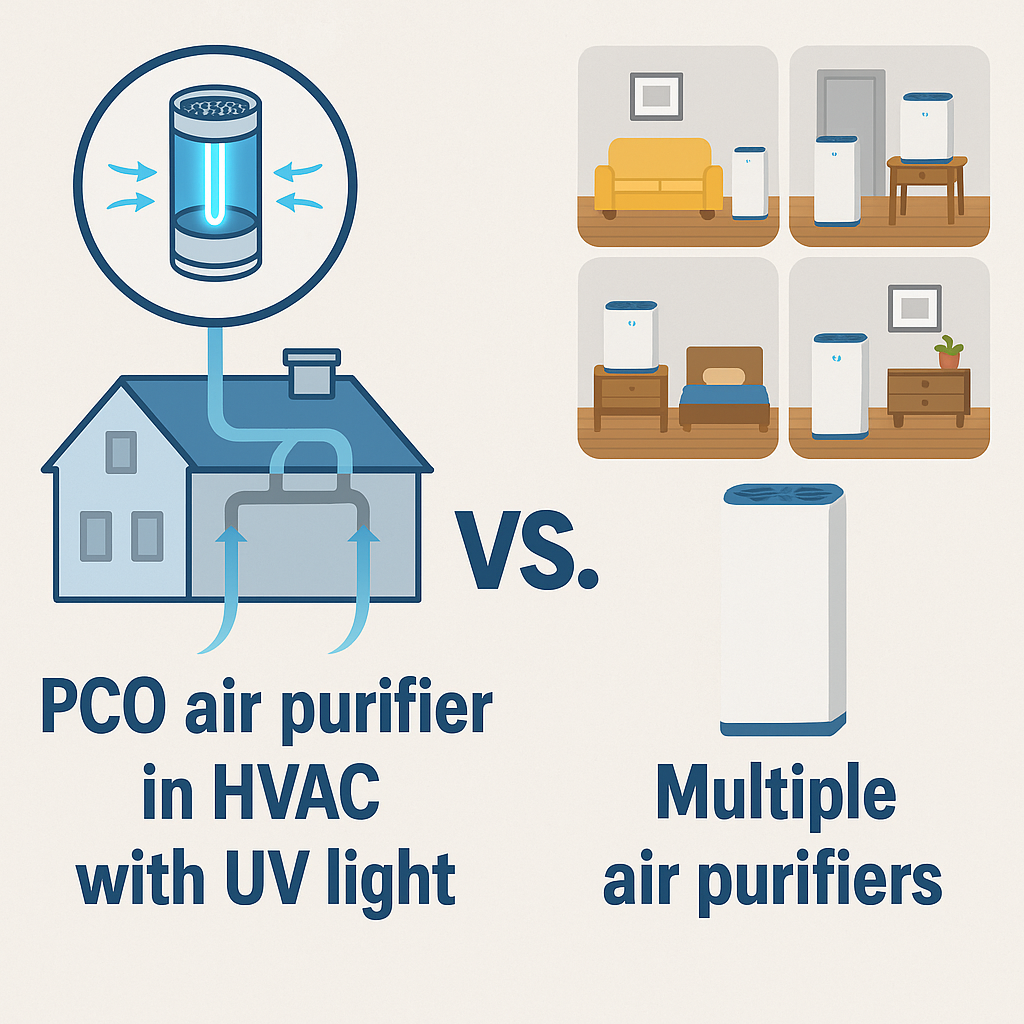
Can one device purify the air in your entire home? That’s what UV light in your HVAC system promises. Unlike portable air purifiers that treat only one room, A UV system can reduce microbial growth inside the air handler/coil area, which can help with musty odors and system cleanliness before air is recirculated.
But is it worth the cost? And what can’t it do? Let’s break it down: pros, cons, and whether it’s the smartest upgrade you can make for your indoor air quality.
Who Should Actually Install UV Light in Their HVAC?
Most homeowners research UV lights after an HVAC technician mentions it during a service visit. The real question isn’t whether UV technology works — it’s whether it makes sense for your specific situation.
UV Light Makes Sense If:
- You’ve had visible mold growth on your evaporator coil
- Your system produces a recurring “musty” or dirty-sock smell
- You’ve needed repeated coil cleanings
- Your HVAC tech showed you microbial buildup inside the air handler
- You live in a humid climate where moisture control is a constant challenge
UV Light May Be Overkill If:
- Your system stays dry and clean year-round
- Your main issue is dust, pet hair, or pollen (filtration matters more here)
- You’ve never had microbial growth inside your system
- You’re expecting UV to replace a HEPA filter
Pros and Cons of UV Light in HVAC
Installing UV lights in HVAC systems can significantly improve air quality by neutralizing harmful microorganisms. However, potential drawbacks include the initial installation cost and the limited purification scope, as UV lights do not filter particulates and may produce ozone.
| Pros of UV Light in HVAC | Cons of UV Light in HVAC |
|---|---|
| Kills bacteria, viruses, and mold at the source — inside your HVAC system | Does not filter out dust, pet hair, or other airborne particles |
| Purifies air throughout the entire house — no need for multiple room purifiers | Initial installation can be costly depending on system type and setup |
| Helps prevent mold growth on coils and in ductwork | UV bulbs require regular replacement to maintain effectiveness |
| Improves HVAC system efficiency and reduces maintenance over time | Direct UV exposure can be harmful during servicing if not properly shielded |
| Silent and automatic — runs with your HVAC system | Not compatible with every HVAC model or duct material |
Bottom line: UV light is primarily a microbial control tool — not a particle filter. If mold or bio-growth is your real issue, it can be a smart upgrade. If dust and allergens are your main concern, better filtration or humidity control may deliver better value.
Before buying, run through our 8 smart questions to ask your installer so you don’t overpay for the wrong setup.
Is UV Light in HVAC Safe for Your Home?
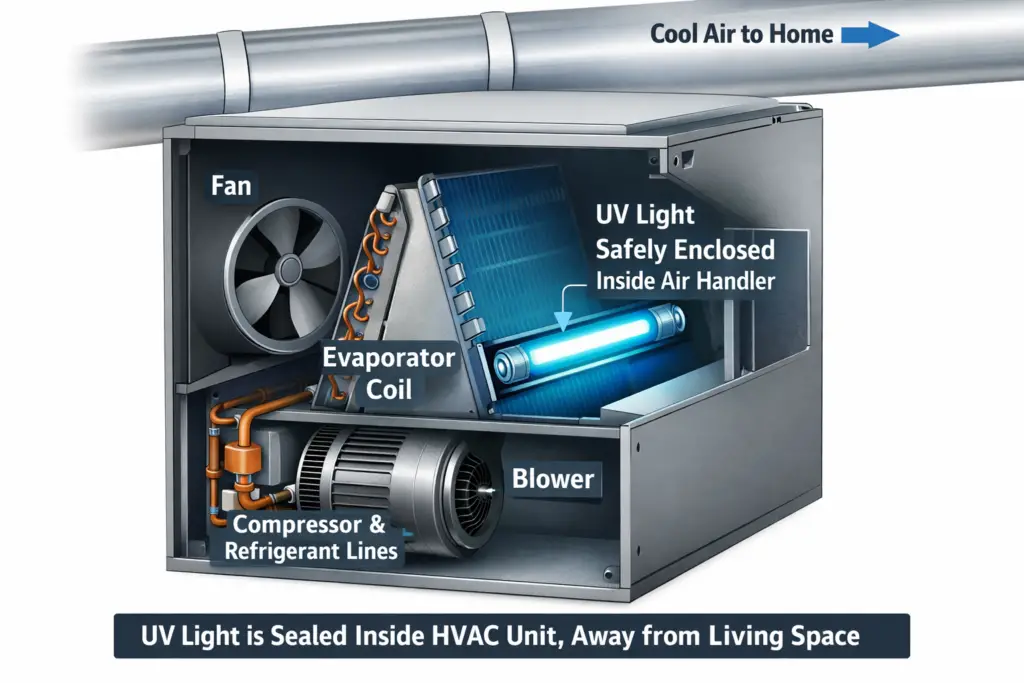
When UV light is installed inside sealed HVAC equipment, it’s designed to treat air and surfaces — not people. The lamps sit behind panels or inside ductwork where you can’t see them during normal operation.
For a typical home, that means you get germ-killing benefits without UV shining into the room the way a tanning bed or “UV wand” might. Most safety risks come from servicing the equipment or choosing the wrong type of product.
- Avoid direct exposure: The access panel should stay closed while the system is running. Anyone opening the air handler should shut off power first so the UV light turns off.
- Use non-ozone or low-ozone designs: Many modern HVAC UV systems are marketed as “no ozone” or “meets ozone limits.” If anyone in the home has asthma or lung issues, stick with these options.
- Protect eyes and skin during service: Technicians should wear UV-rated eye protection and gloves when working near an exposed bulb.
- Watch plastics and wiring: Long-term, unshielded UV exposure can weaken some plastics and wire insulation if the lamp is aimed too close. A good installer will position the lamp to avoid this.
Bottom line: A properly sized, professionally installed UV system is generally safe for families and pets because the light stays hidden inside the HVAC cabinet or ducts. The main safety rule is simple — don’t stare at a live UV bulb, and shut off power before opening panels.
What Does UV Light in HVAC Really Cost Overall?
When people ask if UV in HVAC is “worth it,” they’re really weighing the cost of one whole-home system against multiple room purifiers, repeated coil cleanings, or ongoing odor complaints.
- Upfront investment: Most homeowners pay for the UV device itself plus installation. Coil-only lights are usually the least expensive; whole-home PCO or REME-style systems cost more but cover every room through the ductwork.
- Lifetime bulb costs: UV-C output slowly fades, so replacing the bulb every 1–2 years is part of the long-term price. Skipping replacements means you’re paying for a system that’s no longer doing much.
- Energy and maintenance savings: Cleaner coils can help your system run more efficiently and reduce the need for deep cleanings. Over several years, that can offset a chunk of the original price.
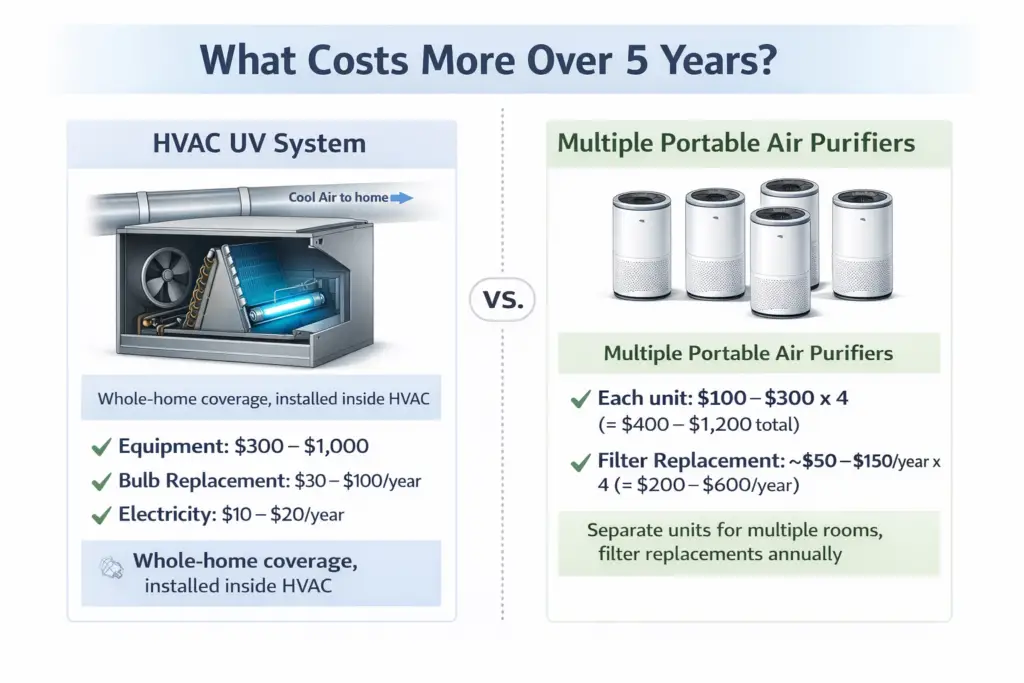
- Compared to plug-in purifiers: To match whole-house coverage, many homes would need 3–5 portable units (plus filters) running in different rooms. A single HVAC UV system consolidates that into one device tied to your existing blower.
Think of UV as a long-term air quality upgrade, not a one-time gadget. The real value shows up over several years in fewer mold issues, fewer “dirty sock” odors, and less time chasing room-by-room solutions.
 UV in HVAC Benefits
 UV in HVAC Benefits
One of the primary benefits of UV light in HVAC is its ability to kill bacteria, viruses, and other microorganisms that can cause health problems.
By neutralizing these harmful pathogens, UV light can improve the quality of the air in your home or business and reduce the risk of illness.
UV light can also help prevent the growth of mold and mildew in HVAC systems.
These fungi can thrive in moist, warm environments like air conditioning coils, and can cause respiratory problems, allergies, and other health issues.
UV light can kill mold and mildew spores, preventing them from spreading and improving overall indoor air quality.
Another advantage of UV light in HVAC is that it can increase system efficiency and longevity by keeping coils and other components clean.
When dust, dirt, and other debris accumulate on coils, it can reduce the efficiency of the system and cause it to work harder than necessary.
By eliminating these contaminants with UV light, HVAC systems can operate more efficiently and last longer.
For placement and results, see how UV targets mold on coils and drain pans.
Cons of UV Light in HVAC
While there are many benefits to using UV light in HVAC, there are also some potential drawbacks.
For one, UV light can be expensive to install and maintain.
Depending on the size and complexity of your HVAC system, installing UV light can be a significant investment.
Additionally, UV lamps may need to be replaced periodically to ensure they continue to function effectively.
Not sure it’s worth it for your situation? This guide helps you decide.
Another concern with UV light in HVAC is that it can be harmful to humans and pets if exposed directly.
While the amount of UV radiation emitted by HVAC systems is typically very low, prolonged exposure can still cause skin and eye damage.
For this reason, it’s important to follow proper safety protocols when installing and maintaining UV lamps in HVAC systems.
Finally, some types of HVAC systems may not be compatible with UV light installations.
For example, systems with coated or painted surfaces may not be suitable for UV lamps, as the coatings can block the light from penetrating the surface.
How Much Does a UV Light for HVAC Cost?
The cost of a UV light system depends on the type you choose and whether you’re installing it for coil sterilization or whole-home air purification. Here’s what most homeowners can expect:
- Equipment cost: Basic coil UV lights usually run $150–$400. Whole-house UV purifiers (like REME HALO-style systems) typically cost $500–$1,200.
- Installation cost: Professional installation ranges from $100–$350 depending on your ductwork and whether electrical work is required.
- Bulb replacement: UV-C bulbs lose strength over time and typically need replacing every 9–12 months. Replacement bulbs cost $30–$100 depending on the model.
- Electricity cost: Most HVAC UV bulbs draw only 15–30 watts, so the operating cost is low — usually $10–$20 per year depending on usage.
- Maintenance cost: Beyond bulb replacement, there’s very little maintenance. Some homeowners have the tech clean the bulb area during annual tune-ups.
Is it worth it?
If you’re dealing with mold, musty AC smells, or allergy triggers, UV lights can be a cost-effective long-term solution compared to repeated coil cleanings, odor complaints, or duct sanitizing. But if your system is always dry and clean, the benefits may be more limited.
What are the most strategic places to install UV Light in HVAC
 What are the most strategic places to install UV Light in HVAC
-
- Air Handling Units (AHUs): UV lights placed in AHUs disinfect the air as it passes through, reducing the overall microbial load. This helps ensure that the air distributed throughout the building is cleaner, contributing to healthier indoor environments.
- Cooling Coils and Drain Pans: These areas are prone to moisture and can harbor mold and bacteria. UV lights installed here directly target these microorganisms, preventing their growth. This not only improves air quality by reducing mold spores and bacteria in the circulated air but also maintains the efficiency of the HVAC system by keeping the coils clean, ensuring optimal heat exchange and reducing energy consumption.
Why coils and pans matter: UV vs. mold explained.
- Supply Ducts: Installing UV lights in the supply ducts treats the air one more time before it enters the occupied spaces, offering an additional layer of disinfection. This can be particularly beneficial in settings that require high levels of cleanliness, such as hospitals or laboratories.
- Return Air Ducts: Placing UV lights in the return air ducts helps to minimize the recirculation of pathogens and contaminants back into the air handling unit and throughout the building. By disinfecting the air before it’s mixed with fresh air and recirculated, the overall indoor air quality is improved.
Each location targets different aspects of air quality and system efficiency: AHUs and ductwork focus on treating the air, while cooling coils and drain pans target surface disinfection to prevent microbial growth that can affect air quality and system performance.
Most Strategic?
If you have only one or two UV lights to install in your HVAC system, targeting the cooling coils and drip (or drain) pans would be among the best choices for several reasons:
-
- High Risk for Mold Growth: These areas are prone to moisture accumulation, making them ideal environments for mold and bacteria to thrive. By focusing on these spots, you can directly address the primary conditions that facilitate mold growth.
- Impact on Air Quality: Mold and bacteria growth on the cooling coils and in the drip pans can significantly affect the air quality, as these microorganisms can be dispersed into the air circulated throughout the building. Using UV lights to minimize growth in these areas can help maintain healthier indoor air.
- System Efficiency: Mold growth on the cooling coils can reduce the HVAC system’s efficiency by insulating the coils and inhibiting heat exchange. Keeping the coils clean with UV light can help maintain the system’s efficiency and potentially reduce energy costs.
Before you commit, ask these questions about placement, bulb output, and maintenance.
By positioning UV lights to irradiate the cooling coils and the area around the drip pans, you can effectively reduce the microbial load in these critical areas, helping to prevent mold growth, maintain air quality, and ensure the efficient operation of the HVAC system.
Best UV Light for HVAC System
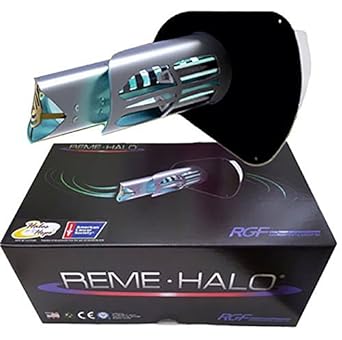
- Category: Hybrid in-duct air treatment (UV + oxidation technology), installed inside the HVAC system
- Best fit for: Homeowners who want broader treatment than coil-only UV (odors + general air quality goals)
- Not necessary for: Someone who only needs coil mold prevention (a basic coil UV is often enough)
- Ongoing costs: Replacement cell/bulb schedule + occasional maintenance
- Example product: REME HALO (one commonly installed option)
Comparing a coil UV light with a whole-home purifier like REME HALO? See the differences and when to choose each.
Safety Considerations When Using UV Light in HVAC
To ensure safe and effective use of UV light in HVAC systems, it’s important to follow proper safety protocols.
This includes installing UV lamps correctly, using shielding and warning signs to prevent accidental exposure, and wearing appropriate personal protective equipment when working on or around UV installations.
Proper maintenance is also critical to ensure the continued effectiveness of UV lamps in HVAC systems.
This includes regularly cleaning the lamps and replacing them when necessary, as well as ensuring that they are positioned correctly within the system.
For installer conversations, keep this question checklist handy.
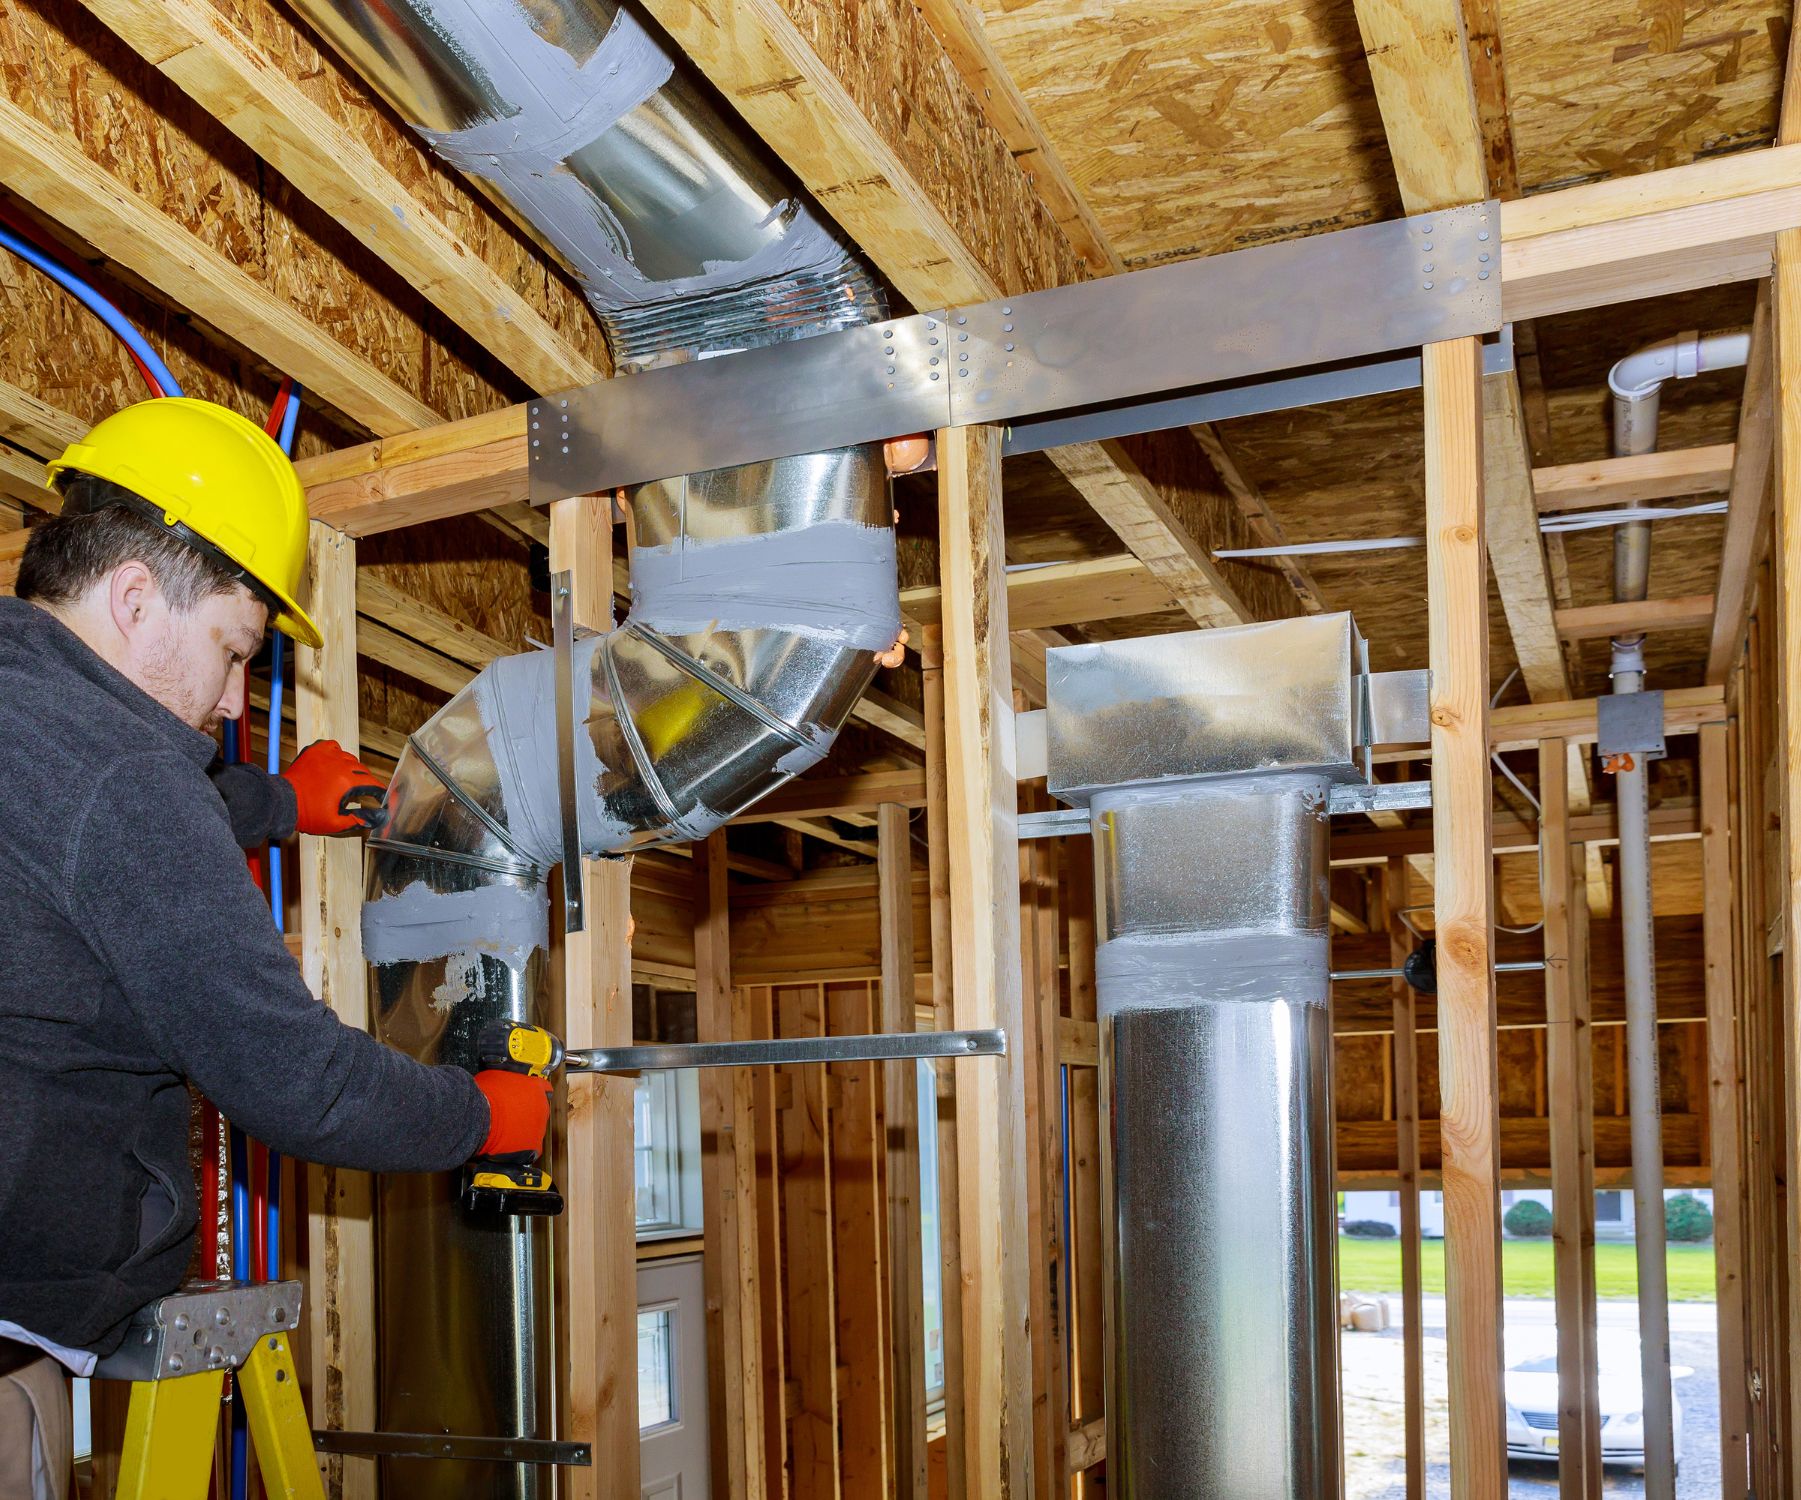
Installation of UV Lamps in HVAC Systems
 Installation of UV Lamps in HVAC Systems
Proper installation of UV lamps in HVAC systems is critical to ensure their effectiveness and safety. Here are some key considerations to keep in mind:
1. Hire a qualified professional
UV lamps should be installed by a qualified HVAC technician who has experience with UV technology.
A professional installer can ensure that the lamps are positioned correctly and that the wiring is done safely.
Not sure you even need UV? Use this decision guide first.
2. Choose the right location
UV lamps can be installed in several locations in an HVAC system, such as in the air handler, ductwork, or near the coil.
The location will depend on the type of system and the specific needs of the building.
It’s important to choose a location that will provide optimal coverage of the air flowing through the system.
For coil-first installs, see why coils/pans are priority #1.
3. Determine lamp type and quantity
The type and quantity of UV lamps needed will depend on the size of the HVAC system and the level of air disinfection required.
A qualified installer can help determine the appropriate lamp type and quantity.
Weighing coil UV vs whole-home purifier? Compare them here.
4.Install the lamps correctly
Once the location and lamp type and quantity have been determined, the lamps can be installed.
UV lamps should be installed in a way that minimizes exposure to humans and pets, as direct exposure to UV radiation can be harmful.
Shielding and warning signs can be used to prevent accidental exposure.
5. Connect the power supply
After the lamps are installed, they need to be connected to the power supply.
This should be done by a qualified professional to ensure that the wiring is done safely and in compliance with local electrical codes.
6.Test the lamps
Once the lamps are installed and connected, they should be tested to ensure that they are functioning properly.
A professional installer can perform a test to verify that the lamps are emitting the correct amount of UV radiation.
FAQ
Can UV light in HVAC systems help with allergies?
Yes, UV light can help reduce the presence of allergens in indoor air, such as mold spores and dust mites.
If allergies and odors are the main issue, compare UV lights vs UV air purifiers.
How often do UV lamps need to be replaced in HVAC systems?
It varies depending on the type of lamp and the manufacturer’s recommendations, but typically every one to two years.
Before buying, ask about lamp life, output, and replacement cost.
Is UV light in HVAC systems safe for humans and pets?
While the amount of UV radiation emitted by HVAC systems is typically very low, prolonged exposure can still cause skin and eye damage.
It’s important to follow proper safety protocols when installing and maintaining UV lamps in HVAC systems.
Installation placement and shielding matter. See why coil-area targeting improves results.
Can UV light in HVAC systems damage the equipment?
No, when properly installed and maintained, UV light should not cause damage to the HVAC system.
Will UV light in HVAC systems eliminate all microorganisms?
While UV light is effective at killing many types of microorganisms, it may not be effective against all strains or types.
For whole-home coverage and odors/VOCs, consider UV air purifiers.
Does installing UV light in my HVAC system require professional help?
Yes, professional installation is recommended to ensure the UV light is correctly positioned for maximum effectiveness and safety.
Can UV lights in HVAC systems reduce energy costs?
By maintaining cleaner coils and components, UV lights can improve system efficiency, potentially leading to lower energy costs.
Are there different types of UV lights for HVAC systems?
Yes, there are various types of UV lights available, including coil sterilization lights and air sterilization lights, each designed for specific applications within the system.
How do I know if a UV light is working in my HVAC system?
Some UV light systems have indicators or viewing ports to check operational status, but it’s best to have regular maintenance checks by a professional.
Can UV light in HVAC systems help with odor control?
Yes, by reducing microbial growth, UV lights can also help minimize odors caused by mold and bacteria in the system.
What to Read Next
Watch the video or read the transcript below:
Video Transcript
What if your HVAC system could kill germs and purify the air in every room of your home—without a single portable air purifier?
UV light and PCO purifiers work at the source—inside your ductwork—disinfecting the air as it flows through your system.
That means cleaner air delivered through every vent, before it ever reaches your lungs.
To get the same effect with plug-in purifiers, you’d need 4 or 5 of them. UV does it all at once—automatically.
So, is it worth it? If you’re serious about clean air in every room, a UV system might be the smartest upgrade you can make.


 Why This Matters
 Install Water Filter


 If you find yourself coughing more often when the central heating is on, you’re not alone. Central heating can dry out the air and irritate respiratory passages, leading to coughing for some people. However, it’s not just the dry air that could be causing discomfort. Mold in HVAC systems can also contribute to respiratory issues, including coughing. Thankfully, there are steps you can take to mitigate these effects and keep your airways calm.
 The Hidden Hazards of Dirty Ducts
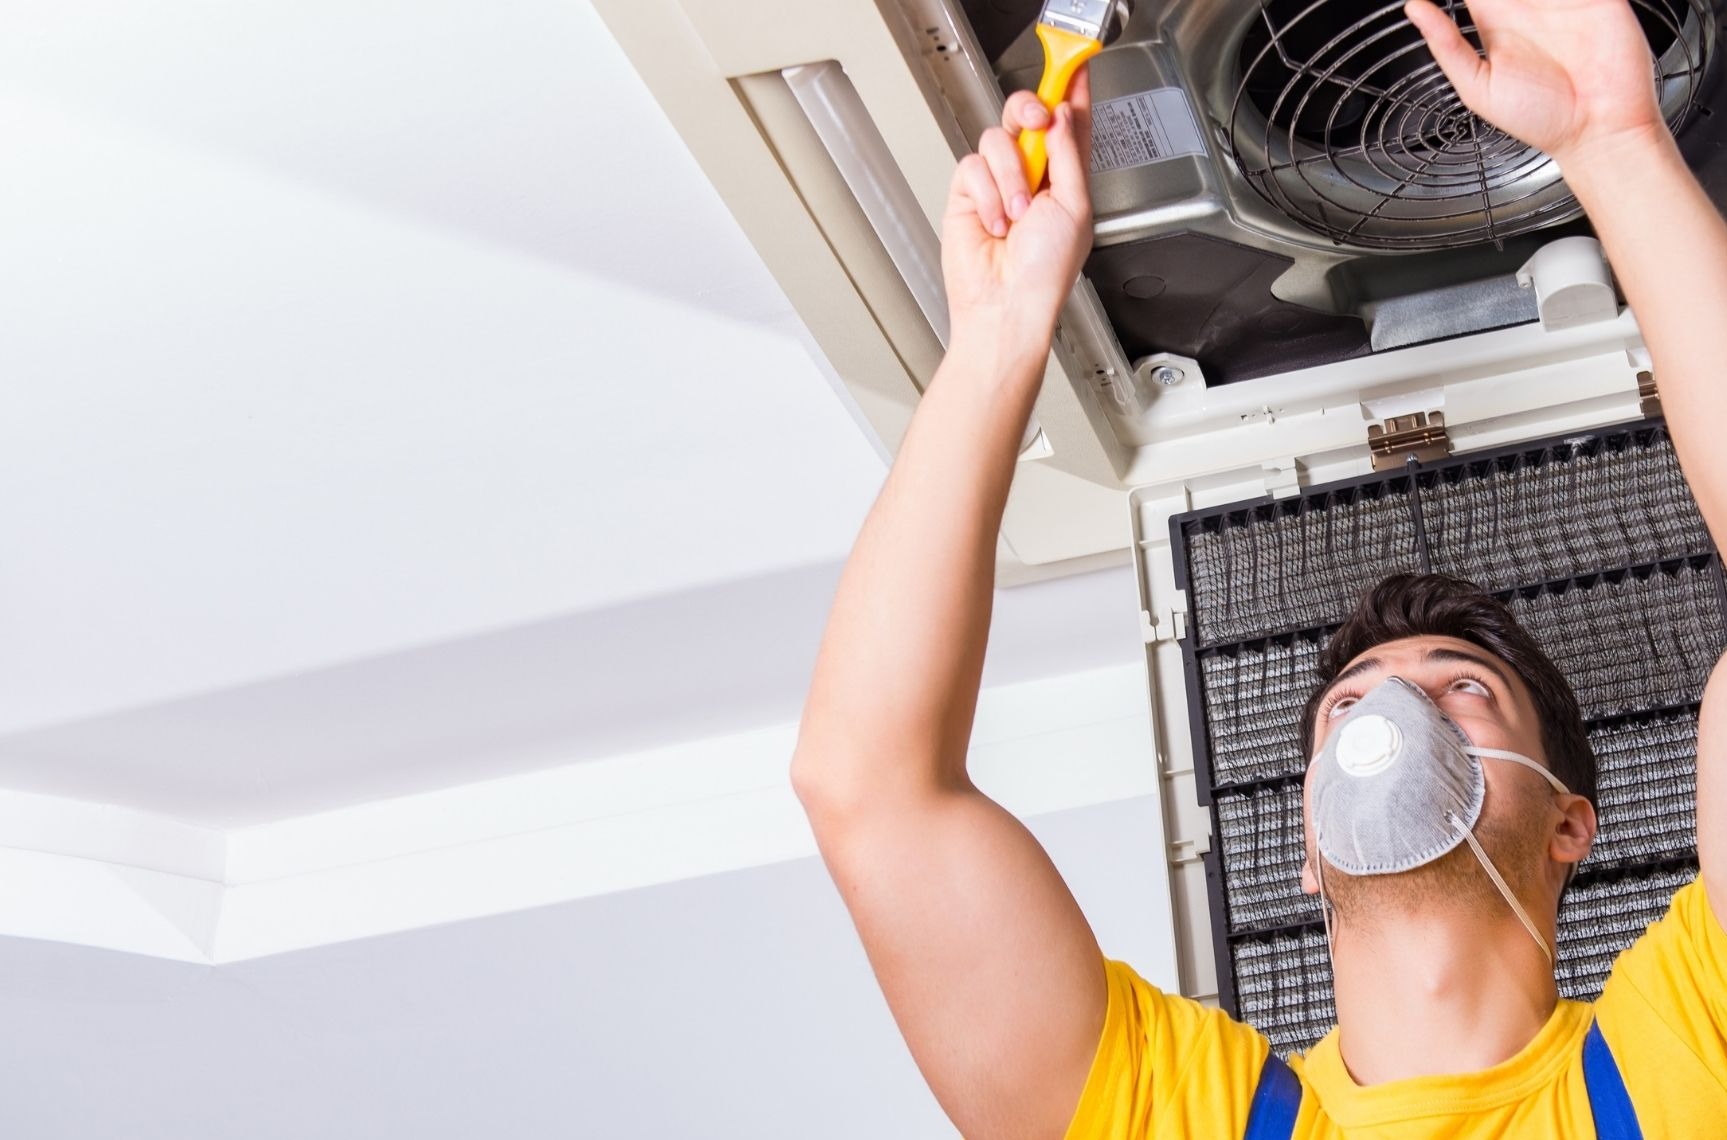
 Mold in HVAC Systems

 Ozone and Bed Bugs
 Spiders and Ozone
 Roaches and Ozone
 Fleas and Ozone
 How To Get The Best Results From A Ozonator?
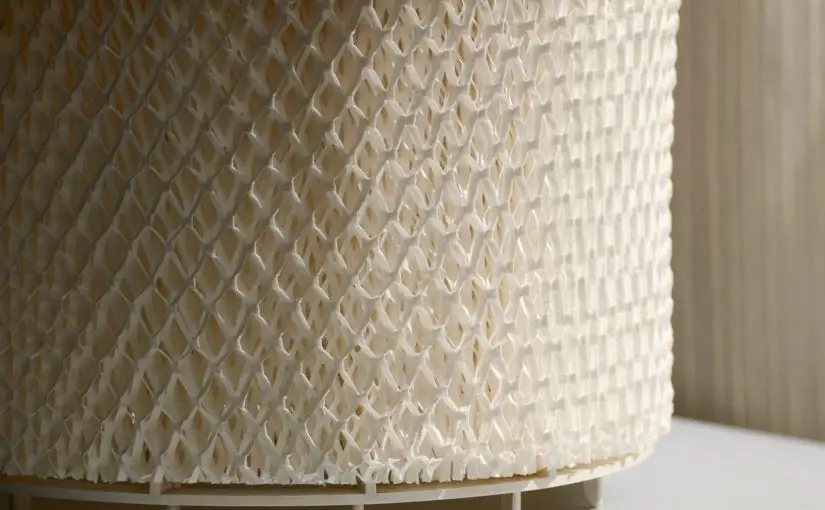
 The purpose of a filter on a humidifier is:
 Other Preventative Solutions Besides Filters:
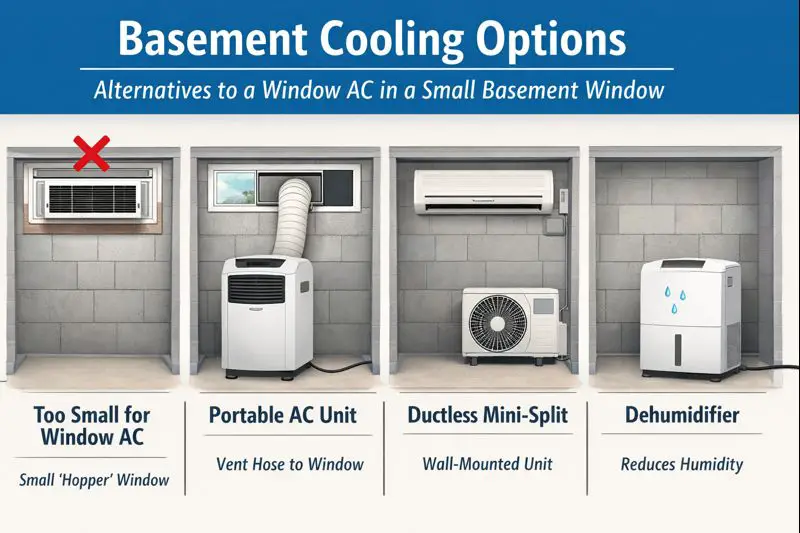 Main Alternatives to Window Air Conditioners in Basements
 4. New HVAC zone
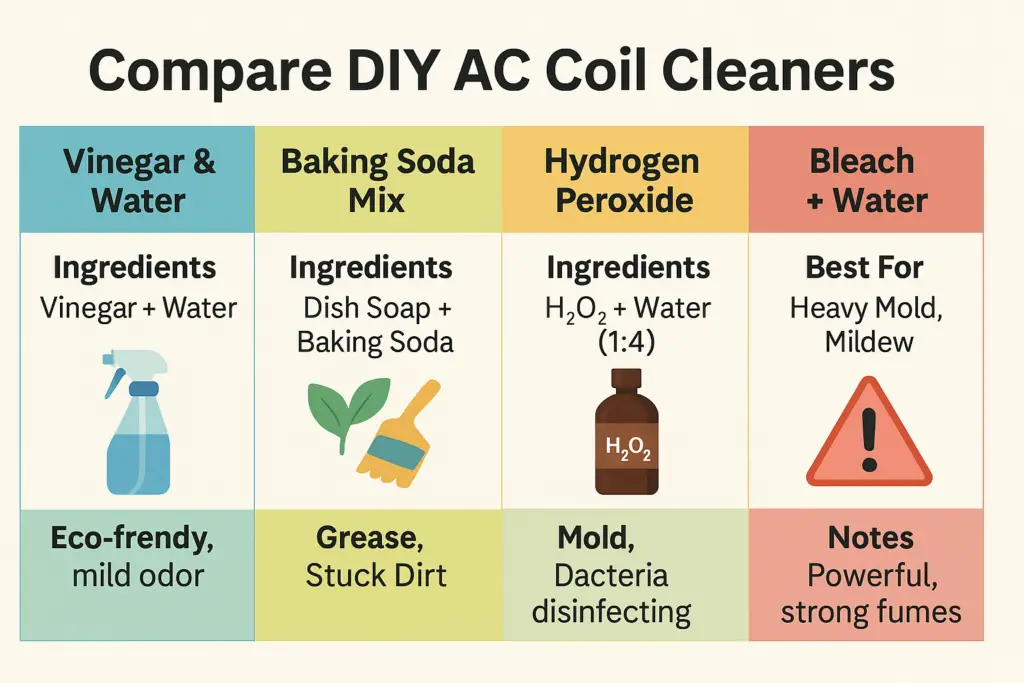

 3. Bleach and Water
 7. Mini-Split Coil Cleaner (Indoor Units)