High or Low. Where to Place an Air Purifier for Maximum Effectiveness

Where’s the Best Place to Put an Air Purifier?

Quick Answer: The best place to put an air purifier is 5–6 feet off the ground in a central, unobstructed location, facing the middle of the room. This placement maximizes airflow so clean air reaches every corner.


Air purifier placement can make or break its performance. Even the most powerful unit will struggle if it’s stuck in a corner, hidden behind furniture, or placed too low. By positioning your purifier where air naturally circulates, you’ll capture more dust, dander, smoke, and allergens—and feel the difference faster.

In this guide you’ll learn the best placement strategies for every room, how to adjust for specific pollutants, common mistakes to avoid, health and safety considerations (including ozone), when to use more than one unit, and how to pair a portable purifier with a whole‑home UV solution.


1. Why Placement Matters

Air purifiers pull in contaminated air through an intake vent, trap particles in a filter, and push clean air back into the room. If the intake is blocked or the purifier sits in a dead zone, circulation drops and fewer pollutants reach the filter.

  • Near a wall: Reduces intake from multiple directions.
  • Behind furniture: Blocks both intake and outlet vents.
  • Too low: Misses airborne pollutants circulating higher in the room.

Comfort matters too. A purifier blowing directly on your face can dry your nose and throat; placing your face right next to the intake can pull unfiltered air past you before it’s cleaned. If you’re still choosing a unit, see The Hidden Dangers of Ionized Air Purifiers.

2. Best Placement for an Air Purifier

Best place to put an air purifier diagram showing ideal high wall placement facing room center for maximum airflow and clean air circulation.
Best placement: high on a wall, facing the center of the room, away from obstructions and corners.

As the diagram shows, an elevated, central location lets the purifier pull air from all directions and redistribute clean air evenly—preventing “clean pockets” near the device and stale areas elsewhere.

3. General Placement Guidelines

  • Height matters: Aim for 5–6 feet from the floor to reach the breathing zone and improve room-wide circulation.
  • Keep it central: Middle of a wall or open area beats corners and alcoves.
  • Clear the vents: Leave 2–3 feet of clearance around intake and outlet.
  • Mind the intake path: Don’t position the intake so it pulls unfiltered air across your face in seating or sleeping spots.
  • Face the room: Angle the outlet toward where people spend time, not a wall.

4. Room-by-Room Placement Guide

Most rooms have unique airflow, noise concerns, and pollutant sources. Use this guide to tune placement for each space.

Air purifier placement guide by room with best positions for bedroom, living room, kitchen, nursery, office, and basement for optimal air cleaning.
Best placement for an air purifier in each type of room.
Room Type Ideal Placement Why It Works
🛏️ Bedroom High up, ≥5 ft Circulates clean air through the breathing zone without pulling pollutants past your face. Place opposite the bed if noise is a concern; use sleep mode at night.
🛋️ Living Room Central, away from electronics Even coverage across seating areas. Keep a few feet from TVs/speakers to avoid heat/noise interference. In open concepts, place between seating areas—not in a corner.
🍳 Kitchen Near stovetop, raised Intercepts smoke/odors before they spread. Don’t put directly above the stove; keep ≥3 ft from the sink to protect filters.
🍼 Baby’s Room High wall, away from crib Keeps buttons/cords out of reach and reduces noise by angling the outlet away from the crib.
💻 Office Near desk, angled away Filters your breathing zone without drying your eyes. Keep a few feet from computer vents.
🏠 Basement Central/elevated, near stairs Improves circulation in stagnant spaces and helps clean air reach upper floors. Elevate to avoid pulling damp/radon-heavy floor air.

Small adjustments—raising the unit a foot, angling the outlet toward seating, or moving a few feet from a wall—can noticeably improve results.


5. Placement for Specific Pollutants

Pollutants behave differently. Smoke rises quickly, pet hair collects low, and dust is easily stirred. Target them with tailored placement.

Air purifier placement for smoke, pet hair, and dust showing ideal locations near stove, raised pet area, and high wall mount to reduce allergens.
Target specific pollutants by adjusting your air purifier placement.

Smoke

  • Place within 3–6 ft of the source—but never directly above heat.
  • Use a counter/wall-mount elevation to intercept smoke quickly.
  • In large rooms, angle the outlet toward open areas to push clean air into the flow path.

Pet Hair & Dander

  • Keep near pet zones but raise 1–2 ft to reduce hair clogging.
  • Ensure a clear intake path; don’t block with beds/furniture.
  • Run higher fan speeds during shedding/grooming.

Dust

  • Mount 4–6 ft high to catch airborne dust before it settles.
  • Position where sunlight reveals floating particles—often active air currents.
  • Vacuum/dust regularly so the purifier stays effective.

6. Avoid These Bad Placement Spots

Certain locations create airflow problems, reduce efficiency, or let pollutants bypass the filter entirely.

  • Near windows: Outdoor pollutants enter before filtering; keep ≥3 ft away from open windows.
  • Inside closets/cupboards: Airflow is blocked; room air isn’t cleaned.
  • Corners & alcoves: Stagnant “dead zones” limit reach.
  • Behind furniture: Blocks intake/output vents.
  • Next to HVAC vents: Disrupts purifier airflow patterns.
  • Face-level outlet: Can cause dryness if blowing directly on you for hours.

Think of a purifier like a fan in reverse: it needs a clear path to pull dirty air in and push clean air out.


7. Can the Wrong Air Purifier Placement Make You Sick?

Most purifiers improve health by reducing airborne pollutants. Poor placement, poor maintenance, or the wrong type of unit can cause irritation or worsen symptoms.

  • Intake path risk: If you sit/sleep right next to the intake, dust, pollen, smoke, and dander can be drawn past your face on their way to the filter.
  • Outlet too close: Air blowing directly at you for hours can dry your nose, throat, and eyes.
  • Ozone-producing models: Some ionizers/ozone generators emit ozone, which can irritate lungs and aggravate asthma. If your purifier emits ozone, see What to Do If Your Purifier Emits Ozone and The Hidden Dangers of Ionized Air Purifiers.
  • Dirty/moldy filters: Neglected filters can harbor and re-release irritants.
  • Wrong room choice: Running a purifier in a damp, moldy room without fixing moisture can recirculate unhealthy air.

Solutions: keep a few feet from beds/sofas, angle the outlet away from faces, maintain filters on schedule, and avoid ozone‑producing devices in occupied spaces.


8. When You Need More Than One Air Purifier

One purifier only treats its immediate area. Large homes, open concepts, and multi-story layouts often need more than one unit.

Signs You Need Multiple Units

  • Room size exceeds the unit’s CADR/square-foot rating.
  • Open concepts with multiple pollutant sources (kitchen + living).
  • Multi-level homes (air doesn’t travel efficiently between floors).
  • Persistent dust/odors in multiple rooms.

How to Place Them

  • Opposite sides of a large room: Face toward center for balanced airflow.
  • Target sources + people: One unit near pollutant sources, another where people gather.
  • Stairs as support: A unit near stairs can cut inter-floor transfer; still keep a unit per level.

9. Pairing with an HVAC UV System

For whole-home coverage, pair a portable purifier (captures particles where you live and breathe) with an HVAC UV system (neutralizes germs in the ductwork).

  • Portable purifier: Captures dust, dander, smoke, and allergens in key rooms.
  • HVAC UV light: Kills mold spores, bacteria, and viruses as air circulates.

Benefits: cleaner coils/ducts, fewer germs circulating, silent always‑on operation. Learn more in Pros and Cons of UV Light in HVAC.


10. Seasonal Placement Adjustments

Winter

  • Keep away from heating vents that distort airflow.
  • Prioritize closed rooms where you spend more time indoors.
  • If air feels dry, angle outlet away from faces/sleeping areas.

Summer

  • Give AC vents space so they don’t overwhelm intake or blow clean air away.
  • During pollen season, place near frequently used doors/windows.
  • In humid areas, use dehumidification in damp spaces; don’t pull in wet air from the floor.

Shoulder Seasons

  • Move units between rooms as needs change.
  • Watch sunlit zones that reveal floating dust—great targets for placement.

11. Special Placement Scenarios

Allergy Season

  • Place near entry points and windows to capture pollen early.
  • Run higher fan speeds during morning/evening peaks.

During Illness

  • Keep a purifier in the patient’s room; position intake to pull air away from others.
  • Angle outlet toward doorway/hall to send cleaner air outward.
  • Avoid the intake path passing directly by the patient’s face.

After Cleaning

  • Vacuuming/dusting stirs particles—run higher speed for 30–60 minutes.
  • Central placement captures stirred dust from multiple surfaces.

Hotel Rooms, RVs, Vacation Homes

  • Hotels: near the bed, outlet angled away from your face.
  • RVs: near cooking or sleeping zones depending on use.
  • Unused homes: start in mustiest room, then move as odors clear.

12. Testing Your Placement

Verify performance—tiny moves can make big differences.

Use Built‑In Sensors

  • Run auto mode; note how fast it returns to “good.”
  • Try another spot; compare times.

Standalone Monitors

  • Use PM2.5/VOC meters; measure before and 30 minutes after.

When to Move It

  • Persistent odors or dust accumulation.
  • Uneven airflow—breeze on one side, stale on the other.
  • Allergy/asthma symptoms persist in certain rooms.

Test for a full day in each spot; airflow can shift with weather, HVAC cycles, and activity.


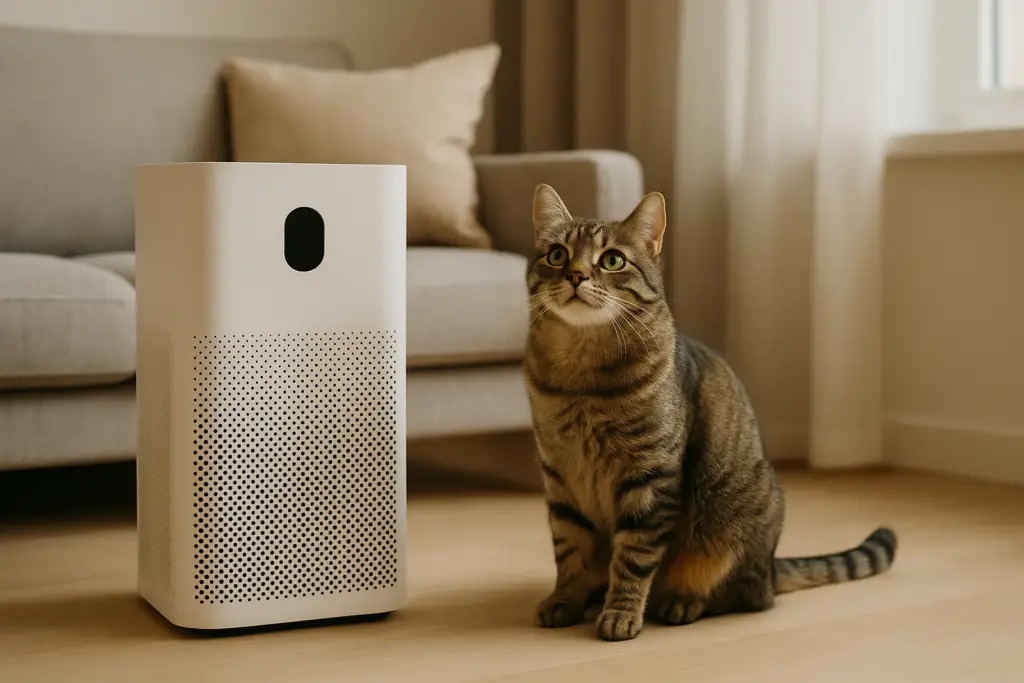
Tabby cat sitting beside a modern white air purifier in a sunlit living room, symbolizing pet allergy relief and cleaner indoor air.13. Key Takeaways

  • Place purifiers 5–6 ft high, central, and unobstructed; face the room.
  • Match placement to the room and to the pollutant you’re targeting.
  • Avoid dead zones: corners, closets, behind furniture, and right by HVAC vents.
  • Keep the intake away from your breathing zone and maintain filters on schedule.
  • Use multiple units for large/open/multi‑floor homes.
  • Consider HVAC UV for whole‑home germ control.
  • Test placement with sensors/monitors and adjust seasonally.

With smart placement and consistent use, your air purifier will deliver cleaner, healthier air where you need it most.

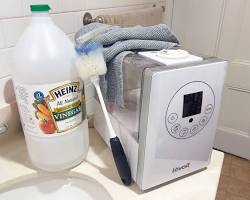
How to Properly Store a Humidifier When Not in Use

Essential Guidelines for Proper Humidifier Storage

Properly storing your humidifier during periods of non-use is crucial to keep it functioning optimally and avoid microbial growth. Leaving residual moisture inside can allow mold, bacteria and fungi to accumulate over time, contaminating the water and releasing harmful spores into the air when used again.
Action Details
Deep Clean the Humidifier
  • Drain all water from tank, reservoir, hoses, and filters
  • Scrub tank with vinegar/bleach and rinse
  • Replace filters as recommended
  • Use descaling solutions for mineral deposits
  • Disinfect with antimicrobial cleaner
  • Air dry all parts before reassembling
Dry Out All Moisture
  • Empty tank water and wipe surfaces dry
  • Remove and air dry filters for at least 48 hours
  • Use absorbent pads inside to wick away moisture
  • Run the humidifier empty for 30 minutes to evaporate internal moisture
Store in a Cool, Dry Location
  • Good Locations: Closet shelf, dry basement, pantry
  • Bad Locations: Bathroom, damp attic, garage
  • Avoid temperature extremes to prevent damage
  • Cover with a breathable material to avoid dust buildup
  • Store upright to prevent water pooling in crevices
  • Remove batteries to prevent corrosion

The Importance of Complete Drying

Before you store your humidifier away, one crucial step stands above the rest: ensuring complete dryness. Any residual moisture left inside can become a breeding ground for harmful microorganisms like mold and bacteria. These not only pose a risk to the humidifier’s integrity but can also become significant health hazards when the device is next used.

Why It’s Essential:

  • Mold and bacteria thrive in moist environments. Even a small amount of leftover water can lead to contamination.
  • When reactivated, a humidifier with microbial growth can spread spores into the air, potentially causing respiratory issues and allergic reactions.

Practical Drying Tips:

  • Wipe Thoroughly: After cleaning, use a dry, clean cloth to wipe down every component of the humidifier, ensuring no water remains.
  • Air Dry: Allow all parts, especially the tank and filters, to air dry in a well-ventilated area for at least 24-48 hours. This step cannot be rushed.
  • Run Empty: Consider running the humidifier on an empty setting for about 30 minutes to evaporate any moisture trapped in hard-to-reach areas.

Monitoring for Mold Growth

Even with diligent drying and cleaning, it’s essential to remain vigilant for signs of mold growth in your humidifier, especially during prolonged storage periods. Mold not only poses a significant health risk but can also damage your humidifier, reducing its efficiency and lifespan.

Key Indicators of Mold Presence:

  • Visible Signs: Keep an eye out for any mold spots or fuzzy growths on any part of the humidifier.
  • Odors: A musty or mildew-like smell emanating from the humidifier is a strong indicator of mold growth.
  • Deposits: Cloudy or colored deposits around crevices, edges, or inside the tank can suggest mold or bacterial buildup.
  • Filter and Tank: Pay special attention to the filter and water tank, as these areas are particularly prone to mold growth.

Action Steps if Mold is Detected:

  • Immediate Cleaning: Upon detecting any signs of mold, thoroughly clean and disinfect the entire humidifier.
  • Part Replacement: Inspect all parts for damage. Replace any components that are heavily affected and cannot be fully cleaned.

Regular checks for mold are crucial, especially before and after storage periods, to ensure your humidifier remains safe and effective for use.

Preparing Your Humidifier for Next Use

After a period of storage, it’s important to ensure your humidifier is clean, functional, and ready for operation. Follow these steps to prepare your humidifier for its next use:

  • Inspect for Mold or Mineral Buildup: Before using your humidifier, inspect it for any signs of mold or mineral deposits. If any are present, refer back to the cleaning and disinfecting steps.
  • Check All Parts: Ensure that all components, especially filters and tanks, are in good condition. Replace any parts that show signs of wear or damage.
  • Run a Cleansing Cycle: Fill the tank with a mixture of water and a small amount of vinegar to run a cleansing cycle. This helps to remove any lingering odors or residues. Rinse thoroughly afterward.

Maintenance During Storage

Even while in storage, your humidifier can benefit from periodic checks and basic maintenance:

  • Dust Off: Every few months, take out your humidifier to dust it off. This prevents dust accumulation that could clog the vents or affect the device’s performance.
  • Battery Check: If your humidifier uses batteries for any functionality, ensure they are removed to prevent corrosion over time.
  • Storage Check: Periodically check the storage environment to ensure it remains dry and cool, without any drastic changes in temperature or humidity that could affect the humidifier.

Frequently Asked Questions

Q: How often should I clean my humidifier before storage?
A: Clean and disinfect your humidifier thoroughly before storing it to prevent mold and bacteria growth. This should be done at least once every 3-6 months or after each use period.

Q: Can I leave water in the humidifier tank during storage?
A: No, it’s crucial to empty and thoroughly dry the tank and all parts of the humidifier to prevent microbial growth.

Q: What should I do if I find mold in my humidifier after storage?
A: Disassemble and clean each part with a mixture of water and vinegar or a manufacturer-recommended cleaning solution. Severely mold-infected parts may need to be replaced.

Q: How long can a humidifier be stored safely?
A: A humidifier can be stored indefinitely if properly cleaned and dried. However, inspect it every few months during storage for any signs of mold or damage.

Q: Is it necessary to replace the filter before storage?
A: Yes, it’s advisable to replace the filter before storage to ensure it’s fresh and clean for the next use. If the humidifier won’t be used for an extended period, consider storing it without the filter and replacing it when you’re ready to use it again.

Q: Can I store my humidifier in the attic or garage?
A: It’s best to avoid storing humidifiers in places with extreme temperature fluctuations or high humidity, such as attics or garages. Opt for a cool, dry location like a closet or pantry.

Q: How do I protect my humidifier from dust during storage?
A: Cover the humidifier with a breathable fabric or store it in its original box or a breathable storage bag to protect it from dust and debris.

Q: What’s the best way to dry a humidifier before storage?
A: After cleaning, leave all parts disassembled in a well-ventilated area to air dry completely. Running the humidifier on an empty setting can also help evaporate residual moisture.

Q: Should I perform any maintenance on my humidifier during its storage period?
A: Periodically check your stored humidifier for dust and any signs of mold. Wipe it down and ensure it’s still in a suitable storage environment.

Q: What kind of cleaning agents are safe for my humidifier?
A: Typically, mild agents like white vinegar or hydrogen peroxide are safe and effective for cleaning humidifiers. Always refer to the manufacturer’s instructions for recommended cleaning solutions to avoid damaging sensitive components.


Can Air Purifiers Make You Sick? Navigating the Dos and Don’ts for Healthy Air


Can Air Purifiers Make You Sick?

Air purifiers are generally beneficial for improving indoor air quality, yet under certain conditions, such as improper filter maintenance or the use of ozone-generating models, they could potentially lead to health issues.
Ensuring regular filter changes and opting for air purifiers that do not emit harmful levels of ozone are key steps to maximize benefits and minimize any adverse effects.

Sore-Throat-from-Air-ConditioningHow Air Purifiers Can Cause Unexpected Health Issues:

Ozone Generation by Air Purifiers

Air purifiers that operate using ionization processes or serve as ozone generators can inadvertently contribute to indoor air pollution by releasing ozone as a byproduct. Scientifically, ozone (O₃) is a molecule comprised of three oxygen atoms, known for its potent oxidizing properties.
While ozone is beneficial for removing odors in unoccupied spaces,  Prolonged exposure to ozone can irritate the respiratory system, leading to coughing, throat irritation, and exacerbation of chronic respiratory diseases such as asthma.

Tip:

Consider running the ozone-generating air purifier only when the space is unoccupied, and ensure there’s ample time for the ozone to dissipate before re-entering the room. Ventilating the area after using such a purifier can accelerate the dispersion of ozone, reducing potential exposure and maintaining indoor air quality.

Improper Filter Maintenance

Air purifiers rely on filters to trap and remove contaminants from indoor air, but without proper maintenance, these filters can become a source of pollution themselves.
Over time, filters can accumulate not only dust and particulate matter but also biological contaminants like mold spores and bacteria. If these filters are not regularly cleaned or replaced , they can begin to release these accumulated pollutants back into the air, potentially degrading indoor air quality and posing health risks to the occupants.

Tip:

To ensure your air purifier continues to function effectively and does not contribute to indoor air pollution.
This should include checking the filters for accumulation of dust and debris and replacing them as necessary. For purifiers with reusable filters, follow the cleaning instructions carefully to avoid damaging the filter and to ensure it effectively traps pollutants.

Inadequate Purification Technology

Not all air purifiers are created equal, and the effectiveness of an air purifier largely depends on its technology and the specific pollutants it’s designed to target.
Some purifiers are excellent at capturing particulate matter like dust and pollen (using HEPA filters), but may not be as effective against gases and odors, including volatile organic compounds (VOCs) emitted from paints, furniture, and cleaning products.
Inadequate purification technology might not address the specific air quality issues in a space, potentially leaving harmful pollutants in the air and leading to health concerns.

Tip:

When selecting an air purifier, it’s essential to first identify the primary pollutants in your indoor environment. If VOCs or odors are a concern, look for air purifiers equipped with activated carbon filters, which are effective at absorbing gases and odors. For allergens and particulate pollutants, ensure the purifier has a true HEPA filter. Some air purifiers offer multi-stage filtration systems that combine several types of filters to address a broad range of pollutants.

Common Indoor Air Pollutants and Their Sources
Indoor Air Pollutant Sources
Dust Mites Bedding, upholstered furniture, carpets
Pollen Plants, trees, grasses
Mold Spores Damp areas, leaks, humidifiers
Volatile Organic Compounds (VOCs) Paints, solvents, cleaners, air fresheners
Pet Dander Pets
Smoke Tobacco products, cooking, fireplaces

Adjustment Period

When introducing an air purifier into a space, especially in environments that have been heavily polluted, individuals may experience an adjustment period.

This period can be characterized by mild symptoms as the body adapts to the significantly cleaner air. These symptoms might be due to the body’s response to the sudden reduction in pollutants, which it had become accustomed to over time. While these symptoms are generally temporary and not harmful, they can sometimes be mistaken for the air purifier having a negative impact on health.

Tip:

If you experience symptoms during the initial period of using an air purifier, consider gradually increasing the usage time of the device rather than running it continuously from the start. This gradual approach allows your body to adapt more comfortably to the changes in air quality.

 Ensure that the air purifier is correctly sized for the room, as an oversized unit might clean the air too quickly for your body to comfortably adjust. Additionally, maintaining good ventilation in your space can help ease the transition to cleaner air by providing a balance between purified and fresh outdoor air.

Displacement of Air Pollutants

Air purifiers work by drawing in air, filtering out pollutants, and releasing clean air back into the room. However, if an air purifier is not properly sized or placed in a room, it might not effectively circulate and clean the air throughout the entire space.

This can lead to areas where pollutants are not adequately removed and may even become concentrated, particularly in corners or areas far from the purifier. Such displacement of air pollutants can reduce the overall effectiveness of the air purifier and potentially lead to pockets of poor air quality within a room, causing confusion about the air purifier’s effectiveness or concerns about it making the situation worse.

Tip:

To ensure effective air circulation and filtration in your space, it’s important to choose an air purifier that matches the size of the room where it will be used.

Additionally, consider the placement of your air purifier; it should be positioned in a way that allows for unobstructed air flow from all sides. Avoid placing it in corners or tightly against walls. For larger spaces, you may need more than one air purifier strategically placed to ensure even coverage and optimal air quality throughout the area.

Chemical Off-Gassing

New air purifiers, like many new electronic devices, can emit volatile organic compounds (VOCs) through a process known as off-gassing. This occurs as the new materials used in the construction of the device, such as plastics and electronic components, release chemicals into the air. While the levels of VOCs are typically low and decrease over time, sensitive individuals might experience irritation or discomfort from these emissions. This off-gassing can lead to confusion about the air purifier’s effectiveness, with users wondering if the device is worsening the air quality instead of improving it.

Tip:

To minimize exposure to VOCs from a new air purifier, consider unboxing and running the device in a well-ventilated area or outdoors for a few hours before introducing it into your living or working space.

Types of Air Purifiers and Their Technologies
Type of Air Purifier Primary Function Effective Against
HEPA Filters Trap particulate matter such as dust, pollen, and pet dander Particulate pollutants
Activated Carbon Filters Absorb gases, odors, and VOCs Gaseous pollutants and odors
Ionizers Charge air molecules to attract and settle dust and allergens Airborne particles
UV Light Purifiers Use ultraviolet light to kill bacteria, viruses, and mold Microorganisms
Ozone Generators Generate ozone to neutralize odors and pollutants Odors and some microorganisms

In Summary

Can Air Purifiers Make You Sick? When utilized correctly, air purifiers have the remarkable potential to enhance not just the quality of our indoor air, but also our overall health and well-being. By embracing proper maintenance practices and selecting the right air purifier for your needs, you’re not just investing in cleaner air – you’re investing in a healthier, more vibrant life.
Only remember to make informed decisions by considering factors such as specific indoor air quality needs, existing health conditions, and the features of different air purifier models.


Cooling Off Smartly: Should You Give Your AC a Break This Summer?

Should You Give Your AC a Break?

Giving your AC a break by adjusting the thermostat up a few degrees differs significantly from turning it off, as it maintains a balance between energy efficiency and system strain. While completely turning off the AC can lead to high energy use during re-cooling, moderately increasing the set temperature reduces workload and wear without compromising overall comfort. This approach optimizes energy conservation and prolongs the unit’s lifespan.

Intro

As temperatures soar, so does our reliance on air conditioning to keep our homes cool. But amidst the sweltering heat, one question arises: Is it wise to give your air conditioner a rest?

This question isn’t just about seeking relief from the heat; it’s about finding a balance between immediate comfort and long-term considerations like energy efficiency, system durability, and cost savings.

While the air conditioner is a vital ally during summer, its constant operation raises concerns about its impact on both the machine and our finances. Deciding whether to lower its usage involves weighing various factors, including saving costs, environmental responsibility, and comfort

giving the ac a break

Understanding ‘A Break’ for Your AC

When contemplating the idea of giving your air conditioner a break, it’s essential to first clarify what we mean by “a break.”
In the context of air conditioning, taking a break can manifest in two primary ways:
1. turning off the AC entirely or
2. merely turning it down by adjusting its settings.

Each approach has distinct implications for your home’s comfort, energy consumption, and the AC unit’s longevity.

Turning Off Your AC: This involves completely powering down your air conditioning unit. Homeowners might consider this option during cooler times of the day or when the house is empty. While this can lead to significant energy savings, the drawback is the discomfort you might experience upon returning to a heated home, alongside the energy-intensive process of cooling down a warm space back to a comfortable temperature.

Turning Down Your AC: Alternatively, turning down your AC means adjusting the thermostat to a higher, yet still comfortable, temperature. This reduces the AC unit’s workload by minimizing the number of cooling cycles it performs, leading to energy savings without a substantial compromise on comfort. This approach is about finding a sweet spot where the system operates less frequently but is still ready to maintain a reasonable level of coolness.

What is the Best Approach?

Completely turning off the AC removes the workload entirely but requires a significant effort to re-cool the space later.
On the other hand, turning down the unit lessens the demand while keeping the system engaged, allowing for more consistent management of indoor temperatures and humidity levels.

Understanding these distinctions is crucial in making an informed decision about how to give your air conditioner a break. The goal is to achieve a balance that reduces energy consumption and strain on the AC system while maintaining an environment that remains comfortable and healthy for the occupants.

 Pros and Cons of Turning Off vs. Turning Down AC

Strategy Pros Cons
Turning Off AC Maximizes energy savings during non-use periods. Can lead to discomfort and high energy use when cooling down again.
Turning Down AC Reduces energy use while maintaining a base level of comfort. Might still consume more energy than turning off if not managed well.

The Case for Turning Down Instead of Turning Off

Deciding between turning off your air conditioner and merely adjusting its settings can significantly impact both your comfort and energy bills. This is why turning down the AC, rather than switching it off entirely,  is often the preferable strategy.

Energy Efficiency During Re-cooling: When an AC is turned off in the heat of the day and then turned back on, it has to work overtime to reduce the indoor temperature to a comfortable level.

This catch-up can consume more energy than maintaining a steady, slightly elevated temperature. By turning down the thermostat instead—raising the set temperature by a few degrees—you allow the AC to maintain a more consistent and energy-efficient operation.

Reduced Strain on the System: Constantly cycling an air conditioner on and off can put additional strain on the system, particularly on its compressor. This can lead to increased wear and tear over time, potentially shortening the lifespan of the unit.
Turning down the AC reduces the frequency of these on-off cycles, thereby lessening the strain and possibly extending the system’s operational life.

Maintaining Baseline Comfort: Completely turning off the AC can lead to significant increases in indoor temperatures and humidity levels, creating an uncomfortable environment, especially in regions with high heat and humidity.

By setting the thermostat to a higher but still comfortable level, you can maintain a more consistent and pleasant indoor climate, avoiding the discomfort of returning to an overly hot and stuffy home.

Mitigating Humidity Issues: Air conditioners do more than cool the air; they also reduce humidity levels, which is a critical component of comfort during hot weather. Turning the AC off allows humidity to build up, potentially leading to discomfort, mold growth, and other moisture-related problems.
A moderate thermostat setting helps manage humidity effectively while providing a break to the system.

Practicality and Convenience: Programmable thermostats and smart home systems have made it easier than ever to control your AC’s operation effectively. These technologies can adjust the indoor temperature based on your daily schedule, weather conditions, and personal preferences, optimizing comfort and efficiency without the need to manually turn the system on and off.

 How to Effectively Give Your AC a Break

To maximize the efficiency of your air conditioning while ensuring your home remains comfortable, consider these strategies for effectively giving your AC a break without turning it off completely.

Using Programmable Thermostats:

  • Programmable thermostats allow you to set your AC to operate less when you are away or during cooler times, and resume normal cooling when you’re home or during the hottest parts of the day.

    Programmable Thermostat Settings Examples

    Time of Day Setting When Home Setting When Away Notes
    Daytime (Active) 78°F (25°C) 85°F (29°C) Adjust based on personal comfort and outdoor temperature.
    Nighttime (Sleep) 75°F (24°C) – Consider using fans for added comfort without lowering the temperature.
    Away for Work – 85°F (29°C) Set to start cooling 30 minutes before returning home.

Supplementary Cooling Strategies:

  • Utilize Fans: Ceiling or oscillating fans can make a room feel cooler through the wind-chill effect, allowing for higher thermostat settings. Remember, fans cool people, not rooms, so turn them off when the room is unoccupied.
  • Enhance Insulation: Improve insulation in your home to keep cool air in and hot air out. This can include adding insulation to attics and walls, using thermal curtains, and sealing leaks around windows and doors.
  • Shade and Ventilation: Use natural shade or create it with awnings and curtains to reduce solar heat gain. Ventilate your attic and other hot areas to prevent heat buildup that your AC has to counteract.
  • Mindful Appliance Use: Avoid using heat-generating appliances during the hottest parts of the day. For example, cook during cooler hours, or opt for outdoor grilling.

Optimizing Home Layout and Behavior:

  • Close Off Unused Areas: If possible, close doors to unused rooms to prevent cooling areas that don’t require it.
  • Smart Ventilation: Use windows and ventilation strategies during cooler parts of the day to allow fresh, cool air to circulate through the home, reducing the need for AC.

Supplementary Cooling Strategies

Strategy Benefit Implementation Tips
Utilize Fans Enhance comfort with less energy use. Use ceiling or oscillating fans to circulate air.
Enhance Insulation Prevent cool air from escaping. Add insulation to attics/walls, and use thermal window treatments.
Shade and Ventilation Reduce heat gain and improve indoor air quality. Use natural shade, awnings, and ventilate during cooler hours.
Mindful Appliance Use Avoid adding heat during peak temperatures. Use heat-generating appliances during cooler parts of the day.

Maintenance Tips for Optimal Performance

Regular maintenance is crucial to ensure that your air conditioning system remains efficient, effective, and capable of providing comfort without unnecessary strain.
Here are some essential maintenance tips to keep your AC in top condition:

Task Frequency Notes
Filter Cleaning/Replacement 1-3 months More frequently in high use periods or if you have pets.
Condenser Unit Inspection Annually Remove debris and ensure adequate space around the unit.
Professional Service Check Annually Include coolant level checks, system controls, and thermostat function.
Duct Inspection and Sealing As needed Look for leaks or damage, especially in unconditioned spaces like attics.

Final thoughts

Navigating the balance between keeping your home comfortably cool and managing energy use during the hot months is no small feat.

But the strategy of giving the AC a rest by turning down the settings, coupled with regular maintenance and mindful usage, can significantly enhance the performance and longevity of your air conditioner.

Employing programmable thermostats to manage your cooling needs automatically allows for a seamless integration of energy efficiency into your daily life, ensuring your home remains comfortable when needed while conserving energy when possible.

Regular maintenance remains a cornerstone of efficient air conditioner operation. Simple tasks like cleaning or replacing air filters, ensuring the outdoor unit is free from debris, and scheduling annual check-ups with a professional can prevent common issues that lead to inefficiency and discomfort.1

Call to Action

As we move forward into the warmer months, take a moment to evaluate your current air conditioner usage habits. Consider implementing the strategies discussed, from installing a programmable thermostat to embracing regular maintenance routines.

If you’ve noticed any warning signs that your AC might be underperforming, don’t hesitate to consult a professional for a thorough assessment. Embracing these practices ensures that your air conditioner serves you effectively, providing a cool and comfortable sanctuary in your home throughout the summer season.

How to Remove VOCs for Safer Home & Bedroom Air

To effectively remove VOCs from your home:

  • Employ activated carbon air purifiers, which adsorb a wide range of chemical compounds.
  • Ensure adequate ventilation to dilute and expel indoor air pollutants.
  • Utilize low-VOC or VOC-free products and materials during home renovations and daily activities, significantly reducing the overall VOC burden in your living environment.

Introduction: VOC Removal

In our quest to create the coziest and the most beautiful homes, we often overlook an invisible factor that can significantly impact our comfort and health: the presence of Volatile Organic Compounds, or VOCs. These widespread chemicals, emitted as gases from certain solids or liquids, can accumulate indoors, leading to a decline in air quality and posing various health risks. From the paint on our walls to the cleaning products under our sinks, VOCs are more prevalent in our living spaces than many of us realize.

Understanding VOCs, their sources, and potential impacts is the first step towards creating a healthier indoor environment. This article aims to shed light on this often-overlooked aspect of home health, offering practical insights and strategies to identify, reduce, and manage VOC levels in your home.

Understanding VOCs

Volatile Organic Compounds, or VOCs, are chemicals found in many everyday products and materials that can evaporate into the air at room temperature. These compounds are not inherently bad; in fact, they’re used in everything from manufacturing fragrances to preserving food. However, when they accumulate indoors, particularly in poorly ventilated spaces, they can negatively impact air quality and health.

Common Sources of VOCs in the Home

VOCs can emanate from a wide range of sources within our homes, some of which might surprise you. Here’s a closer look at where these compounds can be found:

  • Building Materials: Paints, varnishes, sealants, and adhesives can release VOCs long after application. Pressed wood products, often used in furniture and cabinetry, can emit formaldehyde, a particularly harmful VOC.
  • Household Products: Cleaning agents, air fresheners, and cosmetics may contain VOCs that contribute to indoor air pollution. Even everyday items like printed materials and dry-cleaned clothing can be sources.
  • Electronic Equipment: Computers, printers, and other electronic devices can emit VOCs, adding to the indoor air mix, especially in home offices.

Sources of VOCs in the Home

Source of VOCs Common VOCs Emitted
Paints and Varnishes Formaldehyde, Toluene, Xylene
Cleaning Products Ethylene glycol, Acetone, Terpenes
Building Materials Formaldehyde (in pressed wood), Benzene (in plastics)
Upholstered Furniture & Carpets Formaldehyde, Toluene, Acetone
Air Fresheners & Scented Candles Various synthetic fragrances, Formaldehyde
Electronic Equipment Phenols, Flame retardants
Hobby Supplies Toluene (in glues), Methylene chloride (in paint thinners)

Health Impacts of VOCs

The effects of VOC exposure can vary widely, depending on the type of compound, the level of concentration, and the duration of exposure. While some individuals may experience mild and temporary symptoms, others may face more severe health risks, especially with long-term exposure.

Short-Term Exposure

Initial exposure to VOCs can lead to a range of acute symptoms, often resembling those of common allergies or colds:

  • Irritation: Eyes, nose, and throat irritation are common, along with skin rashes in some cases.
  • Respiratory Symptoms: Difficulty breathing, wheezing, and exacerbation of asthma symptoms can occur.
  • Headaches and Dizziness: Many people report headaches, dizziness, or feelings of lightheadedness.
  • Nausea: Exposure to strong odors or fumes from VOCs can lead to feelings of nausea or even vomiting.

Long-Term Exposure

The more concerning effects of VOCs are related to prolonged exposure, which can lead to more serious health issues:

  • Chronic Respiratory Problems: Long-term exposure can contribute to chronic respiratory issues and lung damage.
  • Neurological Effects: Extended exposure to certain VOCs has been linked to neurological damage and cognitive impairments.
  • Cancer: Some VOCs, such as formaldehyde and benzene, are known carcinogens and pose a risk of cancer with long-term exposure.

What Level of VOC is Dangerous?

Determining the danger level of VOCs in your home can be challenging, as it depends on various factors including the specific type of VOC, concentration, and duration of exposure.
Generally, indoor air quality guidelines suggest that lower concentrations of VOCs are preferable, with some health organizations providing specific limits for certain compounds.
For instance, the World Health Organization (WHO) recommends keeping formaldehyde levels below 0.1 mg/m³ (0.08 ppm) to minimize health risks. However, sensitivity to VOCs can vary greatly among individuals, with some experiencing adverse effects even at low concentrations.

It’s important to note that “dangerous” levels can be significantly lower for sensitive populations such as children, the elderly, and those with pre-existing health conditions. Regular monitoring and maintaining VOC levels as low as reasonably achievable is key to ensuring a safe indoor environment.

VOCs Categorized by Severity

VOC Severity Common Sources Health Impacts
Formaldehyde High Pressed wood products, adhesives, certain insulations Eye, nose, throat irritation; potential carcinogen linked to nasal and lung cancer
Benzene High Tobacco smoke, stored fuels, paint supplies Blood disorders including leukemia; carcinogen
Methylene Chloride High Paint strippers, adhesive removers, aerosol sprays Neurotoxicity, potential carcinogen, can metabolize to carbon monoxide in the body
Tetrachloroethylene High Dry cleaning solvents, metal degreasing Liver and kidney damage, likely carcinogen
1,3-Butadiene High Environmental tobacco smoke, vehicle exhaust, stored gasoline Cardiovascular diseases, carcinogen
Acetone Moderate Nail polish remover, furniture polish, wallpaper Eye, nose, throat irritation; headaches; dizziness; dermatitis
Ethanol Moderate Cleaning products, hand sanitizers, personal care products Irritation of eyes, nose, and throat; central nervous system effects at high levels
Limonene Low Cleaning products, air fresheners Mild skin and eye irritation, relatively low toxicity
Isoprene Low Natural emissions from plants, some food products Minimal toxicity, unlikely to cause serious health issues at typical environmental levels
Alpha-pinene & Beta-pinene Low Cleaning products, air fresheners with pine scent Mild irritation, generally low toxicity


Identifying VOCs in Your Home

Recognizing the presence of VOCs in your home is the first step towards mitigating their impact. While some VOCs emit noticeable odors, others are odorless and can go undetected without proper monitoring. Here’s how you can identify VOCs in your living spaces:

Using Air Quality Monitors

Air quality monitors equipped with VOC sensors can provide a comprehensive view of the air quality in your home, including the presence and concentration of various VOCs. These devices vary in complexity and price, offering features such as:

  • Real-Time VOC Levels: Immediate feedback on the current VOC levels in your home.
  • Specific VOC Identification: Some advanced monitors can identify specific VOCs, helping you pinpoint the source more effectively.
  • Data Logging: Tracking VOC levels over time to identify patterns and the effectiveness of reduction strategies.

Visual Inspection and Smell

While not as accurate as air quality monitors, being observant can also provide clues:

  • Noticeable Odors: Pay attention to strong or unusual smells, especially after bringing new furniture, electronics, or household products into your home.
  • Physical Symptoms: Be aware of any physical symptoms that occur or worsen while at home, such as headaches, eye irritation, or respiratory issues.

Professional Assessment

If you suspect high levels of VOCs and cannot identify the source or if someone in your household is experiencing severe health effects, consider hiring a professional to conduct an indoor air quality assessment.

Strategies for Reducing Specific VOCs

VOC Reduction Strategies
Formaldehyde
  • Use formaldehyde-free or low-emitting materials and products.
  • Ensure proper ventilation during and after installation of new furnishings or building materials.
  • Use air purifiers with activated carbon filters to absorb formaldehyde.
Benzene
  • Avoid smoking indoors; benzene is a major component of tobacco smoke.
  • Store fuels and solvents in sealed containers outside living spaces.
  • Increase natural ventilation to dilute indoor air.
Methylene Chloride
  • Opt for methylene chloride-free paint strippers and solvents.
  • Use protective equipment and ensure ample ventilation if use is necessary.
  • Prefer manual or mechanical methods for paint removal when possible.
Tetrachloroethylene
  • Use dry cleaning services that do not use tetrachloroethylene or air out dry-cleaned clothes in open, well-ventilated areas before bringing them inside.
  • Choose wet cleaning or CO2 cleaning methods for delicate fabrics.
1,3-Butadiene
  • Reduce exposure to vehicle exhaust by maintaining a well-sealed indoor environment, especially near busy roads.
  • Avoid the use of gasoline-powered equipment indoors.
Acetone
  • Use acetone-free nail polish removers and personal care products.
  • Ensure proper ventilation when using products containing acetone.
  • Store products containing acetone in well-sealed containers.
Ethanol
  • Opt for natural or ethanol-free cleaning and personal care products.
  • Ensure rooms are well-ventilated when using products containing ethanol.
Limonene
  • Choose fragrance-free or naturally scented products without synthetic limonene.
  • Use natural alternatives for air freshening, such as essential oils in moderation.
Isoprene Given its natural occurrence and low toxicity, specific reduction measures for isoprene are typically not necessary. However, maintaining overall good air quality and ventilation will minimize any potential impacts.
Alpha-pinene & Beta-pinene
  • Opt for natural cleaning products without synthetic pine scents.
  • Use pine-scented products sparingly and ensure good ventilation during use.

Reducing the levels of VOCs in your home can significantly improve indoor air quality and minimize health risks.

Here are effective strategies to achieve this:

Improve Ventilation

Enhancing the ventilation in your home is one of the simplest yet most effective ways to reduce VOC concentrations:

  • Open Windows: Regularly open windows to allow fresh air to circulate and dilute VOCs.
  • Use Exhaust Fans: Install and use exhaust fans in high-moisture areas like bathrooms and kitchens to expel contaminated air.
  • Consider Air-to-Air Exchangers: For homes in extreme climates, air-to-air exchangers can introduce fresh air while minimizing energy loss.

Choose Low-VOC Products

When purchasing new products for your home, opt for those labeled as low-VOC or no-VOC:

  • Paints and Coatings: Select water-based, low-VOC paints and finishes.
  • Building Materials: Look for certified low-emission materials for renovations and repairs.
  • Furnishings: Choose furniture made from solid wood or certified low-VOC emitting materials.

Use Air Purifiers

Air purifiers, especially those with activated carbon filters, can effectively remove VOCs from indoor air:

  • Placement: Position air purifiers in high-traffic areas or where VOC sources are located.
  • Maintenance: Regularly replace filters according to the manufacturer’s recommendations to ensure efficiency.

Store Chemicals Properly

Proper storage of household chemicals can prevent unnecessary VOC release:

  • Seal Containers: Ensure that all chemical products are tightly sealed and stored in well-ventilated areas, preferably outside living spaces.
  • Reduce Inventory: Only buy what you need to minimize the quantity of stored chemicals in your home.

Regular Maintenance and Cleaning

Keeping your home clean and well-maintained can also help reduce VOCs:

  • Dust Regularly: Dust can absorb and release VOCs. Use a damp cloth or microfiber mop to capture dust effectively.
  • Clean with Natural Products: Opt for natural or homemade cleaning solutions, such as vinegar and baking soda, to avoid introducing new VOCs.

Be Mindful of Humidity Levels

Some VOCs are more easily released into the air in high humidity:

  • Use Dehumidifiers: In damp areas or during humid seasons, use a dehumidifier to maintain optimal humidity levels (30-50%).

High VOC Levels in the Bedroom

The bedroom is a sanctuary for rest and rejuvenation, making it crucial to maintain low VOC levels in this space. High VOC levels in the bedroom can significantly impact sleep quality and overall health, as we spend many hours here each night, often in close proximity to various potential sources of VOCs such as mattresses, furniture, and personal care products.

To ensure a healthier sleeping environment, consider choosing low-VOC materials for bedroom furnishings, using air purifiers specifically during nighttime, and maintaining regular ventilation. Additionally, be mindful of the cleaning products used in this space, opting for natural or homemade alternatives that do not contribute to the VOC load. Prioritizing air quality in your bedroom not only supports better sleep but also enhances your long-term health and well-being.

Targeted VOC Reduction

While general strategies for reducing VOCs are effective, some high-priority VOCs require specific actions for effective mitigation. Here’s how to address some of the most concerning VOCs:

Formaldehyde

  • Avoid Pressed Wood Products: Choose solid wood or metal furniture over pressed wood products, which often contain formaldehyde-based glues.
  • Use Air Purifiers: Invest in air purifiers with activated carbon filters specifically designed to capture formaldehyde.

Benzene

  • Limit Exposure to Tobacco Smoke: Ensure your home is smoke-free, as tobacco smoke is a significant source of benzene.
  • Store Automotive Products Safely: Keep benzene-containing products like gasoline and solvents in well-ventilated areas, away from living spaces.

Methylene Chloride

  • Choose Safer Paint Strippers: Opt for paint removal methods that don’t contain methylene chloride, such as heat guns or mechanical strippers.
  • Ventilate During Use: If you must use products containing methylene chloride, ensure adequate ventilation and consider using respiratory protection.

Tetrachloroethylene

  • Air Out Dry-Cleaned Clothes: Before bringing dry-cleaned garments indoors, air them out in a well-ventilated area to allow any residual tetrachloroethylene to dissipate.
  • Seek Alternatives to Traditional Dry Cleaning: Look for “green” dry cleaners that use water-based or CO2 cleaning methods.

1,3-Butadiene

  • Reduce Indoor Combustion: Avoid using gasoline-powered tools or equipment indoors, and ensure your home is well-ventilated if located near heavy traffic areas.

By focusing on these specific VOCs and implementing targeted strategies, you can further reduce the risk of exposure to the most harmful compounds, ensuring a safer indoor environment.

Maintaining Low VOC Levels

Ensuring your home remains low in VOCs is an ongoing process. Here are some strategies to maintain healthy indoor air quality over the long term:

Regular Monitoring

  • Use Air Quality Monitors: Keep track of VOC levels with an indoor air quality monitor to identify any increases promptly.
  • Conduct Periodic Inspections: Regularly check your home for potential new sources of VOCs, such as damaged furnishings or building materials.

Sustainable Purchasing Habits

  • Prioritize Low-VOC Products: Continuously opt for low-VOC alternatives when purchasing new items for your home.
  • Research Before Buying: Spend time researching products and materials to ensure they meet indoor air quality standards.

Lifestyle Adjustments

  • Adopt a Minimalist Approach: Reducing the overall number of products in your home can decrease potential VOC sources.
  • Embrace Natural Cleaning Methods: Shift towards using natural cleaning agents to avoid introducing new VOCs through commercial cleaning products.

Ventilation Upkeep

  • Maintain Ventilation Systems: Regularly clean and service HVAC systems to ensure they are effectively removing contaminants from your home.
  • Incorporate Plants: While the air-purifying effects of plants are modest, they can contribute to overall air quality and provide a visual reminder of the importance of a healthy living environment.

Community Engagement and Education

  • Stay Informed: Keep up with the latest research and recommendations on indoor air quality and VOC reduction.
  • Share Knowledge: Educate friends and family about the importance of VOC reduction to foster a community-wide focus on healthier indoor environments.

Conclusion

Navigating the complexities of VOCs in our homes can seem daunting, but armed with the right knowledge and strategies, it’s entirely possible to significantly reduce their presence and protect our health. From understanding the sources and health impacts of VOCs to implementing targeted reduction strategies and maintaining low levels over time, we’ve explored a comprehensive approach to managing indoor air quality.

Remember, small changes can make a big difference. Whether it’s opting for low-VOC paints, improving home ventilation, or simply being more mindful of the products we bring into our living spaces, each step contributes to a healthier indoor environment. It’s not just about immediate benefits; reducing VOCs is an investment in our long-term health and well-being.


Should AC Drip Water Outside? Here’s Why It’s a Good Thing

Should AC Drip Water Outside?

Yes indeed, it’s common for an air conditioner to release water outside, and it’s a natural part of its operation. As the air conditioner cools the indoor air, it acts as a dehumidifier, extracting moisture from the atmosphere. This moisture condenses and is collected, eventually dripping outside the unit. This process is crucial for maintaining indoor comfort levels and preventing excess humidity, which can lead to issues like mold growth and discomfort.

Air conditioning is essential for comfort during hot weather, but many people are confused by the water that seems to drip from their AC units.
So, is it normal for an AC to drip water outside? In short, the answer is yes.
 In this article, we will delve deeper into this topic and answer some common questions that people have about AC water dripping.

Is it normal for AC to drip water outside?

Air conditioners typically release water outside as part of their normal operation.

During the cooling process, air conditioners remove moisture from the air, which must be drained away.

To accomplish this, the water that is produced is typically drained through a pipe that runs from the AC unit to the outside of the home.

Therefore, it is normal for an AC unit to drip water outside.

How much should AC drip outside?

The amount of water that an AC unit drips outside can vary depending on factors such as the size of the unit, the humidity in your home, and the temperature outside.

Typically, an AC unit should produce around 5 gallons of water per day. If you notice that your unit is producing an excessive amount of water, it could indicate a problem that needs to be addressed.

Do air conditioners always drip water?

While it is normal for AC units to drip water, not all AC units are designed to do so.
Some models are designed to collect the water that is produced by the unit and recycle it, while others may use the water to help cool the compressor.

When is it not normal for an air conditioner to be dripping water outside?

If you notice that your AC unit is producing an excessive amount of water or is leaking water inside your home, it could indicate a problem with the unit.

Common causes of this problem include clogged drain lines, a malfunctioning condensate pump, or a refrigerant leak.

What if your AC is not dripping outside? What to check?

If your AC unit is not dripping water outside, it could indicate a problem with the unit.

Check the drain line to make sure it is not clogged or blocked.
You should also check the air filter to ensure that it is clean, as a dirty air filter can cause the unit to produce less water.

If these checks do not resolve the issue, it may be time to call a professional to inspect the unit.

What Is Leaking – Water or Refrigerant?

If you notice that your AC unit is leaking, it is important to determine whether it is water or refrigerant that is leaking.

Water leaks are generally not a cause for concern, while refrigerant leaks can be dangerous and should be addressed immediately.

Signs of a refrigerant leak include a hissing sound coming from the unit, ice forming on the coils, and a decrease in cooling performance.

In conclusion, Should AC water drip outside?

it is normal for an AC to drip water outside as it is a natural byproduct of the cooling process.
However, if you notice excessive water or a leak inside your home, it may indicate a problem that needs to be addressed.

If you are unsure about any issues with your AC unit, it is best to call a professional to inspect and diagnose the problem.

FAQ

Question Answer
Why does my air conditioner drip water outside? Air conditioners cool and dehumidify the air inside your home, and as a result, they produce condensation that needs to be drained away. This is why air conditioners drip water outside.
How much water should my air conditioner produce? The amount of water produced by an air conditioner can vary based on factors such as the size of the unit, the humidity in your home, and the temperature outside. A typical air conditioner produces around 5 gallons of water per day.
Is it normal for an air conditioner to produce excessive amounts of water? No, it is not normal for an air conditioner to produce an excessive amount of water. If you notice that your air conditioner is producing more water than usual, it could indicate a problem with the unit.
What should I do if my air conditioner is producing an excessive amount of water? If you notice that your air conditioner is producing an excessive amount of water, you should check the drain line and condensate pump to make sure they are working properly. If the problem persists, it may be time to call a professional.
Should I be worried if my air conditioner is not producing any water? If your air conditioner is not producing any water, it could indicate a problem with the unit. You should check the drain line and air filter to make sure they are not clogged or blocked. If the problem persists, it may be time to call a professional.
Why is my air conditioner leaking water inside my home? If your air conditioner is leaking water inside your home, it could indicate a problem with the unit. Common causes of this problem include clogged drain lines, a malfunctioning condensate pump, or a refrigerant leak.
Can a dirty air filter cause my air conditioner to produce less water? Yes, a dirty air filter can cause your air conditioner to produce less water. This is because a dirty air filter can restrict the flow of air through the unit, which can reduce the amount of moisture that is removed from the air.
What should I do if my air conditioner is leaking refrigerant? If your air conditioner is leaking refrigerant, it is important to address the problem immediately. Refrigerant leaks can be dangerous and can also cause damage to the unit. You should call a professional to diagnose and repair the problem.
How can I prevent my air conditioner from producing excessive amounts of water? To prevent your air conditioner from producing excessive amounts of water, you should make sure that the drain line and condensate pump are working properly. You should also make sure that the air filter is clean and that the unit is properly sized for your home.
Can I stop my air conditioner from dripping water outside? No, you cannot stop your air conditioner from dripping water outside. This is a natural byproduct of the cooling and dehumidifying process, and the water must be drained away to prevent damage to the unit and your home.

How to Remove Asbestos from Your Air? Tips for Identifying Risks and Implementing Protective Measures

How to Remove Asbestos from Your Air?

Dealing with asbestos, especially on job sites, is heavily regulated due to its significant health risks. These regulations are in place to ensure that only trained professionals handle asbestos to prevent exposure.

For non-professionals or the general public, direct interaction with or attempts to remove asbestos is strongly discouraged due to the high risk of releasing asbestos fibers into the air, which can lead to serious health issues upon inhalation.

But clearly there are times when encountering asbestos may be unavoidable.

You may suspect or have confirmed the presence of asbestos but cannot immediately access professional remediation services.

This can occur in varied ways:

After Disturbance: Discovering that asbestos-containing materials have been accidentally disturbed, releasing fibers into the air.

During Renovations: During DIY home renovations or in workspaces where renovations uncover previously undisturbed asbestos.

In Rented Spaces: Tenants in older buildings might suspect asbestos but have landlords who are unresponsive or slow to take action.

In Workplaces: Employees might become aware of asbestos in their workplace but find that their employer is delaying professional assessment or remediation.

In Waiting Periods: When professional asbestos removal is scheduled but there’s a waiting period before the work begins.

In these scenarios, the primary concern is reducing immediate asbestos exposure until professional help can be secured.

Temporary Measures for Reducing Asbestos in the Air

HEPA Air Purifiers

While HEPA air purifiers cannot eliminate the source of asbestos, they can help reduce airborne asbestos fibers. Its importance to choose air purifiers with HEPA filters rated to capture particles as small as 0.3 microns. For asbestos, the denser the filter, the better. We recommend air purifiers that can use H13 and H14 filters.

Usage: Placing them near the disturbed area and run them continuously.
Selection:

Room Size Model Filter Type Key Features
Small Rooms (Under 300 sq ft) Levoit Core 300S H13 True HEPA Compact design, Wi-Fi-enabled, high CADR rating for size
Medium Rooms (300-800 sq ft) Coway Airmega 400 True HEPA with Max2 system Effective for larger spaces, smart features, real-time air quality monitoring
Large Rooms (Over 800 sq ft) Alen BreatheSmart Classic H13 HEPA (optional) Customizable for specific concerns (allergies, asthma, etc.), quiet operation, customizable panels

Seal Off Area

Seal off the area where asbestos disturbance occurred to prevent the spread of fibers to other parts of the building or home.
The Goal is to isolate the threat: Use plastic sheeting and tape to seal the area.

Ventilation

Avoid using HVAC systems that might circulate asbestos fibers throughout the space.

Personal Safety

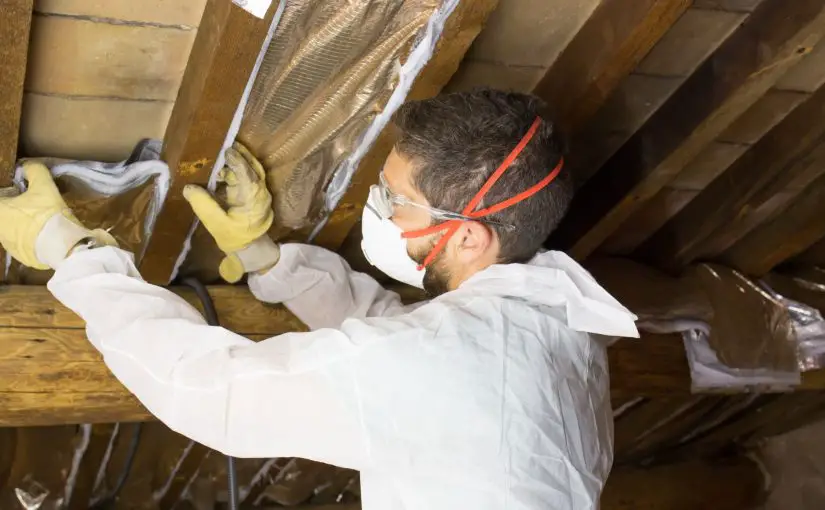
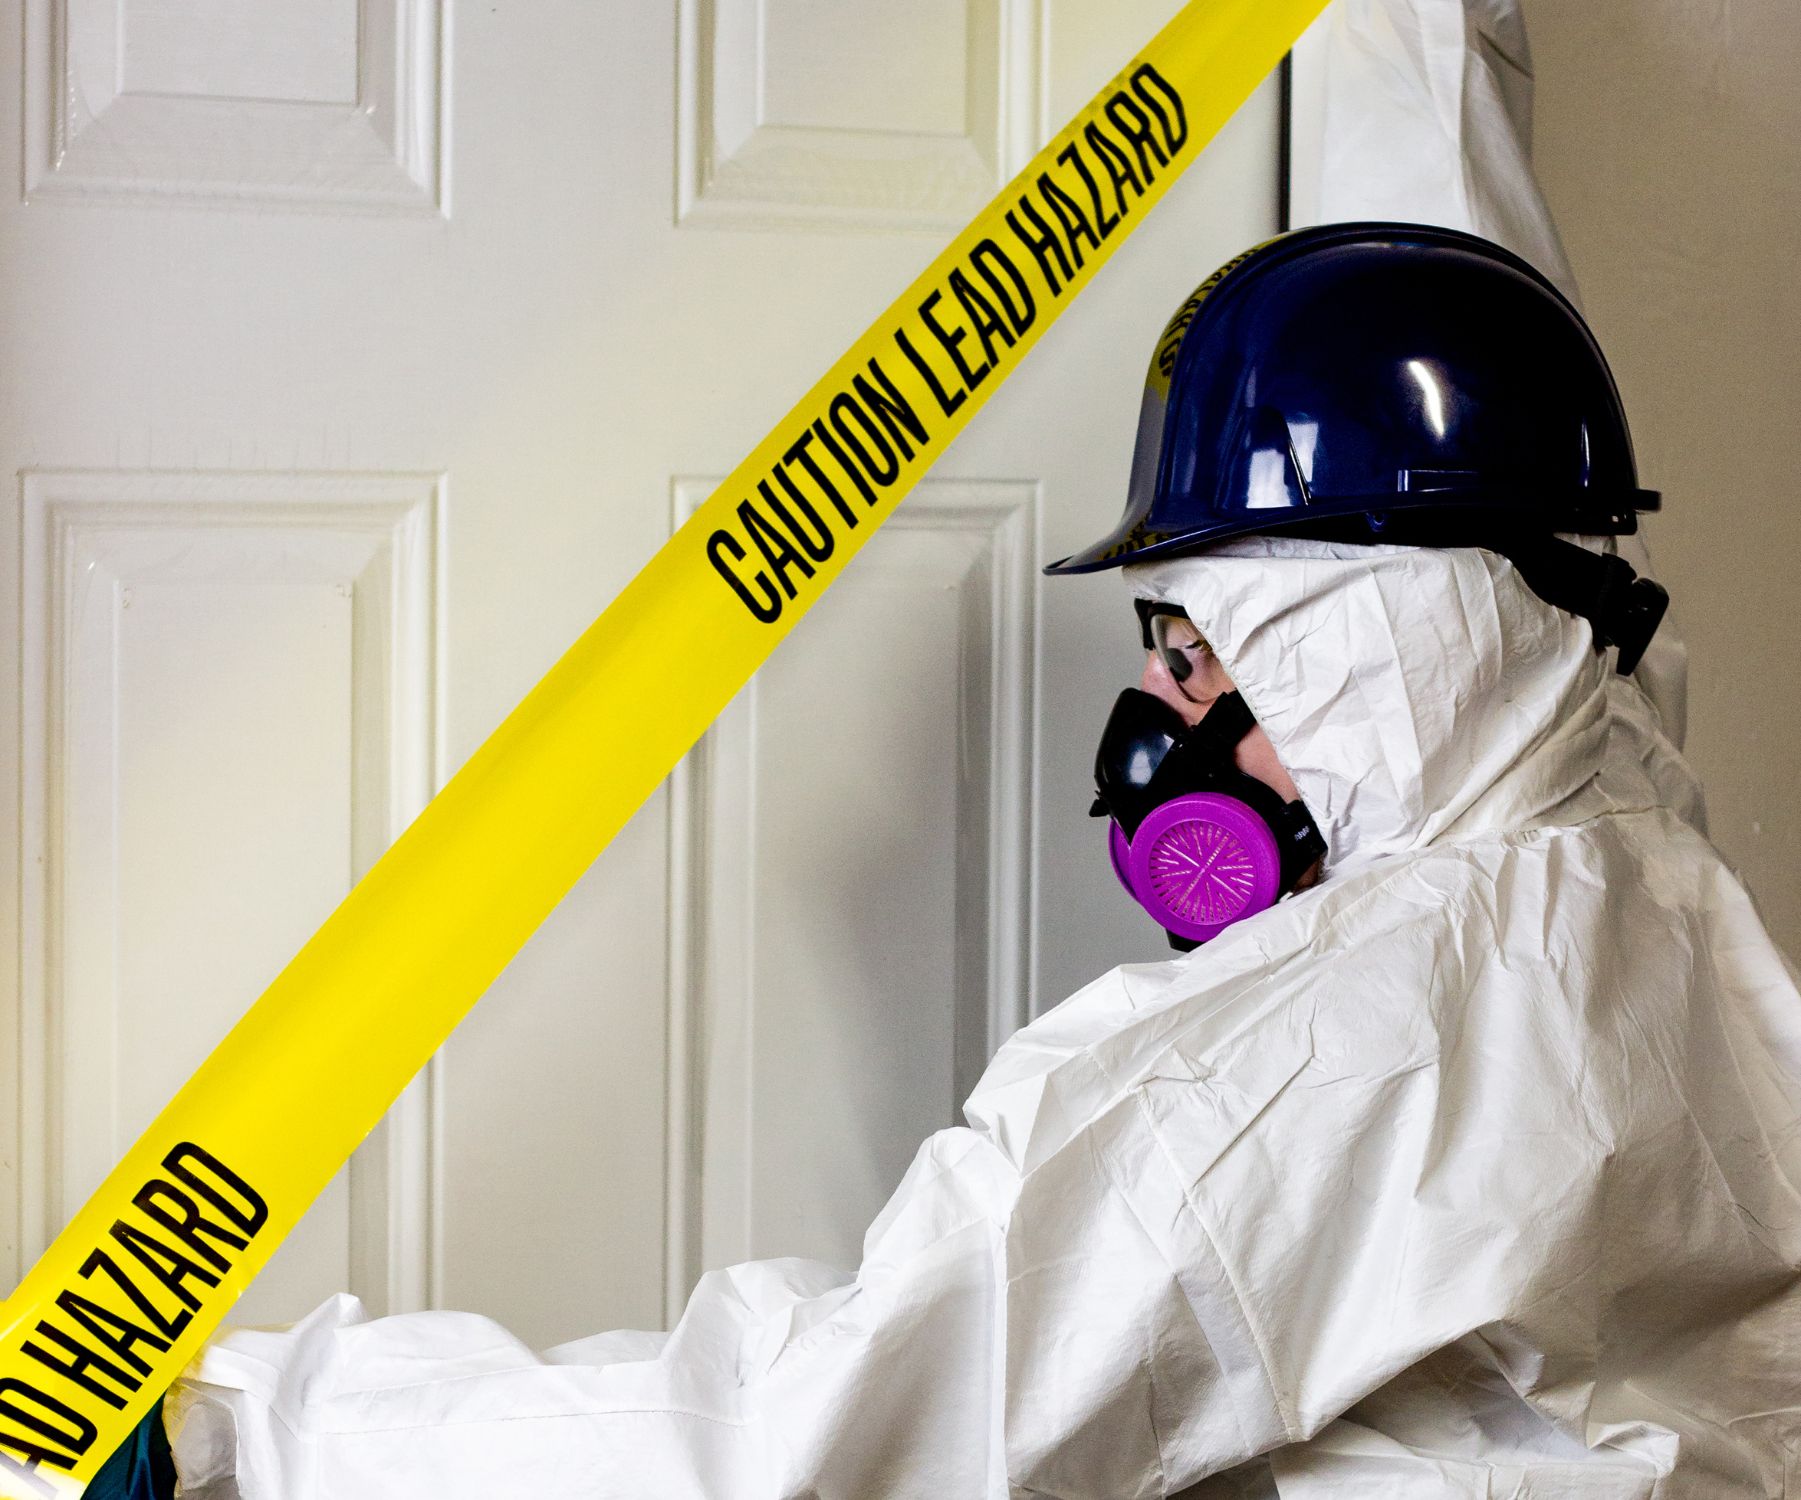
Consider wearing personal protective equipment (PPE), such as P100 respirators and disposable coveralls, when near the affected area to minimize personal exposure.

asbestos homePreventing Home Contamination from Workplace Asbestos
When asbestos is present at your job, it’s natural to worry about accidentally bringing it home, potentially exposing your family to its dangers.

Here are targeted strategies to prevent this:

  1. Dedicated Work Attire: Maintain a set of clothing exclusively for work, including footwear. Changing out of these clothes before leaving work can significantly reduce the risk of carrying asbestos fibers home.
  2. Secure Storage: Use on-site lockers or airtight bags to store your work attire after changing. This containment helps prevent any loose fibers from escaping.
  3. Home Entry Routine: Establish a routine at home where you immediately place any potentially contaminated items in a designated area for cleaning or disposal. This might include items like your work bag or personal protective gear that you can’t leave at work.
  4. Separate Laundry: Wash work clothes separately from the household laundry. Consider using disposable coveralls that can be discarded after use to eliminate the need for laundering potentially contaminated work clothes.
  5. Vehicle Care: If you must transport potentially contaminated items, place them in a sealed container or bag in the trunk. Regularly clean your vehicle’s interior, focusing on areas that might come into contact with work-related items.
  6. Communication with Household Members: Inform your family about the importance of these measures and why maintaining this separation is crucial for everyone’s health.

Identifying Potential Asbestos Hazards in Your Environment

While asbestos itself cannot be seen, smelled, or felt directly, certain indicators can signal its presence:

  1. Building Age: Buildings constructed or significantly renovated before the late 1970s are more likely to contain asbestos materials. If your workplace or home falls into this category, it’s wise to be cautious.
  2. Common Asbestos-Containing Materials: Familiarize yourself with the types of materials that commonly contained asbestos, such as popcorn ceilings, vinyl floor tiles, insulation around pipes, and certain types of shingles. Recognizing these materials can serve as a warning to take extra precautions.
  3. Material Condition: Pay attention to the condition of older building materials. If you notice wear, damage, or signs of disturbance in materials known to potentially contain asbestos, this could indicate a higher risk of fiber release.
  4. Review Historical Records: If possible, consult any available construction records, renovation logs, or material safety data sheets for your building. These documents can provide insights into the materials used and whether they might contain asbestos.
Indicator Detection Capability Notes Recommended Action
Sight Limited Asbestos fibers themselves are not visible. Look for aging or deterioration in building materials known to contain asbestos. If suspect materials are damaged, avoid disturbing them and consult an asbestos professional.
Smell No Asbestos is odorless; its presence cannot be detected by smell. Do not rely on the absence of odors as an indicator; professional testing is required for detection.
Feel No Asbestos fibers are microscopic and cannot be felt. Roughness in materials does not indicate asbestos. Avoid handling suspect materials. Disturbance can release fibers into the air.
Historical Records Yes Building construction or renovation dates, materials used, and past asbestos assessments can indicate potential asbestos presence. Review building records or consult with the building management for historical data on asbestos use.
Material Type Yes Certain materials used in construction before the 1980s are known to commonly contain asbestos, such as vinyl tiles, insulation, and textured paints. Identify potential asbestos-containing materials based on their common use in construction and consult a professional for confirmation.
Professional Assessment Yes A certified asbestos professional can conduct a thorough inspection and take samples for laboratory analysis. Engage a qualified asbestos inspector to perform a comprehensive assessment if asbestos is suspected.

Key Takeaway: While direct detection of asbestos through sight, smell, or feel is not possible due to the microscopic nature of asbestos fibers, understanding the types of materials that may contain asbestos, along with historical building information, can guide you in identifying potential risks. Professional assessment remains the most reliable approach to confirm the presence of asbestos and determine the necessary safety measures.

Historical Use and Initial Discovery of Hazards:

  1. Ancient Use: Historical records indicate that asbestos was known and used by ancient civilizations, like the Greeks and Romans, for its fire-resistant properties. They used it in lamp wicks, clothing, and building materials. However, there are also early accounts suggesting that they noticed health problems among those who worked with the material.
  2. Industrial Revolution: The use of asbestos materials expanded significantly during the Industrial Revolution. It became a popular material for insulation, fireproofing, and other industrial applications due to its durability and resistance to heat and chemicals.
  3. Early Health Concerns: The first documented health concerns related to asbestos exposure date back to the late 19th and early 20th centuries. Factory inspectors and physicians began to notice a higher incidence of lung problems and early deaths among workers in asbestos mining and manufacturing industries.
  4. Medical Research and Studies: Throughout the 20th century, medical research increasingly linked asbestos exposure to various lung conditions, including asbestosis (a fibrotic lung disease caused by asbestos fibers) and later mesothelioma (a rare form of cancer almost exclusively associated with asbestos exposure). Studies observed workers in industries such as shipbuilding, construction, and textile manufacturing, where asbestos use was prevalent.
  5. Public Awareness and Regulation: By the mid to late 20th century, the evidence of asbestos-related health risks became more widely recognized, leading to public awareness campaigns, regulatory changes, and eventually bans or strict controls on asbestos use in many countries.

Post-Asbestos Detection Action Plan and Contacts

Step Description Who to Contact
Confirm Asbestos Presence If asbestos is suspected but not confirmed, arrange for professional testing to determine if asbestos fibers are present. Certified Asbestos Inspector or Testing Service
Inform Stakeholders Notify anyone who might be affected by the asbestos discovery, including family members, employees, or tenants. N/A
Review Local Regulations Understand your legal obligations and rights regarding asbestos management and removal in your area. Local Health and Safety Authority or Environmental Agency
Professional Asbestos Abatement Engage a licensed asbestos removal contractor to safely remove or encapsulate the asbestos. Licensed Asbestos Abatement Contractors
Air Quality Testing After asbestos removal, have the air quality tested to ensure all asbestos fibers have been effectively removed. Environmental Testing Service
Document Actions Keep detailed records of all actions taken, including communications, professional assessments, and remediation efforts. N/A
Seek Legal Advice If encountering resistance from landlords or employers regarding asbestos management, consider seeking legal counsel. Attorney specializing in Environmental or Occupational Health Law
Report Non-Compliance If applicable laws and regulations regarding asbestos management are not being followed, report the issue to the appropriate authorities. Local or National Health and Safety Regulatory Bodies
Health Monitoring If exposure occurred, consider medical monitoring for any potential health effects related to asbestos. Healthcare Provider specializing in Occupational Health


FAQ: Asbestos Exposure and Safety Measures

Q: How can I tell if there’s asbestos in my home or workplace?

A: It’s challenging to identify asbestos by sight, as it’s often mixed with other materials. If your building was constructed or renovated before the late 1970s, it might contain asbestos. Look for signs of aging or damage in materials known to contain asbestos, such as insulation, vinyl tiles, and textured coatings. For a definitive answer, consult a certified asbestos inspector.

Q: What should I do if I accidentally disturb a material that might contain asbestos?

A: Stop work immediately to avoid further disturbance. Isolate the area by sealing it off with plastic sheeting and tape, and avoid using HVAC systems that could spread fibers. Consult a professional asbestos abatement service for assessment and remediation.

Q: Are HEPA air purifiers effective in removing asbestos fibers from the air?

A: HEPA air purifiers can reduce airborne asbestos fibers, but they don’t eliminate the source of asbestos. Use air purifiers with H13 or H14 HEPA filters for best results, and place them near the disturbed area, running them continuously.

Q: Can I remove asbestos materials myself if I wear protective gear?

A: It’s strongly discouraged to attempt DIY asbestos removal, even with protective gear. Improper handling can increase the risk of fiber release and exposure. Always seek professional asbestos abatement services for removal.

Q: How do I prevent bringing asbestos fibers home from a job site?

A: Use dedicated work attire andchange before leaving the job site. Store work clothes in airtight bags or containers, and wash them separately. Consider showering and changing clothes at the job site if possible.

Q: What are my rights if my landlord or employer is not taking asbestos seriously?

A: Regulations regarding asbestos management vary by location, but generally, landlords and employers have a duty to manage asbestos safely. If you’re facing resistance, seek advice from local health and safety authorities or legal counsel.

Q: How often should asbestos-containing areas be monitored or inspected?

A: Asbestos-containing materials in good condition and left undisturbed should be inspected periodically for signs of wear or damage. The frequency can depend on local regulations and the specific conditions of the materials.

Q: What happens after asbestos removal? Is the area safe immediately?

A: After asbestos removal, the area should be thoroughly cleaned by the abatement team, and air quality testing should be conducted to ensure all asbestos fibers have been removed. The area is considered safe once it passes clearance testing.

For more information, visit the EPA’s asbestos webpage.

How Long Does Asbestos Stay in the Air? The Key Factors

How Long Does Asbestos Stay Airborne?

“The duration asbestos fibers remain airborne depends on factors like fiber size and disturbance method – smaller fibers under 5 microns can stay suspended for weeks, while larger fibers settle in hours. More aggressive mechanical release causes longer airborne times than low-impact disturbance, but there are no exact rules for how long asbestos stays airborne after release.”

Airborne Duration Table

Fiber Type Size (Microns) Indoor Air (Calm) Outdoor Air (Windy) Constantly Disturbed Air Common Sources
Chrysotile >5 Within hours Within minutes Up to 24 hours Roofing, tiles, insulation, textiles
Chrysotile <5 Up to a few days A few hours Up to weeks Gaskets, brake linings
Amphibole >5 Within hours Within minutes Up to 24 hours Insulation, cement pipes
Amphibole <5 Several days A few hours Weeks to indefinitely High-temp applications like boilers
Sanded Asbestos Mixed Significant airborne presence for 48+ hours Rapid dispersion but high initial concentration Elevated levels for weeks in confined space Flooring, ceiling tiles, joint compounds, plaster

Airborne Duration of Different Types of Asbestos

Chrysotile Asbestos

Common Sources: Chrysotile, also known as white asbestos, is the most common form of asbestos found in buildings. It is frequently used in roofing materials, floor and ceiling tiles, insulation, and various textiles. Chrysotile fibers are also found in automotive parts like gaskets and brake linings due to their resistance to heat.

Airborne Duration:

  • Large Fibers (>5 Microns): These fibers tend to settle within hours in calm indoor environments and within minutes in outdoor or windy conditions.
  • Small Fibers (<5 Microns): Smaller chrysotile fibers can remain airborne for up to a few days in calm indoor air, and for a few hours outdoors. In constantly disturbed air, such as during ongoing construction activities, these fibers can stay suspended for up to several weeks.

Amphibole Asbestos

Common Sources: Amphibole asbestos includes types such as amosite (brown asbestos) and crocidolite (blue asbestos). These fibers are typically found in high-temperature applications such as insulation for pipes and boilers, and in some cement products. Amphibole fibers are known for their needle-like shape.

Airborne Duration:

  • Large Fibers (>5 Microns): Similar to chrysotile, larger amphibole fibers will settle within hours in calm air and within minutes when exposed to windy conditions outdoors.
  • Small Fibers (<5 Microns): The thinner and more durable nature of amphibole fibers means they can remain airborne for several days in calm air, and for a few hours in windy conditions. In environments where the air is constantly disturbed, these fibers can remain suspended for weeks or even indefinitely in extreme cases.

Sanded Asbestos

Common Sources: Sanded asbestos refers to the dust created when asbestos-containing materials like flooring, ceiling tiles, joint compounds, and plaster are mechanically disturbed through sanding. This process is particularly risky as it aggressively releases a mixture of fiber sizes into the air.

Airborne Duration:

  • Mixed Fiber Sizes: The act of sanding can release a significant concentration of asbestos fibers into the air. In calm indoor environments, this dense concentration of fibers can result in a significant airborne presence for more than 48 hours. Outdoors or in windy conditions, the fibers will disperse more rapidly but still start at a high initial concentration. In areas with constant disturbance, elevated levels of airborne fibers can persist for weeks, especially in confined spaces.

Other Types of Asbestos:

  1. Tremolite Asbestos:
    • Common Sources: Not used commercially on its own, tremolite asbestos can be found as a contaminant in chrysotile asbestos, vermiculite insulation, and talc powders.
    • Airborne Duration: Similar to other forms of asbestos, tremolite fibers can remain airborne for extended periods, especially the finer fibers. The specific duration would depend on the environment and the form in which the tremolite is present (e.g., within chrysotile or in contaminated vermiculite).
  2. Actinolite Asbestos:
    • Common Sources: Less commonly used, actinolite asbestos can be found in some insulation materials, paints, and sealants.
    • Airborne Duration: Actinolite fibers, due to their brittle nature, can easily become airborne and may stay suspended for prolonged periods similar to other amphibole types.
  3. Anthophyllite Asbestos:
    • Common Sources: Rarely used in commercial products, anthophyllite can be found in some composite flooring and insulation materials.
    • Airborne Duration: Given its rarity and limited use, specific airborne duration data is less available, but it would likely mirror other amphibole asbestos fibers in behavior.

Additional Situations of Concern:

  1. Demolition of Asbestos-Containing Structures:
    • Large-scale demolition can release significant quantities of asbestos fibers into the air, especially if proper abatement procedures are not followed. The duration and concentration of airborne fibers would be highly variable, depending on the methods used and the types of asbestos-containing materials present.
  2. Natural Weathering and Degradation:
    • Asbestos-containing materials that are exposed to the elements over time can degrade, releasing fibers into the air. This can occur in older buildings with exterior asbestos products or in natural deposits. The duration of fibers remaining airborne would depend on environmental conditions.
  3. Fire and High-Temperature Exposure:
    • Exposure to high temperatures or fire can cause asbestos-containing materials to break down, releasing fibers. The impact of such situations on airborne duration is complex and would vary based on the intensity of the heat and the type of asbestos material involved.

Situations with Increased Danger and Risk

Situation Risk Level Context
DIY Renovations in Older Homes High Homes built before the 1980s may contain asbestos in various materials. DIY renovations, like sanding, drilling, or cutting into walls, ceilings, or floors, can unknowingly disturb these materials, releasing fibers. The lack of professional control and containment can lead to prolonged exposure.
Accidental Damage to Asbestos-Containing Materials Moderate to High Accidental disturbances, such as damaging insulation, ceiling tiles, or other asbestos-containing materials, can release fibers. The risk is particularly high if the area is not promptly and properly contained and cleaned.
Professional Asbestos Abatement Low to Moderate When conducted by licensed professionals, asbestos removal is performed under strict regulations and safety measures, minimizing the release of fibers and exposure. However, some risk remains, especially if safety protocols are not adhered to.
Natural Disasters or Building Deterioration High Events like earthquakes, floods, or significant wear and tear can disturb asbestos-containing materials in structures, leading to unexpected exposure. The extent of fiber release depends on the condition of the materials and the nature of the disaster.
Occupational Exposure in Construction, Demolition, and Maintenance Very High Workers in these industries face the highest risk, especially when working in older buildings where asbestos is more common. Without proper precautions, these activities can result in significant asbestos fiber release and prolonged exposure.


  1. DIY Renovations in Older Homes:
    • Risk Level: High
    • Context: Homes built before the 1980s may contain asbestos in various materials. DIY renovations, like sanding, drilling, or cutting into walls, ceilings, or floors, can unknowingly disturb these materials, releasing fibers. The lack of professional control and containment can lead to prolonged exposure.
  2. Accidental Damage to Asbestos-Containing Materials:
    • Risk Level: Moderate to High
    • Context: Accidental disturbances, such as damaging insulation, ceiling tiles, or other asbestos-containing materials, can release fibers. The risk is particularly high if the area is not promptly and properly contained and cleaned.
  3. Professional Asbestos Abatement:
    • Risk Level: Low to Moderate
    • Context: When conducted by licensed professionals, asbestos removal is performed under strict regulations and safety measures, minimizing the release of fibers and exposure. However, some risk remains, especially if safety protocols are not adhered to.
  4. Natural Disasters or Building Deterioration:
    • Risk Level: High
    • Context: Events like earthquakes, floods, or significant wear and tear can disturb asbestos-containing materials in structures, leading to unexpected exposure. The extent of fiber release depends on the condition of the materials and the nature of the disaster.
  5. Occupational Exposure in Construction, Demolition, and Maintenance:
    • Risk Level: Very High
    • Context: Workers in these industries face the highest risk, especially when working in older buildings where asbestos is more common. Without proper precautions, these activities can result in significant asbestos fiber release and prolonged exposure.

Risk Mitigation Strategies

For each of these scenarios, specific strategies can be employed to mitigate the risks:

  • DIY Projects: Before beginning any renovation project in an older home, have the materials assessed for asbestos. If asbestos is present, consider hiring a professional for removal.
  • Accidental Damage: If asbestos-containing materials are accidentally damaged, isolate the area, avoid further disturbance, and consult with an asbestos abatement professional.
  • Professional Abatement: Ensure the abatement company is licensed and follows all safety regulations. Stay out of the area until the work is complete and clearance air testing confirms it’s safe to return.
  • Natural Disasters: After a disaster, have a professional assess the damage for potential asbestos exposure risks before starting clean-up or renovation efforts.
  • Occupational Safety: Workers should use appropriate PPE, follow safety protocols, and participate in asbestos awareness and safety training programs.

FAQ

1. How long does asbestos stay in the air?

The duration asbestos fibers remain airborne depends on factors like fiber size and disturbance method. Smaller fibers under 5 microns can stay suspended for weeks, while larger fibers settle in hours. More aggressive mechanical release causes longer airborne times than low-impact disturbance, but there are no exact rules for how long asbestos stays airborne after release.

2. Why is asbestos dangerous?

Asbestos fibers, when inhaled, can cause serious health issues like lung cancer and mesothelioma. These microscopic fibers are resistant to heat and chemicals, allowing them to remain in the lungs for long periods and potentially leading to lung tissue scarring, shortness of breath, and even mesothelioma.

3. What factors determine how long asbestos stays airborne?

The duration asbestos fibers stay airborne depends on factors such as fiber size and type, the amount of asbestos released, ventilation conditions, and disturbance method. Larger fibers settle faster, while thinner fibers can remain suspended for weeks. Amphibole asbestos remains airborne longer than chrysotile. Greater disturbance leads to higher initial fiber levels, and ventilation and disturbance methods also influence airborne times.

4. How long do different types of asbestos fibers stay airborne?

Heavier fibers above 5 microns settle within hours or minutes in calm or windy conditions, respectively. Smaller fibers below 5 microns can remain airborne for weeks with constant disturbance, and in extreme cases, they might never settle. Major fiber release can lead to elevated airborne presence for 48 hours or more, while low-impact disturbance results in dropped concentrations after a few hours.

5. What recommendations exist for minimizing asbestos exposure?

To minimize asbestos exposure, avoid disturbing asbestos-containing materials. If released, leave the area, isolate it if possible, and contact professionals. During renovations, have materials inspected for asbestos and hire accredited professionals for removal. Use protective equipment, improve ventilation, and follow safety regulations when dealing with older buildings.

6. How long is the latency period for asbestos-related health issues?

The latency period between asbestos exposure and the onset of diseases can be 20 years or more. Asbestos-related health issues may not arise until decades after initial exposure. The EPA warns that there is no safe level of asbestos exposure, and higher exposure increases the risk of disease.

7. What are the risks associated with inhaling asbestos fibers?

Inhaling asbestos fibers can lead to lung tissue scarring, shortness of breath, and mesothelioma, a rare cancer affecting the lung and abdominal linings. The severity of health risks increases with the amount of inhaled fibers. Early evaluation after exposure is advised even though fiber inhalation doesn’t always lead to disease.

  1. How can asbestos be safely removed from a home or building?

    • Safe asbestos removal requires professional asbestos abatement teams who follow strict regulations and safety protocols. This includes sealing off the area, using specialized equipment, and wearing appropriate protective gear. It’s critical not to attempt DIY removal, as improper handling can increase the risk of fiber release and exposure.
  2. Can asbestos be present in newer buildings or homes?

    • While the use of asbestos in construction has significantly declined since the late 20th century, it’s not entirely banned in some countries, including certain uses in the United States. Newer buildings may still contain asbestos in specific materials, so it’s important to check construction documents or have materials tested if there’s any doubt.
  3. What should I do if I accidentally disturb asbestos-containing materials?

    • If you suspect you’ve disturbed asbestos, stop work immediately to prevent further fiber release. Isolate the area, and avoid any airflow that could spread fibers further. Contact professional asbestos abatement services for assessment and removal if necessary. Do not try to clean up or contain the material yourself.
  4. Are there any health screenings recommended for individuals exposed to asbestos?

    • Individuals with significant asbestos exposure should consult their healthcare provider for advice on monitoring their health. This may include regular chest X-rays, lung function tests, and in some cases, CT scans to detect early signs of asbestos-related diseases.
  5. How should asbestos waste be disposed of?

    • Asbestos waste is hazardous and requires special handling and disposal procedures in line with local and federal regulations. It must be wetted, sealed in leak-tight containers with proper labeling, and disposed of at approved waste sites. Only licensed professionals should handle and dispose of asbestos materials.

Can You Be Allergic to Air Conditioning? Unveiling the Hidden Allergens in Your AC

Can You Be Allergic to Air Conditioning?

Yes, people can experience allergy-like symptoms in response to air conditioning, but these symptoms are not due to an allergy to the air conditioning itself. Instead, the symptoms may be triggered by various factors associated with air conditioning use, such as:

  1. Mold and Mildew: Air conditioning systems can harbor mold and mildew, especially if they are not properly maintained. When the AC is in use, it can circulate these allergens through the air, potentially causing allergic reactions in sensitive individuals.1
  2. Dust and Dust Mites: Dust can accumulate in the filters and ducts of air conditioning systems. When the system is turned on, these particles can be dispersed into the indoor environment, which might trigger allergies.2
  3. Pollen: For systems that pull in outside air, pollen can be introduced into the indoor environment through the air conditioning system, which could trigger symptoms in individuals with pollen allergies.
  4. Dry Air: Air conditioning can reduce indoor humidity levels, which might lead to dry air. This can irritate the mucous membranes of the nose and throat, leading to symptoms that resemble an allergic reaction, such as a sore throat, itchy eyes, and nasal irritation.
  5. Cooling Agents and Chemicals: While less common, some individuals might be sensitive to certain chemicals used in air conditioning systems, including refrigerants. However, this is not a true allergy but rather a sensitivity or irritation caused by exposure to these chemicals.

    What Are Some AC Allergy Symptoms?

Symptom Description
Respiratory Issues Sneezing, coughing, runny or stuffy nose, asthma attacks, difficulty breathing.
Allergic Reactions Itchy, watery eyes, sneezing, nasal congestion, triggered by allergens like mold, dust mites, or pollen.
Dryness Dry skin, dry eyes, sore throat, itchy eyes due to reduced indoor humidity.
Headaches and Fatigue Headaches, dizziness, fatigue, possibly due to temperature and humidity changes or chemicals.
Skin Irritations Dry, irritated skin, exacerbation of eczema or dermatitis due to dry air.


  1. Respiratory Issues: This can range from sneezing, coughing, and a runny or stuffy nose to more severe symptoms like asthma attacks or difficulty breathing, especially in individuals with pre-existing respiratory conditions.
  2. Allergic Reactions: Symptoms similar to those experienced with common allergies, such as itchy, watery eyes, sneezing, and nasal congestion. These reactions can be triggered by allergens like mold, dust mites, or pollen that might be circulated by the air conditioning.
  3. Dryness: Air conditioning can reduce indoor humidity levels, leading to dry skin, dry eyes, and irritation of the mucous membranes in the nose and throat. This can result in a sore throat, itchy eyes, and general discomfort.
  4. Headaches and Fatigue: Some people may experience headaches, dizziness, or fatigue when exposed to air conditioning for prolonged periods, possibly due to changes in temperature and humidity or to certain chemicals used in air conditioning systems.
  5. Skin Irritations: Dry air produced by air conditioning can lead to dry, irritated skin, and in some cases, may exacerbate conditions like eczema or dermatitis.

It’s important to note that these symptoms can also be caused by other factors and are not exclusively related to air conditioning.

While anyone can experience discomfort from air conditioning, certain individuals may be at a higher risk of developing symptoms. Understanding these risk factors can help in identifying and implementing appropriate preventive measures.

  • Individuals with Respiratory Conditions: People with pre-existing respiratory issues, such as asthma or chronic obstructive pulmonary disease (COPD), may find that air conditioning exacerbates their symptoms due to the circulation of cool, dry air, which can irritate sensitive airways.
  • Allergy Sufferers: Those with allergies to dust, pollen, mold, or pet dander might experience heightened symptoms in air-conditioned environments if the system circulates or exacerbates these allergens.
  • People with Weakened Immune Systems: Individuals with compromised immune systems, including the elderly and those undergoing treatments that weaken immunity, might be more susceptible to infections from airborne pathogens that can proliferate in poorly maintained AC systems.
  • Individuals with Skin Conditions: People with eczema, dermatitis, or other skin conditions may find that the dry air produced by air conditioning aggravates their skin issues.
  • Contact Lens Wearers: The reduced humidity in air-conditioned environments can cause discomfort for contact lens wearers, leading to dryness and irritation of the eyes.

Preventive Measures and Solutions

Recognizing the groups at higher risk for air conditioning-related symptoms underscores the importance of maintaining indoor air quality. Regular maintenance of air conditioning systems, including filter changes and duct cleaning, can mitigate many of the issues. Additionally, integrating air purifying technologies, such as UV and induct air purifiers, can further enhance indoor air quality, benefiting all occupants, especially those at higher risk.


Mitigating Air Quality Issues: The Role of UV and Induct Air Purifiers

While air conditioning can inadvertently contribute to indoor air quality issues, modern technology offers effective solutions to mitigate these concerns. Two such innovations are UV (Ultraviolet) and induct air purifiers, which can significantly enhance the quality of indoor air by targeting the pollutants that contribute to the symptoms listed above.

UV Air Purifiers: A Shield Against Microorganisms

UV air purifiers utilize ultraviolet light to deactivate airborne pathogens such as bacteria, viruses, and mold spores. By incorporating UV-C light, known for its germicidal properties, these purifiers can disrupt the DNA or RNA of microorganisms, effectively neutralizing them as they pass through the air purification system. This process not only sanitizes the air but also reduces the likelihood of microbial-induced allergies and respiratory issues.

Induct Air Purifiers: Whole-House Purification

Integrated directly into the HVAC system’s ductwork, induct air purifiers ensure that the air circulating throughout your home or office is consistently purified. These systems can leverage multiple technologies, including UV light, to tackle a broad spectrum of air pollutants. The continuous purification process helps in maintaining optimal air quality, thereby addressing concerns like dust, pollen, and other allergens that might be distributed by the air conditioning system.

The Combined Approach for Healthier Indoor Air

Employing UV and induct air purifiers can create a more comprehensive air quality management strategy. By addressing airborne microorganisms and pollutants at the source, these systems work in concert with regular HVAC maintenance to ensure that the air in your environment remains clean and healthy. This holistic approach not only mitigates the potential negative impacts of air conditioning but also contributes to a healthier indoor environment, reducing the risk of allergy symptoms, respiratory issues, and other air quality-related health concerns.

Installation Insights: Integrating UV and In-Duct Air Purifiers into Your HVAC

Deciding to enhance your indoor air quality with UV or in-duct air purifiers involves a straightforward installation process, typically carried out by HVAC professionals. Here’s what you can expect:

UV Air Purifiers

  • Placement: UV air purifiers are usually installed in the ductwork near the HVAC system’s air handler. This placement ensures maximum exposure of the air passing through the system to the UV light.
  • Installation Process: A professional will cut a small opening in the ductwork to mount the UV light unit. The unit is then connected to the HVAC system’s electrical supply, ensuring it operates only when the system is active.
  • Considerations: It’s important to choose a UV purifier that is compatible with your HVAC system in terms of size and capacity. Regular maintenance, including bulb replacement, is necessary to ensure effectiveness over time.

In-Duct Air Purifiers

  • Integration Point: These purifiers are installed directly into the HVAC system’s ductwork and are designed to treat the air as it circulates through the system.
  • Installation Steps: The process involves cutting an opening in the ductwork to accommodate the air purifier unit. The unit is then securely mounted and connected to the HVAC system, ensuring it purifies the air throughout the entire system.
  • Key Considerations: Selecting the right size and type of in-duct air purifier is crucial for effective air purification. The system should be compatible with the existing HVAC setup and have the capacity to handle the volume of air being circulated.

What to Expect

  • Professional Assessment: An HVAC technician will assess your current system to determine the most suitable type and placement of the air purifier.
  • Minimal Disruption: Installation is relatively quick and should not require significant changes to your existing HVAC system.
  • Maintenance Needs: Like any HVAC component, these purifiers require periodic maintenance to ensure optimal performance, including filter changes or bulb replacements for UV purifiers.

By understanding the installation process and what it entails, homeowners can make informed decisions about integrating air purification solutions into their HVAC systems. Such enhancements not only improve indoor air quality but also contribute to a healthier living environment, especially for those at higher risk of air quality-related symptoms.

Type Primary Function Best For Considerations
UV Air Purifiers Destroys microorganisms (bacteria, viruses, mold) Reducing airborne pathogens Does not remove particulates; often used with other filters
HEPA Air Purifiers Captures particulate matter (pollen, dust, pet dander) Allergy and asthma relief Regular filter replacement needed; does not remove gases or odors
Activated Carbon Purifiers Absorbs odors, smoke, and VOCs Odor and chemical removal Primarily for gases and odors; not effective for particulate matter
Ionic Air Purifiers Removes particles from the air using ions Dust and allergen removal in small areas May produce ozone; effectiveness varies
Window Air Exchangers Introduces fresh air and improves ventilation Rooms where air conditioning can’t be used or is insufficient Depends on outdoor air quality; may not filter incoming air


Alternative Air Purification Solutions for Apartments and Workspaces

Not everyone has the ability to modify their HVAC systems with in-duct or UV air purifiers, particularly those living in rental properties or dealing with workplace systems. Fortunately, there are effective standalone air purification options that can significantly improve indoor air quality without the need for HVAC integration.

Portable Air Purifiers

  • Versatility: Portable air purifiers come in various sizes, making them suitable for different room sizes, from compact units ideal for personal spaces to larger models designed for living rooms or open-plan areas.
  • Technology: Many of these units utilize HEPA filters, which are highly effective at capturing a wide range of airborne particles, including dust, pollen, mold spores, and pet dander. Some models also incorporate activated carbon filters to reduce odors and VOCs, and even UV-C light to kill germs.
  • Placement: For best results, place the air purifier in areas where you spend the most time or where air quality concerns are greatest. Ensure the unit is not obstructed by furniture to allow for unimpeded air flow.

Desktop and Personal Air Purifiers

  • Convenience: Smaller air purifiers can be placed on desks or bedside tables, providing clean air directly in your personal breathing space, which is particularly useful in shared environments like offices or dorm rooms.
  • Functionality: These compact units often include HEPA and carbon filters, and while they have a smaller coverage area, they can be effective at improving the air quality around your immediate vicinity.

Window Filters and Air Exchangers

  • Fresh Air Introduction: For those who can open windows, window filters can help by filtering out pollen and dust from incoming air. Air exchangers, which replace indoor air with filtered outdoor air, can also improve indoor air quality without needing to alter the HVAC system.

Considerations for Non-HVAC Solutions

  • Maintenance: Portable and personal air purifiers require regular maintenance, such as filter replacements, to maintain their effectiveness.
  • Noise Level: Consider the noise level of the unit, especially for use in bedrooms or quiet spaces.
  • Air Purification Capacity: Check the unit’s Clean Air Delivery Rate (CADR) to ensure it is adequate for the size of the room where it will be used.

By exploring these alternative air purification options, individuals can take proactive steps to enhance their indoor air quality, regardless of their living or working situation. These solutions offer flexibility and can be particularly beneficial for renters, office workers, or anyone unable to modify existing HVAC systems.

Frequently Asked Questions

Q1: Can air conditioning cause respiratory problems?

A1: Yes, air conditioning can contribute to respiratory problems, especially if the system is not well-maintained. Circulating air can spread dust, mold, and other allergens, potentially exacerbating conditions like asthma and allergies.

Q2: What are common symptoms of air conditioning-related issues?

A2: Common symptoms include coughing, sneezing, congestion, headaches, dry skin, and eye irritation. These can result from exposure to allergens or the dry, cool air produced by AC units.

Q3: Are some people more at risk from air conditioning-related symptoms?

A3: Yes, individuals with pre-existing respiratory conditions, allergies, weakened immune systems, skin conditions, and contact lens wearers may be more susceptible to symptoms.

Q4: How do UV air purifiers work?

A4: UV air purifiers use ultraviolet light to kill or inactivate airborne pathogens, such as bacteria and viruses, as air passes through the HVAC system.

Q5: What’s the difference between an in-duct air purifier and a portable air purifier?

A5: An in-duct air purifier is integrated into the HVAC system’s ductwork and treats air throughout the entire system. A portable air purifier is a standalone unit designed to clean the air in a specific room or area.

Q6: Can portable air purifiers be effective in managing air quality?

A6: Yes, portable air purifiers, especially those with HEPA filters, can effectively remove particulate matter, allergens, and some odors from indoor air, improving air quality in individual rooms or areas.

Q7: How often should HVAC systems and air purifiers be maintained?

A7: HVAC systems should generally be inspected and maintained at least annually, with filter changes as recommended by the manufacturer. Portable air purifiers may require more frequent filter checks and replacements depending on usage.

Q8: Are there any air purification options for people living in apartments or unable to modify their HVAC systems?

A8: Yes, portable or personal air purifiers are great options for apartments or rented spaces. They don’t require modifications to existing HVAC systems and can be placed in any room.

Q9: What should I look for in a portable air purifier?

A9: Key features to consider include the type of filters used (HEPA, activated carbon), the size of the area the purifier can effectively cover, noise level, and maintenance requirements.

Q10: Can opening windows help improve indoor air quality?

A10: Opening windows can introduce fresh air and improve ventilation, which may help reduce indoor pollutants. However, it may also allow outdoor allergens like pollen to enter, which could be a consideration for allergy sufferers.


Can You Be Allergic To Air? You May Be Surprised

Breathing is such a fundamental part of life that it can be shocking to learn that it could be the very thing causing you to be allergic.

Can You Be Allergic To Air?

Technically No, You can’t be allergic to air.

But while you cannot be allergic to air itself, you can be allergic to various pollutants and particles suspended in it, such as pollen, dust mites, mold spores, and pet dander.
These allergens trigger immune responses in sensitive individuals, leading to symptoms like sneezing, congestion, and asthma exacerbations.

Introduction

In the quest to understand the myriad ways our environment impacts our health, an intriguing question arises:

Can one be allergic to the very air we breathe? At first glance, the concept may seem far-fetched; after all, air is the essential, life-sustaining medium we all share.
However, a closer examination reveals a complex tapestry of substances suspended in the air, invisible to the naked eye yet potent in their effects.

From the bustling city streets to the quiet of a suburban home, the air is laden with a diverse array of pollutants—particulate matter, volatile organic compounds, nitrogen dioxide, and more—that can trigger allergic reactions.

It’s not the air itself that betrays us but the unseen assailants it carries, turning our most basic necessity into a potential source of discomfort and disease.

This article delves into the invisible world of air pollutants and their impact on our health, challenging us to rethink our relationship with the very essence of our environment.

pollenCommon Airborne Allergens: Invisible Triggers of Allergic Reactions

While the air we breathe seems clear and harmless, it is often teeming with microscopic entities that can provoke allergic responses in many individuals. Understanding these common airborne allergens is crucial in recognizing and mitigating the unseen risks they pose to our health.

  • Pollen: Produced by trees, grasses, and weeds, pollen is one of the most prevalent airborne allergens. Its tiny grains are designed to be carried by the wind to fertilize other plants, but when inhaled by humans, they can trigger allergic rhinitis, commonly known as hay fever.
  • Dust Mites: These microscopic creatures thrive in household dust. Their body fragments and fecal matter can become airborne, especially during cleaning or when disturbing bedding, upholstered furniture, and stuffed toys, leading to allergic reactions and asthma.
  • Mold Spores: Molds produce spores that float in the air like pollen and can be inhaled. In damp or humid conditions, indoors or outdoors, mold spores can flourish, causing allergic reactions and asthma flare-ups in sensitive individuals.
  • Pet Dander: Pets, especially cats and dogs, shed tiny flakes of skin called dander, which can become airborne and trigger allergies. Even homes without pets can have dander, as it can be carried on clothing and spread through the air.
  • Industrial Pollutants: Chemicals and particulates released from factories, vehicles, and construction sites can also act as allergens. Substances like sulfur dioxide, nitrogen oxides, and fine particulate matter can irritate the respiratory system and exacerbate existing allergies.
Types of Airborne Allergens
Allergen Sources Common Environments Potential Health Effects
Pollen Trees, grasses, weeds Outdoor areas, especially during pollination seasons Sneezing, runny nose, itchy eyes, asthma exacerbation
Dust Mites Household dust Homes, especially in bedding, upholstered furniture Sneezing, runny nose, itchy eyes, asthma exacerbation
Mold Spores Mold growth Damp or humid areas, indoors and outdoors Sneezing, coughing, itchy eyes, asthma exacerbation
Pet Dander Flakes of skin from cats and dogs Homes with pets, clothing of pet owners Sneezing, runny nose, itchy eyes, asthma exacerbation

Impact on Health: Navigating the Spectrum of Allergic Responses

The infiltration of airborne allergens into our daily lives can lead to a wide range of health impacts, affecting individuals differently based on their sensitivity, exposure level, and overall health. Understanding these impacts is essential for managing and mitigating allergic reactions.

  • Immediate Reactions: For many, the immediate response to allergens includes symptoms such as sneezing, nasal congestion, itchy or watery eyes, and throat irritation. These reactions, while uncomfortable, are typically manageable with over-the-counter remedies and avoidance strategies.
  • Respiratory Issues: More severe reactions involve the respiratory system, where allergens can trigger asthma attacks, characterized by wheezing, shortness of breath, chest tightness, and coughing. For individuals with pre-existing asthma or other respiratory conditions, exposure to allergens can significantly exacerbate their symptoms, requiring more intensive treatment and management.
  • Chronic Conditions: Prolonged exposure to certain allergens, especially in poor air quality conditions, can contribute to the development or worsening of chronic respiratory diseases, such as chronic obstructive pulmonary disease (COPD) and chronic rhinitis. These conditions can lead to a persistent decline in quality of life and require ongoing medical care.
  • Skin and Eye Irritations: Apart from respiratory symptoms, allergens can also affect the skin and eyes, leading to conditions like eczema (atopic dermatitis) and allergic conjunctivitis. These conditions can cause significant discomfort and may require specialized treatment.
  • Impact on Quality of Life: Beyond the physical health effects, the presence of airborne allergens can significantly impact an individual’s quality of life. Symptoms can disrupt sleep, reduce productivity, and limit outdoor activities, contributing to stress and general well-being decline.
Symptoms of Allergic Reactions
Severity Symptom Type Specific Symptoms Recommended Actions
Mild Respiratory Sneezing, runny or stuffy nose Antihistamines, nasal sprays
Mild Eye Itchy, watery eyes Allergy eye drops
Moderate Respiratory Wheezing, chest tightness, coughing Inhalers, avoiding allergens
Moderate Skin Eczema, hives Topical creams, avoiding allergens
Severe Respiratory Difficulty breathing, asthma attacks Immediate use of rescue inhaler, medical attention

Navigating the Air Quality Index (AQI): A Guide to Healthier Air

Understanding the Air Quality Index (AQI) is crucial for anyone looking to minimize their exposure to airborne allergens and pollutants. The AQI is a tool used by environmental agencies to communicate how clean or polluted the air is on any given day, and what associated health effects might be a concern.

What is AQI?

The AQI measures the air pollution level from 0 to 500, with higher values indicating greater pollution levels and higher potential health risks. It is calculated based on the concentrations of major air pollutants, including particulate matter (PM2.5 and PM10), ozone (O3), sulfur dioxide (SO2), nitrogen dioxide (NO2), and carbon monoxide (CO).

Interpreting AQI Values

AQI values are divided into categories that correspond to different levels of health concern. Understanding these categories can help you make informed decisions about your daily activities, especially if you are sensitive to poor air quality.

AQI Categories and Actions Table

AQI Range Category Health Implications Recommended Actions
0-50 Good Air quality is considered satisfactory, and air pollution poses little or no risk. Enjoy outdoor activities.
51-100 Moderate Air quality is acceptable; however, there may be a risk for some people, particularly those who are unusually sensitive to air pollution. Sensitive individuals should consider limiting prolonged outdoor exertion.
101-150 Unhealthy for Sensitive Groups Members of sensitive groups may experience health effects. The general public is not likely to be affected. Sensitive individuals should limit prolonged outdoor exertion.
151-200 Unhealthy Everyone may begin to experience health effects; members of sensitive groups may experience more serious health effects. Limit prolonged outdoor exertion; sensitive groups should avoid outdoor activity.
201-300 Very Unhealthy Health alert: everyone may experience more serious health effects. Avoid all outdoor exertion.
301-500 Hazardous Health warnings of emergency conditions. The entire population is more likely to be affected. Remain indoors and keep activity levels low.

Practical Tips for Using AQI

  • Check the AQI regularly, especially during warmer months or periods of known high pollution (e.g., wildfire season).
  • Use smartphone apps, websites, or local news outlets to stay informed about daily AQI values.
  • Plan outdoor activities for times when the AQI is lower, typically in the morning or late evening.
  • Consider indoor exercise options when AQI levels are high.

Here are some reliable sources where the AQI can be checked:

  1. AirNow: This is a government website (airnow.gov) provided by the EPA (Environmental Protection Agency) in the United States, offering real-time AQI readings and forecasts for locations across the country. It’s a primary source for many looking to check the air quality.
  2. The Weather Channel: Many weather forecasting websites and apps, including The Weather Channel (weather.com), provide AQI information along with weather forecasts. These platforms often offer user-friendly interfaces for checking local air quality.
  3. AQICN (The World Air Quality Index project): This website (aqicn.org) provides real-time air quality information for over 100 countries. It’s a useful resource for checking AQI in various locations worldwide.
  4. Smart Home Devices: Some smart home devices and air quality monitors can provide indoor and outdoor AQI readings directly to your smartphone or device, offering personalized air quality information based on your immediate environment.

hepa air purifierMitigating Allergens with HEPA Air Purifiers: A Breath of Fresh Air

As we grapple with the health impacts of airborne allergens, technology offers a beacon of hope in the form of HEPA air purifiers. These devices are designed to capture a significant percentage of the allergens that permeate our indoor environments, providing a cleaner, healthier air quality at home.

  • Understanding HEPA Technology: HEPA filters are constructed to trap particles as small as 0.3 microns with a 99.97% efficiency rate, including pollen, dust mites, mold spores, and pet dander. By circulating air through these dense filters, HEPA purifiers can significantly reduce the concentration of airborne allergens.
  • Selecting the Right Purifier: When choosing a HEPA air purifier for your home, consider factors such as the size of the room (square footage), the purifier’s Clean Air Delivery Rate (CADR), filter replacement indicators, and noise levels. For those with specific allergies or asthma, look for purifiers certified by reputable health organizations, which may offer additional filtration capabilities to target particular allergens. Alpine Air Purifiers are among the best.
  • Placement and Maintenance: To maximize effectiveness, place air purifiers in areas where you spend the most time, such as bedrooms and living rooms. Regular maintenance, including filter replacement as per the manufacturer’s guidelines, is crucial to ensure the purifier operates efficiently.
  • Complementary Strategies: While HEPA purifiers can significantly improve indoor air quality, they should be part of a broader allergen reduction strategy. This can include regular cleaning to reduce dust and pet dander, maintaining optimal humidity to discourage mold growth, and minimizing indoor plants that can contribute to pollen and mold spores.
Table 4: Allergen Reduction Strategies
Strategy Effectiveness Implementation Tips Considerations
Use of Air Purifiers High Place in high-traffic areas, maintain filters Initial cost, maintenance
Regular Cleaning Moderate to High Use damp cloths to avoid raising dust, vacuum regularly with a HEPA filter vacuum Time, effort required
Humidity Control Moderate to High Use dehumidifiers to keep humidity below 50% Energy usage, maintenance of device
Allergen-proof Bedding Moderate Encase mattresses and pillows in allergen-proof covers Initial cost, regular washing required

In Conclusion

Can You Be Allergic to Air?

While it’s not the air itself that causes allergies, the particles it carries, such as pollen, dust, and pet dander, can lead to allergic reactions. These reactions include symptoms like sneezing, itchy eyes, and even asthma in sensitive individuals.
Thank you for taking the time to read this article. We hope it has provided valuable insights into the unseen world of airborne allergens and how they can impact our health. Remember, understanding is the first step toward better health and well-being. Stay informed, stay healthy, and breathe easier.