
My Wife’s CPAP Broke from Tap Water: Why Distilled Is the Only Safe Choice

No — you should not use tap water in your CPAP machine. Tap water contains minerals, bacteria, and other impurities that can damage the device, leave behind harmful buildup, and even cause respiratory problems. Always use distilled water to keep your CPAP safe and effective.

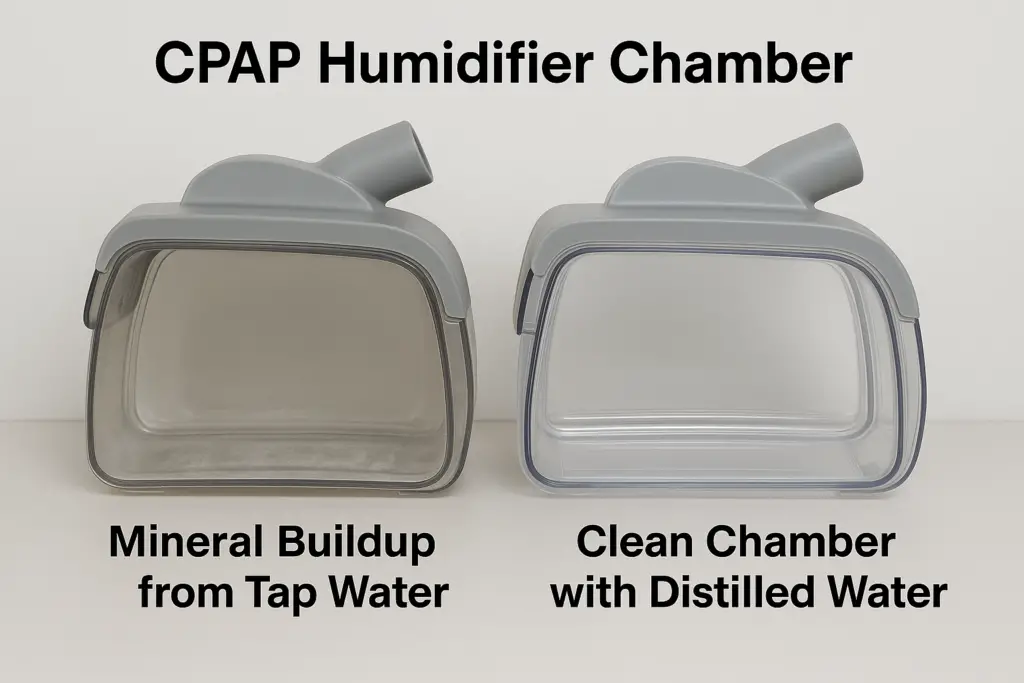
CPAP humidifier chamber showing mineral buildup from tap water compared to a clean chamber with distilled water.Why You Shouldn’t Use Tap Water in a CPAP
When you set up a CPAP machine at night, it feels natural to just fill the reservoir with whatever water is on hand. But here’s the problem: tap water isn’t pure. It contains minerals like calcium and magnesium, trace metals, and sometimes even chlorine or bacteria. Over time, those tiny impurities can turn into big problems for both your machine and your health.

Organizations like the Sleep Foundation and the American Academy of Sleep Medicine both stress that distilled water is the only safe, long-term choice for CPAP humidifiers.

A Real-World Example: What Happened When My Wife Used Tap Water

My wife got her CPAP through a sleep study, so it wasn’t as simple as running to the store for a replacement when it stopped working. When the machine quit, she had to send it off for repair. They gave her a loaner in the meantime, but even that took a mix-up and extra waiting to sort out. In the end, she went weeks without her own machine, struggling through the hassle of back-and-forth replacements.

Finally, the repair center let us know what had happened: the problem wasn’t a bad motor or faulty electronics — it was the water. The tap water she had been using had left behind so much mineral buildup that it clogged and damaged the system. All of that frustration, time lost, and inconvenience came down to one simple mistake: not using distilled water.

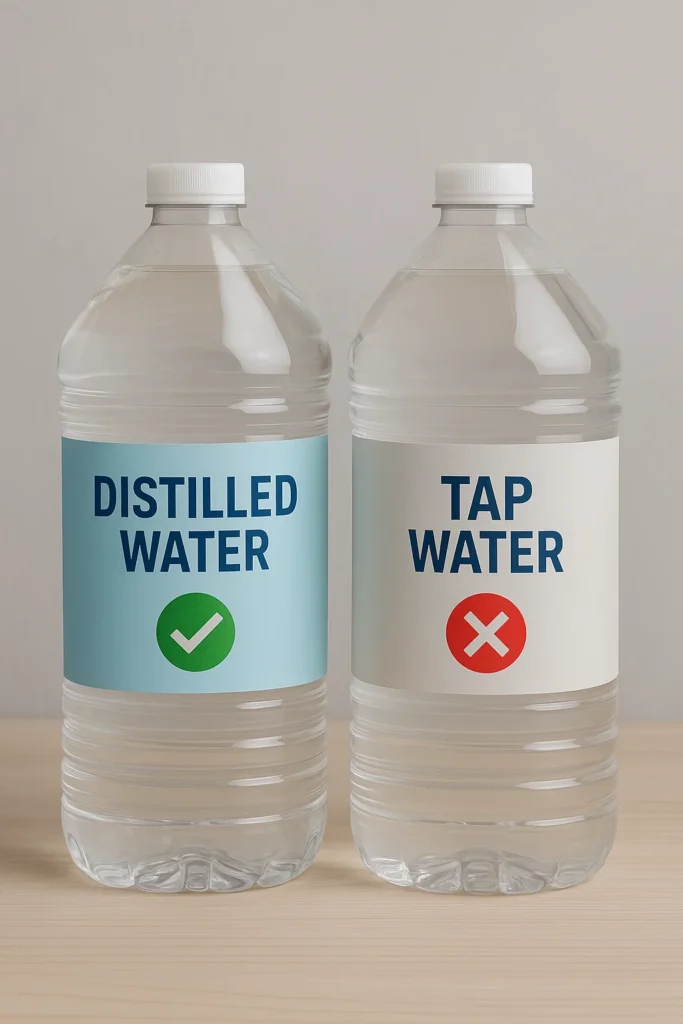
Distilled water and tap water bottles side by side, highlighting the difference in safety for CPAP useWhat Happens If You Use Tap Water?

  • Mineral Buildup: Hard water leaves white, chalky deposits inside the water chamber. Over time, these scale deposits can damage heating elements and block airflow.
  • Bacterial Growth: Tap water is not sterile. Bacteria and mold can grow in the humidifier chamber, then travel into the mask and tubing — straight into your lungs.
  • Bad Smells: Machines can start to smell musty or stale, making it harder to sleep comfortably.
  • Warranty Issues: Manufacturers often state clearly that using anything other than distilled water may void your warranty. The FDA lists distilled water as the standard for safe use in medical devices like CPAPs, BiPAPs, and APAPs.

Repair shops see this all the time — it’s one of the top reasons CPAP machines fail early.

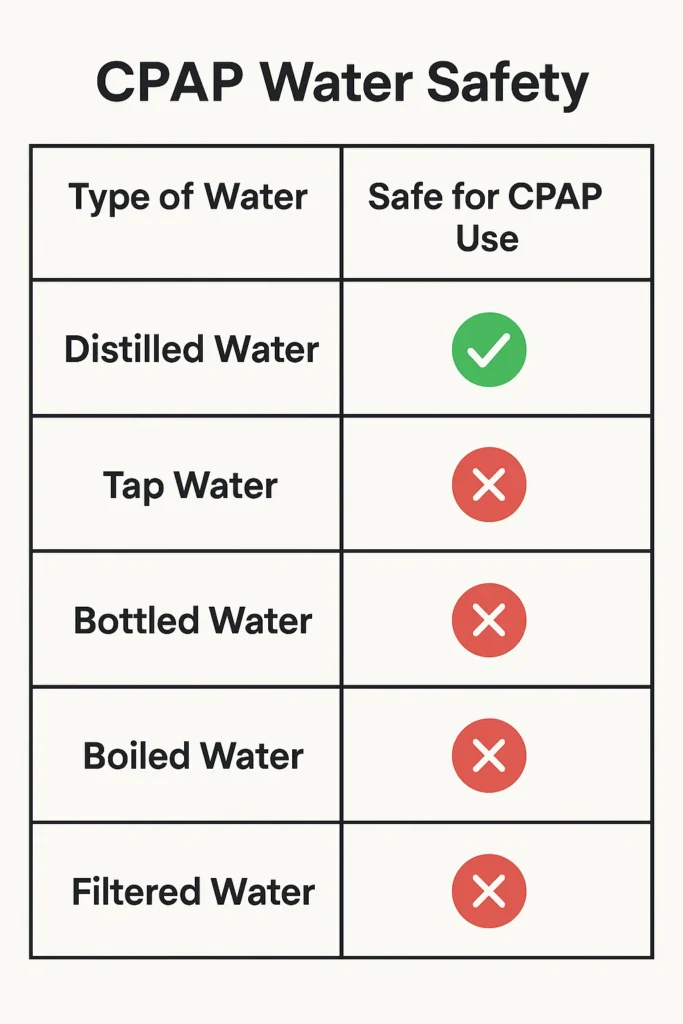
Comparison table showing distilled, tap, bottled, boiled, and filtered water safety for CPAP useWater Types Compared for CPAP Use

Not all water is created equal. Here’s how different types stack up for CPAP safety:

Water Type Safe for CPAP? Notes
Distilled Water ✅ Best choice Removes minerals & bacteria; manufacturer-recommended.
Tap Water ❌ No Mineral deposits, bacteria, mold, and warranty issues.
Bottled/Spring Water ⚠️ Short-term only Often contains minerals; may cause buildup.
Boiled Tap Water ⚠️ Short-term only Kills bacteria but minerals remain; still causes scaling.
Filtered Water ⚠️ Not recommended Reduces some impurities but doesn’t remove minerals completely.

The Cost of Repairs vs. Distilled Water

A gallon of distilled water usually costs between $1 and $2 at most grocery stores. A CPAP repair, on the other hand, can run anywhere from $100 to $300 or more depending on the issue. And if your machine was supplied through a sleep study, the process of getting it fixed can drag out for weeks — leaving you dependent on a loaner machine or, worse, without one at all. That makes distilled water one of the cheapest and smartest forms of protection you can buy.

Why Protecting Your CPAP Matters

CPAP, BiPAP, and APAP machines aren’t just gadgets — they’re life-changing medical devices that keep sleep apnea under control. Going without one for even a few nights can mean poor sleep, daytime fatigue, higher blood pressure, and added strain on the heart. Protecting your machine with distilled water isn’t just about saving money on repairs — it’s about protecting your health every single night.

Quick Checklist: Caring for Your CPAP Humidifier

  • ✔️ Always use distilled water
  • ✔️ Empty the chamber daily
  • ✔️ Wash with mild soap weekly
  • ✔️ Replace the water chamber as recommended
  • ✔️ Inspect tubing and mask regularly for buildup

Following this routine will prevent most problems CPAP users run into — from funky smells to clogged machines.

Health Risks of Using the Wrong Water

It’s not just about protecting the device. Using tap water or letting bacteria grow in your CPAP humidifier can lead to respiratory irritation, sinus infections, and even more serious conditions like pneumonia. The American Lung Association warns that contaminated air sources can worsen chronic respiratory conditions, especially in people already dealing with sleep apnea. For anyone with a compromised immune system, the risks are even higher.

What If You Don’t Have Distilled Water?

Sometimes you might run out of distilled water at night. If you’re in a pinch:

  • Boiled Water: Boil tap water for at least 5 minutes, then let it cool. This removes bacteria but not minerals — so use sparingly.
  • Bottled Water: Safer than tap, but still not ideal because it often contains minerals.
  • Filtered Water: Removes some impurities but still doesn’t equal distilled.

These are temporary solutions only. As soon as possible, switch back to distilled water to avoid long-term problems.

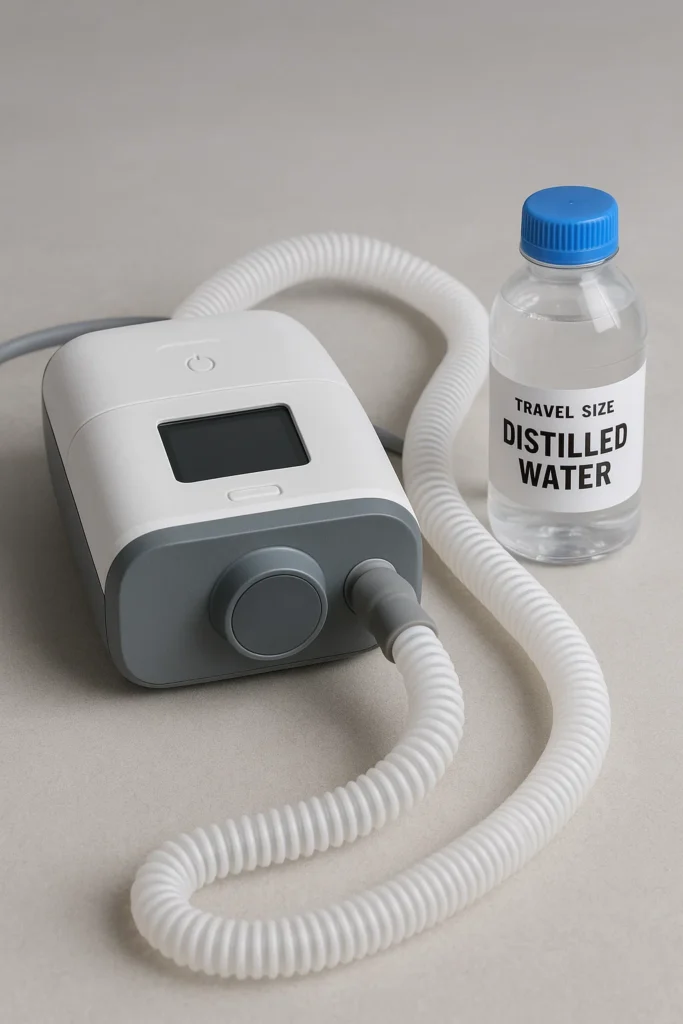
Portable CPAP machine with a small travel bottle of distilled water for safe use while travelingTravel Tips for CPAP Users

If you travel often, it can be tricky to always find distilled water on the road. Here are some ways to stay prepared:

  • ✈️ Pack small bottles of distilled water in your luggage for short trips.
  • 🛒 Order travel-size CPAP water packs online for convenience.
  • 🏠 Invest in a home countertop water distiller if distilled water is hard to find in your area.
  • 📦 Use an Amazon Subscribe & Save option to always have a steady supply delivered to your door.

With a little preparation, you can avoid the temptation to use tap water while away from home.

Lesson Learned: Distilled Water Is Cheap Protection

If you take nothing else away from this article, remember this: distilled water is not just a suggestion — it’s the lifeline of your CPAP machine. My wife’s experience showed how quickly things can snowball: weeks without her own machine, hassle with a loaner, and the frustration of learning that it all came down to tap water. Don’t risk damaging your machine, voiding your warranty, or breathing in harmful bacteria. A $1 jug of distilled water keeps your therapy safe, your machine running longer, and your nights worry-free.

CPAP Water FAQs

Here are some of the most common questions people have about CPAP water use:

What happens if I accidentally used tap water one night?

Don’t panic — one night won’t usually cause major damage. Just empty the chamber in the morning, rinse it well, and switch back to distilled water. Problems come from repeated use of tap water, which leads to buildup and bacterial growth.

Can I use bottled water in my CPAP?

Bottled water is cleaner than tap but often contains minerals, so it’s not a safe long-term replacement. If you’re traveling and can’t find distilled water, bottled can work for a night or two until you get the right water.

Can I boil tap water to make it safe for my CPAP?

Boiling kills bacteria, but it does not remove minerals. So while boiled water is safer than raw tap water in an emergency, it still risks leaving deposits inside your CPAP over time. Use only as a short-term solution.

How often should I clean my CPAP water chamber?

Most manufacturers recommend rinsing it daily and giving it a thorough wash with mild soap once a week. Regular cleaning prevents buildup and bacteria, even when you’re using distilled water.

What happens if I keep using tap water anyway?

Over time, you’ll likely face mineral scale buildup, musty smells, and possibly mold. Worst case, the machine can fail — just like my wife’s did — leaving you without therapy until it’s repaired or replaced.

Are Carbon Filters Safe? The Hidden Dangers You Should Know

Are Carbon Filters Safe?

Carbon filters, widely used in air and water purification systems, are generally safe and effective at removing various contaminants. However, their safety can be compromised if they are not replaced regularly, since saturated filters can become a breeding ground for bacteria or allow pollutants to pass through untreated. Regular replacement and maintenance are key to keeping them safe.

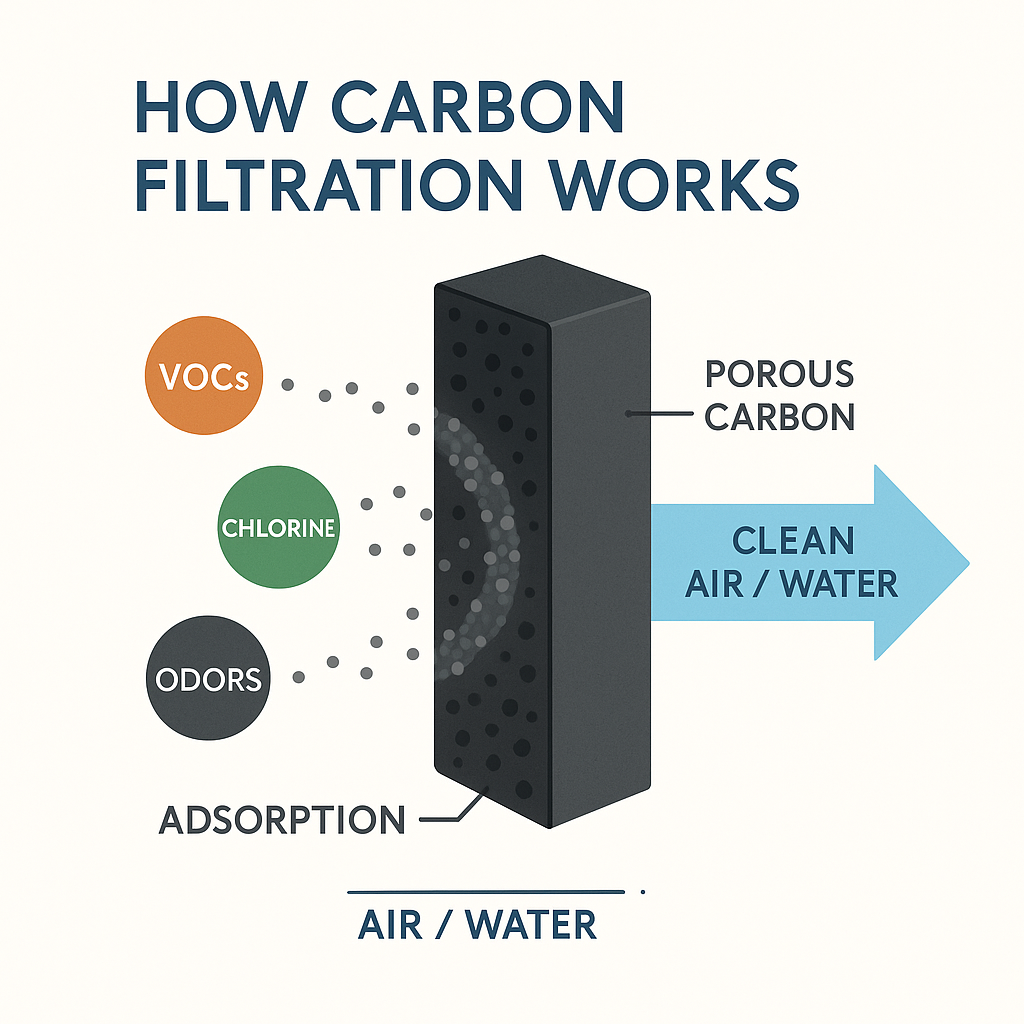
Diagram showing how carbon filters trap VOCs, chlorine, and odors through adsorption

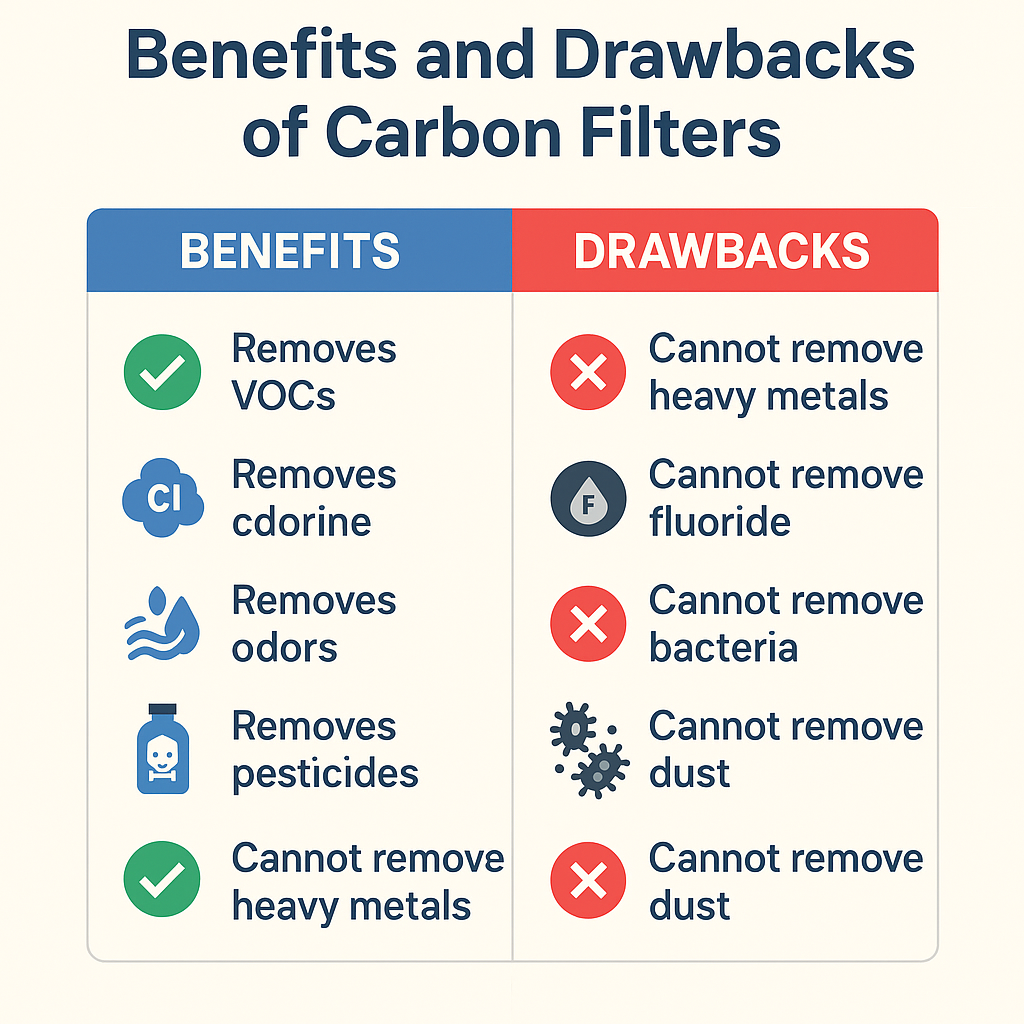
Benefits and Drawbacks of Carbon Filters

Carbon filters are popular in both air and water systems because they excel at capturing gases, chemicals, and odors. They make air smell fresher and water taste cleaner by adsorbing volatile organic compounds (VOCs), chlorine, smoke, and pesticides.
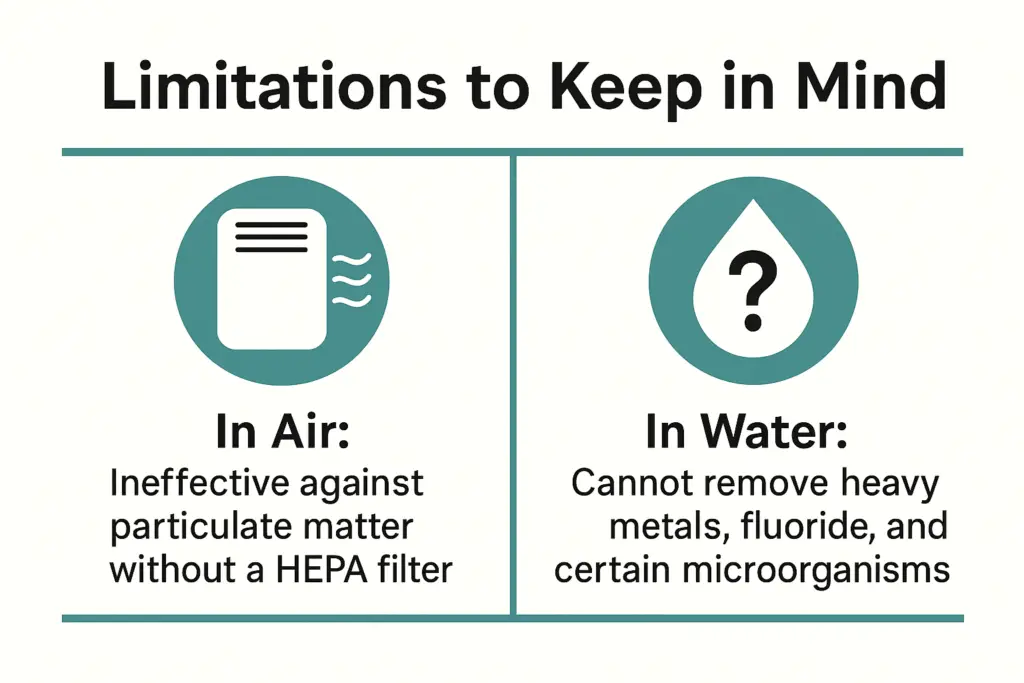
Still, they are not a catch-all solution. Carbon filters cannot trap dust, pollen, or pet dander without a HEPA partner, and they cannot remove heavy metals, fluoride, or all microorganisms in water.

Infographic comparing benefits and drawbacks of carbon filters for air and water

The Science Behind Carbon Filtration

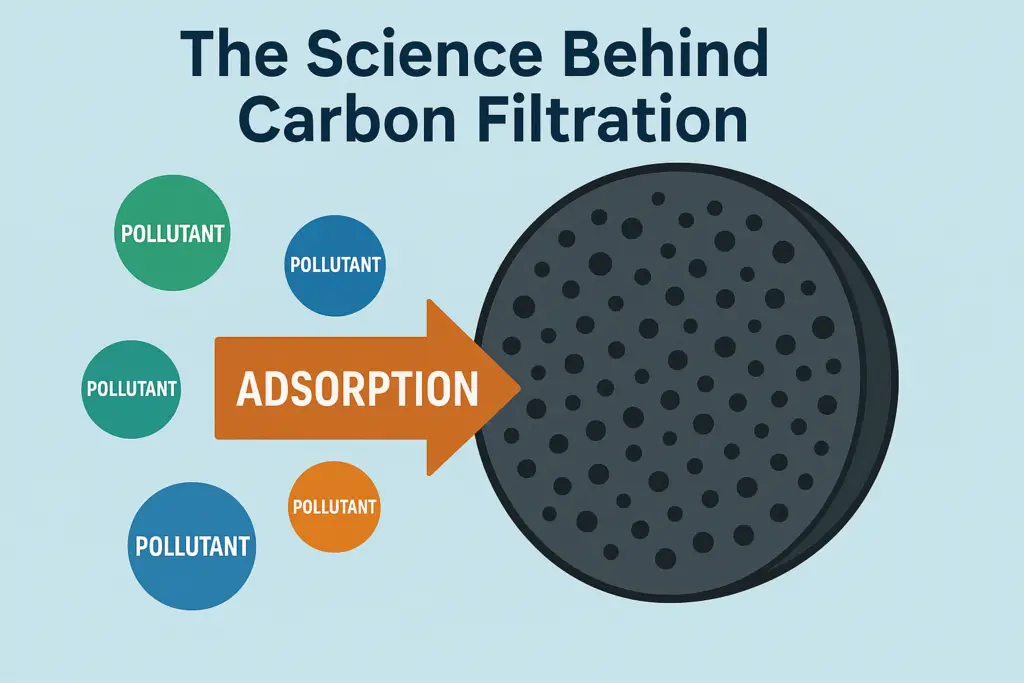
Activated carbon works through a process called adsorption, where pollutant molecules stick to the porous surface of the carbon. Each tiny pore acts like a sponge, drawing in gases and chemicals. This is highly effective for VOCs, chlorine, and odors—but once those pores are full, the filter’s performance drops sharply, and safety risks rise if it isn’t replaced on schedule.

The Double-Edged Sword of Carbon Filters: Navigating Air and Water Purification

Carbon filters are a cornerstone in both air and water purification systems, celebrated for their ability to adsorb a wide range of contaminants. These versatile filters use activated carbon to improve the quality of air we breathe and the water we drink. However, it’s crucial to understand their benefits and limitations in both applications to ensure safe and effective use.

What Carbon Filters Excel At

  • In Air: VOCs, odors, smoke, and some chemicals. see our air purifier guide
  • In Water: Chlorine, pesticides, organic compounds, and odors
Contaminants Removed by Carbon Filters
Contaminant Removal Efficiency Application
VOCs (Volatile Organic Compounds) High Air & Water
Pesticides Varies by specific pesticide Air & Water
Chlorine High Water primarily
Odors High Air & Water
Tastes High Water primarily
Cloudiness Moderate Water primarily

Limitations to Keep in Mind

  • In Air: Ineffective against particulate matter without a HEPA filter
  • In Water: Cannot remove heavy metals, fluoride, and certain microorganisms2

Hidden Dangers of Carbon Filters

Saturation and Reduced Effectiveness

Carbon filters, whether used for air or water, have a finite capacity for adsorption. Once saturated, their effectiveness diminishes, potentially allowing pollutants to pass through untreated.

Risk of Microbial Growth

In water filters, saturation can lead to bacterial growth, especially in filters that remain damp. While less common in air filters, high humidity environments can also pose a risk for microbial proliferation in carbon filters.

Best Practices for Maintenance

Timeline showing carbon filter lifecycle from fresh to saturated with replacement reminder

Regular Replacement

To maintain effectiveness, carbon filters should be replaced according to the manufacturer’s guidelines—typically every 3-6 months for air purifiers and water filters alike.

Signs of a Compromised Filter

  • In Air Purifiers: Persistent odors, increased allergy symptoms
  • In Water Filters: Change in taste or odor, decreased flow
 Comparison of Activated Carbon Sources
Source Efficiency Pore Size Environmental Impact
Coconut Shell High Small to Micro Low
Coal Moderate to High Varies High
Wood Low to Moderate Large Moderate

Technical Deep Dive into Activated Carbon Sources

Activated carbon can be made from various materials, each offering unique benefits for air and water filtration. The three most common sources are coconut shell, coal, and wood. Understanding the differences between these sources can help in choosing the right type of carbon filter for specific needs.

Coconut Shell Carbon

  • High Porosity: Coconut shell carbon is known for its high microporosity, which makes it particularly effective at adsorbing volatile organic compounds (VOCs) and other small-molecule contaminants from air and water.
  • Renewable Resource: It’s a more sustainable option, as coconut shells are a by-product of the coconut industry and are considered a renewable resource.
  • Low Ash Content: Coconut shell carbon typically has a low ash content, which is beneficial because it results in less waste material that could clog the filter, maintaining its effectiveness over time.

Coal-Based Carbon

  • High Density: Coal-based activated carbon has a higher density, making it suitable for applications requiring the adsorption of larger molecules, such as certain chemicals and odors in air filtration systems.
  • Cost-Effective: Generally, coal-based carbon is less expensive to produce than other types, making it a cost-effective option for large-scale and industrial applications.
  • Broad Range of Pore Sizes: It offers a broad range of pore sizes, from micro to meso and macropores, which allows for the adsorption of a wide variety of contaminants.

Wood-Based Carbon

  • Wide Surface Area: Wood-based carbon typically has a wide surface area, which is effective for adsorbing medium-sized molecules found in both air and water contaminants.
  • Sustainability: Like coconut shell carbon, wood-based carbon is considered more sustainable, especially if sourced from waste wood or sustainably managed forests.
  • Less Dense: It’s generally less dense than coal-based carbon, which can make it less efficient by volume in some applications, but its lighter weight can be an advantage in portable filtration devices.

Choosing the Right Carbon Filter

When selecting a carbon filter, consider the specific contaminants you need to remove and the filter’s intended application. For example, coconut shell carbon might be preferred for residential water filters due to its effectiveness against VOCs and chlorine. In contrast, coal-based carbon could be more suitable for industrial air purification systems where a broader range of contaminants must be addressed.

Health Risks Associated with Common Contaminants
Contaminant Health Implications Not Removed By Carbon Filters
Heavy Metals (e.g., Lead, Mercury) Neurological damage, kidney damage Yes
Fluoride Dental and skeletal issues Yes
Bacteria & Viruses Infectious diseases, gastrointestinal illnesses Yes
Nitrates Methemoglobinemia, increased heart rate Yes

bleach headacheInfographic showing what carbon filters remove in air and water and their limitationsHealth Implications of Air and Water Contaminants
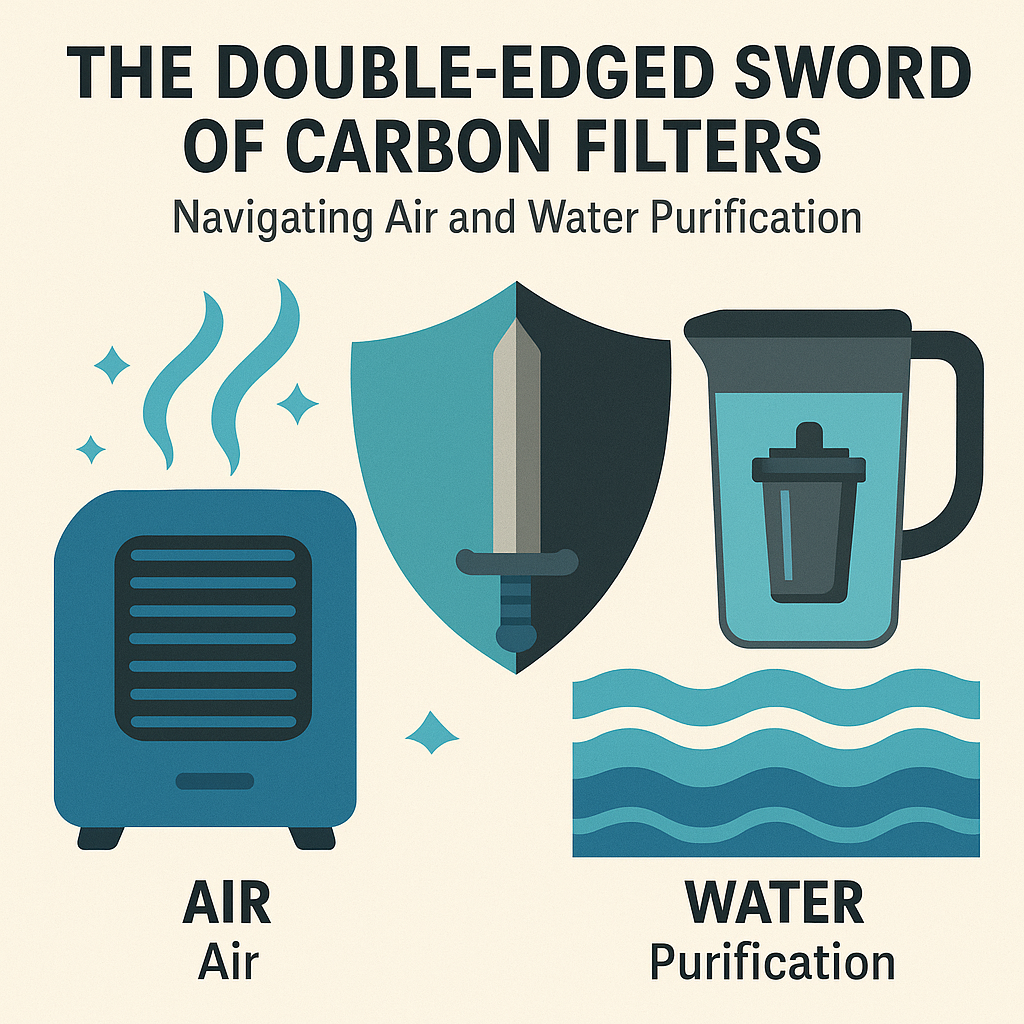
The quality of the air we breathe and the water we drink has a profound impact on our health. Contaminants in both can lead to a range of health issues, making effective filtration, such as through carbon filters, essential. However, it’s important to recognize the limitations of carbon filters and the potential dangers when they fail to remove certain harmful substances.

Air Contaminants and Health Risks

  • Volatile Organic Compounds (VOCs): Found in household products like paints, varnishes, and cleaning agents, VOCs can cause symptoms ranging from headaches and nausea to damage to the liver, kidney, and central nervous system.
  • Particulate Matter: Fine particles from sources like traffic pollution and industrial processes can penetrate deep into the lungs, leading to respiratory and cardiovascular diseases, and in severe cases, premature death.
  • Microbial Contaminants: Mold spores and bacteria in the air can exacerbate allergies, asthma, and other respiratory conditions.

Carbon filters are effective at adsorbing VOCs and odors, but they must be used in conjunction with HEPA filters to capture particulate matter. Regular replacement is crucial to prevent the filters from becoming a breeding ground for microbes.

Water Contaminants and Health Effects

  • Chemicals and Pesticides: Chemicals like chlorine, used to disinfect water, and pesticides can make their way into water sources, potentially causing a range of health issues from skin irritations to more serious conditions like cancer.
  • Heavy Metals: Lead, mercury, and arsenic in water can lead to severe health problems, including neurological damage, kidney failure, and increased risk of cancer.
  • Microorganisms: Bacteria, viruses, and parasites in untreated or poorly treated water can cause gastrointestinal illnesses and other serious health conditions.

While carbon filters are effective at removing many chemical contaminants and improving taste and odor, they cannot remove all types of heavy metals or microorganisms. Additional filtration methods, like reverse osmosis or UV sterilization, may be necessary for comprehensive water purification.

The Importance of Effective Filtration

Inadequate or failed filtration can expose individuals to harmful contaminants, underlining the importance of maintaining and replacing carbon filters as recommended. For those with compromised immune systems, the elderly, and children, the risks are even more pronounced, making it vital to ensure that air and water purification systems are functioning correctly.

FAQ

  • Can one carbon filter serve both air and water purification needs?No, carbon filters are designed specifically for air or water applications, due to differences in the contaminants they need to adsorb and the flow rates they accommodate.
  • How can I tell if my carbon filter is saturated?For air filters, signs include reduced effectiveness in odor removal and increased allergy symptoms. In water filters, look for changes in taste, smell, or flow rate.
  • Are carbon filters environmentally friendly?Carbon filters are made from natural materials like coconut shells, wood, and coal, but their environmental friendliness also depends on their disposal and replacement frequency. Some filters are more eco-friendly than others, based on the materials used and the manufacturing process.
  • How do carbon filters compare to HEPA filters for air purification?Venn diagram comparing carbon filters for odors and VOCs versus HEPA filters for dust and pollenWhile carbon filters are excellent for removing gases, odors, and VOCs, HEPA filters are designed to capture 99.97% of particles as small as 0.3 microns, including pollen, dust mites, and pet dander. Combining both can provide comprehensive air purification.
  • Can carbon filters improve indoor air quality affected by outdoor pollution?Carbon filters can adsorb outdoor pollutants that enter indoor spaces, such as car exhaust gases and industrial VOCs, helping to improve indoor air quality. However, their effectiveness depends on the pollutant concentration and the filter’s capacity.
  • How can you tell if a carbon filter needs replacement in air purifiers?Signs include a noticeable decrease in air purification efficiency, persistent odors, and an increase in allergy symptoms among household members. It’s important to follow the manufacturer’s recommended replacement schedule.
  • Are carbon filters safe for pets?Yes, carbon filters are safe and beneficial for pets, as they can remove common odors and airborne chemicals that might affect your pet’s health. Ensure the air purifier is placed in a secure location to prevent pets from tampering with it.

5 Side Effects of A Dehumidifier-The Good, The Bad, and The Must-Know

Quick Summary: A dehumidifier can make your home feel more comfortable by reducing excess moisture, cutting down on mold and allergens, and protecting your belongings. At the same time, they can raise your electric bill, add some noise, and require regular upkeep. This article breaks down both the pros and cons, shows real-life scenarios, and explains how to pick the right dehumidifier size and features for your space.

If you’re like me, living in a city where humidity isn’t just a weather condition but a way of life, especially during the sweltering summer months, the thought of purchasing a dehumidifier has likely crossed your mind more than once.

It’s not just about combating the sticky feeling that seems to cling to everything; it’s about creating a comfortable, healthier home environment.

But, as with most things in life, dehumidifiers come with their share of pros and cons.

In this article, we’ll dive into both the sunny and the not-so-sunny sides of owning a dehumidifier. From the bliss of breathing easier to the potential pitfalls of maintenance, we’ll cover it all.

Plus, we’ll guide you through the maze of options to help you choose the dehumidifier that’s just right for your space and lifestyle.

5 Positive Effects of Using a Dehumidifier

  1. Reduces Mold and Mildew Growth: Lower humidity levels make environments less hospitable for mold and mildew, which thrive in moist conditions.
  2. Improves Air Quality: By reducing humidity, dehumidifiers can help alleviate allergy symptoms and respiratory issues caused by dust mites and mold spores.
  3. Prevents Damage to Home: Excessive moisture can damage wood, paint, and electronics. Dehumidifiers help in preserving the structural integrity of a home.
  4. Comfortable Living Environment: High humidity can make a room feel hotter than it actually is. Dehumidifiers make indoor environments more comfortable.
  5. Controls Pests: Insects like cockroaches and silverfish prefer moist environments. A dehumidifier can help deter these pests.

5 Negative Effects of Using a Dehumidifier

  1. Over-Drying of Air: If used excessively, dehumidifiers can strip too much moisture from the air, leading to dry skin, irritated sinuses, and itchy eyes.
  2. Increased Energy Bills: Running a dehumidifier, especially a larger model, can lead to a significant increase in electricity consumption.
  3. Noise: Some dehumidifiers can be quite noisy, which might be disturbing, especially in quiet environments or during nighttime.
  4. Maintenance Requirements: Dehumidifiers require regular cleaning and maintenance to prevent mold and bacteria buildup inside the unit.
  5. Unintended Health Effects: In certain cases, dehumidifiers might lower humidity levels too much, potentially worsening respiratory conditions in sensitive individuals.

Expectations vs. Reality

Scenario 1: Relief from Allergies

  • Sarah lives in a humid coastal city and suffers from allergies and asthma.
  • After Using a Dehumidifier: She noticed a significant reduction in allergy symptoms, fewer asthma attacks, and an overall more comfortable home.

Scenario 2: High Energy Costs and Over-Drying

  • Mark uses a dehumidifier to combat summer humidity.
  • After Using a Dehumidifier: He faces higher electricity bills and issues like dry skin and disturbed sleep due to noise.

Scenario 3: Preservation of Valuables

  • Emily, an avid collector, uses a dehumidifier to protect her collections.
  • After Using a Dehumidifier: She observes better preservation of her books and artwork.

Scenario 4: Maintenance Hassle

  • John, living in a basement apartment, bought a dehumidifier for dampness.
  • After Using a Dehumidifier: He finds maintenance cumbersome and eventually stops using it regularly.

What is a Dehumidifier?

A dehumidifier is an appliance that reduces and maintains the level of humidity in the air. It is typically used for health or comfort reasons, or to eliminate musty odor and prevent the growth of mildew by extracting water from the air.
It works by drawing moist air into the unit, cooling the air to remove the moisture, and then reheating it and releasing it back into the room. 

How Do You Use a Dehumidifier?

  1. Placement: Position it in an area with high humidity like basements or laundry rooms.
  2. Settings: Adjust the settings for desired humidity levels.
  3. Maintenance: Regularly empty the water collection tank and clean the air filter.
  4. Continuous Monitoring: Monitor the humidity levels and adjust the settings as needed.

When Do You Use a Dehumidifier?

  1. High Humidity Conditions: Use it in climates with high humidity or in damp areas like basements.
  2. Allergy Management: Helpful for people suffering from allergies or respiratory issues.
  3. After Water Damage: Useful for drying out spaces that have experienced significant water damage.
  4. Preserving Items: In spaces where you store sensitive items like books or electronics.
  5. Comfort and Odor Control: When your home feels damp or has a musty odor.

dehumidifier featuresHow to Choose a Dehumidifier Based on Key Features

  1. Pint Capacity: Choose based on the size of your space and the level of humidity. Larger rooms or higher humidity levels require a higher pint capacity.
  2. Humidistat: Look for a dehumidifier with a humidistat to set and maintain desired humidity levels.
  3. Continuous Drainage: Useful if you don’t want the hassle of emptying the water bucket frequently. Be warned though, This could include a garden hose strung across the floor.
  4. Auto-Defrost: Important for colder climates to prevent the coils from freezing.
  5. Energy Efficiency: Opt for an Energy Star certified dehumidifier for better energy usage and cost savings.
  6. Noise Level: Consider the noise level, especially if the unit will be placed in living spaces or bedrooms.
  7. Portability: Features like handles and wheels add convenience if you plan to move the unit around.
  8. Filter Indicator: Helps in maintaining the dehumidifier by indicating when the filter needs cleaning or replacement.
  9. Auto-Restart: Useful in areas with frequent power outages, ensuring the dehumidifier resumes operation automatically.
  10. Timer: Allows setting operating times for energy efficiency and convenience.

Dehumidifier Features Comparison

Feature Description Importance Level
Pint Capacity Amount of moisture the dehumidifier can remove in a day. High
Humidistat Allows you to set and maintain a desired humidity level. High
Continuous Drainage Option to drain water continuously without emptying a bucket. Medium
Auto-Defrost Prevents coils from freezing in cold temperatures. Medium
Energy Efficiency Energy Star certification indicates more efficient power usage. High
Noise Level Volume of noise produced by the unit, important for bedrooms or quiet areas. Medium
Portability Ease of moving the unit around, including handles and wheels. Low to Medium
Filter Indicator Alerts you when the filter needs to be cleaned or replaced. Medium

what size dehumidifierWhat Size Dehumidifier to Buy

  • Houses with Two Stories: Consider separate dehumidifiers for each level or larger capacity units (30-40 pints) for each level.
  • Houses with Crawl Spaces: Smaller dehumidifiers (around 20-30 pints) are usually sufficient.
  • Single-Level Homes: Base the size on the square footage and humidity level. For moderate humidity in a 500 sq. ft area, a 10-12 pint dehumidifier is suitable.
  • Room Conditions and Climate: Adjust capacity based on room conditions (very wet rooms) and the climate in your area.

 Dehumidifier Size Guide

Room Size (sq. ft.) Humidity Level Recommended Capacity (pints per day)
Up to 500 Moderate 10-12
500-1,000 Moderate 14-16
1,000-1,500 Moderate 18-22
1,500-2,000 Moderate 24-26
2,000-2,500 Moderate 28-30
Up to 500 High 12-14
500-1,000 High 16-18
1,000-1,500 High 22-26
1,500-2,000 High 26-32
2,000-2,500 High 30-34

Note: “Moderate” humidity refers to noticeable dampness without visible water patches, while “High” refers to visibly wet floors or walls.


Summary

And there you have it! We’ve journeyed through the world of dehumidifiers, exploring their benefits and drawbacks, understanding how they work, and learning how to choose the right one for your needs.

Whether you’re battling high humidity levels, looking to alleviate allergy symptoms, or simply aiming for a more comfortable living environment, a dehumidifier can be a game-changer.

Remember, the key to reaping the benefits of a dehumidifier lies in choosing the right size and features for your specific situation. It’s not just about pulling moisture out of the air; it’s about creating a healthier, more comfortable space for you and your loved ones.

Regular maintenance and mindful usage will ensure that your dehumidifier works efficiently without becoming a burden.

As we wrap up, think of a dehumidifier as more than just an appliance; it’s a step towards a more comfortable and healthier home. So, whether you’re dealing with a damp basement or a sticky summer, the right dehumidifier can make all the difference.

FAQ

1. What exactly does a dehumidifier do?

A dehumidifier removes excess moisture from the air, helping to reduce humidity levels in your home. This creates a healthier and more comfortable living environment.

2. How do I know if I need a dehumidifier?

If your home feels humid, has a musty smell, or you notice condensation on windows, it might be a sign that you need a dehumidifier. It’s also useful for people with allergies to mold and dust mites.

3. Where is the best place to put a dehumidifier in my house?

The best place is where humidity is highest, like basements, laundry rooms, or bathrooms. Ensure it’s on a level surface and away from walls for proper air circulation.

4. Can a dehumidifier help with allergies?

Yes, by reducing humidity, it creates an environment less hospitable for allergens like dust mites and mold, which thrive in moist conditions.

5. How often should I clean my dehumidifier?

It’s recommended to clean the water bucket and air filter at least every two weeks to prevent mold and bacteria buildup.

6. Do dehumidifiers use a lot of electricity?

It depends on the model. Energy-efficient models, especially those with an Energy Star rating, consume less power. Larger models typically use more electricity.

7. Can a dehumidifier cool my room?

While it doesn’t function like an air conditioner, by reducing humidity, it can
make the air feel cooler and more comfortable in your room.

8. Are dehumidifiers noisy?

Some models can be noisy, but many modern dehumidifiers are designed to operate quietly, especially those intended for use in living spaces or bedrooms.

9. How long do dehumidifiers typically last?

With proper maintenance, a good quality dehumidifier can last about 5-10 years. Regular cleaning and proper usage can extend its lifespan.

10. Can I use a dehumidifier in the winter?

Yes, you can use a dehumidifier in the winter, especially in areas like basements where dampness can be a problem regardless of the season.


Does Air Conditioning Use Water? Understanding How Your AC Unit Works

Do Air Conditioners Use Water?

Air conditioners primarily use refrigerants to cool and dehumidify indoor air. During this process, condensation occurs, resulting in water formation.

This condensate is then safely drained away from the unit. In contrast, air coolers, or evaporative coolers, actively use water as part of their cooling process.

 These coolers employ a water pump to moisten a cooling pad. As air moves through the wet pad, water evaporates, reducing the air temperature and providing a cooling effect.

Introduction

Air conditioning is an essential part of our daily life, especially in hot and humid areas.

It helps us to keep our indoor environment comfortable and pleasant by regulating the temperature and humidity.

One of the common questions people ask about air conditioning is whether it uses water or not.

In this article, we will discuss this topic in detail and try to answer some of the common questions related to it.

Why Is There Water Around My AC Unit?

If you have ever noticed water around your AC unit, you might be wondering where it comes from.

The answer is simple; air conditioning units produce water as a byproduct of the cooling process.

When warm and humid air passes over the evaporator coil, it condenses into water droplets, which then fall into the drain pan and flow out of the unit through a drain line.

This process helps to reduce the humidity level in the indoor environment and makes it more comfortable.

What Types of AC Cooling Uses Water?

There are three types of air conditioning systems that use water for cooling: evaporative cooling , refrigerated air, and absorption cooling.

1. Evaporative cooling systems

use water to cool the air by evaporating it. These systems are commonly used in dry and arid regions, where humidity levels are low.

2. Refrigerated AC

(HVAC, heating, ventilation, and air conditioning) uses water to cool and dehumidify the air.

This water is produced as condensation when warm, moist air is circulated over the unit’s cold evaporator coil, causing the moisture in the air to condense on the coil.

The water is then collected in a drip pan and drained out of the unit through a drain line.

3. Absorption cooling systems

use water and other chemicals to create a cooling effect. These systems are commonly used in commercial buildings and industries.


Aspect Evaporative Cooling Systems Refrigerated AC (HVAC) Absorption Cooling Systems
Basic Function Utilize water to cool air through evaporation. Use refrigerants to cool and dehumidify air, producing water as a byproduct. Employ water and chemicals to generate a cooling effect.
Water Usage Actively use water as part of the cooling process. Do not use water actively; water is a byproduct of the cooling process. Use water in the chemical process for cooling but do not produce water as a byproduct.
Ideal Environment Best in dry, arid regions due to reliance on water evaporation. Suitable for various climates, especially where dehumidification is needed. Commonly used in commercial buildings and industries, not dependent on external climate.
Water Production Does not produce water as a byproduct; water must be added to the system. Can produce 2 to 5 gallons of water per day as condensation from humid air. Does not produce water as a byproduct.
Water Safety Water used can be safe to drink if properly filtered and treated. Water produced is not suitable for drinking due to contaminants. Not applicable, as water is part of the chemical process and not produced as a byproduct.
Maintenance Concerns Requires regular water supply and can be affected by water quality. Potential for water leaks due to clogged drain lines or malfunctioning parts; regular maintenance needed. Complex systems that may require specialized maintenance, particularly related to the chemical process and water handling.
Impact of Shutting off Water Direct impact on cooling efficiency; the system cannot function without a water supply. No direct impact, as water is not actively used for the cooling process. Depending on the specific design, shutting off water could impact the chemical process and cooling efficiency.

Do window ac units use water?

Yes, a window AC unit also uses water to cool and dehumidify the air.

Like central air conditioners, window units dehumidify air and  produce condensate, which needs to be drained.

Window ACs have a hole on the bottom that is used for drainage,

How Much Water Does an Air Cooler Use?

The amount of water an air cooler uses depends on several factors, such as the size of the unit, the humidity level, and the operating conditions.

Generally, a typical residential air conditioning unit can produce between 2 to 5 gallons of water per day.

However, this amount can vary depending on the size of the unit and the climate conditions.

Is Water from an Air Conditioner Safe to Drink?

The water produced by an air conditioning unit is not suitable for drinking as it contains bacteria, dirt, and other contaminants.
It is also acidic and can damage your plumbing system.

However, water from an air cooler, which is a different type of cooling system that uses water to cool the air, can be safe to drink if it is properly filtered and treated.

Why Do Residential AC Units Leak Water?

If you notice water leaking from your residential AC unit, it could be due to several reasons, such as a clogged drain line, a dirty air filter, or a malfunctioning condensate pump.

It is important to address the issue as soon as possible to avoid any damage to your unit or your property.

Does Shutting off Water Affect AC?

For Air Coolers.

Shutting off the water supply to your Air cooler can affect its performance as it needs water to cool the air.

If the water supply is shut off, the unit may continue to run, but it will not cool the air as efficiently.

It is important to keep the water supply on to ensure the proper functioning of your AC unit.

For HVAC

HVAC cooling on the hand creates water as a by product of the condensation that it is pulling from the air.

This type of Air conditioning does not require water to be added and turning off the water will not effect it.

In conclusion, Does air conditioning use water?

 HVAC and other refrigerated type air conditioning units, like window air ACs and Portable ACs do use water, but only as a byproduct of the cooling process.

The amount of water used depends on several factors, such as the size of the unit and the humidity level.

Air Coolers require water to be added as a way to use water to cool down the air. It is also important to keep the water supply on to ensure the proper functioning of your Air cooler.

Water produced by an AC is not suitable for drinking, and it is important to address any water leaks as soon as possible.

FAQs

Can I drink water from an air conditioning unit?

No, water produced by an air conditioning unit is not safe for drinking as it contains contaminants.

How can I prevent water leaks from my AC unit?

Regular maintenance and cleaning of your AC unit can prevent water leaks. It is also important to address any issues promptly.

How much water does an AC unit produce in a day?

A typical residential AC unit can produce between 2 to 5 gallons of water per day, but this can vary depending on the size of the unit and the climate conditions.

What should I do if my AC unit is leaking water?

If you notice water leaks from your AC unit, it is important to address the issue promptly.

You can try cleaning the drain line or replacing the air filter. If the issue persists, it is recommended to seek professional help.

Can I turn off the water supply to my AC unit?

It is not recommended to turn off the water supply to your AC unit as it needs water to cool the air efficiently.

Turning off the water supply can affect its performance and may cause damage to the unit.

Can air conditioning units use recycled water?

Some AC units can use recycled water, but it depends on the type of unit and its design.

It is best to consult with a professional to determine if your unit is capable of using recycled water.

What should I do if my AC unit is not producing any water?

If your AC unit is not producing any water, it could indicate a problem with the unit’s drainage system.

You should contact a professional to diagnose and fix the issue.

Is it normal for my AC unit to produce a lot of water?

While some water production is normal for AC units, an excessive amount of water could indicate an abnormal amount of humidity in the air.

How often should I check my AC unit’s water levels?

You do not need to check your AC unit’s water levels regularly.

However, if you notice any leaks or changes in performance, it is important to address the issue promptly.

Can I use the water produced by my AC unit for watering plants or other purposes?

The water produced by your AC unit is not recommended for consumption or for use in watering plants.

It may contain impurities or chemicals that can be harmful to plants or people.

How to Clean AC Coils Without Removing the Unit – No Tools Needed

How to Clean AC Coils Without Removing the Unit – No Tools Needed

Cleaning your AC coils is essential for maintaining efficiency and preventing breakdowns, but you don’t need special tools or technical skills to do it. With simple household items and these easy methods, you can clean both indoor and outdoor AC coils without removing any parts. This guide is perfect for renters, beginners, or anyone who wants to maintain their AC without professional help.

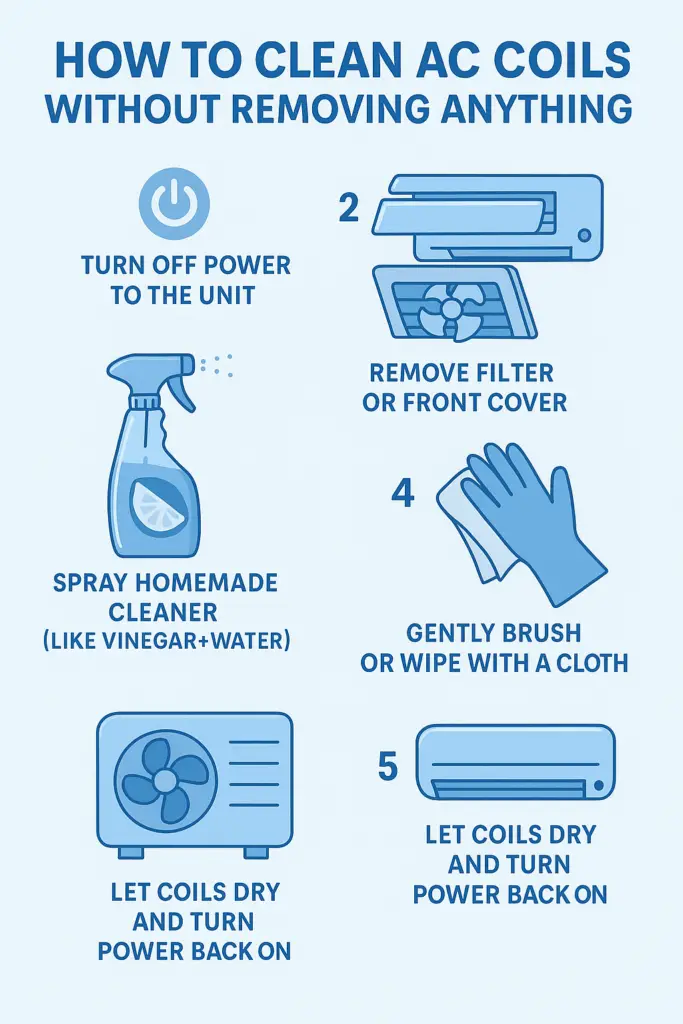
graphic showing how to clean ac coils without removing anythingWhy Clean Your AC Coils Without Disassembly?

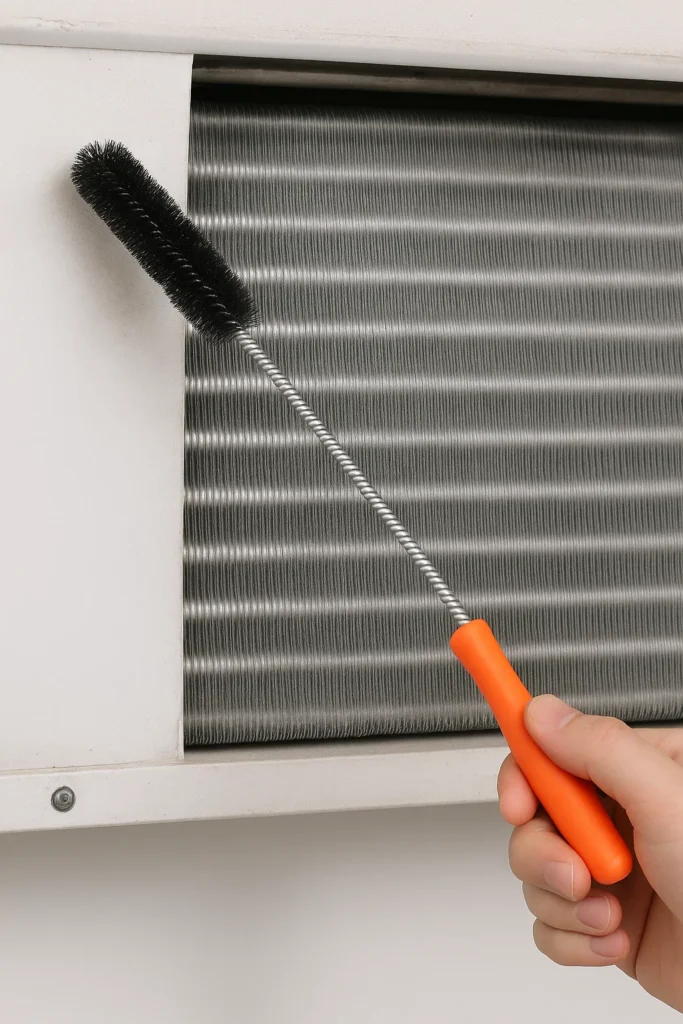
Many people avoid cleaning their AC coils because they think it requires dismantling the unit. The truth is you can effectively clean most coils without removing them or using special tools. Regular cleaning improves cooling performance, reduces energy bills, and extends your AC’s lifespan.

If you’re not sure whether your coils need cleaning, check out our guide on how to tell if your AC coils are dirty for common symptoms to watch for.

Safety First: Precautions Before Cleaning

✔️ Turn Off Power to the Unit

Always turn off power at the breaker before cleaning. This simple step prevents electrical shocks and protects your AC system.

✔️ Wear Protective Gloves

Coils have sharp edges that can cut skin. A pair of rubber gloves protects your hands while cleaning.

✔️ Avoid Pressure Washers

High-pressure water can bend delicate coil fins. Stick to gentle spraying or wiping methods instead.

Tool-Free Methods for Cleaning Indoor Coils

1. The Vinegar Spray Method

White vinegar is a natural cleaner that dissolves dirt and kills mold. This is one of the safest and most effective methods for indoor coils.

  1. Mix equal parts white vinegar and water in a spray bottle
  2. Remove the access panel (usually held by simple clips)
  3. Lightly spray the solution onto the coils
  4. Let sit for 5-10 minutes
  5. Wipe away loosened dirt with a soft cloth

2. Soapy Water Wipe Down

For light dirt buildup, mild soap works perfectly. This gentle method won’t damage sensitive components.

  1. Mix a few drops of dish soap with warm water
  2. Dip a soft cloth or sponge in the solution
  3. Gently wipe the coil surfaces
  4. Use a dry cloth to remove excess moisture

Easy Outdoor Coil Cleaning Without Tools

1. Garden Hose Rinse Technique

Your garden hose can clean outdoor coils if used correctly. Always spray at an angle to avoid bending the fins.

  1. Remove loose debris by hand first
  2. Set hose nozzle to “shower” or gentle spray
  3. Spray from the inside out at a 45-degree angle
  4. Let the unit dry completely before restarting

2. Hydrogen Peroxide Deep Clean

For stubborn grime on outdoor units, hydrogen peroxide works wonders. It’s more powerful than vinegar but still safe for coils.

  1. Mix 1 part 3% hydrogen peroxide with 2 parts water
  2. Spray onto coils and let bubble for 5 minutes
  3. Rinse gently with your hose

Natural Cleaning Solutions to Try

You don’t need harsh chemicals to clean AC coils effectively. These DIY solutions work great and are safe for your home environment. For more options, see our homemade AC coil cleaner recipes.

Cleaner Best For Mixing Ratio
White vinegar Indoor coils, mold 1:1 with water
Dish soap Light dirt Few drops per gallon
Hydrogen peroxide Stubborn grime 1:2 with water
Baking soda Odor removal 2 tbsp per cup water

After Cleaning: Important Next Steps

✔️ Let the Unit Dry Completely

Moisture can cause electrical issues. Wait at least 30 minutes before restoring power.

✔️ Replace the Air Filter

A clean filter prevents quick recontamination. This simple step extends your cleaning results.

✔️ Monitor Performance

Notice if cooling improves after cleaning. This helps you determine your ideal cleaning schedule.

When to Consider Professional Help

While these methods work for most routine cleaning, sometimes you need more advanced care. Call a professional if you notice any of these issues:

  • Bent or damaged coil fins
  • Ice buildup after cleaning
  • Strange noises when the unit runs
  • No improvement after cleaning

For more thorough cleaning, you might want to explore the best AC coil cleaning brushes and tools for future maintenance.

Maintenance Tips to Keep Coils Clean Longer

✔️ Regular Filter Changes

A clean filter prevents dust from reaching coils. Change filters every 1-3 months during cooling season.

✔️ Keep the Area Clear

For outdoor units, maintain 2 feet of clearance. This improves airflow and reduces debris accumulation.

✔️ Schedule Annual Cleaning

Mark your calendar for seasonal maintenance. Twice-yearly cleaning prevents major buildup.

Final Thoughts

Cleaning your AC coils doesn’t require special tools or technical expertise. With these simple methods, anyone can maintain their air conditioner’s performance and efficiency. Regular cleaning with safe, homemade solutions keeps your cooling costs down and extends your unit’s lifespan.

For more detailed cleaning recipes, visit our guide to easy coil cleaning recipes using common household ingredients.


Best AC Coil Cleaning Brushes and Tools

Best AC Coil Cleaning Brushes and Tools for DIY Maintenance

Proper AC maintenance requires the right tools for the job. Investing in quality coil cleaning tools can save you hundreds in repair costs and keep your system running efficiently for years. Whether you’re tackling indoor evaporator coils or outdoor condenser units, these essential tools make DIY cleaning easier and more effective.

Essential AC Coil Cleaning Tools

example of a flexible coil cleaning brush1. Flexible Coil Cleaning Brush

The backbone of any DIY coil cleaning toolkit, a good brush removes debris without damaging delicate fins. Look for one with soft, flexible bristles specifically designed for AC coils.

Pros:

  • Reaches tight spaces between fins
  • Gentler than metal tools
  • Works for both indoor and outdoor units

Cons:

  • May require multiple passes for heavy buildup
  • Needs occasional cleaning to maintain effectiveness

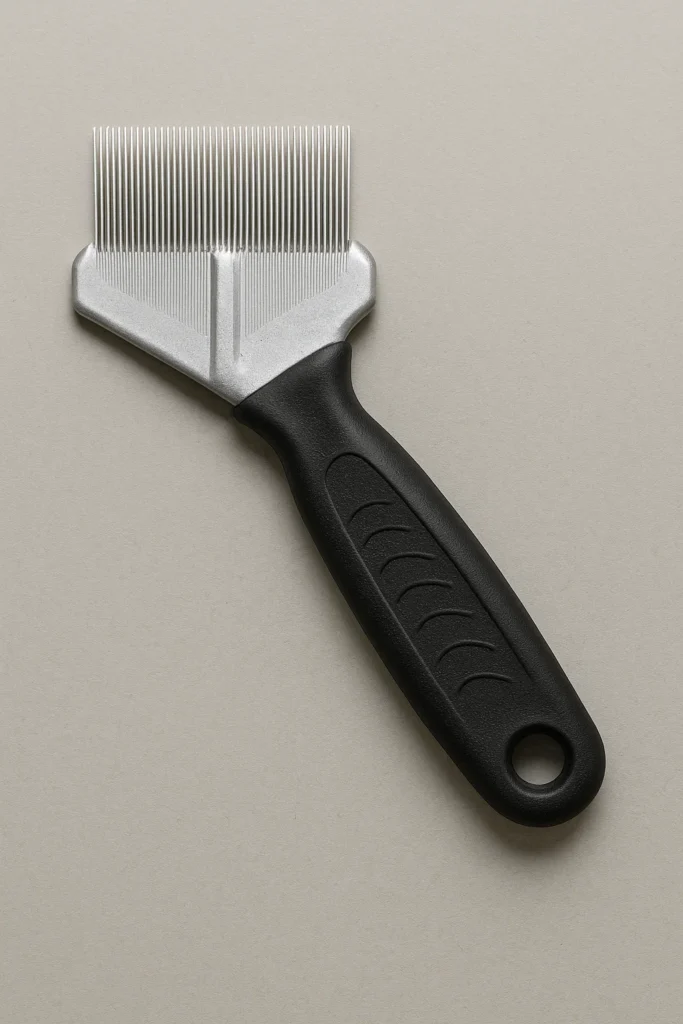
A picture of a fin comb used to clean AC Coils2. Fin Comb

Bent fins reduce airflow and efficiency. A fin comb straightens aluminum fins to restore proper airflow in seconds.

Pros:

  • Quickly fixes airflow issues
  • Prevents further damage
  • Multiple sizes for different fin spacing

Cons:

  • Only works on aluminum fins
  • Requires careful handling

3. Chemical Sprayer or Pump Sprayer

A quality sprayer helps apply cleaning solutions evenly without oversaturating components. Choose one with adjustable nozzles for different spray patterns.

Pros:

Cons:

  • Requires proper cleaning after use
  • Can be messy if not used carefully

4. Garden Hose Nozzle with Adjustable Settings

For outdoor units, water pressure matters. A nozzle with “shower” setting cleans effectively without bending fins.

Pros:

  • Gentler than pressure washers
  • Adjustable for different cleaning needs
  • Inexpensive and widely available

Cons:

  • Still requires caution with water pressure
  • Not for indoor use

5. Coil Cleaning Foam

Specialized foam clings to vertical surfaces. This professional-grade solution breaks down stubborn grime with minimal effort.

Pros:

  • Penetrates deep into coil stacks
  • Reduces scrubbing needed
  • Works on both evaporator and condenser coils

Cons:

  • More expensive than homemade cleaners
  • Requires proper rinsing

6. Inspection Mirror and Flashlight

Seeing problem areas is half the battle in effective coil cleaning. A good inspection setup helps identify hidden buildup.

Pros:

  • Reveals hidden dirt accumulation
  • Helps verify cleaning results
  • Useful for other home maintenance

Cons:

  • Additional tool to purchase
  • Requires proper lighting conditions

Tool Safety Tips

✔️ Power Off Before Cleaning

Always turn off power at the breaker before working on any AC components. This prevents electrical shock and protects your system.

✔️ Mind the Fins

Aluminum fins bend easily. Always brush parallel to the fins, never across them.

✔️ Avoid Oversaturation

Too much moisture can damage electrical components. Use cleaners sparingly and allow proper drying time.

✔️ Wear Protective Gear

Gloves and eye protection are essential. Coil cleaners can irritate skin and eyes.

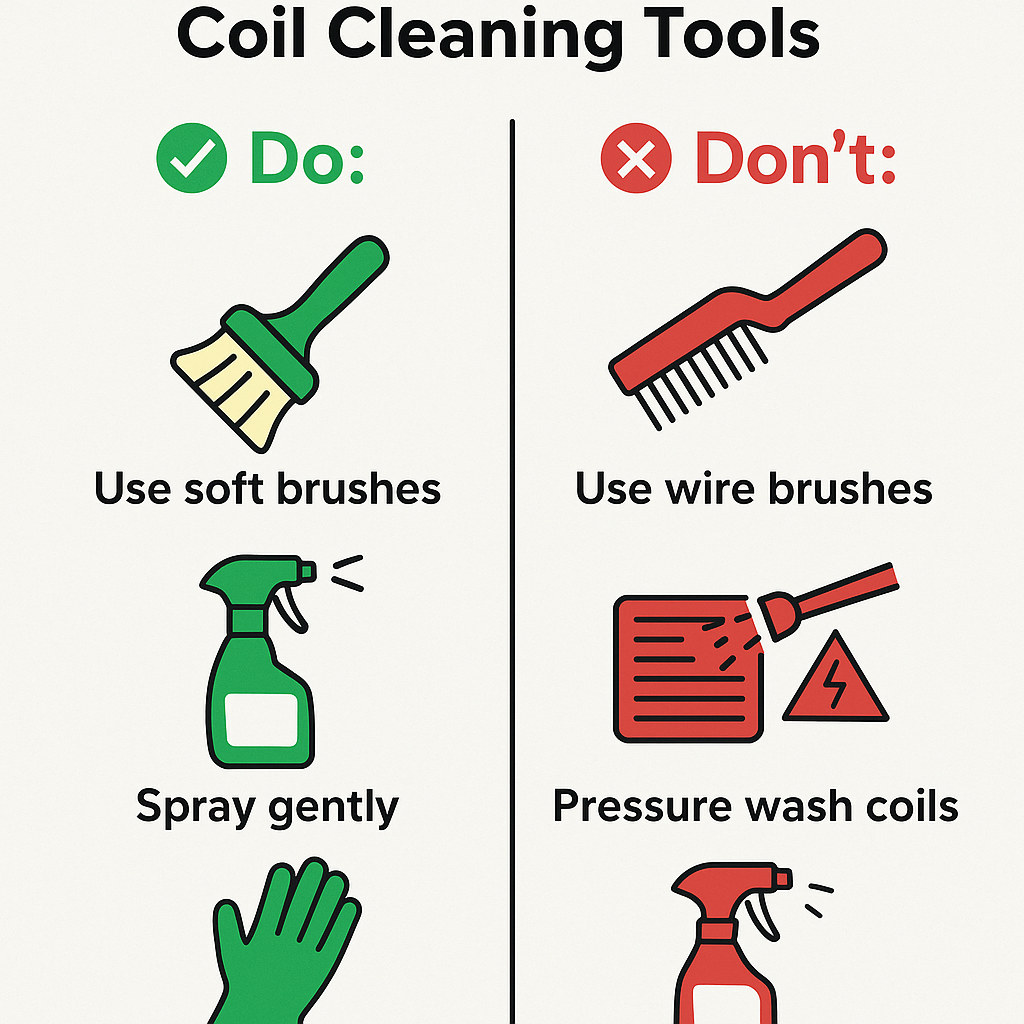
diagram showing proper AC coil cleaning tools vs what not to useChoosing the Right Tools for Your Needs
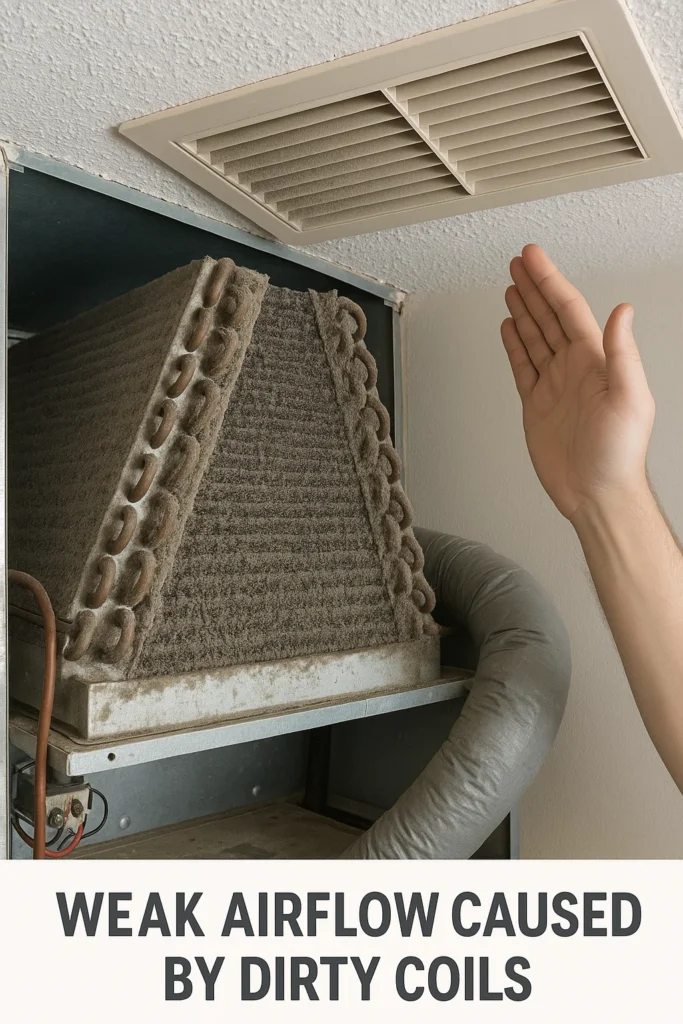
Your ideal toolkit depends on your specific situation. For basic maintenance, start with a coil brush, fin comb, and spray bottle. If you’re dealing with heavy outdoor buildup, add a garden hose nozzle and cleaning foam.

Not sure if your coils need cleaning? Check our guide on how to tell if your AC coils are dirty for common symptoms.

Tool Maintenance and Care

✔️ Clean Brushes After Use

Dirty brushes spread grime. Rinse bristles thoroughly and allow to dry before storage.

✔️ Store Properly

Keep tools in a dry place. Moisture causes rust and reduces tool lifespan.

✔️ Replace Worn Items

Bent fin combs or frayed brushes can cause damage. Inspect tools regularly and replace when worn.

When to Combine Tools With Other Methods

For optimal results, use these tools alongside other cleaning methods. Our guide on how to clean AC coils without removing the unit shows effective techniques that work with these tools.

Tool Best Used With Frequency of Use
Coil Brush All-purpose cleaning Every 3-6 months
Fin Comb Visible fin damage As needed
Sprayer homemade recipes that work with these tools With each cleaning
Hose Nozzle Outdoor unit rinsing Seasonally

Final Recommendations

Building your AC maintenance toolkit doesn’t require expensive professional equipment. With these essential tools and proper technique, you can maintain your system as effectively as many HVAC professionals. Regular cleaning with the right tools improves efficiency, prevents breakdowns, and extends your AC’s lifespan.

For best results, combine these tools with proper cleaning solutions and techniques. Whether you’re maintaining a window unit or central air system, the right tools make all the difference in your DIY maintenance success.


Signs of Dirty AC Coils and What to Do About Them

How to Tell If Your AC Coils Are Dirty

A well-functioning air conditioner is essential for staying comfortable during hot weather. However, dirty AC coils can reduce efficiency, increase energy bills, and even lead to costly repairs. The key to maintaining your AC’s performance is recognizing the signs of dirty coils early.

In this guide, we’ll walk you through the most common symptoms of dirty AC coils, complete with pictures and practical tips. Whether you’re a homeowner or a renter, these insights will help you keep your cooling system running smoothly.

What Are AC Coils and Why Do They Get Dirty?

Your air conditioner has two main types of coils:

  1. Evaporator coils – Located inside your home (usually near the air handler), these absorb heat from indoor air.
  2. Condenser coils – Found in the outdoor unit, these release absorbed heat outside.

Both types of coils are prone to dirt buildup from dust, pollen, pet hair, and debris. Over time, this grime acts as insulation, preventing proper heat exchange and forcing your AC to work harder.

Regular cleaning can prevent these issues. If you’re looking for safe and effective solutions, check out our guide on homemade AC coil cleaner recipes.

6 Signs Your AC Coils Are Dirty

1. Weak or Reduced Airflow

If your AC is running but the airflow feels weak, dirty evaporator coils could be the culprit. Clogged coils restrict airflow, making it harder for your system to cool your home effectively.

  • Check your vents—if some rooms feel cooler than others, your coils may need cleaning.
  • Compare airflow before and after turning on the AC (a significant drop indicates a problem).

picture of a hand demonstrating that dirty coils in an Air conditioner causes weak airflow

2. Rising Energy Bills

A sudden spike in your electricity bill without increased usage often points to an inefficient AC. Dirty coils force your system to run longer, consuming more power.

  • Monitor your energy bills—if they climb during peak cooling months, inspect your coils.
  • A professional HVAC tune-up can identify hidden efficiency issues.

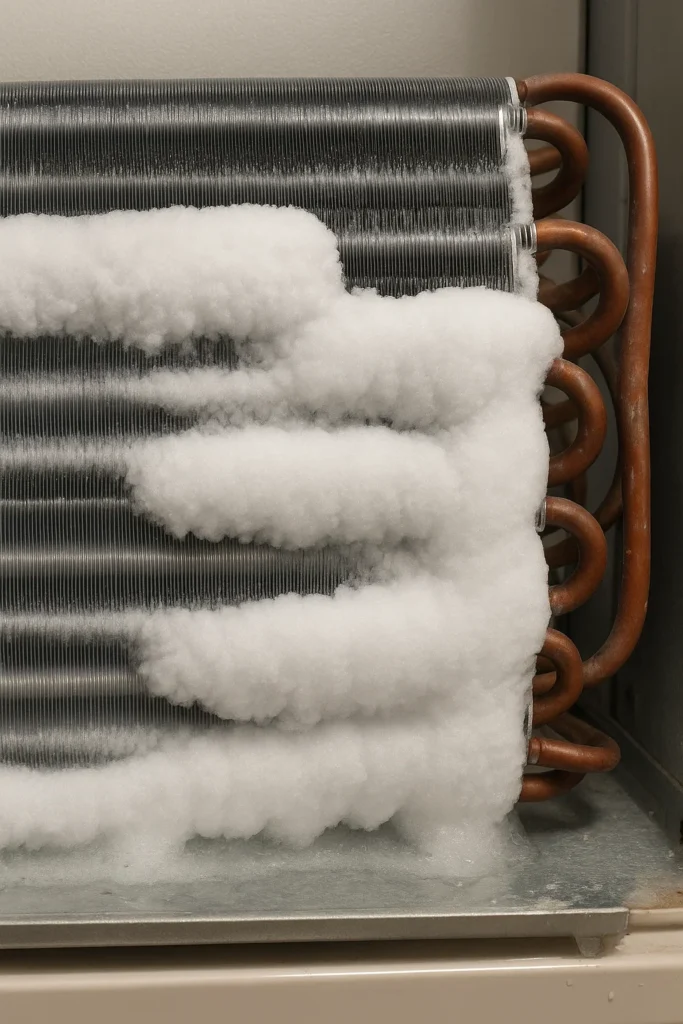
3. Frost or Ice Buildup on Coils

If you notice ice forming on your indoor unit, dirty evaporator coils are likely restricting refrigerant flow. Frost buildup is a clear warning sign that your AC isn’t functioning properly.

  • Turn off the AC to let the ice melt before inspecting the coils.
  • If frost returns after cleaning, you may have a refrigerant leak.

pic showing frost build up on dirty ac coils

4. Musty or Moldy Odors

A foul smell when your AC runs usually means mold or mildew is growing on damp, dirty coils. This not only affects air quality but can also trigger allergies.

  • If you detect a musty odor, clean the coils and replace the air filter.
  • Persistent smells may require professional duct cleaning.

5. AC Struggling to Cool Your Home

If your air conditioner runs constantly but doesn’t cool your home, dirty coils may be preventing proper heat transfer. Your system is working overtime but failing to lower the temperature.

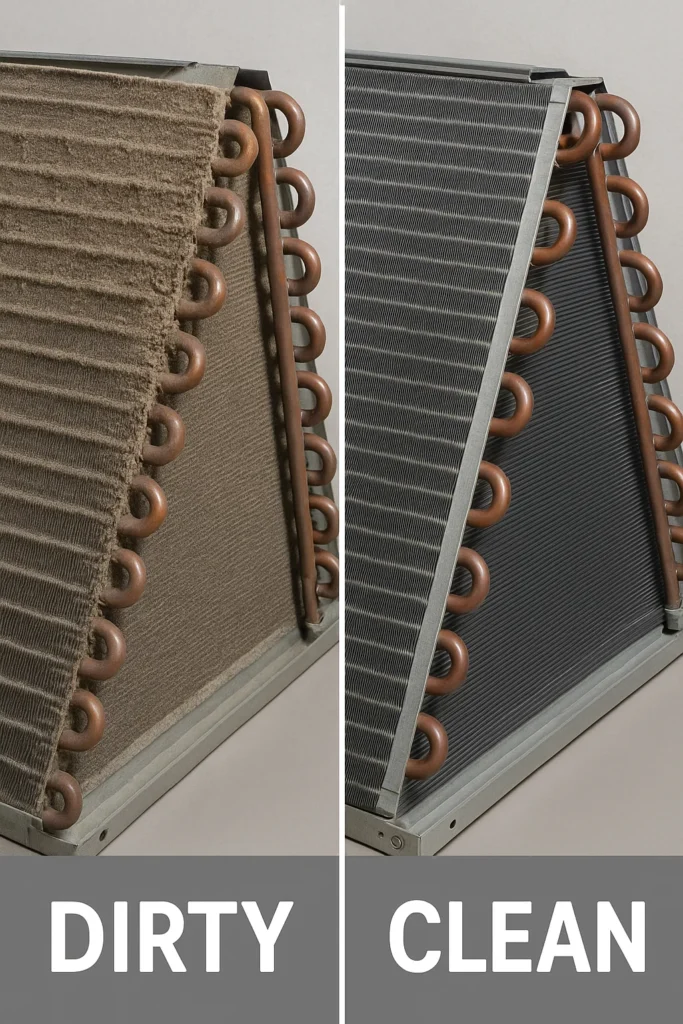
6. Visible Dirt and Debris on Coils

A simple visual inspection can reveal dirty coils. If you see layers of dust, grime, or debris, it’s time for cleaning.

  • For outdoor condenser coils, look for dirt, leaves, or grass clippings.
  • Indoor evaporator coils may have dust and mold buildup.

picture showing the difference between clean and dirty AC coils

How to Prevent Dirty AC Coils

Preventive maintenance keeps your AC running efficiently and extends its lifespan. Here’s how:

✔️ Change Air Filters Regularly

  • A clogged filter allows dust to reach the coils. Replace it every 1-3 months.

✔️ Keep the Outdoor Unit Clear

  • Trim plants and remove debris around the condenser to ensure proper airflow.

✔️ Schedule Annual HVAC Maintenance

  • A professional tune-up includes coil cleaning and system checks.

✔️ Use the Right Cleaning Tools

When to Call a Professional

While DIY cleaning helps, some situations require expert attention:

  • Persistent cooling issues after cleaning
  • Refrigerant leaks (indicated by hissing sounds or ice buildup)
  • Electrical problems (e.g., tripped breakers or faulty wiring)

Final Thoughts

Dirty AC coils reduce efficiency, increase energy costs, and shorten your system’s life. By recognizing the signs early, you can take action before major problems arise.

For a simple, cost-effective cleaning solution, try our DIY coil cleaning solutions. And if you’re unsure about tackling the job yourself, don’t hesitate to call an HVAC professional.

Stay cool and breathe easier with a well-maintained air conditioner!

Need more help? Check out our related guides:


The Risks of UV Air Purifiers and How to Use Safely

The Dangers of UV Air Purifiers and How to Stay Safe

UV air purifiers have become increasingly popular in recent years as a way to remove harmful pathogens from the air. However, these devices also come with some potential risks that consumers should be aware of.

How Do UV Air Purifiers Work?

UV air purifiers use ultraviolet light to kill microorganisms like bacteria, viruses, and mold spores. The UV light damages the DNA and RNA of these organisms, preventing them from replicating and making them harmless.

Most UV air purifiers have a chamber inside where the UV light is generated. As air passes through this chamber, exposure to the UV rays neutralizes any microbes present. This clean air is then circulated back into the room.

The Dangers of UV Radiation Exposure

While UV light is effective at eliminating microorganisms, it can also be harmful to human health. UV radiation, particularly UV-C rays, have been linked to:

  • Skin damage and accelerated skin aging
  • Eye damage like photokeratitis
  • Suppressed immune system function
  • Skin cancer

Prolonged exposure to UV radiation, even at low levels, carries risks. UV air purifiers are designed to contain the UV rays inside the device. However, any malfunction that allows UV light to escape could expose people and pets in the room to harmful rays.

Safety Tips for Using UV Air Purifiers

When used properly, UV air purifiers present a minimal risk to health. Here are some tips for using them safely:

  1. Place the purifier away from areas where people spend a lot of time, like desks or beds.
  2. Do not sit or stand directly next to the purifier when it’s on.
  3. Do not stare directly into the UV light inside the chamber.
  4. Make sure the purifier is designed to contain UV rays.
  5. Buy from reputable brands and check consumer product reviews.
  6. Check the purifier chamber for damage periodically.
  7. Turn off the purifier when room is occupied if possible.
  8. Don’t use the purifier in rooms where infants, children, or pets will be present.

Choosing the Best UV Air Purifier

To maximize safety, choose a UV air purifier from a trusted brand with safety features like:

  • Enclosed chamber – The UV light should be fully enclosed inside a chamber that blocks rays from escaping.
  • Automatic shut-off – Motion sensors that turn the UV light off when someone enters the room.
  • Timer – Allows the purifier to run when room is unoccupied and turn off after a set time.

High quality HEPA filtration to trap particles is also recommended to complement UV sanitization.

Alternatives to UV Air Purifiers

If you have concerns about UV purifier safety, other options include:

  • HEPA air purifiers – Use mechanical filtration to remove particles.
  • Activated carbon purifiers – Absorb gases, odors, and chemicals.
  • Ionizers – Electrically charge particles to trap them in filters.
  • Photocatalytic oxidation – Uses UV light safely contained inside a catalyst.

While no purifier is 100% risk-free, these alternatives have less potential for UV exposure.

The Bottom Line

UV air purifiers provide effective air sanitization if used properly. However, UV radiation can be dangerous if you’re exposed. Follow basic safety precautions, choose a purifier with safety features, and consider alternatives to minimize risk.

Frequently Asked Questions

Can UV air purifiers harm pets?

UV radiation can be harmful to pets, especially small mammals and birds. Avoid using UV purifiers in rooms where pets spend time. Keep litter boxes and cages out of the path of UV rays.

Should you run a UV purifier all the time?

It’s best to only run a UV purifier when the room is unoccupied to limit exposure. Use timers or motion sensors to automatically turn off the UV when people enter.

How often should you replace UV bulbs?

Most manufacturers recommend replacing UV bulbs every 6-12 months as their effectiveness decreases over time. Mark your calendar to replace bulbs annually.

Can you look at UV light in air purifiers?

Never stare directly into the UV light chamber, even briefly. UV rays can damage eyes. Observation windows allow you to monitor bulbs without direct exposure.

Do UV purifiers produce ozone?

Some models may emit small amounts of ozone as a byproduct, which can irritate lungs. Check if the product explicitly states it emits no ozone.

Are UV air purifiers FDA approved?

The FDA does not regulate UV air purifiers specifically. However, reputable brands voluntarily submit to testing for electrical and materials safety.

Can UV purifiers catch fire?

Malfunctioning electrical components can overheat and ignite fires in air purifiers. Purchase units from major brands with quality manufacturing. Never run purifiers unattended.

BTU Calculator for Air Conditioners: Instantly Size Your Room

How Many BTUs Do You Need?

Use our free BTU calculator to quickly find out how much cooling power your space requires. Just enter your room size and a few details about your setup — no guesswork needed!

Room BTU Calculator


📎 Share This Tool

Want to share this calculator on your own blog or website? Just copy and paste the code below:

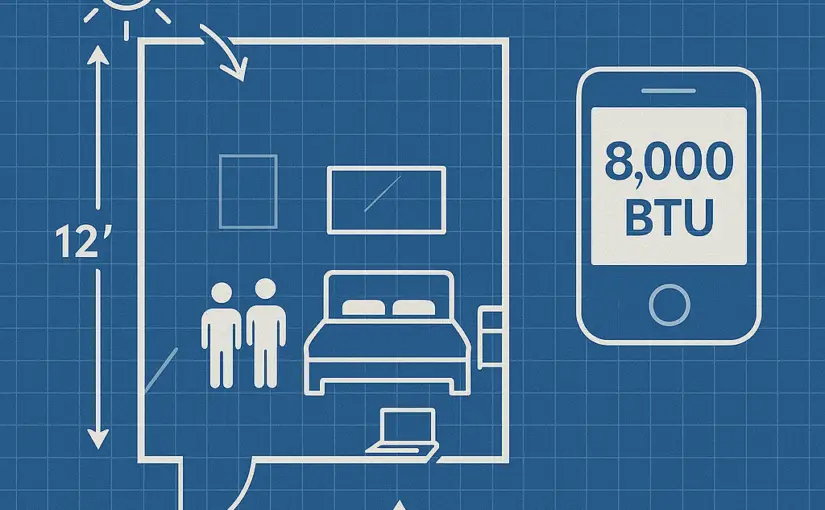
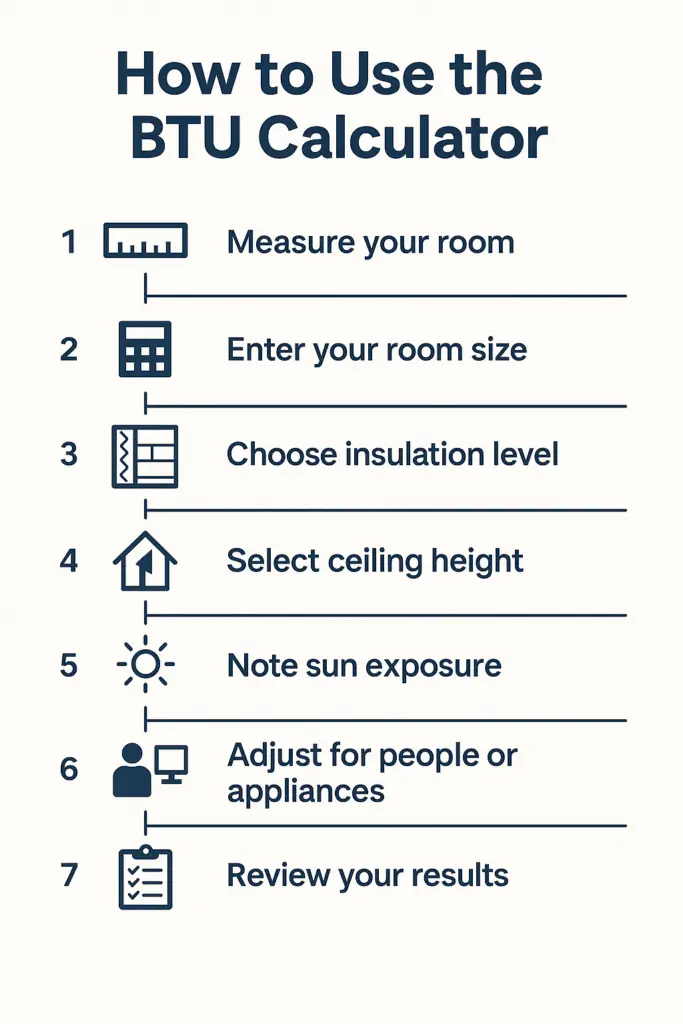
Infographic showing how to use the BTU calculator in 7 steps including measuring room size, entering square footage, choosing insulation level, and reviewing cooling needs

How to Use the BTU Calculator

Not sure where to start? Follow these simple steps to get an accurate BTU estimate for your space:

  1. Measure your room: Use a tape measure to find the length and width of the room. Multiply them to get the square footage (e.g., 12 ft × 15 ft = 180 sq. ft.).
  2. Enter your room size: Plug in the square footage where indicated in the calculator.
  3. Choose insulation level: If your room has good insulation and energy-efficient windows, you may need fewer BTUs. Poor insulation means you’ll need more.
  4. Select ceiling height: Higher ceilings mean more air to cool, which raises the BTU requirement.
  5. Note sun exposure: Rooms that get a lot of direct sunlight will need extra cooling power. Mark your room as “sunny” if it faces south or west or has large windows.
  6. Adjust for people or appliances: If the room is regularly occupied by 2+ people or has heat-generating electronics (TVs, computers), add a few hundred BTUs to the result.
  7. Review your results: The calculator will give you a recommended BTU range. Use this to choose the right size AC unit for your room.

Tip: It’s better to size your AC unit slightly above the minimum recommendation than to go too small. Too big, however, can lead to poor humidity control and energy waste.

What Is a BTU and Why Does It Matter?

BTU stands for British Thermal Unit, and it’s a way to measure heat. When it comes to air conditioning, it tells you how much cooling power an AC unit has. If you choose a system with too few BTUs, it won’t cool the room efficiently. Too many, and it could waste energy or cool unevenly.

What Affects the Number of BTUs You Need?

  • Room Size: The bigger the room, the more BTUs required.
  • Sun Exposure: Bright, sunny rooms need more cooling power.
  • Insulation: Poorly insulated spaces lose cold air faster.
  • Ceiling Height: Higher ceilings = more air to cool.
  • Number of Occupants: More people = more body heat.

Our calculator accounts for all of these to give you an accurate estimate.

BTU Chart by Room Size

Room Size (sq. ft.) Recommended BTUs
100–150 5,000
150–250 6,000
250–300 7,000
300–350 8,000
350–400 9,000
400–450 10,000
450–550 12,000
550–700 14,000

Frequently Asked Questions

Can I use this calculator for heating too?

While it’s primarily for cooling, the same BTU principles apply to heating — but factors like furnace type and humidity matter more for heating calculations.

What size AC unit do I need for a 12×12 room?

A 12×12 room is 144 sq. ft., which usually needs about 5,000–6,000 BTUs, depending on sunlight and insulation.

Is more BTU always better?

No. An oversized unit will cycle too quickly, failing to dehumidify the air properly and driving up energy bills.

Whole-House Steam Humidifiers: Benefits and Considerations


What is a Whole House Steam Humidifier?

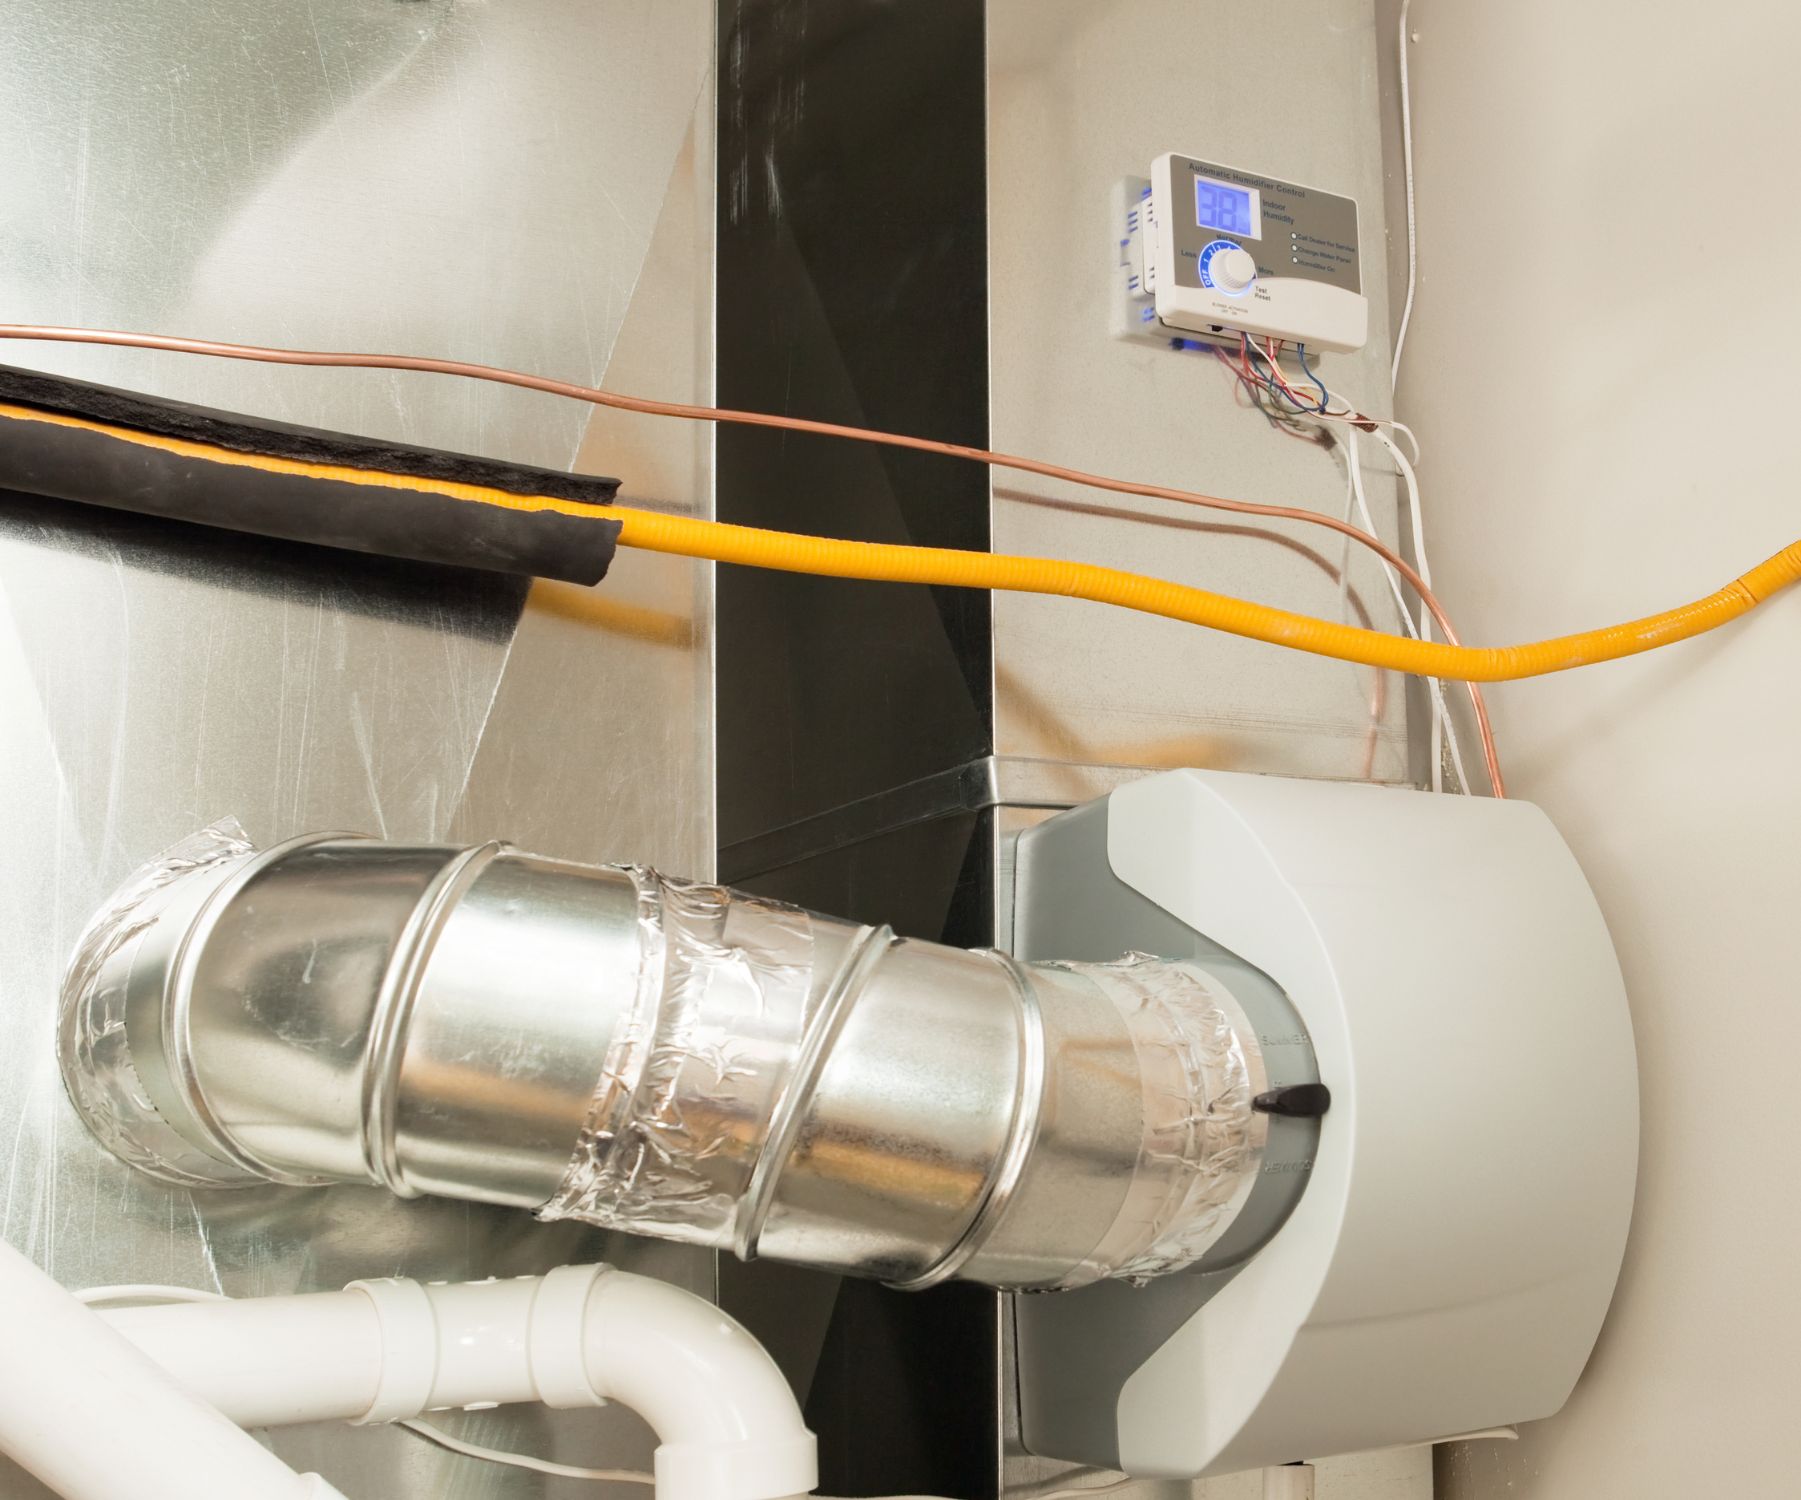
A steam humidifier is a specialized type of whole-house humidifier that integrates directly into a home’s HVAC ductwork.

True to its name, it employs a steam-generation technique by boiling water to produce steam. This steam is then efficiently distributed throughout the entire house via the duct system, effectively increasing the humidity levels across all rooms.
This method not only ensures a uniform distribution of moisture but also provides precise control over the indoor humidity levels, making it an ideal solution for maintaining optimal indoor air quality and comfort throughout your home.


Benefits of using a steam humidifier:

Steam humidifiers offer a wide array of advantages over other types of humidifiers like evaporative and ultrasonic models, especially in the context of whole-house humidification.

However, a key benefit that truly sets steam humidifiers apart and boosts their popularity is their water boiling process. By heating water to create steam, these humidifiers naturally purify the water, significantly reducing the presence of mineral dust and eliminating germs.

This feature not only ensures a more consistent and efficient distribution of humidity throughout large areas but also provides a cleaner, healthier air quality, making steam humidifiers a preferred choice for maintaining optimal indoor comfort and health.

Don’t miss our in-depth Humidifier Guide.


Types of steam humidifiers:

Type Description
Console humidifiers Free-standing units with an internal reservoir, heating element, and fan to distribute steam.
Electrode humidifiers Use electrodes in the water that boil the water to produce steam.
Canister humidifiers Portable units with a removable water tank.


Comparison of Steam Humidifiers with Other Types

Feature Steam Humidifier Evaporative Humidifier Ultrasonic Humidifier
Humidity Control High precision Moderate Varies
Coverage Whole house Single room to whole house Single room
Water Purification Boiling process Wick filter None
Maintenance Frequency Lower Higher Moderate
Operation Noise Quiet Can be noisy Very quiet
Mineral Dust Production None Possible Possible
Ideal Use Large, integrated systems Individual rooms or smaller homes Individual rooms

Steam humidifiers excel in large-scale applications, offering precise control and efficient performance without the drawbacks of mineral dust or frequent maintenance. Their quiet operation and ability to integrate into existing HVAC systems make them an ideal choice for comprehensive home humidification solutions.

Who can benefit from a steam humidifier?

A steam humidifier, particularly the whole-house variety that integrates with a home’s HVAC system, is best suited for specific circumstances where its unique advantages can be fully leveraged:

  1. Large Homes or Spaces: Given its capacity to distribute moisture evenly throughout extensive areas, a steam humidifier is ideal for larger homes where maintaining consistent humidity levels in every room is challenging.
  2. High Demand for Precise Humidity Control: In environments where maintaining an exact humidity level is crucial, such as homes with sensitive woodwork, artwork, or musical instruments, the precise control offered by steam humidifiers is invaluable.
  3. Cold Climates with Heavy Heating Use: In areas where the heating system is frequently used, indoor air can become extremely dry. Steam humidifiers can effectively counteract this by integrating with the heating system to provide necessary moisture.
  4. Health-Related Needs: For households with occupants who have severe respiratory issues, allergies, or skin conditions aggravated by dry air, the clean and consistent moisture output of a steam humidifier can provide significant relief.
  5. Integration with Smart Home Systems: For homeowners who prioritize smart home technology and seek seamless integration with existing HVAC systems for centralized control, steam humidifiers are an excellent fit due to their compatibility and efficiency.
  6. Areas with Hard Water: The boiling process of steam humidifiers can help minimize issues related to mineral buildup, making them a suitable option in regions with hard water, where other types of humidifiers might struggle or require frequent maintenance.

In these scenarios, the unique features of a steam humidifier—such as its ability to provide rapid, consistent, and controlled humidification over large areas—make it an optimal choice for effective whole-house humidity management.


Flow-Through Humidifiers

Is it true that steam humidifiers are the best for avoiding the dangers of humidifiers mold and bacteria?

Like we briefly touched on before, there are some advantages to steam humidifiers when it comes to avoiding mold and bacteria, but they are not completely immune to these issues:

Steam humidifiers boil water, which can help kill mold spores and bacteria that might be in the water. However, this is only effective if the water reservoirs are cleaned regularly.

Steam humidifiers don’t require wicks or filters that can trap mineral deposits and microbes. However, the steam outlet and any surfaces the steam touches can still allow mold growth if not cleaned.

Steam humidifiers add dry steam to the air rather than cool mist, which is less likely to promote surface condensation that can lead to mold.

However, steam humidifiers still require proper maintenance to prevent mold and bacteria:

1.The water reservoir should be cleaned regularly with a disinfectant to kill any mold or bacteria.
2.Any surfaces the steam comes into contact with should be cleaned to prevent microbial growth.
Steam humidifiers, like other types, can spread microbes in the air if the water reservoir contains any contaminants. Always use clean water.

Are Steam Whole House Humidifiers better at avoiding mold and bacteria than the other types of whole house humidifiers?

Yes, in general steam humidifiers are better at avoiding mold and bacteria growth compared to other types of whole house humidifiers:

1.Evaporative humidifiers require wicks and filters that can promote mold growth if not cleaned regularly. The standing water is also prone to bacterial growth.

2.Ultrasonic and impeller humidifiers produce cool mists that can condense on surfaces and promote mold.

By contrast, steam humidifiers boil the water, killing many microbes. And they don’t require wicks or filters.

However, steam humidifiers are not foolproof:

If not cleaned regularly, mineral deposits can accumulate in the water reservoir and provide an environment for microbial growth.

Steam can condense on humidifier surfaces, allowing mold if not cleaned.
Adding steam to air can make dust particles and allergens airborne.
So while steam humidifiers have an advantage, proper maintenance is still crucial

Do You Need A Boiler Present?

Steam humidifiers do have higher energy demands compared to other types of humidifiers, which can make them more expensive to operate, especially if a boiler is not already present.

Here are some factors to consider regarding the costs of steam humidifiers:

Steam humidifiers require heating water to boiling temperatures, which uses more electricity than cool mist options. This can drive up energy bills.

Installing a steam humidifier without an existing boiler/furnace can require running new steam lines, condensed water returns, and installing a water heater to generate steam. This significantly increases upfront costs.

Without a boiler, standalone electric steam humidifier units are available, but energy costs may still be high depending on humidification needs.

Ongoing costs are higher as mineral deposits in hard water can cause scaling in steam humidifiers, requiring frequent maintenance and part replacement.

However, in a large home a steam humidifier may be the only option capable of properly humidifying the whole space. Their higher output can justify the costs.

In summary, for homes without an existing steam system/boiler, the costs of installing and operating a steam humidifier are often prohibitive.

Cool mist and evaporative options are more affordable.

But steam systems make sense for larger homes if the initial investment can be accommodated. As with any system, considering long term costs and benefits is advisable.

FAQ

How do steam humidifiers increase humidity?

Steam humidifiers boil water in a reservoir to produce water vapor or steam. This steam is dispersed into the air through a built-in fan or existing HVAC system ducts. As the steam evaporates in the air, it raises the humidity level.

What maintenance is required for steam humidifiers?

To avoid mineral deposits and microbial growth, steam humidifiers require:

– Daily water changes
– Regular cleaning/disinfecting of tanks
– Descaling agents to remove mineral deposits
– Replacement of filters, wicks, and gaskets

How often do steam humidifier filters need replacement?

Most manufacturers recommend replacing steam humidifier filters every 1-2 months of use. Hard water and frequent operation may require more frequent filter replacements.

Can steam humidifiers lead to mold growth?

Yes, steam humidifiers can promote mold growth if not properly maintained. Mold can grow in mineral deposits or on surfaces where steam condenses. Proper cleaning and disinfecting of tanks, filters, and surfaces is essential.

Are steam humidifiers safe for pets?

Steam humidifiers are generally safe for pets as long as hot surfaces are out of reach to avoid burns. The steam itself is not hazardous. Proper maintenance is key to avoid mold and bacteria that could pose a health risk.

How often should the water tank be cleaned in a steam humidifier?

The water tank or reservoir in a steam humidifier should be drained, cleaned and disinfected daily to help prevent mineral deposits and bacteria growth. Weekly deep cleanings are also recommended.

Can I use a steam humidifier in a bedroom?

Yes, steam humidifiers can be used in bedrooms, but precautions should be taken. Avoid very hot steam emissions. Place the unit far from beds and aim steam away from sleeping areas. Monitor humidity levels to avoid condensation.

Are steam humidifiers energy efficient?

No, steam humidifiers require boiling water so they typically use more energy than other types of humidifiers. Their energy efficiency can be improved by insulating steam lines, proper sizing, and using energy efficient models.

Does water quality affect a steam humidifier?

Yes, hard water with high mineral content can cause scale buildup in steam humidifiers. This requires more frequent maintenance. Using filtered or distilled water can help reduce deposits.

How can I prevent white dust from my steam humidifier?

White dust is caused by mineral deposits from hard water. Change water daily, use distilled or filtered water, clean scale buildup regularly, and replace filters as needed to prevent white dust.

Can I install a steam humidifier myself?

Steam humidifier installation is complex, especially if steam lines need to be run. Hiring a qualified HVAC technician is highly recommended unless you have expertise in steam system installation.