
Get the Ozone Generator Guide – Free Download
Want everything you need to know about ozone machines in one place? Download our free guide to learn when to use them, how they work, and how to stay safe while getting results.
Introduction to Ozone Generators: Harnessing the Power of Ozone for Your Space
Ozone generators release ozone gas (O₃) to neutralize odors, kill bacteria, and sanitize indoor air. While highly effective, they must only be used in unoccupied spaces and require proper ventilation afterward to ensure safe reentry.
What Is an Ozone Generator and How Does It Work?
Ever walk into a space that smells crisp and clean—almost like the air after a thunderstorm? That fresh scent might be ozone at work.
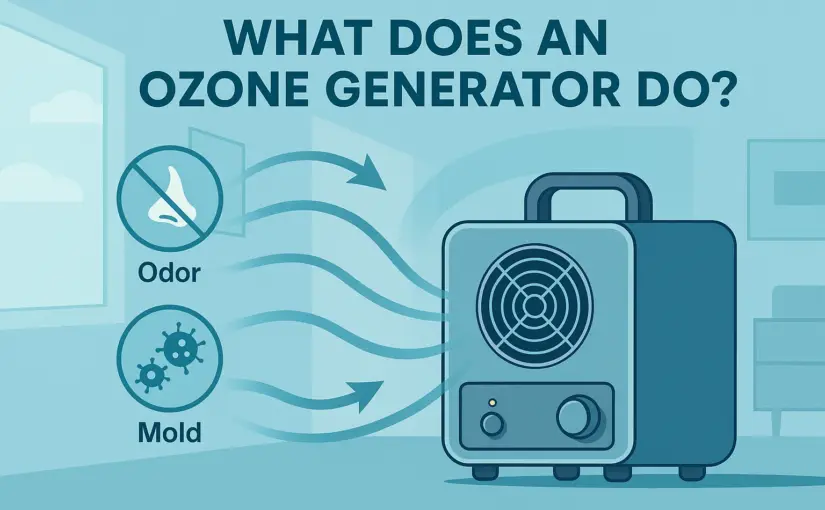
An ozone generator is a device that produces ozone gas (O₃), a molecule made of three oxygen atoms. Ozone is naturally present in the Earth’s atmosphere and is known for its ability to oxidize—or break down—odor-causing particles, bacteria, viruses, and even mold spores.
How it works: The generator pulls in regular oxygen (O₂) and uses an electrical process to convert it into ozone (O₃). When released into a room, this extra oxygen atom binds with pollutants in the air and destroys them at a molecular level.
Common uses include:
- Odor elimination: Great for removing smells caused by smoke, pets, cooking, or mildew.
- Air purification: Helps clear the air of bacteria, allergens, and even some viruses.
- Surface sanitization: In high enough concentrations, ozone can sanitize entire rooms—including furniture and textiles.⚠️ However, this power comes with responsibility. Ozone can be harmful if used improperly—so it’s vital to understand when and how to use these machines safely.
Are Ozone Generators Safe? Key Safety Precautions
Ozone generators are effective—but they’re not plug-and-play devices. Misuse can lead to health risks, especially for your lungs. Here’s what every user should know before running one at home.
🔹 Before You Start
- Know what ozone is: It’s a strong oxidizer, great for cleaning—but dangerous to breathe in high concentrations.
- Clear the area: Make sure people, pets, and plants are out of the room before turning on the device.
- Read the manual: Always follow the manufacturer’s instructions carefully. Models vary in strength and operation.
🔹 During Use
- Use in unoccupied spaces only: Never stay in the room while the generator is running.
- Watch your settings: Higher concentrations and longer treatment times aren’t always better. Start small and adjust as needed.
- Protect sensitive items: Cover or remove rubber, plastic, electronics, and fabrics that could degrade from repeated ozone exposure.
🔹 After Treatment
- Ventilate thoroughly: Open windows and use fans to circulate fresh air. Let ozone break down naturally before reentering.
- Wear protection if needed: If early entry is required, use an ozone-rated respirator and gloves.
- Have a backup plan: Know what to do in case of overexposure. Symptoms can include coughing, chest tightness, and shortness of breath.
Safety should always come first. Used properly, ozone generators can make your air cleaner and your space feel renewed—just be sure you’re treating the air, not the people inside it.
Buying Guide: How to Choose the Right Ozone Generator for Your Home
Choosing the right ozone generator can make a huge difference in how effective—and safe—your treatment is. The best model for your space depends on what you’re trying to achieve, the size of the area, and how often you plan to use the machine.
Here’s a simplified guide to help you make a smart decision:
1. Know Your Purpose
- Air Purification: If you’re targeting allergens or bacteria in the air, a lower-output unit with better control settings is often best. You may also want to consider UV light air purifiers as a long-term solution for air quality maintenance.
- Odor Elimination: For smoke, mildew, or strong pet odors, go for a model designed for deeper, more intense treatments. If you’re dealing with lingering smells after a disaster, you may want to read our guide on using ozone generators after tornado damage.
2. Match Output to Space Size
Ozone output is measured in milligrams per hour (mg/h)—and bigger spaces require stronger machines.
- Small rooms (closets, bathrooms): 100–500 mg/h
- Bedrooms, kitchens: 500–1,000 mg/h
- Basements, garages, large rooms: 1,000–4,000 mg/h or more
📌 Tip: Always start with lower settings and short durations to avoid over-treatment. For more on how ozone concentration affects safety, see our guide on chemical fume safety.
3. Prioritize Safety Features
Look for models that include:
- Built-in timers for automatic shutoff
- Adjustable ozone output to match room size
- Delay start or remote control to avoid being in the room when it starts
4. Consider Portability and Design
If you plan to use the unit in different rooms or take it to other locations:
- Choose a lightweight unit with a handle or wheels
- Look for a compact design for easier storage—especially useful for cleanup projects like post-flood restoration
5. Durability and Maintenance
Quality materials and build matter. A cheap unit may wear out quickly, especially with regular use.
- Check for metal casing instead of flimsy plastic
- Look for brands that include or sell replacement ozone plates and filters
- Review the warranty and availability of customer support
💡 If you’re planning regular use for mold control, check out our article on UV light systems vs. ozone machines to compare long-term maintenance needs.
6. Noise Level and Energy Use
These are easy to overlook but can matter depending on where and how often you use it.
- Noise-sensitive areas: Check decibel (dB) ratings in the product specs
- Frequent use: Choose energy-efficient models to save power
7. Price vs. Value
Don’t just buy the cheapest machine. A higher-quality model with more control, safety, and power is often worth the extra cost.
- Compare brands with good customer reviews
- Ensure it’s certified or compliant with local safety standards
🧠 Final Tip:
If you’re unsure, start with a mid-range generator rated for medium rooms (500–1,000 mg/h). These are versatile, effective, and safer for first-time users. And if you’re using your unit in an HVAC space, you might want to review the pros and cons of HVAC UV lights as a maintenance-free supplement to ozone treatment.
Before choosing a size, decide whether you’ll need ozone often. Here’s how to know when to rent an ozone machine and when buying is more cost-effective
Step-by-Step: How to Use an Ozone Generator at Home
Using an ozone generator for the first time might seem intimidating, but once you know the steps, it becomes a straightforward process. The key is always safety—ozone is effective, but it must be handled with care.
This step-by-step guide will walk you through the full process of using your generator properly so you can get the results you want—whether it’s removing stubborn odors or disinfecting a room after a cleanup.
Step 1: Unboxing and Assembly
- Carefully remove the ozone generator and any accessories from the box.
- Follow the manufacturer’s instructions for assembly. This might include attaching a hose or inserting filters.
Step 2: Choose the Right Location
- Select a space that will be unoccupied during treatment—no people, pets, or plants.
- Place the device in a central, elevated location (like a table or shelf) to allow ozone to spread evenly.
Step 3: Prepare the Area
- Remove or cover sensitive materials like rubber, leather, electronics, or live plants. Ozone can degrade these over time.
- Close all windows and doors to seal the room. If you’re treating HVAC odors, be sure the system is off unless you’re using ozone for duct treatment (see our related post: UV Light in HVAC: Is It Worth It?).
Step 4: Plan Your Treatment
- Decide on a treatment time and ozone output level based on the size of the room and the intensity of the issue (refer to our section on output levels).
- When in doubt, start with shorter times and lower settings, then adjust as needed.
Step 5: Set Up the Device
- Plug the generator into a secure outlet. Make sure it’s sitting level and won’t be disturbed.
- If your unit has a timer, set it. If not, use an external timer or smart plug to control treatment duration safely.
Step 6: Start the Ozone Generator
- Turn on the device using the appropriate setting.
- Immediately exit the room and close the door tightly behind you.
Step 7: Let It Run Uninterrupted
- Do not re-enter the room while the ozone generator is running.
- If you’re treating a space after water damage, check out our tips on ozone use after flooding.
Step 8: Ventilate After Treatment
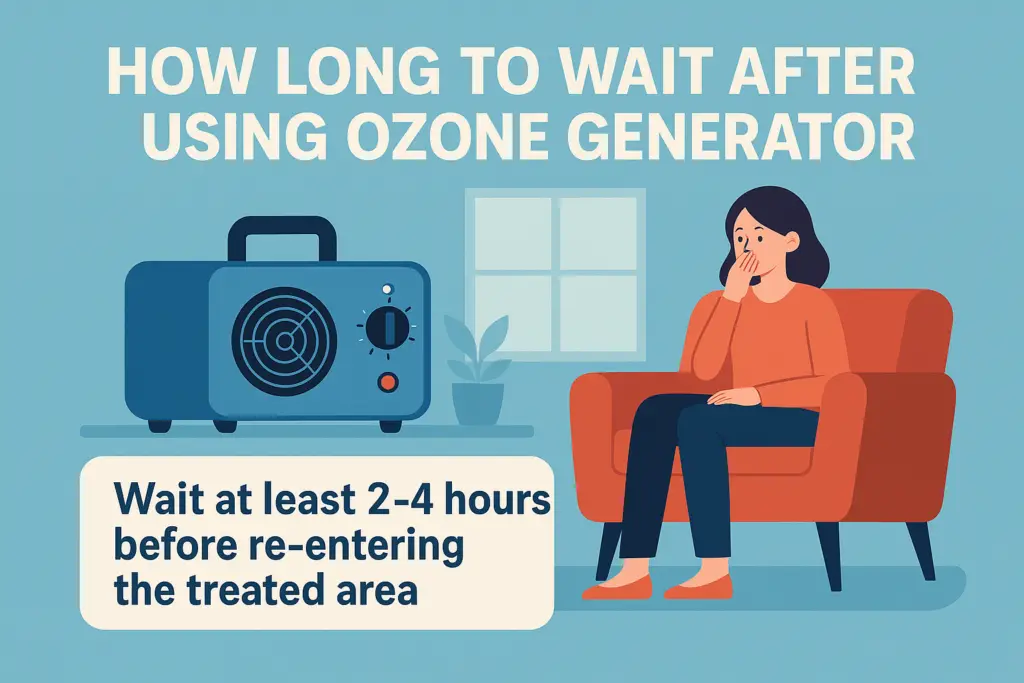
- Once the treatment ends, wait 1–2 hours before re-entering to allow ozone to dissipate.
- Open windows and use fans to increase ventilation and help clear any lingering ozone. You can also run your HVAC system in Fan Mode to circulate air without cooling.
Step 9: Post-Treatment Check
- Return to the space and assess. You should notice a clean, fresh smell and significantly reduced odor or contamination.
- If results aren’t sufficient, you can do a second treatment—just make sure to adjust duration or settings based on your first experience.
Step 10: Maintenance
- Clean or replace filters or ozone plates if needed (see the maintenance table below for full instructions).
- Store the unit in a dry place and unplug it when not in use.
Remember: Every space is different. Start small, follow safety guidelines, and adjust based on your results. Used properly, ozone generators are powerful tools for eliminating odors and improving indoor air quality.
Ozone Output Levels: How Much Do You Really Need?
Ozone generators vary widely in how much ozone they produce—measured in milligrams per hour (mg/h). Choosing the right output level is crucial for both effectiveness and safety. Too little ozone, and you won’t get results. Too much, and you risk damaging materials or overexposing the space.
Here’s a simple breakdown of what each level is best suited for:
🔹 Low Output (100–500 mg/h)
- Best for: Small spaces like closets, pantries, or bathrooms
- Use cases: Light pet odors, mild mildew, lingering food smells
- Duration: Short bursts of 15–30 minutes are often enough
👉 Ideal for apartment dwellers or anyone dealing with light but persistent odors.
🔸 Medium Output (500–1,000 mg/h)
- Best for: Bedrooms, small living rooms, or laundry rooms
- Use cases: Moderate odors from pets, smoke, or humidity-related mildew
- Duration: 30 minutes to 1 hour, depending on severity
💡 Tip: If you’re also using your AC to circulate air, check out our article on Fan Mode on your AC to help move treated air safely after a session.
🔶 High Output (1,000–4,000 mg/h)
- Best for: Basements, garages, entire apartments
- Use cases: Strong smoke damage, pet accidents, mold issues
- Duration: 1 to 2 hours per treatment, followed by thorough ventilation
📌 Great for post-disaster cleanup. If you’re dealing with storm recovery, see our guide to ozone generators and tornado damage.
🔴 Very High Output (4,000+ mg/h)
- Best for: Whole-house treatments, commercial spaces, or extreme conditions
- Use cases: Flood restoration, hoarding cleanup, biohazards
- Duration: 2–4 hours+ followed by 4–6 hours of ventilation (or longer)
⚠️ These are best handled by professionals. If you’re considering this level of ozone treatment, also weigh the pros and cons of alternatives like UV light in HVAC systems.
Quick Visual Comparison: Ozone Generator Output Levels
| Output (mg/h) | Room Size | Use Case | Run Time | Skill Level |
|---|---|---|---|---|
| 100–500 | Closet, Bathroom | Light odors, mildew | 15–30 minutes | Beginner |
| 500–1,000 | Bedroom, Kitchen | Pets, smoke, damp smells | 30–60 minutes | Beginner |
| 1,000–4,000 | Garage, Apartment | Mold, strong odors | 1–2 hours | Intermediate |
| 4,000+ | Whole House, Commercial | Fire, flood, biohazards | 2–4 hours+ | Pro / Extreme Use |
How to Maintain Your Ozone Generator (And Why It Matters)
Ozone generators don’t require daily upkeep, but regular maintenance is essential if you want reliable performance and a longer lifespan. Dirty filters, corroded plates, or internal dust buildup can all reduce your unit’s effectiveness—and in some cases, make it unsafe to use.
Below is a maintenance schedule you can follow to keep your machine in top condition:
🧰 Ozone Generator Maintenance Schedule
| Maintenance Task | Frequency | Description |
|---|---|---|
| Filter Cleaning/Replacement | After every use | Clean or replace filters to prevent airflow blockages and maintain ozone output efficiency. |
| Ozone Plate Cleaning | Monthly | Use mild detergent and warm water to remove residue from plates, then dry completely before reuse. |
| Interior and Fan Cleaning | Every 3–6 months | Remove dust and buildup from internal components and fan blades to prevent overheating or performance drops. |
| Electrical Connections Check | Every 6 months | Ensure wiring is secure and that there are no signs of corrosion or damage. |
| Exterior Cleaning | As needed | Wipe down the exterior with a soft, damp cloth to prevent dust accumulation. |
| Overall Inspection | Annually | Conduct a full system check to identify any signs of wear, electrical issues, or needed part replacements. |
🔍 Notes & Best Practices
- Always unplug your unit and let it cool down completely before doing any maintenance.
- Refer to your manufacturer’s manual for any brand-specific cleaning steps or part compatibility.
- Handle ozone plates with care—they can be fragile and costly to replace.
- Staying on top of these tasks helps prevent performance drops and extends the overall life of the machine.
📌 If your ozone generator is being used frequently for tough jobs—like treating smoke or mold after a storm—consider pairing it with a more permanent system like a UV light in HVAC system to reduce how often deep ozone treatments are needed.
Frequently Asked Questions (FAQ)
Safety and Usage
Q: Are ozone generators safe to use at home?
A: Yes, as long as they are used according to manufacturer instructions. Always ensure the area is unoccupied during use and well-ventilated afterward. Improper use can lead to respiratory irritation.
Q: Can I be in the room while the ozone generator is running?
A: No. It is unsafe to stay in a room with active ozone generation. Ozone in high concentrations can irritate the lungs and airways.
Q: What are the health risks associated with ozone?
A: Inhaling ozone can cause coughing, chest discomfort, and difficulty breathing—especially for those with asthma or respiratory conditions.
Q: Are there any items that should be removed before treatment?
A: Yes. Remove plants, pets, rubber items, delicate fabrics, and certain electronics. Ozone can deteriorate these materials over time.
Ozone can tackle odors and bacteria, but it’s not a cure for insects. Read the full bed bug guide for details.
Selecting the Right Ozone Generator
Q: What size ozone generator do I need?
A: It depends on the size of the space and the severity of the problem. Small units (100–500 mg/h) are great for closets or bathrooms, while larger spaces like basements may require 1,000–4,000 mg/h or more.
Q: Can I use one generator to treat my whole house?
A: It’s possible, but treating individual rooms is safer and more effective. Whole-house treatments require higher-output machines and longer ventilation times.
Q: How does an ozone generator differ from an air purifier?
A: Air purifiers use physical filters (like HEPA) to trap particles. Ozone generators chemically break down pollutants and odors using ozone gas. Each has its own role.
Operation and Maintenance
Q: How long should I run my ozone generator?
A: Duration depends on room size and odor severity. Start with 15–30 minutes for small rooms or 1–2 hours for larger spaces. Adjust based on results.
Q: How often should I clean my ozone generator?
A: Clean the filters after every use and wipe down the ozone plates monthly (or as directed by your model’s manual).
Q: What happens if I don’t maintain my generator?
A: Lack of maintenance can reduce ozone output, impair performance, and shorten the lifespan of the unit.
Troubleshooting Guide
If your ozone generator isn’t working as expected, here are common issues and how to fix them:
Power & Startup Issues
Problem: Generator won’t turn on
✅ Check if it’s plugged into a working outlet
✅ Inspect the power cord for damage
✅ Look for safety switches or loose components that prevent startup
Performance Issues
Problem: Reduced ozone output
✅ Clean the ozone plates (they may have buildup)
✅ Ensure air vents and filters aren’t blocked
✅ Consider humidity—ozone output drops in high humidity environments
Problem: Persistent odors after treatment
✅ Increase treatment duration
✅ Boost ozone output if adjustable
✅ Repeat treatment cycles if needed
Problem: Ozone smell lingers too long
✅ Improve room ventilation
✅ Use shorter treatment times
✅ Check that the generator isn’t oversized for the space
Mechanical Issues
Problem: Strange noises
✅ Clean the fan and check for obstructions
✅ Tighten loose screws or components
Problem: Overheating
✅ Allow time to cool down between sessions
✅ Ensure vents are clear and device isn’t near heat sources
Problem: Sparks or electrical smell
❌ Unplug the unit immediately
☎️ Contact the manufacturer or a certified electrician—do not attempt repair yourself
Complementary Products to Use with Ozone Generators
To boost air quality and maintain freshness between ozone treatments, consider combining your generator with the following tools:
1. HEPA Air Purifiers
What They Do: Trap airborne particles like dust, pollen, and allergens down to 0.3 microns
Why It Helps: While ozone kills odors and microbes, HEPA purifiers filter the physical debris left behind.
2. Activated Charcoal Filters
What They Do: Absorb odors, gases, and VOCs
Why It Helps: These work great in conjunction with ozone, catching leftover chemicals or smells.
3. UV Light Systems
What They Do: Kill bacteria and viruses with UV-C light
Why It Helps: Provide passive air sanitation between ozone treatments. Learn more in our article on UV lights in HVAC.
4. Essential Oil Diffusers
What They Do: Add pleasant scents and may offer mild antimicrobial effects
Why It Helps: Great for freshening air naturally after ozone dissipates
5. Proper Ventilation
What It Does: Improves airflow and reduces pollutant buildup
Why It Helps: Helps ozone clear faster post-treatment. Use with open windows or in fan mode on your AC.
6. Humidity Control (Dehumidifiers or Humidifiers)
What They Do: Keep indoor humidity at optimal levels
Why It Helps: Reduces conditions that cause mildew and odor buildup
7. Indoor Plants
What They Do: Absorb pollutants and increase oxygen levels
Why It Helps: Offers a passive, natural form of air purification that works well alongside occasional ozone treatments
8. Baking Soda
What It Does: Absorbs mild household odors
Why It Helps: Great for maintenance between ozone sessions—use in trash cans, fridges, or on carpets
Final Thoughts
Ozone generators are powerful tools that can transform your indoor air—when used responsibly. From choosing the right output level to following essential safety steps, it’s all about balancing effectiveness with caution. Whether you’re targeting stubborn smoke smells, battling mold, or just freshening up a space, knowing how to use your machine the right way makes all the difference.
If you’re still exploring air purification options, be sure to check out our guides on UV lights in HVAC and mold prevention strategies.
Breathe better, live healthier—and treat ozone with the respect it deserves.

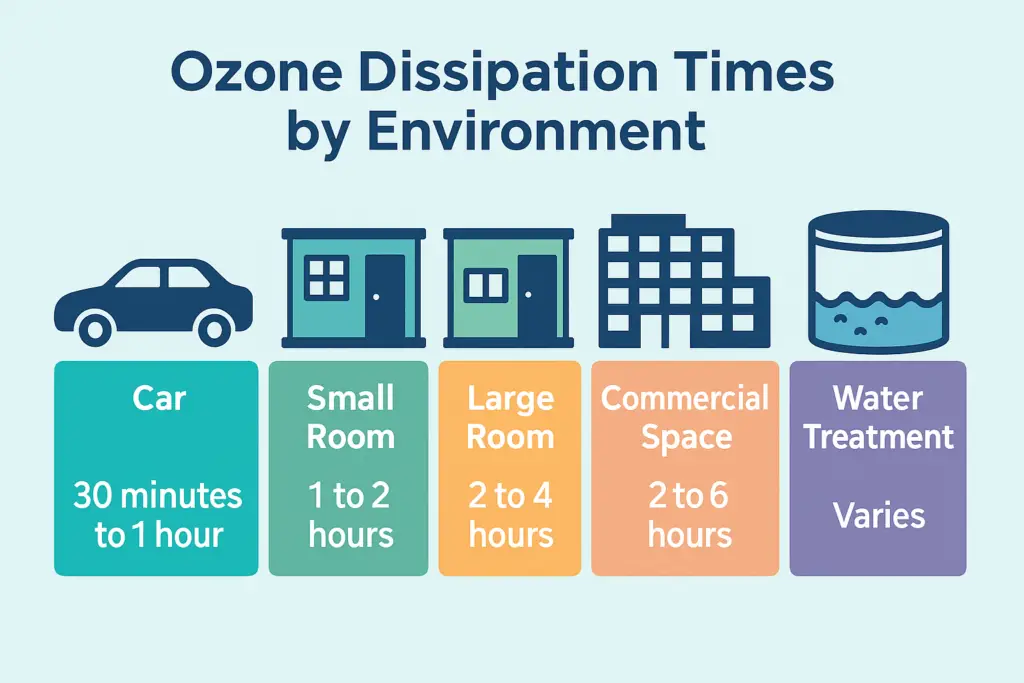
 Ozone Dissipation in Specific Environments
 Technological Aspects of Ozone Generators
 OdorFree Villa 3000 Ozone Generator for Eliminating Odors, permanently removing Tobacco, Pet and Musty Odors at their Source – Easily Treats Up To 3000 Sq Ft