Improving and maintaining high-quality indoor air is vital for senior home care. It is a well-known fact that as the human body ages, the immune system slowly deteriorates, so the elderly population is more sensitive to respiratory disorders, allergies, and other diseases arising from polluted air.
How can you create a healthier environment for your elderly loved ones?
Key steps include understanding and addressing common indoor pollutants, maintaining cleanliness, and improving ventilation. Thus, the practice described above allows family caregivers to improve the quality of elderly people’s lives and provide safe and comfortable conditions for their homestay.
In this guide, you’ll find practical strategies for sorting through and applying what’s known about achieving the best indoor air quality for elderly home care.
1. Understanding the Importance of Indoor Air Quality for Seniors
The quality of the air inside a home has a profound impact on the health and well-being of seniors. As individuals age, their respiratory systems become more sensitive to pollutants, which can exacerbate conditions like asthma, chronic bronchitis, and even cardiovascular diseases.
Problems related to the indoor environment can cause additional hospital visits and reduced health. One must not underestimate how dust, mold, and even some chemicals in houses can be hazardous to older people.
In addition, as people advance in age, they spend most of their time indoors, particularly those with limited mobility. They are also more vulnerable to indoor air pollution than younger people because they spend much of their time indoors due to their jobs.
Studies have shown that indoor air quality can improve respiratory health, cognitive function, and the quality of life for seniors. When the abovementioned aspects are prioritized, caregivers are more likely to provide a healthier environment that will coincide with the well-being of their elderly family members.
2. When and why air quality is a Concern for Seniors
Smog also poses a risk to the elderly since they are highly susceptible to the effects of polluted air. They also found that in the spring and fall seasons, the pollen count increases, thus affecting allergy and respiratory problems for seniors. Winter further exposes one to indoor heating that circulates dust and other irritants, while summers increase humidity, encouraging mold formation. With every change in the seasons, there is always a different challenge regarding ensuring that the air quality in the indoor environment is good.
Another critical area of concern is that many buildings lack adequate ventilation systems. Residents of homes without proper ventilation face issues like accumulated carbon dioxide, persistent stale smells, and high levels of indoor contaminants. These risks can be avoided by opening the windows frequently, using exhaust fans, and maintaining proper HVAC systems. Also, the days when pollution is high, including when it is reported in weather broadcasts, means that the windows should be closed and air conditioning and air purifiers should be used to minimize the effects of indoor pollutant entry through windows on elderly persons. Knowing these specific triggers helps the caregivers to reduce or eradicate some aspects that contribute to the bad air quality in the seniors’ environments.
3. Identifying Common Indoor Air Pollutants
Knowledge and recognition of ordinary pollutants in indoor air are critical to systematically addressing the problem. These contaminants can significantly affect the conditions of elderly persons.
– Dust and Dust Mites: Dust mites can be found in areas such as bedding, upholstery, and carpet. They feed on shed skin cells and are more common in warm and humid conditions. Dust can also provoke allergies and asthma.
– Mold and Mildew: These fungi are found in areas with high humidity and poor air circulation, such as bathrooms and basements; the spores in their fruiting bodies pose health risks, such as respiratory system infections and allergic reactions.
– Volatile Organic Compounds (VOCs): Coming from home items like paints, cleaners, and recently purchased furniture, VOCs may bring about headaches, dizziness, or other complications with sustained exposure.
– Pet Dander: Pet dander is composed of small skin particles produced by cats, dogs, and other animals, and it may cause asthma and other respiratory problems.
– Tobacco Smoke: Another major air pollutant, tobacco smoke is a known source of thousands of chemicals that can, for instance, have detrimental effects on elderly people’s breathing if they have chronic diseases.
Thus, knowledge of these pollutants helps caregivers implement measures to capture their sources and minimize health risks in their vulnerable elderly wards.
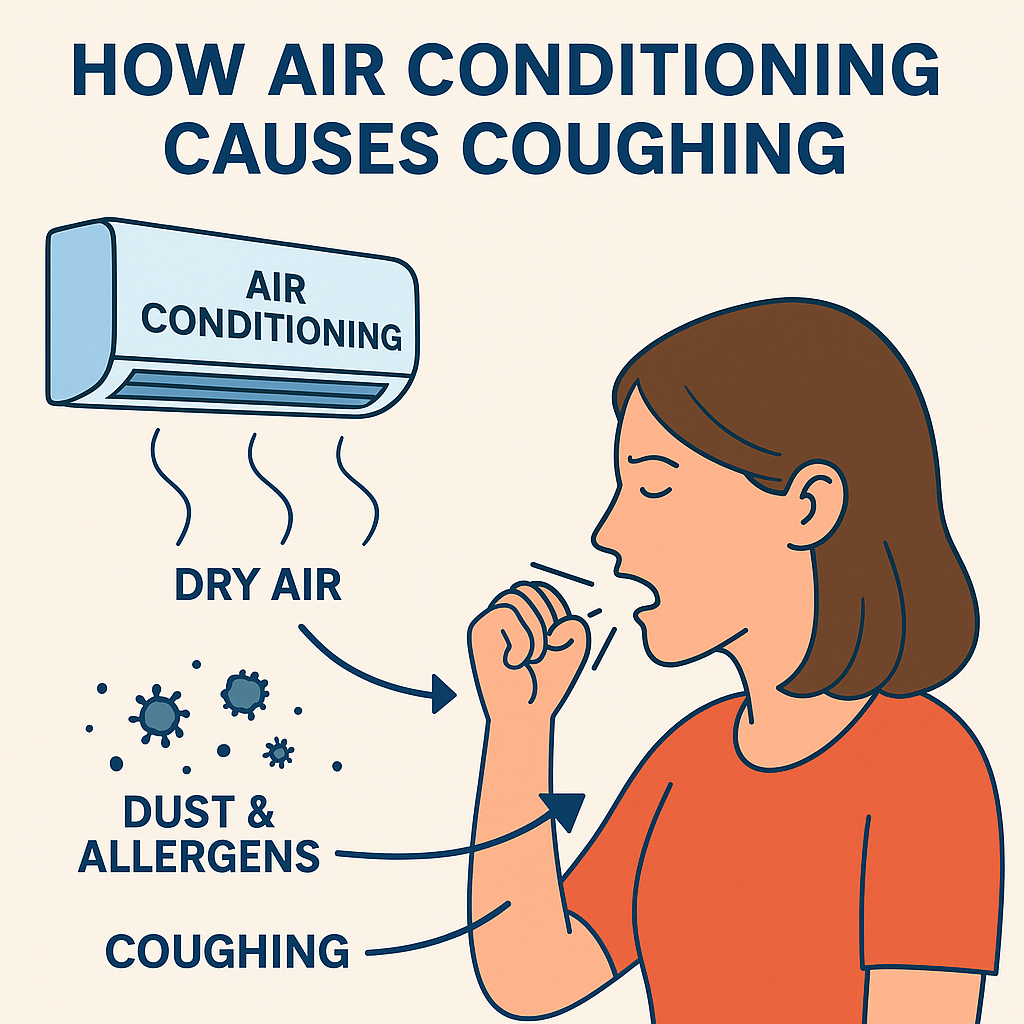
4. The Impact of Humidity on Air Quality
It is also important to maintain humidity levels since this significantly enhances the quality of air inside the house, especially for elderly individuals. Excess moisture leads to drawings that could encourage the development of molds and dust mites that cause allergic reactions and breathing complications. Mold spores pose considerable health risks, including sinus infections and worsening of asthmatic symptoms. For high humidity, make sure you have dehumidifiers and adequate ventilation to prevent moisture-concentrating areas like the bathroom or kitchen.
On the same note, a lack of humidity may also adversely affect individuals. Low humidity means dry mucous membranes, which makes an individual more vulnerable to respiratory diseases and causes a rough feeling on the skin and itching in the eyes. Using the humidifiers will make it easier to regulate the humidity level, which should not be high, especially in the winter, but not extremely low, negatively impacting the senior’s health. Caregivers should pay particular attention to using a hygrometer to check the humidity level frequently and intervene when required.
5. Seasonal Allergies vs. Indoor Pollutants
It is essential to differentiate between the two- namely, the allergies related to season change and the indoor pollutants – to manage the respiratory health challenges seniors are likely to develop. Pollen from trees, grass, and weeds can cause incidences of seasonal allergies and can easily find their way into a house through windows, doors, or even through someone’s clothes. These allergens commonly trigger sneezing, itching of the eyes, and nasal stuffiness. Some measures that may help prevent these impacts include closing windows during high pollen seasons and employing air cleaners with HEPA filters.
On the other hand, internal pollutants are from different sources within the house. In addition to the abovementioned sources, dust, pet dander, and volatile organic compounds from household cleaning agents and paints would affect the IAQ. While some allergies are known to occur only at specific times of the year, indoor pollutants can affect people most of the year. The best ways to keep away these indoor irritants include cleaning them routinely, using low VOC cleaning products, having proper ventilation, and making senior citizens’ homes safe and clean for living.
Making a clear distinction between these two kinds of triggers will help the caregivers devise better ways of protecting their elderly loved ones’ health.
6. Regular Cleaning and Maintenance
Cleaning is crucial in minimizing Indoor Air Pollutants, especially within homes that accommodate seniors. Paying particular attention to cleaning is another way to reduce allergens and irritants in a house. Some examples are vacuum cleaning, where a vacuum cleaner with a HEPA filter is used to clean the air because other vacuums miss tiny particles, and dusting, done using a damp cloth, ensuring that the dust does not float in the air being inhaled.
Another significant factor is how to avoid mold formations. General control methods include providing adequate cross-ventilation in humid areas, repairing damp sites, and using dehumidifiers. This includes appropriately using mold-killing solutions in cleaning the affected region to prevent mold spores from spreading further.
Residents with pets in their households should ensure that they bathe and groom the animals frequently to reduce the volume of pet dander known to cause allergies. Never allow pets in the bedroom or on furniture and bedding; minimizing contact with such irritants is also essential. Through these cleaning and maintenance practices, the caregivers can make the environment fit for seniors.
7. Improving Ventilation
This controls indoor pollution while providing older people with fresh air necessary for their respiratory systems. One relatively bland but highly effective measure is opening windows more often, for example, in fine weather. It enables fresh air to circulate while exhausting stale air, diluting indoor pollution levels.
Besides natural ventilation, mechanical exhaust fans in wet zones, including kitchens and bathrooms, are crucial. These fans also facilitate the elimination of moisture, which, if left on its own, can cause mold formation and aid in expelling cooking odors. Air exchangers provide a controlled means of maintaining indoor air quality as they continuously cycle fresh outdoor air inside the home.
Ventilation is needed to prevent the accumulation of airborne contaminants and provide a better environment for elderly people. Routine inspection and cleaning of ventilation systems play a significant role in improving indoor air quality.
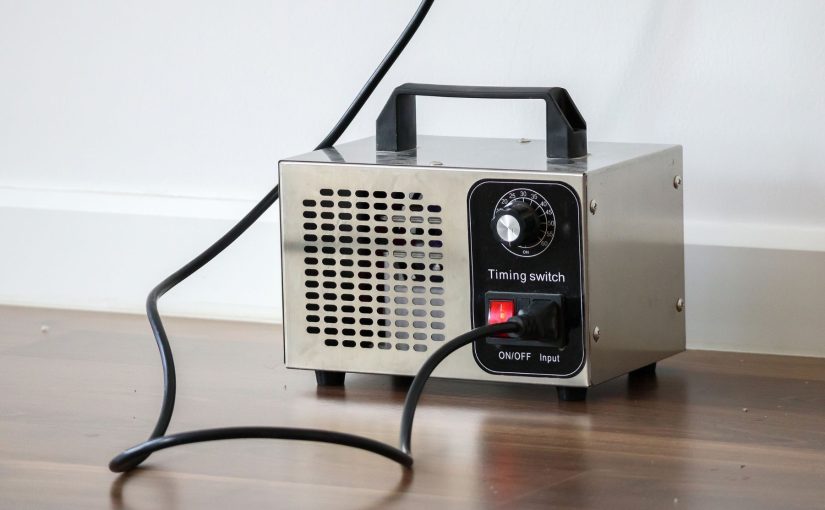
8. Using Air Purifiers
As pointed out earlier, air purifiers help improve air quality inside homes or offices by filtering out several impurities. While choosing an air purifier, consider the one with the HEPA filter more effective as it removes up to 99%. This optical system can focus particles down to 0.97% of the wavelength, or 3 microns, such as dust, pollen, pet dander, etc. For other additional features, one should look at the cleaners with activated carbon filters since they help eliminate bad smells and VOCs from the air.
Like any other equipment, air purifiers require proper maintenance to function efficiently. These procedures must be maintained constantly, like changing the filters as the manufacturer recommends to ensure the device runs optimally. It is also helpful to purchase a cleaner with a filter change indicator to make it easier to monitor maintenance periods. Through the adoption of air purifying systems in homes, caregivers can reduce the levels of airborne particles, hence enhancing the quality of the living conditions for seniors.
9. Choosing Low-VOC Products
Selecting low-VOC or VOC-free household products is a proactive step in reducing chemical pollutants and enhancing indoor air quality, especially for seniors. VOCs (volatile organic compounds) are emitted as gases from certain solids or liquids and can have adverse health effects. When redecorating, opt for water-based, low-VOC paints and finishes, which significantly reduce the release of harmful fumes compared to traditional options.
For cleaning, using natural or environmentally friendly products with less chemical effect on health is better. Such products utilize natural extracts from plants and exclude additives such as synthetic smells and colors, thus being safer for use indoors. Furthermore, select materials like solid wood or metal that spare you toxic paints and other materials used in composite timber and plastic products if procuring new furniture.
In this way, caregivers can intentionally decide on some aspects of their elderly family member’s life that would promote a healthier living situation.
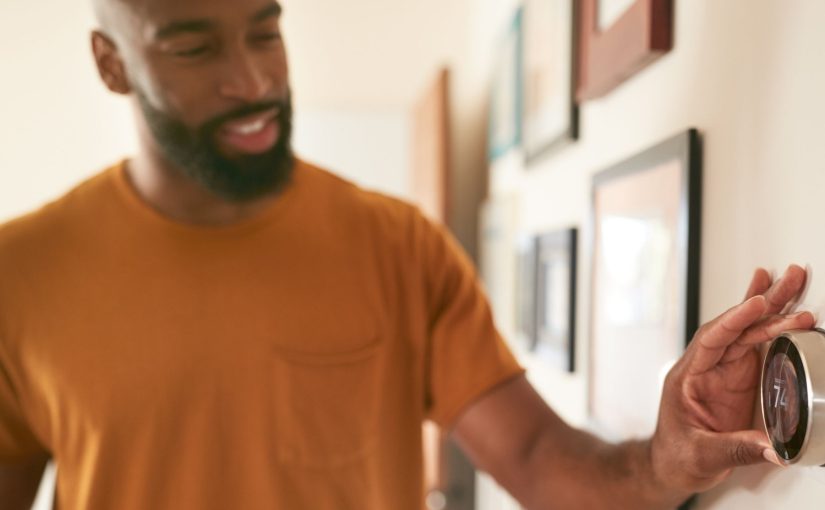
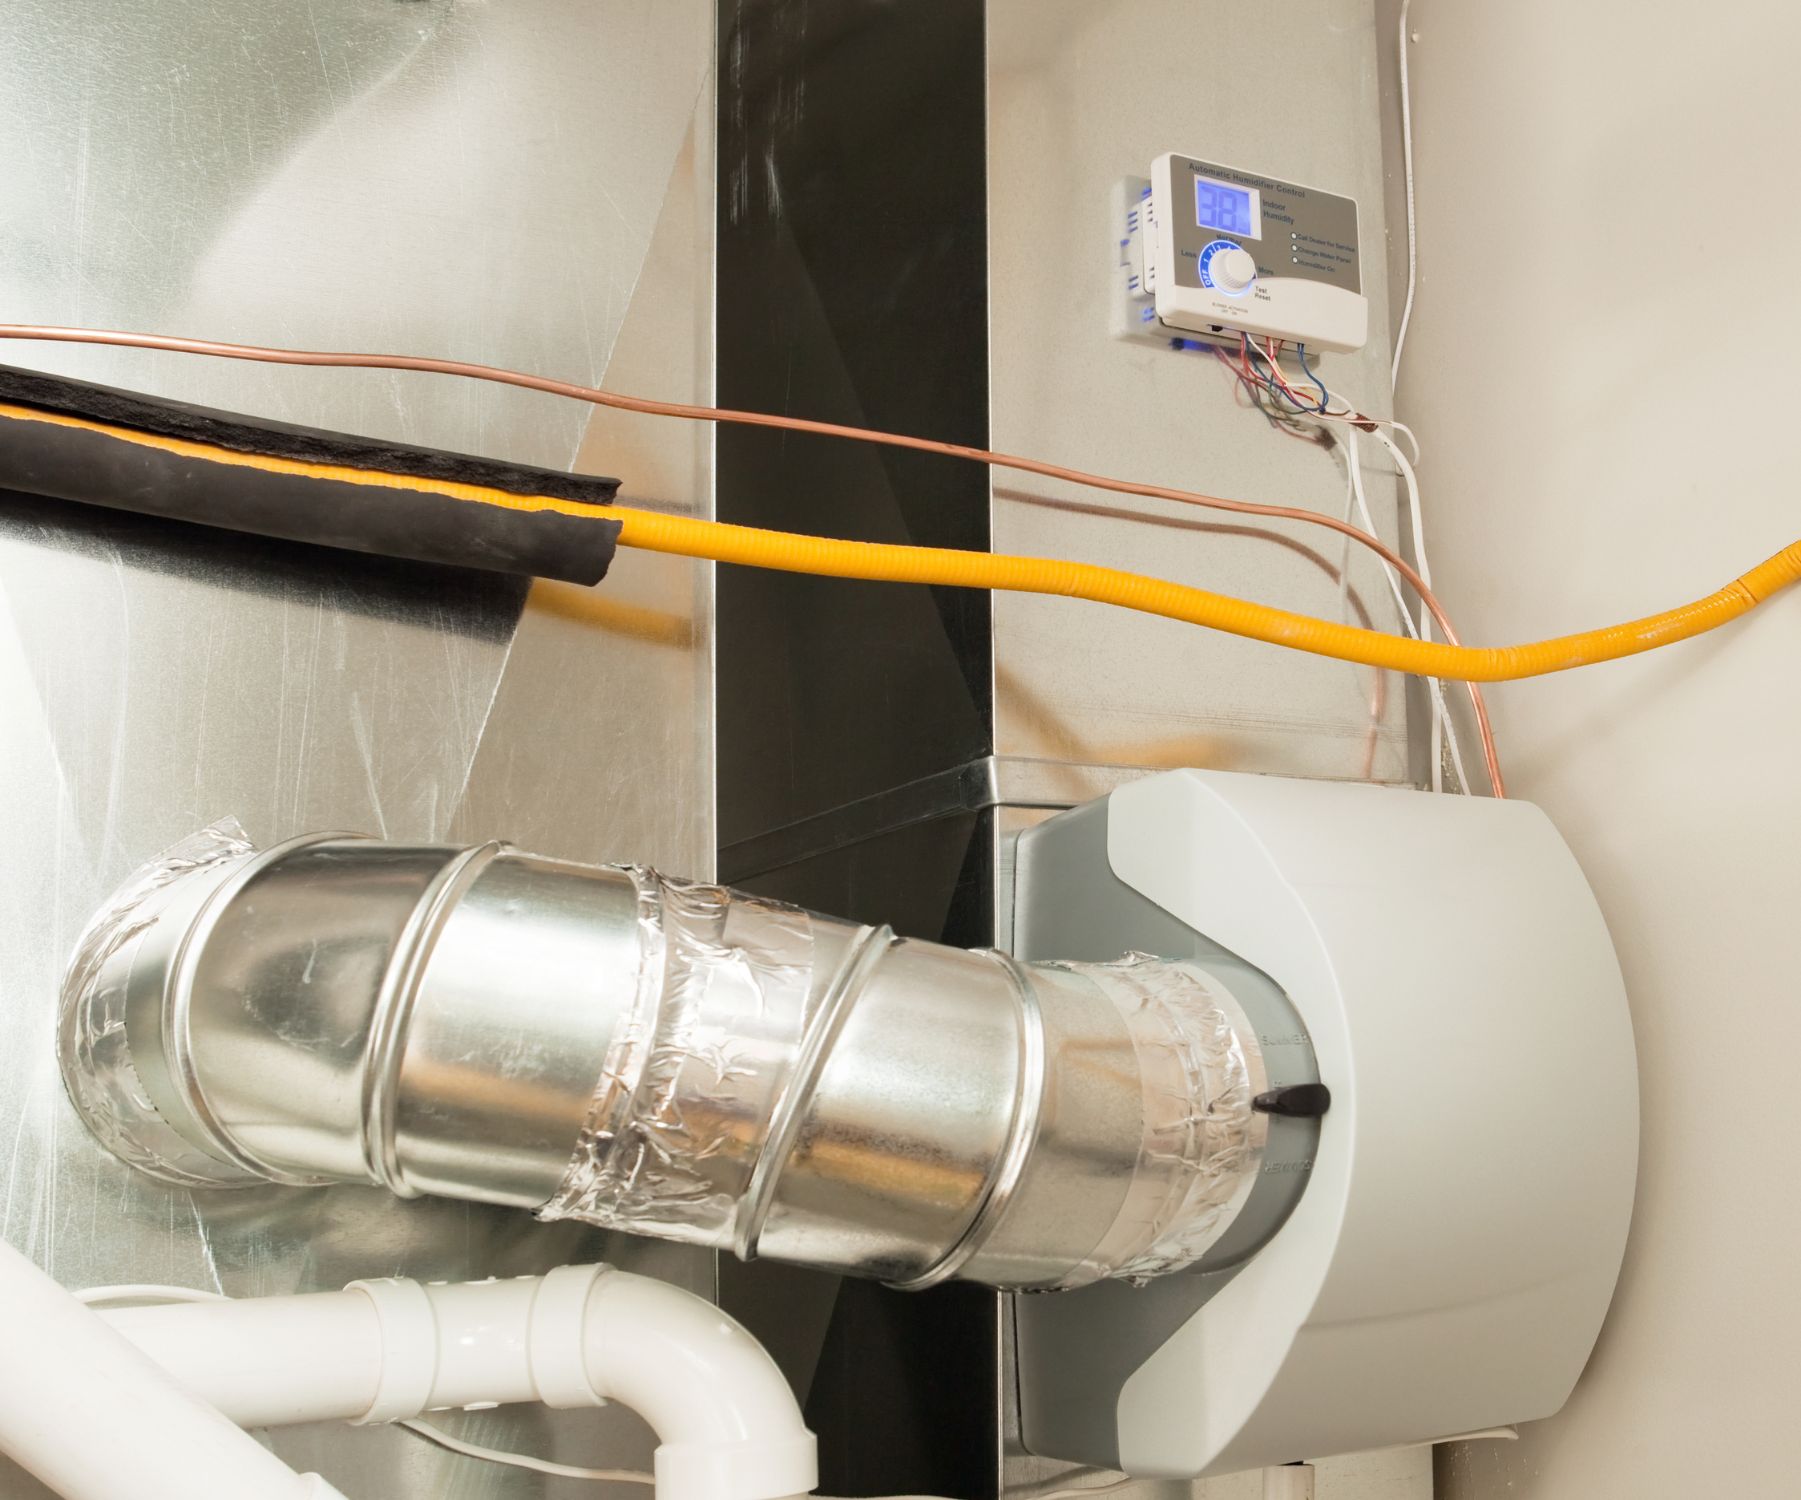
10. Regular HVAC Maintenance
This is crucial because the cleanliness of your home through the air your HVAC system circulates is paramount, especially for senior citizens. Replacing filters in HVAC systems every 1-3 months is essential because they collect dirt, dust, pollen, and other particles contaminating the air. A clogged filter degrades efficiency and circulates air pollutants in the house.
It is also necessary to have the HVAC system serviced by professional technicians at least once every year. Technicians can examine and polish the system’s components and guarantee that it functions proficiently and attenuates and removes pollutants. Furthermore, it may be helpful to clean the ducts if dust accumulates or fuzzy mold formation occurs. They are instrumental in avoiding the dissemination of allergens and enhancing the air quality in the room.
Through these maintenance practices, guardians should be able to avoid the negative impacts of HVAC systems while ensuring seniors have healthier and more comfortable living conditions.
11. Educating Family Members and Caregivers
Educating all seniors’ caregivers about the significance of IAQ in achieving a healthy environment is crucial. Relatives and caretakers should be educated on the availability and impacts of indoor pollutants and ways to eliminate them. It is also essential to periodically check the home environment to note any future issues to be addressed.
Organizing IAQ sessions or workshops can ensure that attendees are equipped with practical knowledge about IAQ and remind them of the importance of clean air. Also, cleaning up, proper airing, and checking the air quality promote the general welfare of elderly family members. If caregivers remain alert and keep abreast of changes, they can ensure the seniors live in a safe and comfortable environment.
12. Monitoring Indoor Air Quality
Failure to assess IAQ frequently means that humans will not detect health hazards early enough and correct them on time. Some specific things that air quality monitors can offer include volatile organic compounds, particulate matter, and humidity data. These devices are especially helpful in identifying variations that might mean new problems are about to surface and taking quick action.
Professional testing periodically provides a better understanding of a home’s indoor air quality. To ensure comprehensive inspections, professionals can utilize sophisticated apparatus, including those used to detect mold, radon, or other concealed pollutants. Such an approach will help us guarantee that we address all the potential causes of indoor pollution, thereby creating better and safer living conditions for seniors.
With self-monitoring in addition to professional evaluations, caregivers can ensure that the IAQ remains in check throughout and the well-being of their elderly family members.
13. Establishing a Safe Living Space
Besides maintaining good air quality, the most crucial consideration when creating a safe environment for seniors in their homes, other issues must be considered to prevent falls and related accidents. Keeping showers, baths, tubs, and kitchens slippery-free requires non-slip mats, which make it easy to avoid falling. These mats offer surface traction and help older adults get a firm footing.
Another essential aspect to consider is the theater’s lighting problem. Make sure that all floors within residences, including the corridors and stairs, are adequately lit to avoid dangers such as falling. The most useful application of motion-sensor lights is in lighting pathways at any time of the day, especially at night.
One way to move around quickly and prevent accidents is to avoid accumulating unnecessary items on walkways. Eliminate some items, such as chairs, tables, or wires, that might hinder passage in some areas. Scheduling and tidying can inadvertently make the home a safe place for seniors, thus preventing any possible accidents and making them more independent.
14. Consulting Healthcare Providers
Regarding the respiratory system, elderly people need physicals with their healthcare physicians. When visiting such households, one should inquire about any anxiety relating to indoor air quality and its effects on health. Healthcare practitioners can counsel patients, advise on medication use, and have long-term diseases such as asthma or chronic bronchitis. If necessary, they can also refer clients to other practitioners, such as a pulmonologist.
Healthcare providers can recommend appropriate measures and vaccines to boost an individual’s respiratory health. As a result, caregivers should engage in active communication with healthcare teams and hence get complete care that may cater to both short-term and long-term health complications influenced by poor indoor air quality.
15. Implementing a Holistic Approach
Enhancing IAQ for seniors also necessitates an extensive, multifaceted strategy. First, it is recommended to implement a combination of measures, such as adherence to cleaning routines, proper airing, and air filtering devices. Moreover, attention should also be paid to humidity and low-VOC products to decrease levels of chemical pollutants.
These should be done in compliance with the updated standard health protocol and available modern technologies. Communicate with all household members to guarantee compliance with the protocols identified above. You can systematically evaluate your plan and adjust it as needed to help improve the quality of life for your senior relatives by providing a healthier and safer environment.
16. Staying Informed and Updated
Staying informed about advancements in air quality management and home care is vital for ensuring the best care for seniors. Engage in caregiver support groups to share experiences and learn from others. Subscribing to newsletters from health organizations and home care experts can provide up-to-date information on new techniques and products.
Furthermore, community workshops, webinars, and other activities may provide valuable information and quality practice. In this way, you will continually learn new and better ways of maintaining a healthy environment within spaces where your elderly relatives are present, keeping them as comfortable as possible.
Final Recommendations
Maintaining the quality of air inside the homes of elderly people is not a one-time effort but requires constant attention. Family caregivers must identify pollutants, practice cleanliness, enhance air circulation, use appropriate products, and implement suitable devices to achieve better living conditions. However, such improvements can only be sustained with ongoing supervision and increased awareness. Ultimately, the objective is to create a safe environment that enables seniors to feel at home. The following steps can be taken to enhance the air quality your loved one breathes: Today is the right time to act and improve their lives, specifically regarding health.


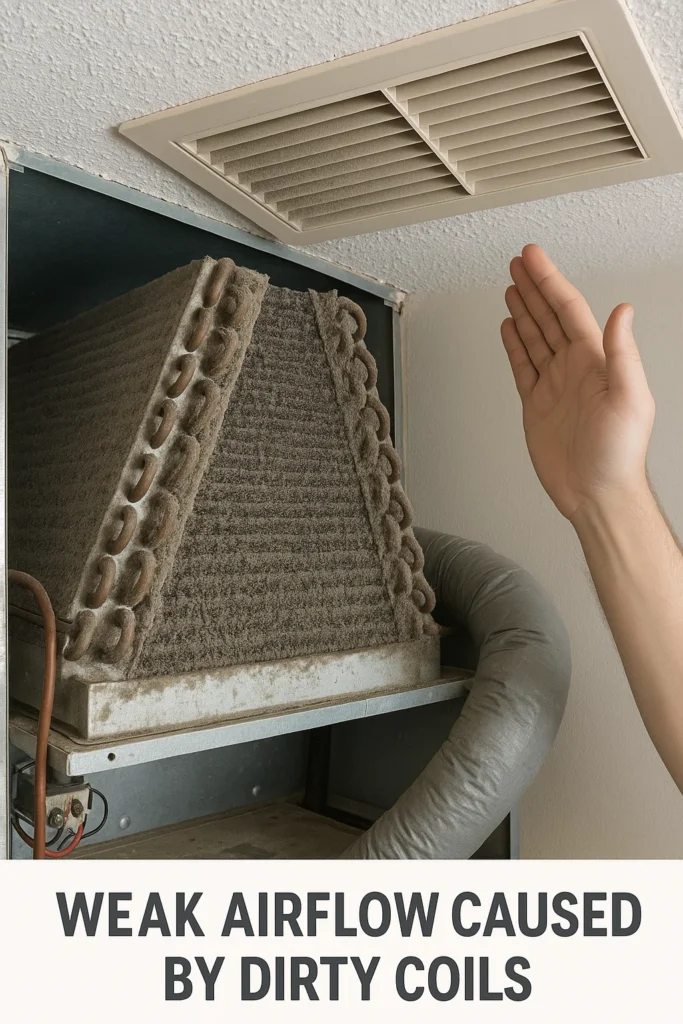
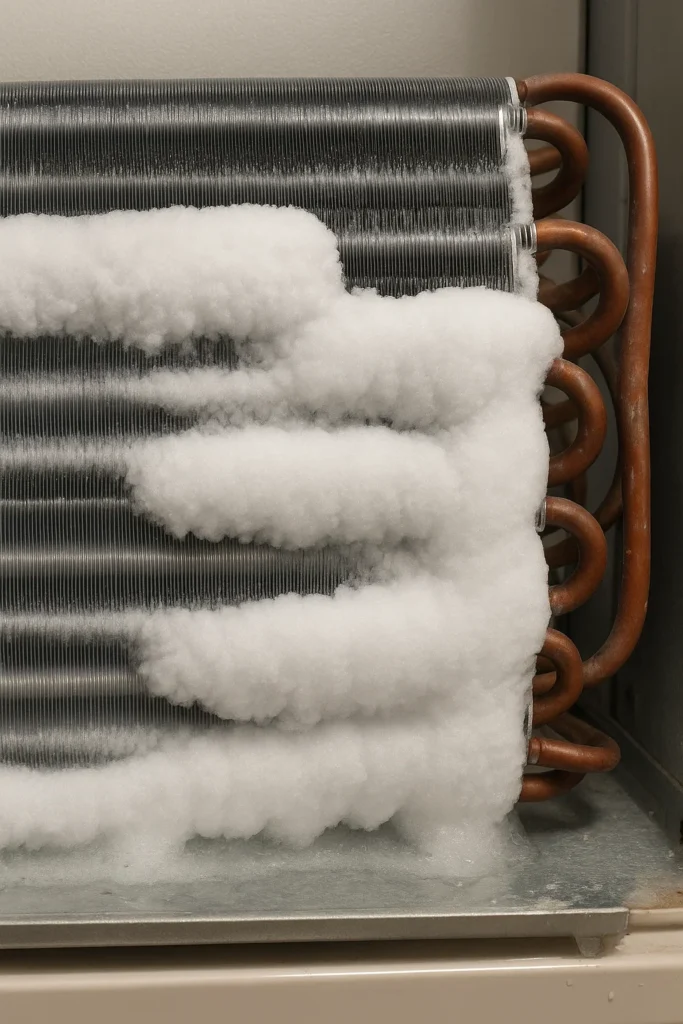
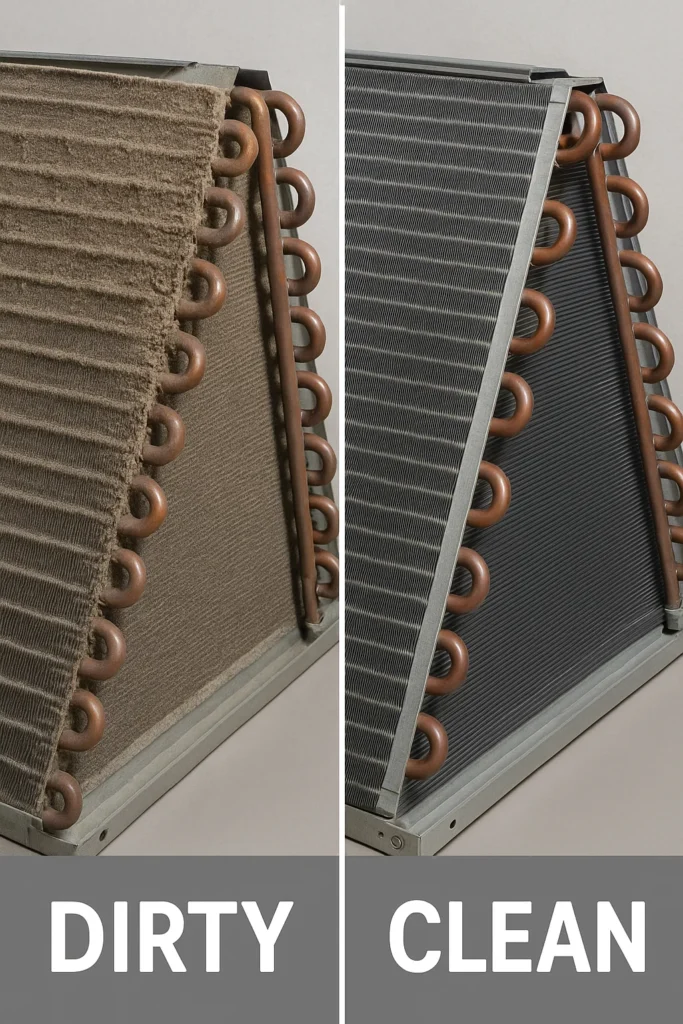
 Why Clean Your AC Coils Without Disassembly?
 1. Flexible Coil Cleaning Brush
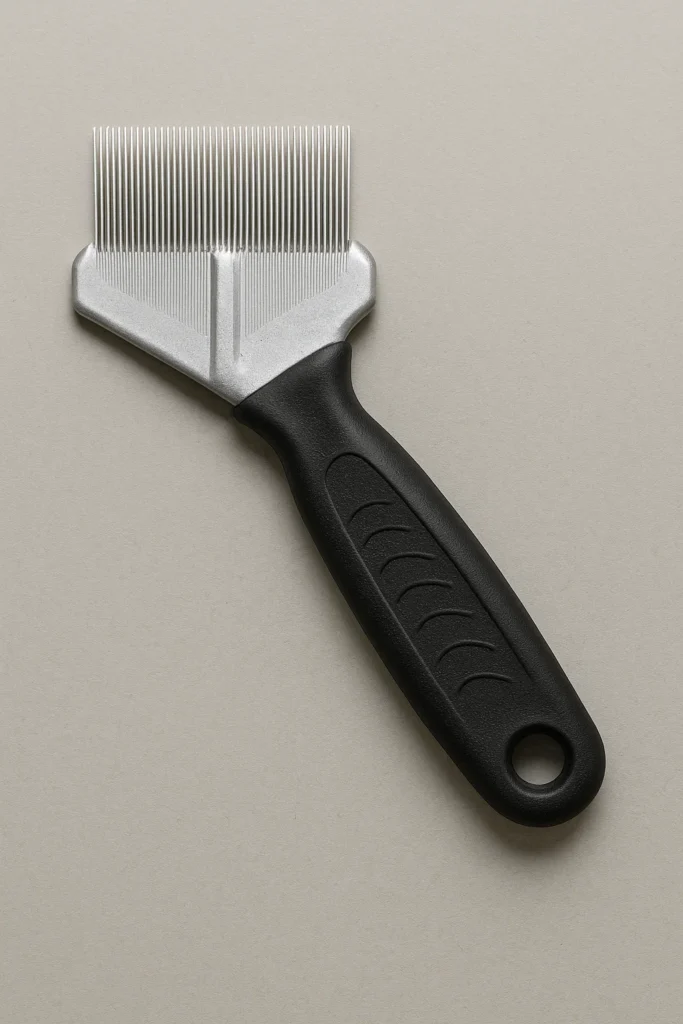 2. Fin Comb
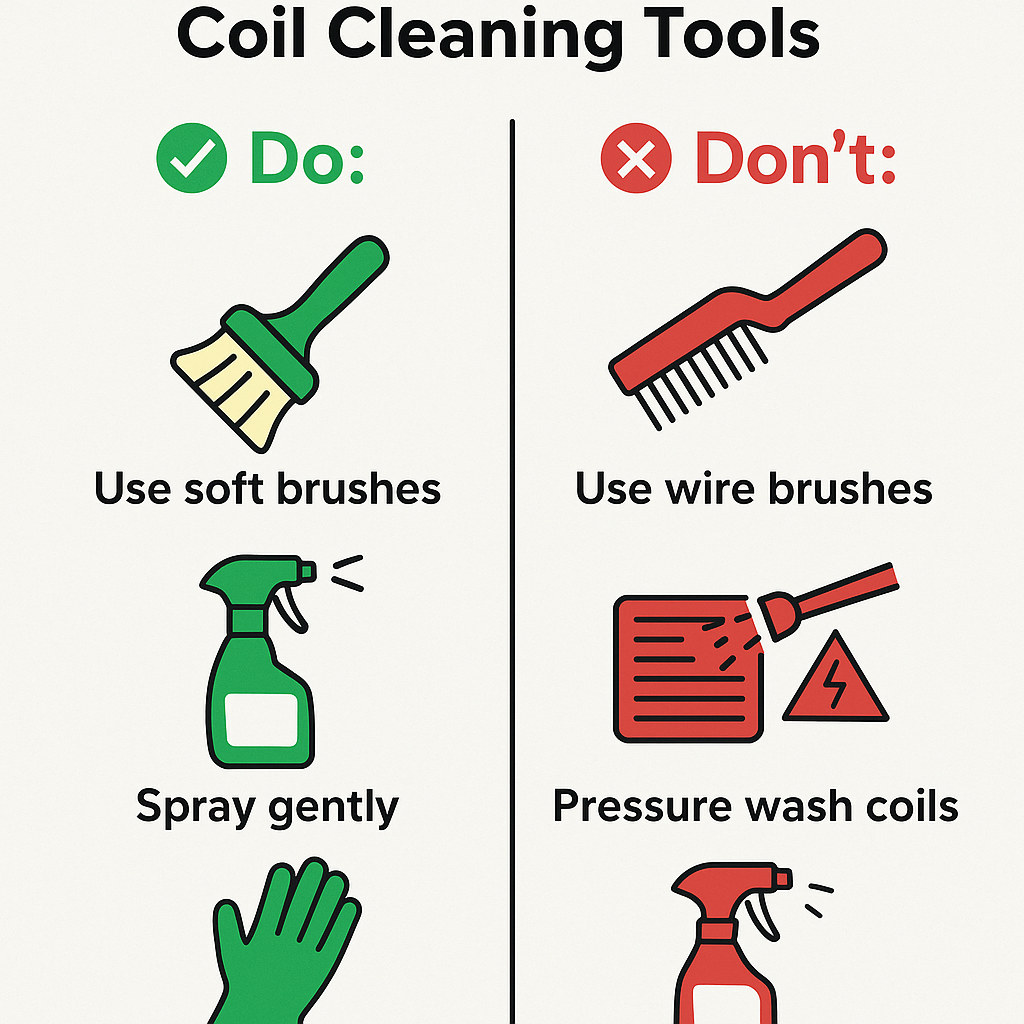 Choosing the Right Tools for Your Needs

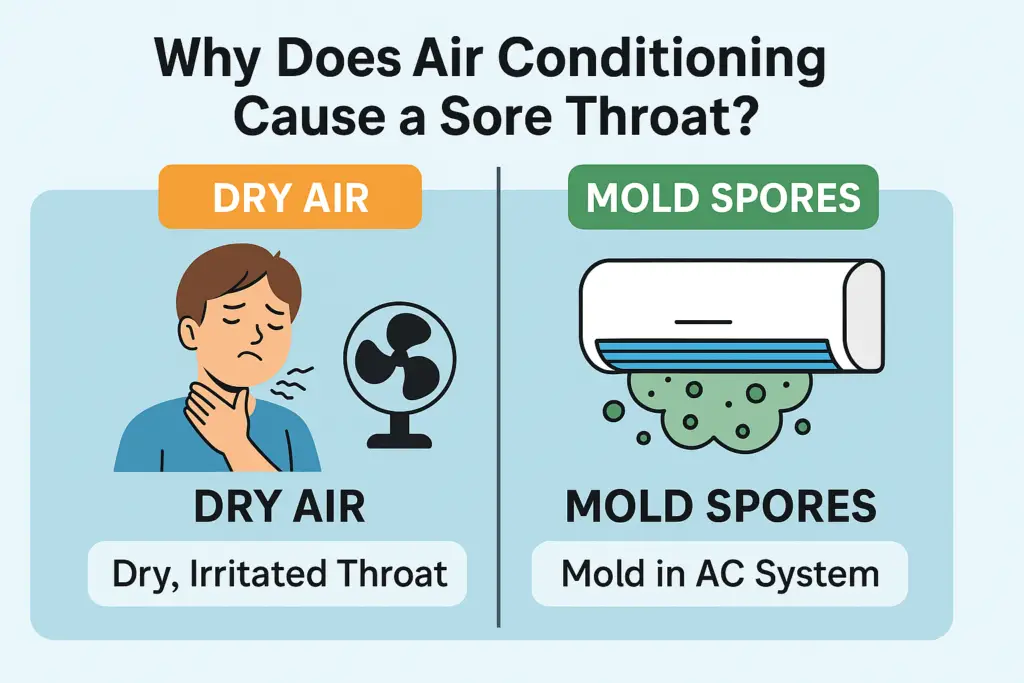
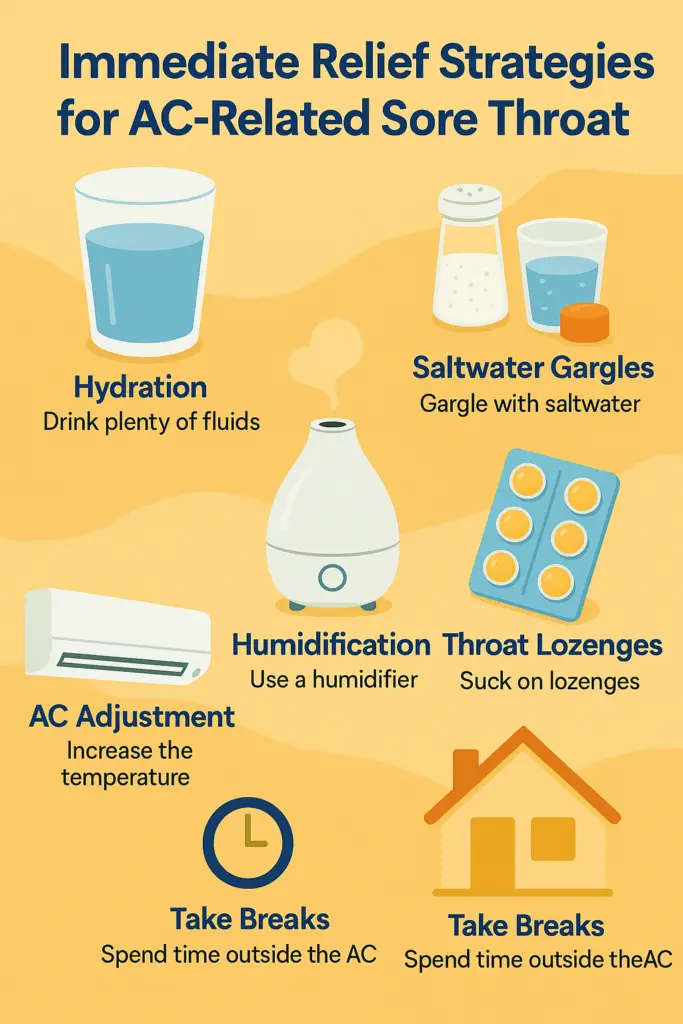
 Tackling Dry Air
 Advanced Solutions


 Improving and maintaining high-quality indoor air is vital for
  2. When and why air quality is a Concern for Seniors
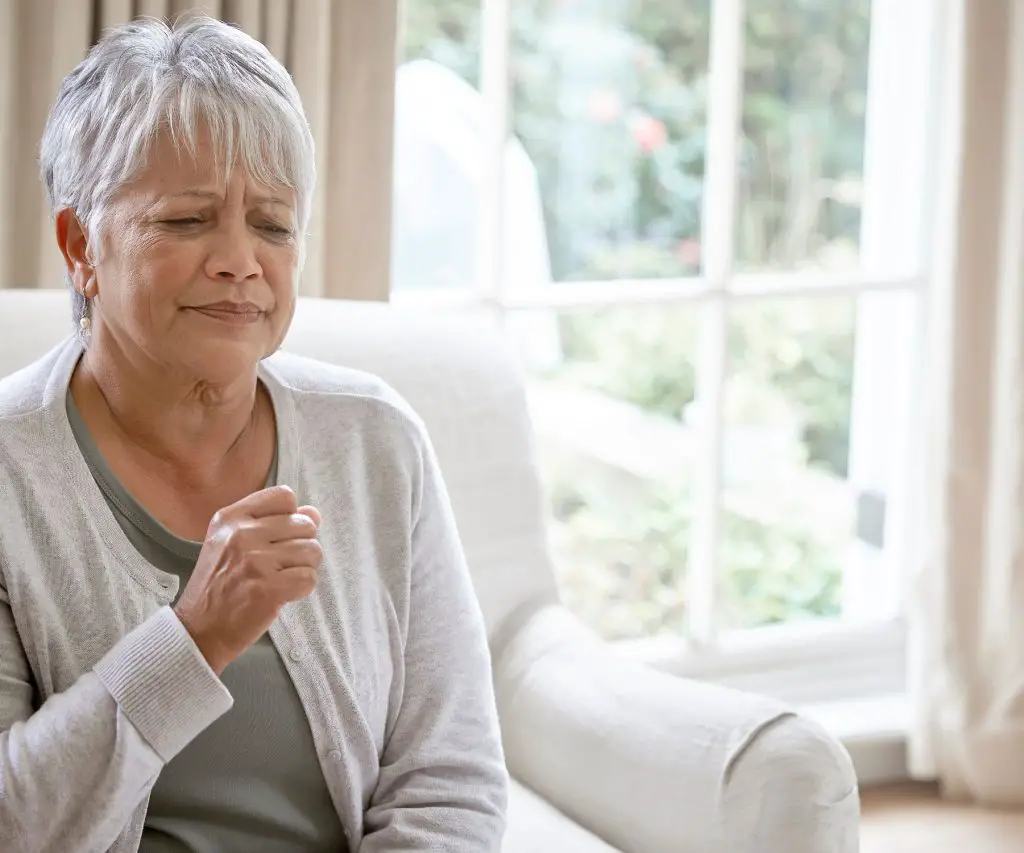 4. The Impact of Humidity on Air Quality
 8. Using Air Purifiers
 10. Regular HVAC Maintenance
 14. Consulting Healthcare Providers