
Author: Dennis Reed
Dennis Reed
Owner and Author @ BreatheBetterAir.org
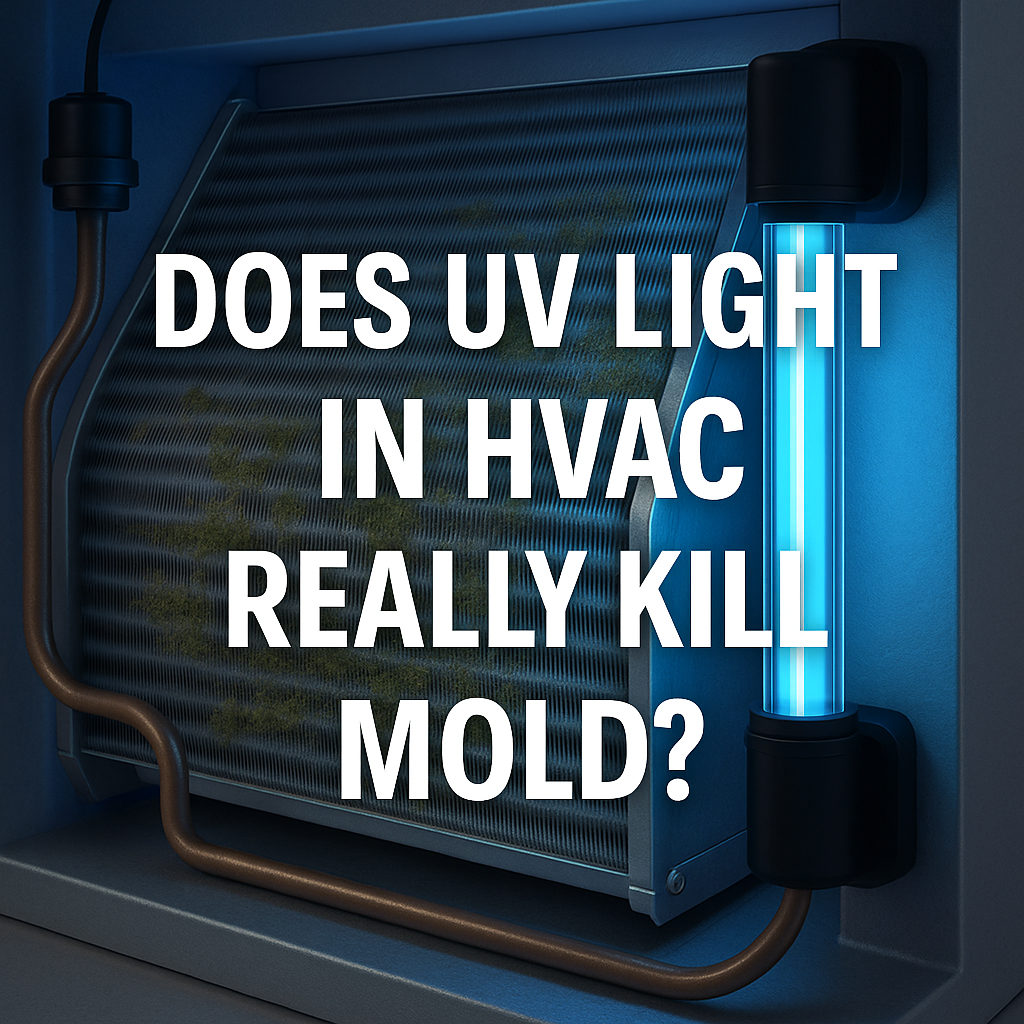
Does UV Light Really Kill Mold in HVAC?
Yes, UV light in HVAC systems can kill mold by disrupting its DNA, preventing growth and reproduction. UV-C light is especially effective at neutralizing mold on surfaces like evaporator coils and drain pans, though its effectiveness depends on placement, intensity, and exposure time.
How UV Light Fights Mold in Your HVAC System
Ultraviolet (UV) light, particularly UV-C, is increasingly used in HVAC systems to combat mold growth and improve indoor air quality. But how exactly does it work—and how effective is it?
If you’ve already read our article on the Pros and Cons of UV Light in HVAC, this deeper dive explains how UV-C light targets mold, what it can and can’t do, and how to get the most out of your installation.
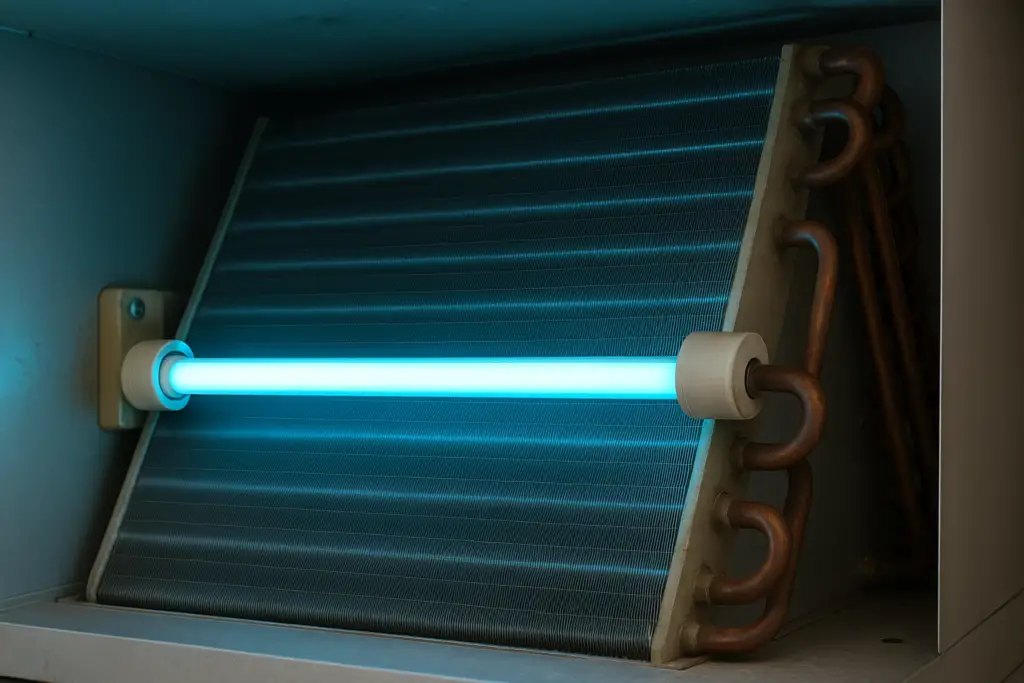
How UV-C Light Targets Mold
UV-C light operates at a wavelength of around 254 nanometers—just the right range to penetrate and damage the DNA of microorganisms like mold and bacteria. When UV-C light shines on mold:
- It breaks the mold’s DNA, rendering it unable to reproduce.
- It kills active spores on exposed surfaces.
- It halts further growth by sterilizing key moisture zones like coils and pans.
Think of it like a silent air guardian, constantly sterilizing the darkest, dampest corners of your HVAC system where mold would otherwise thrive
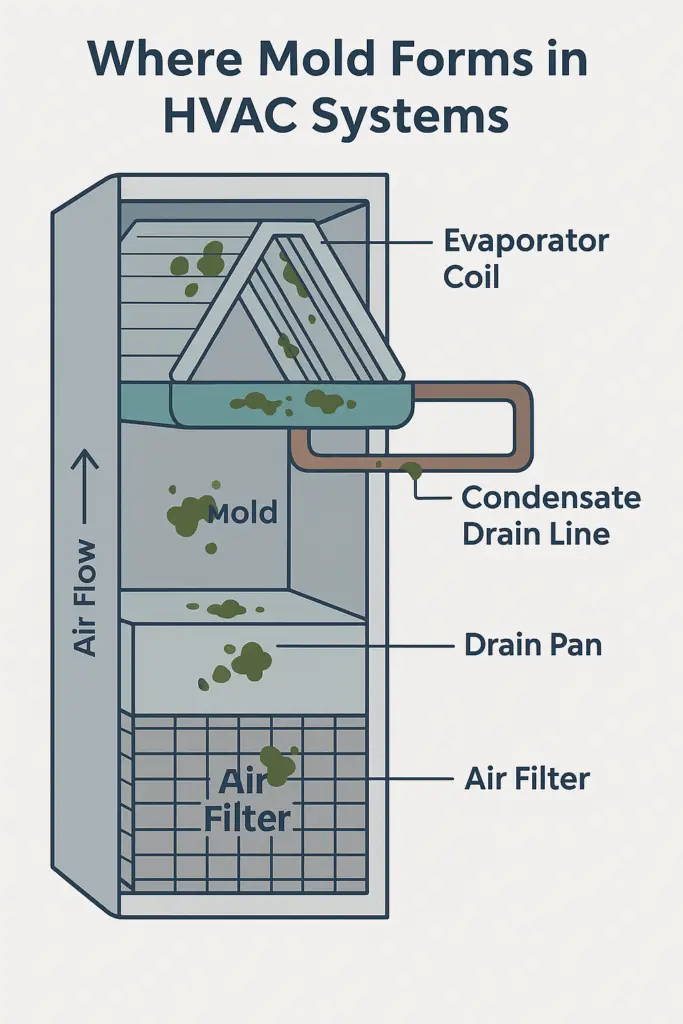
Where Mold Hides in Your HVAC System
Mold doesn’t grow just anywhere—it needs moisture, darkness, and stagnant air. Unfortunately, your HVAC system provides the perfect recipe in a few key places:
- Evaporator coils: Constantly damp and cool—prime territory for mold.
- Drain pans: Collect moisture, especially if clogged or uncleaned.
- Ductwork and filters: Dust buildup + moisture = mold habitat.
What the Research Says About Mold & UV
Studies from institutions like the CDC and Journal of Applied and Environmental Microbiology have shown that UV-C light can significantly reduce microbial contamination in HVAC systems—especially when used in hospitals and commercial buildings where cleanliness is crucial.
Results vary depending on exposure time and installation quality, but with proper setup, UV-C can reduce mold and bacterial growth by up to 90% on coils and interior surfaces.
Realistic Expectations: What UV Can and Can’t Do
UV light is powerful, but it’s not a miracle worker. Here’s a quick comparison:
| ✅ What UV Can Do | ⚠️ What UV Can’t Do |
|---|---|
| Kill mold on coils and exposed surfaces | Remove mold from hidden ductwork or walls |
| Prevent mold regrowth when left on 24/7 | Disinfect through dust, insulation, or buildup |
| Improve air quality and HVAC efficiency | Replace cleaning, maintenance, or filter changes |

Case Example: UV Light Made a Long-Term Difference
A homeowner in Arizona noticed a musty odor coming from their vents. A local HVAC technician inspected the system and discovered mold buildup on the evaporator coil and in the drain pan. They cleaned the affected components and installed a UV-C light directed at the coil.
Three months later, a follow-up inspection showed zero mold regrowth. The odor was gone, and the homeowner reported fewer respiratory issues in the house.
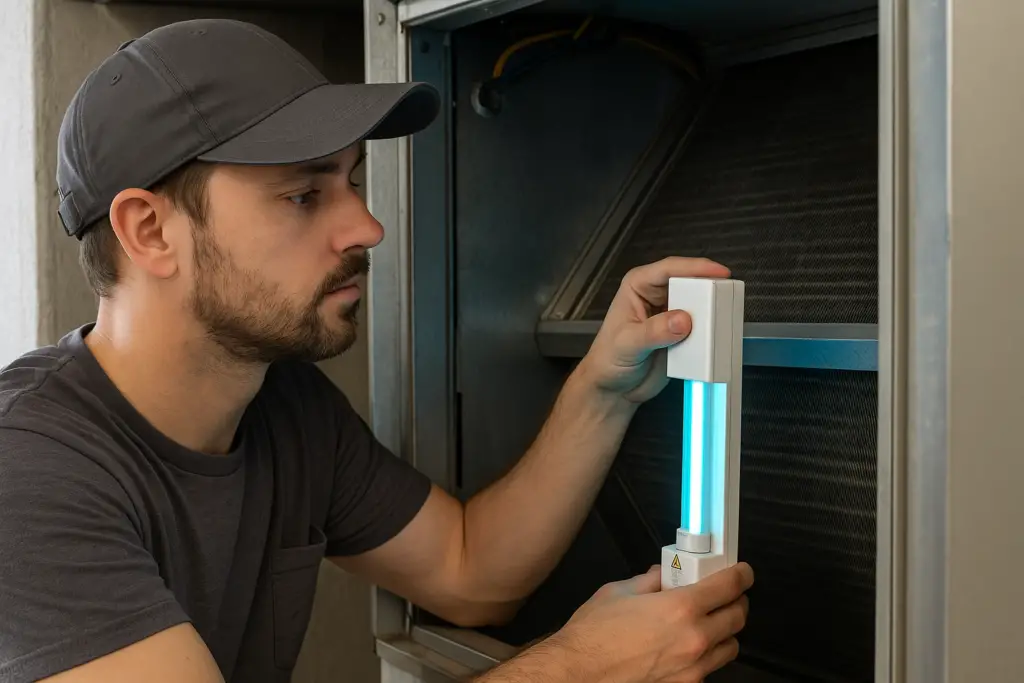
Best Practices to Maximize UV Effectiveness
UV systems only work if they’re installed and maintained properly. Here’s how to make sure you’re getting the most out of yours:
- Install near the evaporator coil—that’s the prime mold zone.
- Use a system rated for 24/7 operation—intermittent UV exposure is less effective.
- Keep the surfaces clean—dirt and debris block UV penetration.
- Change the bulb every 12 months—UV intensity fades over time.
- Consider dual-bulb systems—some cover both coil and air stream.
- Pair with routine filter changes and duct cleaning to maintain optimal airflow and hygiene.
Avoid These Mistakes When Using UV Light in HVAC
- Installing in the wrong location: Bulbs mounted far from the coil won’t be effective against mold.
- Not replacing bulbs regularly: Most UV-C bulbs lose effectiveness after 9–12 months even if they still glow.
- Skipping coil cleaning before install: UV can’t shine through grime or buildup—always clean first.
- Thinking UV replaces filters: UV only kills microorganisms. It doesn’t remove dust, allergens, or pet hair.
How to Choose the Right UV Light for Your System
Not all UV-C systems are created equal. Here’s what to look for:
- High-output bulbs: Especially important for large or high-humidity homes.
- Coil-targeted design: Units designed to shine directly on the evaporator coil are most effective.
- Continuous-operation support: Make sure your system is meant to run 24/7.
- Easy bulb replacement: Consider systems with accessible bulb access and affordable replacements.
- Warranty and support: Look for at least a one-year warranty and tech support availability.
FAQ: What People Ask About UV and Mold
Does UV light kill mold spores in the air?
Yes, but only if the spores pass directly through the UV light’s coverage area. Most systems are more effective on surface mold than airborne spores.
How long does it take UV light to kill mold?
It can take a few minutes to several hours depending on the intensity, distance, and exposure time. Continuous operation provides the best results.
Is UV light safe for HVAC systems?
Yes. UV systems are installed inside the air handler and do not emit radiation outside the HVAC cabinet. Just avoid looking at the bulb directly.
Can UV light damage HVAC components?
Not typically. When installed correctly, UV-C light does not harm metal, plastic, or wiring. However, prolonged direct exposure to certain plastics or filters may cause fading or brittleness over time—this is rare with modern systems.
Do UV lights help with allergies or asthma?
They can. By reducing mold, bacteria, and some airborne pathogens, UV lights can improve overall air quality. This may ease symptoms for people sensitive to microbial pollutants, though UV light doesn’t remove dust, pollen, or pet dander.
What maintenance does a UV system need?
The main task is replacing the bulb once a year. Even if it still glows, UV-C effectiveness fades after 9–12 months. It’s also smart to clean the surrounding area to keep dust from blocking the light.
Can I install a UV light in my HVAC system myself?
Some homeowners with experience can install coil-mounted UV kits, but professional installation is recommended. Proper placement, electrical safety, and UV shielding are important for safe and effective operation.
Final Thoughts: Is UV Light Worth It for Mold Control?
If mold is a concern in your home—or you simply want to keep your HVAC system cleaner—UV light is a strong long-term investment. It complements your air filter, reduces microbial buildup, and can improve your home’s overall air quality.
It’s not a mold remover, but it’s an excellent mold preventer when used correctly. Combined with proper maintenance, UV light can make a noticeable difference in comfort, odor control, and even health.
Next Step?
👉 Read: Pros and Cons of UV Light in HVAC. Is it Worth it?
UV Lights vs. UV Air Purifiers in Your HVAC: What’s the Difference and Which One Do You Need?
UV lights in HVAC systems kill mold and bacteria on internal coils, while UV air purifiers like the REME HALO clean the air circulating throughout your home. Understanding the differences helps homeowners choose the right solution for their air quality needs.
UV Lights vs. UV Air Purifiers in Your HVAC: What’s the Difference and Which One Do You Need?
Indoor air quality has become one of the top concerns for homeowners. Modern homes are tightly sealed for energy efficiency, but this also traps pollutants inside. HVAC systems are designed to circulate and condition air, but they can also spread allergens, bacteria, and mold spores throughout the home. Many homeowners consider upgrading their HVAC with either a UV light or a UV air purifier. While both use ultraviolet technology, they serve different purposes. This article explains what each system does, how they work, and which is right for your needs.
 What Causes Indoor Air Quality Problems?
 What Causes Indoor Air Quality Problems?
There are many common sources of indoor air contamination:
- Excess moisture inside HVAC equipment creates an environment for mold and mildew.
- Dust, pollen, pet dander, and airborne allergens cycle through ductwork continuously.
- Bacteria and viruses can travel through shared air spaces.
- Volatile organic compounds (VOCs) from cleaning products, paints, and furnishings linger in closed spaces.
- Odors from pets, cooking, smoke, and chemicals get trapped inside.
Each of these problems contributes to health concerns, especially for allergy and asthma sufferers. That’s why many homeowners turn to UV-based solutions to keep air fresher and healthier.
How Do HVAC UV Lights Work?
HVAC UV lights are installed directly inside the system, typically near the evaporator coil or drip pan. These components tend to collect moisture, which creates an ideal environment for microbial growth. The UV-C light emitted by these lamps damages the DNA of mold spores, bacteria, and viruses, preventing them from reproducing.
Real example: A homeowner in humid Alabama had ongoing issues with a mildew smell coming from their AC vents. Their HVAC technician installed a UV coil light, and within days the odor disappeared. After several months of use, follow-up service revealed no visible mold growth.
What Do UV Air Purifiers Like the REME HALO Do?
UV air purifiers go a step beyond surface disinfection. Systems like the REME HALO are installed inside the ductwork and clean the air as it passes by. The REME HALO combines UV-C light with ionization and plasma generation to break down and neutralize pollutants. These purifiers reduce not only bacteria and viruses, but also allergens, VOCs, and odors.
- Neutralizes germs and viruses in the air
- Breaks down chemicals and VOCs
- Reduces smoke, pet, and cooking odors
- Improves air quality for those with asthma or allergies
Real example: A family in Texas with multiple pets and allergy-prone children installed a REME HALO. Within two weeks they noticed fewer allergy symptoms, reduced pet odors, and better overall air freshness throughout the home.
Why Whole-House Air Purifiers Aren’t As Easy As They Sound
 Why Whole-House Air Purifiers Aren’t As Easy As They Sound
Many people start shopping for an air purifier with one goal in mind: find something that can clean the air throughout their entire house. It sounds simple—but it’s not. Most air purifiers are portable units designed to work in a single room. Even large-capacity models that claim to cover “open spaces” can only clean the air where they physically sit. If your home has multiple rooms, closed doors, or hallways, that purifier won’t reach very far.
Some homeowners try to solve this by buying multiple units—one for each room. But that gets expensive fast, not to mention noisy, bulky, and hard to maintain.
The Hidden Advantage of HVAC-Based Air Purification
If you already have a central HVAC system, there’s a much more efficient solution: a whole-house in-duct air purifier. These systems install directly into your HVAC ductwork—usually in the supply plenum—and clean the air as it circulates through the system. That means every time your AC or heater runs, it’s not just adjusting temperature—it’s distributing cleaner air to every room in your home.
This type of setup ensures that bedrooms, living spaces, bathrooms, and even rarely used areas all benefit from purified air—no extra machines, no noise, and no wasted space.
Why UV + Ion Air Purifiers Work on a Whole Other Level
While traditional air purifiers rely on filters to trap particles, UV ionization systems take a more proactive approach. Systems like the REME HALO combine UV-C light with ionization and hydro-peroxide plasma to actually neutralize airborne threats—including:
- Viruses and bacteria floating in your home’s air
- Mold spores that standard filters can miss
- Odors from pets, cooking, smoke, or chemicals
- Volatile organic compounds (VOCs) and airborne chemicals
Instead of pulling air through a filter and hoping everything gets caught, these systems actively send out oxidizers and charged ions into your ductwork and living spaces. That means contaminants are broken down mid-air—before you ever breathe them in.
It’s a major step up from passive filtration. And for people who want their whole home to smell cleaner, feel fresher, and reduce health triggers like allergies or sinus irritation, UV air purifiers offer an unbeatable level of protection.
h3>Key Problems Solved by Each System
The following table explains which common household air quality problems each type of UV solution is designed to address.
| Problem | Coil UV Light | UV Air Purifier |
|---|---|---|
| Mold inside HVAC | ✅ Excellent | ➖ Not primary purpose |
| Musty odors from vents | ✅ Often solves | ✅ Often solves |
| Allergy symptoms | ➖ Minimal impact | ✅ Significant relief |
| Pet or cooking odors | ➖ No effect | ✅ Strong reduction |
| Bacteria, germs, viruses | ➖ Surface only | ✅ Airborne and surface reduction |
| Airborne allergens | ➖ No effect | ✅ Strong reduction |
Safety Considerations
Some homeowners worry about the safety of UV technology. When installed by a professional, both coil UV lights and UV air purifiers are very safe. The UV light is confined inside your HVAC system and not exposed to people or pets. Modern devices like the REME HALO are designed to meet strict ozone safety standards and operate within EPA guidelines.
Installer tip: Always have UV systems installed by an experienced HVAC contractor to ensure the light is properly shielded and optimally placed for effectiveness.
Cost vs. Benefit Comparison
The following table breaks down the typical investment, coverage, and maintenance requirements for each type of system.
| System | Cost | Lifespan | Coverage | Maintenance |
|---|---|---|---|---|
| Coil UV Light | $150–$500 | 5+ years | Surface protection only | Replace bulb every 12 months |
| UV Air Purifier | $500–$1,200 | 5–10 years | Whole-house air treatment | Replace cell every 18–24 months |
Quick Recommendation Guide
If you’re still unsure which to choose, here’s a simple decision table to help you decide:
| Situation | Best Option |
|---|---|
| You live in a humid climate | Coil UV Light |
| You want to eliminate pet or cooking odors | UV Air Purifier |
| Your family has allergies or asthma | UV Air Purifier |
| You want the lowest upfront cost | Coil UV Light |
| You want maximum air quality protection | Both systems together |
Which One Is Right for You?
If mold prevention is your main concern, a coil UV light is affordable and effective. For whole-home odor control and allergy relief, a UV air purifier like the REME HALO delivers better results. Many homeowners successfully use both systems together for maximum protection and performance.
Final Thoughts
UV lights prevent mold growth and microbial buildup inside your HVAC system, helping to keep it clean and efficient. UV air purifiers take air quality a step further by neutralizing allergens, bacteria, viruses, odors, and VOCs throughout the entire home. The two systems complement each other well, and many HVAC professionals recommend installing both for homeowners serious about indoor air quality.
Frequently Asked Questions
What is the main difference between UV lights and UV air purifiers?
UV lights protect the HVAC coil from mold and bacteria buildup. UV air purifiers actively clean the air moving through your ducts, neutralizing germs, odors, and allergens.
Can I install both?
Yes. Many homeowners choose to use both a coil UV light and an air purifier for the best combined results in air quality and system cleanliness.
Are HVAC UV systems safe?
Yes, when professionally installed. Systems like the REME HALO meet safety and ozone guidelines set by regulatory agencies.
Do UV systems remove dust or pet hair?
No. UV systems target airborne microbes and odors. A high-quality HVAC filter is still needed to capture dust and larger particles.
How long do HVAC UV systems last?
Coil UV bulbs typically last about 12 months. Air purifier cells, like those in the REME HALO, generally last 18 to 24 months depending on use and conditions.

Questions to Ask Before Buying a UV Light for Your HVAC
Before buying a UV light for your HVAC system, ask about its compatibility with your unit, the type of UV technology used, maintenance needs, installation location, safety features, and whether it targets surface microbes, airborne contaminants, or both. Understanding these factors ensures you choose a system that actually improves your air quality without wasting money or risking safety.
Questions to Ask Before Buying a UV Light for Your HVAC
UV lights can be powerful tools for improving air quality and stopping mold—but not every system is the same. And not every home needs one. Asking the right questions before you buy can save you money, time, and frustration. Here are the essential things to consider—along with some real-world insights from people who’ve already installed them.
1. Is My HVAC System Compatible?
 1. Is My HVAC System Compatible?
Not all HVAC systems are designed to support a UV light. Some older systems may lack the physical space or access points needed to install one safely. Others may use plastic or coated components that UV light can damage over time.
Mini-case: One homeowner had a UV light installed, only to find out weeks later that it was discoloring a plastic housing near the coil. The unit had to be moved—doubling the installation cost.
Ask your HVAC tech: “Can my air handler safely support a UV light? Are there materials inside that UV might damage?”
It’s also worth confirming whether the system runs often enough for the UV light to be effective. If your HVAC only runs seasonally or for short bursts, the UV exposure might not be strong enough to kill microbes efficiently.
2. What Type of UV System Do I Need?
There are two primary types of UV systems: coil sterilization and air sterilization. Knowing the difference helps ensure you’re solving the right problem in your home.
Coil sterilization units sit near the evaporator coil and focus on killing mold and bacteria growing on wet surfaces. These are ideal for homes dealing with musty odors, known moisture issues, or visible mold in the system.
Air sterilization units are installed in the return or supply duct and treat the moving air itself. These systems are better for reducing airborne bacteria, viruses, and odors—but they need proper placement and airflow to work effectively.
Case in point: A homeowner in Arizona chose an air sterilizer thinking it would kill mold. The air was cleaner, but the mold on the coil kept coming back. They later installed a second UV light specifically for coil treatment—and finally got results.
Ask yourself: “Am I trying to stop mold at the source—or clean the air as it moves through my house?” Knowing your goal will help you (or your installer) pick the right system the first time.
3. Where Should the UV Light Be Installed?
 3. Where Should the UV Light Be Installed?
Placement makes a big difference in how well a UV system works. A poorly positioned UV light might do very little—while the right placement can make all the difference in air quality and mold control.
Example: One homeowner had their UV light placed too far from the evaporator coil. Months later, mold returned because the UV light wasn’t targeting the moist surface where spores were growing. A simple repositioning near the coil fixed the issue.
For coil sterilization, the UV light should shine directly on the evaporator coil and drip pan area—places where mold and biofilm like to grow. For air sterilization systems, placement in the supply or return plenum gives the light enough exposure time to treat the air before it enters living spaces.
Ask your installer: “Will this position give the UV light enough exposure time to be effective? Will it hit the areas most prone to microbial growth?” A few extra inches in the right direction can make a big impact.
4. How Much Maintenance Will It Need?
UV lights aren’t just plug-and-play forever. Like lightbulbs, they dim over time—even before they burn out. Most systems need the lamp replaced about once a year to remain effective. Some require cleaning, especially in dusty environments where particles can block UV output.
Case in point: A homeowner in a rural area installed a UV light and forgot about it. Two years later, the light was still on—but lab testing showed it had lost almost all its effectiveness. They hadn’t realized UV strength fades with age.
Ask the seller or installer how often the bulb needs to be replaced, whether it’s easy to access, and if there’s an indicator to alert you when it’s time. Some systems have built-in timers or replacement alerts, while others rely entirely on you remembering to change the lamp manually.
Ask before buying: “What’s the replacement schedule and cost? Will I get a reminder when it’s time to change the lamp?”
5. Is It Safe for My Home and Family?
 5. Is It Safe for My Home and Family?
UV light is powerful—and while that’s great for killing microbes, it also means it can be harmful if misused. Direct exposure to UV-C light can damage skin and eyes, so safety features and proper placement are critical.
Example: One technician recalled a service call where a homeowner had removed the cover to inspect their UV system—without turning it off. They experienced temporary eye irritation, similar to a sunburn. The system had no safety interlock to shut the bulb off automatically.
Look for systems with protective housings, safety switches, and manufacturer guidelines that prevent accidental exposure. Some even include viewing windows with filters so you can safely check if the lamp is on.
Ask the installer: “Does this system have automatic shutoff or protective shielding? Can it be safely serviced without direct exposure to the UV light?”
6. Should I Consider an Advanced UV Air Purifier Like REME HALO?
If you’re looking for more than just mold control, you might consider an advanced UV-based air purifier like the REME HALO. These systems combine UV-C light with other technologies such as ionization or hydrogen peroxide plasma to target a broader range of pollutants—including odors, airborne particles, and even viruses.
Unlike basic UV lights that target surfaces or duct air, the REME HALO and similar devices are designed to purify the air throughout your home continuously. They’re installed in the ductwork and operate automatically when your HVAC system runs.
Scenerio: A family dealing with allergies and lingering pet odors had tried everything from filters to portable purifiers. After installing a REME HALO, they noticed a significant improvement in both smell and breathing comfort within a few days.
Ask yourself: “Do I need basic mold control—or am I looking for an all-in-one indoor air solution?” While more expensive, a system like the REME HALO may be worth it for households with allergy concerns, pets, or higher air quality demands.
And because these units are installed directly in the ductwork, they treat the air as it’s being distributed throughout the entire house. Your HVAC system becomes more than just heating and cooling—it becomes the delivery system for whole-home air purification. No need for multiple standalone units or constant filter changes in every room. Just clean, treated air moving with every cycle.
Conclusion: Let Your HVAC Do More Than Just Heat and Cool
 Conclusion: Let Your HVAC Do More Than Just Heat and Cool
At its core, your HVAC system is already the one appliance in your home that moves air to every room. That makes it the perfect candidate for distributing clean, purified air—if it’s equipped with the right tools. Whether you opt for a simple UV light to stop mold on your coils or go all-in with an advanced system like the REME HALO, you’re turning your HVAC into a whole-house air purifier.
And unlike portable air purifiers that treat one room at a time, this approach works silently and continuously. Every time your system kicks on, it’s doing more than adjusting the temperature—it’s improving the air you breathe.
The key is asking the right questions before you buy. Make sure the unit is compatible, properly placed, maintained, and safe. From there, you can enjoy cleaner air, fewer allergens, and peace of mind knowing your system is working smarter—not just harder.
Frequently Asked Questions
- Can a UV light completely eliminate mold from my HVAC system?
- UV light is highly effective at preventing mold growth on surfaces like coils and drip pans, but it won’t clean existing buildup or reach every nook inside ductwork. It works best as a preventative measure.
- Will a UV light help with allergies?
- Yes. By reducing mold, bacteria, and other airborne irritants, UV lights can help ease allergy symptoms, especially when combined with a good HVAC filter.
- How long does a UV bulb last?
- Most UV-C bulbs need replacing about once a year, even if they’re still glowing. Their germ-killing power fades over time.
- Is it safe to install a UV light myself?
- It’s safer and more effective to have a professional install it. Poor placement or incorrect wiring can reduce effectiveness or expose you to UV radiation.
- What’s the difference between a UV coil cleaner and something like the REME HALO?
- Coil cleaners focus on preventing mold on surfaces inside your HVAC. Units like the REME HALO go further—actively purifying the air through ionization and plasma generation as it moves through your ducts.
- Will the UV light add ozone to my air?
- Some older or cheaper UV systems may produce trace amounts of ozone. Look for systems labeled “ozone-free” if you’re concerned, or ask your installer about ozone-safe models.

Do You Really Need a UV Light in Your HVAC System? Here’s How to Tell
The idea of killing germs and mold with UV light inside your HVAC system sounds like something out of science fiction—but it’s real, and it’s available for homeowners. UV-C lights are marketed as powerful tools to improve indoor air quality, eliminate odors, and keep your HVAC system clean.
But here’s the truth: UV light isn’t a magic cure-all, and it’s not right for every home.
If you’ve seen UV systems advertised and are wondering if they’re worth it, this article will help you decide. We’ll break down what these systems really do, when they’re most helpful, and when your money might be better spent elsewhere.
“A UV light in your HVAC system may be necessary if your home experiences mold growth, musty odors, or indoor air quality issues. These systems use UV-C light to kill mold, bacteria, and viruses that can grow inside your air handler and be circulated through your ductwork. They don’t replace filters but can reduce microbial contaminants and improve HVAC efficiency when installed correctly.”
Why Your HVAC System May Need a UV Light
 Why Your HVAC System May Need a UV Light
Some homes have mold problems you can see—and others have mold you don’t notice until you smell it in the air or feel it in your lungs. The HVAC system, as it turns out, can be a perfect place for that mold to grow.
Here’s why:
- Moisture is always present. During cooling cycles, warm air hits the cold evaporator coil, causing condensation. That moisture collects and drips into a drain pan—but even small blockages can cause standing water.
- It’s dark and enclosed. Mold doesn’t need sunlight—it thrives in the dark, and the inside of your air handler and ductwork is basically a year-round mold resort.
- There’s organic material to feed on. Dust, skin cells, pollen, and pet dander all get sucked into the system and settle onto coils and drain pans, feeding microbial growth.
When all three conditions are met, mold and bacteria start multiplying—and the HVAC system begins circulating spores throughout your home. One homeowner described it as “a dirty sock smell that just wouldn’t go away no matter how much we cleaned.” It turned out the problem wasn’t the house—it was the air system.
Then It Becomes a Delivery System
The trouble isn’t just mold growth—it’s the **spread**. Air moving over a contaminated coil picks up spores, and that air goes to every room with a vent. People often don’t realize it, but if the mold is in the HVAC, it’s *everywhere.*
UV lights are typically installed near the coil and drain pan to stop this cycle at the source. If installed properly, they help prevent the growth of mold and bacteria right where it starts.
Think of UV as a disinfectant—not a vacuum or filter.
Signs You Might Benefit from a UV Light in Your HVAC
 Signs You Might Benefit from a UV Light in Your HVAC
Sometimes it’s obvious that your home’s air could be cleaner. Other times, it’s subtle—just a faint odor or a cough that won’t go away. Here are some real-world situations where homeowners found UV lights made a noticeable difference:
- You smell mustiness when the HVAC kicks on.
If you’ve ever walked into your home and caught that “wet basement” smell—especially after the air conditioner starts—you might be smelling mold inside your system. One homeowner in Tennessee described it as “a musty whiff every time the air came on, like old gym clothes.” After installing a UV light above their coil, the smell was gone within a few days.
- Your home has a history of mold, moisture, or water damage.
Homes with basements, crawl spaces, or poor ventilation are often high-risk for mold. One couple in Florida had no idea mold had started growing on their HVAC coils until a technician opened it up and found a layer of black growth. A UV lamp helped stop further mold from forming and made their air feel noticeably fresher.
- Someone in your home has asthma or immune issues.
UV systems are often recommended for households with high-risk individuals. By neutralizing airborne microbes like bacteria and mold spores, UV light may help reduce triggers for allergies, asthma, or respiratory infections.
- You’re battling fine airborne particles or odors.
While UV doesn’t trap particles, advanced systems like the REME HALO use ionization to clump small particles together, making them easier for your filter to catch. This can help reduce odors, smoke, and invisible airborne dust.
- You want better long-term performance from your HVAC system.
Even if your air seems fine, microbial buildup on coils can silently drag down efficiency. One HVAC tech mentioned a client whose energy bill dropped after UV was installed—not because the light was magic, but because the coil was finally staying clean.
When a UV Light Might Not Be Necessary
On the flip side, there are situations where a UV light may not give you the results you’re hoping for. Here are a few examples where it may not be worth the investment:
- Your main problem is dust or pet hair—UV won’t fix that.
These are physical particles, and UV doesn’t remove them. You’ll get better results by upgrading your air filter to a high-efficiency MERV or HEPA option.
- You don’t have a central HVAC system.
If you use baseboard heaters, window AC units, or mini-splits, UV systems designed for ductwork won’t apply. Portable purifiers may be the better solution.
- Your HVAC is dry and has no mold history.
If a technician has checked and your coil is clean, with no sign of moisture buildup or mold, UV might be an unnecessary expense.
- You’re highly sensitive to ozone.
Some older or cheaper UV systems may emit trace amounts of ozone. If you have respiratory issues, be sure to choose ozone-free models—or skip UV altogether.
- You’re looking for a no-maintenance solution.
UV lights require annual bulb changes and occasional cleanings. If you want a “set it and forget it” fix, a passive filter system might better fit your lifestyle.
How UV Compares to Other Air Quality Solutions
UV lights are just one piece of the puzzle when it comes to cleaner indoor air. Here’s how they compare to other popular solutions homeowners use to tackle air quality issues:
| Solution | What It Targets | Coverage | Best For |
|---|---|---|---|
| UV Light | Germs, mold, viruses | Whole-house | Microbial control in ductwork |
| MERV/HEPA Filter | Dust, pollen, dander | Whole-house | Allergen and particle removal |
| Air Purifier | Particles, some odors | Single room | Bedrooms, offices |
| Dehumidifier | Moisture | Room or whole-home | Mold prevention, comfort |
| Ionizer | Particles, some odors | Room or whole-home | Boosts filter performance |
Final Thoughts: Should You Get a UV Light in Your HVAC System?
 Final Thoughts: Should You Get a UV Light in Your HVAC System?
By now, you’ve got a full picture—not just of what UV systems do, but who they really help. If you’ve noticed moldy smells, have family members with allergies, or just want to protect your system from microbial buildup, a UV light could be a smart next step.
That said, UV lights aren’t a silver bullet. They don’t filter dust. They don’t eliminate odors on their own. And they work best when combined with a good filter and proper maintenance.
One HVAC installer summed it up perfectly: “It’s not going to clean your whole house—but it’ll clean the part of the air system where most of the trouble starts.”
Bottom line: A UV system can be a valuable investment—but only when paired with good airflow, proper filtration, and a real need for microbial control.
Next step: Read the 8 smart questions to ask before buying a UV light for your HVAC
Quick Takeaway: Do You Need a UV Light in Your HVAC?
- Best for: Killing mold, bacteria, and viruses inside your HVAC system
- Won’t do: Remove dust, pet hair, or odors on its own
- Works well when: You’ve had mold problems or respiratory concerns
- Skip it if: You don’t have central air or mold issues
- Pro tip: Combine UV lights with high-quality filters for best results

How to Improve Indoor Air Quality for Seniors: A Guide for Family Caregivers
 Improving and maintaining high-quality indoor air is vital for senior home care. It is a well-known fact that as the human body ages, the immune system slowly deteriorates, so the elderly population is more sensitive to respiratory disorders, allergies, and other diseases arising from polluted air.
In this guide, you’ll find practical strategies for sorting through and applying what’s known about achieving the best indoor air quality for elderly home care.
1. Understanding the Importance of Indoor Air Quality for Seniors
The quality of the air inside a home has a profound impact on the health and well-being of seniors. As individuals age, their respiratory systems become more sensitive to pollutants, which can exacerbate conditions like asthma, chronic bronchitis, and even cardiovascular diseases.
Problems related to the indoor environment can cause additional hospital visits and reduced health. One must not underestimate how dust, mold, and even some chemicals in houses can be hazardous to older people.
In addition, as people advance in age, they spend most of their time indoors, particularly those with limited mobility. They are also more vulnerable to indoor air pollution than younger people because they spend much of their time indoors due to their jobs.
Studies have shown that indoor air quality can improve respiratory health, cognitive function, and the quality of life for seniors. When the abovementioned aspects are prioritized, caregivers are more likely to provide a healthier environment that will coincide with the well-being of their elderly family members.
2. When and why air quality is a Concern for Seniors
 2. When and why air quality is a Concern for Seniors
Smog also poses a risk to the elderly since they are highly susceptible to the effects of polluted air. They also found that in the spring and fall seasons, the pollen count increases, thus affecting allergy and respiratory problems for seniors. Winter further exposes one to indoor heating that circulates dust and other irritants, while summers increase humidity, encouraging mold formation. With every change in the seasons, there is always a different challenge regarding ensuring that the air quality in the indoor environment is good.
Another critical area of concern is that many buildings lack adequate ventilation systems. Residents of homes without proper ventilation face issues like accumulated carbon dioxide, persistent stale smells, and high levels of indoor contaminants. These risks can be avoided by opening the windows frequently, using exhaust fans, and maintaining proper HVAC systems. Also, the days when pollution is high, including when it is reported in weather broadcasts, means that the windows should be closed and air conditioning and air purifiers should be used to minimize the effects of indoor pollutant entry through windows on elderly persons. Knowing these specific triggers helps the caregivers to reduce or eradicate some aspects that contribute to the bad air quality in the seniors’ environments.
3. Identifying Common Indoor Air Pollutants
Knowledge and recognition of ordinary pollutants in indoor air are critical to systematically addressing the problem. These contaminants can significantly affect the conditions of elderly persons.
– Dust and Dust Mites: Dust mites can be found in areas such as bedding, upholstery, and carpet. They feed on shed skin cells and are more common in warm and humid conditions. Dust can also provoke allergies and asthma.
– Mold and Mildew: These fungi are found in areas with high humidity and poor air circulation, such as bathrooms and basements; the spores in their fruiting bodies pose health risks, such as respiratory system infections and allergic reactions.
– Volatile Organic Compounds (VOCs): Coming from home items like paints, cleaners, and recently purchased furniture, VOCs may bring about headaches, dizziness, or other complications with sustained exposure.
– Pet Dander: Pet dander is composed of small skin particles produced by cats, dogs, and other animals, and it may cause asthma and other respiratory problems.
– Tobacco Smoke: Another major air pollutant, tobacco smoke is a known source of thousands of chemicals that can, for instance, have detrimental effects on elderly people’s breathing if they have chronic diseases.
Thus, knowledge of these pollutants helps caregivers implement measures to capture their sources and minimize health risks in their vulnerable elderly wards.
4. The Impact of Humidity on Air Quality
 4. The Impact of Humidity on Air Quality
It is also important to maintain humidity levels since this significantly enhances the quality of air inside the house, especially for elderly individuals. Excess moisture leads to drawings that could encourage the development of molds and dust mites that cause allergic reactions and breathing complications. Mold spores pose considerable health risks, including sinus infections and worsening of asthmatic symptoms. For high humidity, make sure you have dehumidifiers and adequate ventilation to prevent moisture-concentrating areas like the bathroom or kitchen.
On the same note, a lack of humidity may also adversely affect individuals. Low humidity means dry mucous membranes, which makes an individual more vulnerable to respiratory diseases and causes a rough feeling on the skin and itching in the eyes. Using the humidifiers will make it easier to regulate the humidity level, which should not be high, especially in the winter, but not extremely low, negatively impacting the senior’s health. Caregivers should pay particular attention to using a hygrometer to check the humidity level frequently and intervene when required.
5. Seasonal Allergies vs. Indoor Pollutants
It is essential to differentiate between the two- namely, the allergies related to season change and the indoor pollutants – to manage the respiratory health challenges seniors are likely to develop. Pollen from trees, grass, and weeds can cause incidences of seasonal allergies and can easily find their way into a house through windows, doors, or even through someone’s clothes. These allergens commonly trigger sneezing, itching of the eyes, and nasal stuffiness. Some measures that may help prevent these impacts include closing windows during high pollen seasons and employing air cleaners with HEPA filters.
On the other hand, internal pollutants are from different sources within the house. In addition to the abovementioned sources, dust, pet dander, and volatile organic compounds from household cleaning agents and paints would affect the IAQ. While some allergies are known to occur only at specific times of the year, indoor pollutants can affect people most of the year. The best ways to keep away these indoor irritants include cleaning them routinely, using low VOC cleaning products, having proper ventilation, and making senior citizens’ homes safe and clean for living.
Making a clear distinction between these two kinds of triggers will help the caregivers devise better ways of protecting their elderly loved ones’ health.
6. Regular Cleaning and Maintenance
Cleaning is crucial in minimizing Indoor Air Pollutants, especially within homes that accommodate seniors. Paying particular attention to cleaning is another way to reduce allergens and irritants in a house. Some examples are vacuum cleaning, where a vacuum cleaner with a HEPA filter is used to clean the air because other vacuums miss tiny particles, and dusting, done using a damp cloth, ensuring that the dust does not float in the air being inhaled.
Another significant factor is how to avoid mold formations. General control methods include providing adequate cross-ventilation in humid areas, repairing damp sites, and using dehumidifiers. This includes appropriately using mold-killing solutions in cleaning the affected region to prevent mold spores from spreading further.
Residents with pets in their households should ensure that they bathe and groom the animals frequently to reduce the volume of pet dander known to cause allergies. Never allow pets in the bedroom or on furniture and bedding; minimizing contact with such irritants is also essential. Through these cleaning and maintenance practices, the caregivers can make the environment fit for seniors.
7. Improving Ventilation
This controls indoor pollution while providing older people with fresh air necessary for their respiratory systems. One relatively bland but highly effective measure is opening windows more often, for example, in fine weather. It enables fresh air to circulate while exhausting stale air, diluting indoor pollution levels.
Besides natural ventilation, mechanical exhaust fans in wet zones, including kitchens and bathrooms, are crucial. These fans also facilitate the elimination of moisture, which, if left on its own, can cause mold formation and aid in expelling cooking odors. Air exchangers provide a controlled means of maintaining indoor air quality as they continuously cycle fresh outdoor air inside the home.
Ventilation is needed to prevent the accumulation of airborne contaminants and provide a better environment for elderly people. Routine inspection and cleaning of ventilation systems play a significant role in improving indoor air quality.
8. Using Air Purifiers
 8. Using Air Purifiers
As pointed out earlier, air purifiers help improve air quality inside homes or offices by filtering out several impurities. While choosing an air purifier, consider the one with the HEPA filter more effective as it removes up to 99%. This optical system can focus particles down to 0.97% of the wavelength, or 3 microns, such as dust, pollen, pet dander, etc. For other additional features, one should look at the cleaners with activated carbon filters since they help eliminate bad smells and VOCs from the air.
Like any other equipment, air purifiers require proper maintenance to function efficiently. These procedures must be maintained constantly, like changing the filters as the manufacturer recommends to ensure the device runs optimally. It is also helpful to purchase a cleaner with a filter change indicator to make it easier to monitor maintenance periods. Through the adoption of air purifying systems in homes, caregivers can reduce the levels of airborne particles, hence enhancing the quality of the living conditions for seniors.
9. Choosing Low-VOC Products
Selecting low-VOC or VOC-free household products is a proactive step in reducing chemical pollutants and enhancing indoor air quality, especially for seniors. VOCs (volatile organic compounds) are emitted as gases from certain solids or liquids and can have adverse health effects. When redecorating, opt for water-based, low-VOC paints and finishes, which significantly reduce the release of harmful fumes compared to traditional options.
For cleaning, using natural or environmentally friendly products with less chemical effect on health is better. Such products utilize natural extracts from plants and exclude additives such as synthetic smells and colors, thus being safer for use indoors. Furthermore, select materials like solid wood or metal that spare you toxic paints and other materials used in composite timber and plastic products if procuring new furniture.
In this way, caregivers can intentionally decide on some aspects of their elderly family member’s life that would promote a healthier living situation.
10. Regular HVAC Maintenance
 10. Regular HVAC Maintenance
This is crucial because the cleanliness of your home through the air your HVAC system circulates is paramount, especially for senior citizens. Replacing filters in HVAC systems every 1-3 months is essential because they collect dirt, dust, pollen, and other particles contaminating the air. A clogged filter degrades efficiency and circulates air pollutants in the house.
It is also necessary to have the HVAC system serviced by professional technicians at least once every year. Technicians can examine and polish the system’s components and guarantee that it functions proficiently and attenuates and removes pollutants. Furthermore, it may be helpful to clean the ducts if dust accumulates or fuzzy mold formation occurs. They are instrumental in avoiding the dissemination of allergens and enhancing the air quality in the room.
Through these maintenance practices, guardians should be able to avoid the negative impacts of HVAC systems while ensuring seniors have healthier and more comfortable living conditions.
11. Educating Family Members and Caregivers
Educating all seniors’ caregivers about the significance of IAQ in achieving a healthy environment is crucial. Relatives and caretakers should be educated on the availability and impacts of indoor pollutants and ways to eliminate them. It is also essential to periodically check the home environment to note any future issues to be addressed.
Organizing IAQ sessions or workshops can ensure that attendees are equipped with practical knowledge about IAQ and remind them of the importance of clean air. Also, cleaning up, proper airing, and checking the air quality promote the general welfare of elderly family members. If caregivers remain alert and keep abreast of changes, they can ensure the seniors live in a safe and comfortable environment.
12. Monitoring Indoor Air Quality
Failure to assess IAQ frequently means that humans will not detect health hazards early enough and correct them on time. Some specific things that air quality monitors can offer include volatile organic compounds, particulate matter, and humidity data. These devices are especially helpful in identifying variations that might mean new problems are about to surface and taking quick action.
Professional testing periodically provides a better understanding of a home’s indoor air quality. To ensure comprehensive inspections, professionals can utilize sophisticated apparatus, including those used to detect mold, radon, or other concealed pollutants. Such an approach will help us guarantee that we address all the potential causes of indoor pollution, thereby creating better and safer living conditions for seniors.
With self-monitoring in addition to professional evaluations, caregivers can ensure that the IAQ remains in check throughout and the well-being of their elderly family members.
13. Establishing a Safe Living Space
Besides maintaining good air quality, the most crucial consideration when creating a safe environment for seniors in their homes, other issues must be considered to prevent falls and related accidents. Keeping showers, baths, tubs, and kitchens slippery-free requires non-slip mats, which make it easy to avoid falling. These mats offer surface traction and help older adults get a firm footing.
Another essential aspect to consider is the theater’s lighting problem. Make sure that all floors within residences, including the corridors and stairs, are adequately lit to avoid dangers such as falling. The most useful application of motion-sensor lights is in lighting pathways at any time of the day, especially at night.
One way to move around quickly and prevent accidents is to avoid accumulating unnecessary items on walkways. Eliminate some items, such as chairs, tables, or wires, that might hinder passage in some areas. Scheduling and tidying can inadvertently make the home a safe place for seniors, thus preventing any possible accidents and making them more independent.
14. Consulting Healthcare Providers
 14. Consulting Healthcare Providers
Regarding the respiratory system, elderly people need physicals with their healthcare physicians. When visiting such households, one should inquire about any anxiety relating to indoor air quality and its effects on health. Healthcare practitioners can counsel patients, advise on medication use, and have long-term diseases such as asthma or chronic bronchitis. If necessary, they can also refer clients to other practitioners, such as a pulmonologist.
Healthcare providers can recommend appropriate measures and vaccines to boost an individual’s respiratory health. As a result, caregivers should engage in active communication with healthcare teams and hence get complete care that may cater to both short-term and long-term health complications influenced by poor indoor air quality.
15. Implementing a Holistic Approach
Enhancing IAQ for seniors also necessitates an extensive, multifaceted strategy. First, it is recommended to implement a combination of measures, such as adherence to cleaning routines, proper airing, and air filtering devices. Moreover, attention should also be paid to humidity and low-VOC products to decrease levels of chemical pollutants.
These should be done in compliance with the updated standard health protocol and available modern technologies. Communicate with all household members to guarantee compliance with the protocols identified above. You can systematically evaluate your plan and adjust it as needed to help improve the quality of life for your senior relatives by providing a healthier and safer environment.
16. Staying Informed and Updated
Staying informed about advancements in air quality management and home care is vital for ensuring the best care for seniors. Engage in caregiver support groups to share experiences and learn from others. Subscribing to newsletters from health organizations and home care experts can provide up-to-date information on new techniques and products.
Furthermore, community workshops, webinars, and other activities may provide valuable information and quality practice. In this way, you will continually learn new and better ways of maintaining a healthy environment within spaces where your elderly relatives are present, keeping them as comfortable as possible.
Final Recommendations
Maintaining the quality of air inside the homes of elderly people is not a one-time effort but requires constant attention. Family caregivers must identify pollutants, practice cleanliness, enhance air circulation, use appropriate products, and implement suitable devices to achieve better living conditions. However, such improvements can only be sustained with ongoing supervision and increased awareness. Ultimately, the objective is to create a safe environment that enables seniors to feel at home. The following steps can be taken to enhance the air quality your loved one breathes: Today is the right time to act and improve their lives, specifically regarding health.
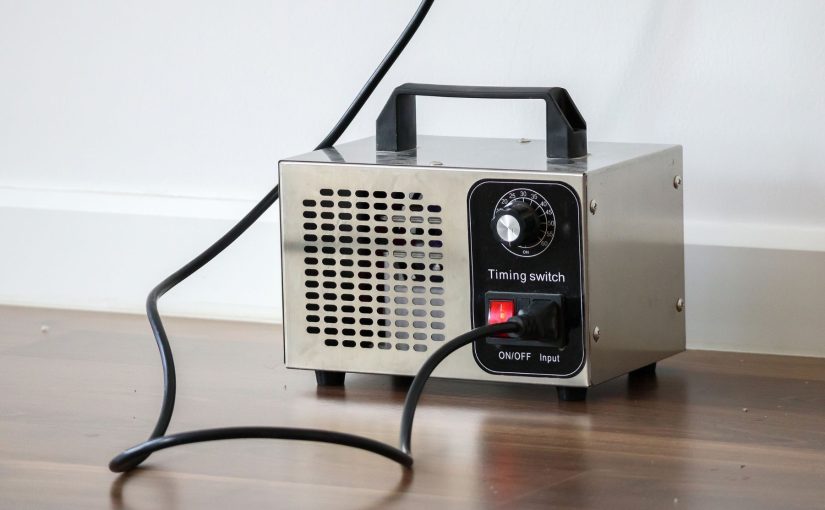
How Long to Wait After Using an Ozone Generator
How long to wait after using an ozone generator
It is recommended to wait at least 1-2 hours after running an ozone generator before re-entering the treated space. Ozone dissipates naturally over time, but allowing enough time for the ozone levels to drop to safe levels is important.
Recommend Waiting Times
Here are some general recommendations for waiting times after running an ozone generator:
| Space Type | Minimum Waiting Time |
|---|---|
| Small room (bathroom) | 1 hour |
| Medium room (bedroom) | 2 hours |
| Large open space | 4-6 hours |
| Whole house | 8-10 hours |
It’s best to verify ozone levels with an ozone monitor. Wait until the monitor reads 0.05 ppm or lower before re-entering. Extend the waiting time if higher levels persist.
Why You Should Wait
Ozone generators are effective at eliminating odors, mold, bacteria, and other contaminants through oxidation. However, ozone is a lung irritant at high concentrations. Prolonged exposure can cause chest pain, coughing, shortness of breath, and throat irritation. Allowing ozone levels to decrease before re-entry prevents these negative health effects.
Here are some key reasons why waiting is recommended:
- Allows ozone concentration to drop to safe levels – Government agencies suggest levels below 0.05 ppm.
- Reduces risk of breathing difficulties, coughing, and irritation.
- Prevents ozone buildup in enclosed spaces.
- Gives time for ozone to fully react with contaminants.
How Long Ozone Persists
Ozone has a short half-life and breaks down relatively quickly, especially with proper ventilation. Here are some general timelines:
- At very high concentrations (50+ ppm), ozone can persist for 1-2 days.
- At moderate concentrations (5-10 ppm), ozone lasts up to 10-12 hours.
- At low concentrations (0.1 ppm), ozone persists only 1-2 hours.
Ventilating the area speeds up ozone dissipation. Opening windows, running fans, or using HVAC systems can reduce ozone levels faster than just waiting for natural breakdown.

Safety Tips
Here are some additional tips for using an ozone generator safely:
- Never occupy a space during ozone generation.
- Post signs indicating ozone use.
- Run generators when area is unoccupied.
- Ventilate the space if possible.
- Start with the minimum runtime recommended.
- Check ozone levels with a monitor before re-entry.
Taking the proper precautions allows ozone generators to be used effectively while avoiding potential hazards.
Frequently Asked Questions
Why can ozone be dangerous?
Ozone is a lung irritant at high concentrations. Prolonged exposure can cause chest pain, coughing, shortness of breath, and throat irritation. Ozone generators produce high levels during use.
How long does ozone last in a house?
In a whole house, ozone can persist at concerning levels for 8-10 hours after running a generator. Ozone breaks down fastest with proper ventilation.
Will ozone damage my possessions?
High ozone levels can degrade rubber, fabric, and artwork. Limiting runtime and direct exposure helps reduce damage.
What is a safe ozone level?
Government agencies suggest ozone levels should be kept below 0.05 ppm. Extended exposure above this can cause health issues.
Should I ventilate after using ozone?
Yes, ventilating spaces after ozone use speeds up dissipation. This allows safe re-entry faster. Open windows, use fans, or run HVAC.
Can ozone permanently remove odors?
Ozone is very effective at permanently eliminating odors, mold, bacteria and viruses when used properly.
Is ozone harmful to pets?
Ozone can be harmful to pets at high levels. Pets should be removed from the home during ozone generation.
For more information, see the EPA’s guide to ozone generators.

Whole-House Steam Humidifiers: Benefits and Considerations
What is a Whole House Steam Humidifier?
A steam humidifier is a specialized type of whole-house humidifier that integrates directly into a home’s HVAC ductwork.
True to its name, it employs a steam-generation technique by boiling water to produce steam. This steam is then efficiently distributed throughout the entire house via the duct system, effectively increasing the humidity levels across all rooms.
This method not only ensures a uniform distribution of moisture but also provides precise control over the indoor humidity levels, making it an ideal solution for maintaining optimal indoor air quality and comfort throughout your home.
Benefits of using a steam humidifier:
Steam humidifiers offer a wide array of advantages over other types of humidifiers like evaporative and ultrasonic models, especially in the context of whole-house humidification.
However, a key benefit that truly sets steam humidifiers apart and boosts their popularity is their water boiling process. By heating water to create steam, these humidifiers naturally purify the water, significantly reducing the presence of mineral dust and eliminating germs.
This feature not only ensures a more consistent and efficient distribution of humidity throughout large areas but also provides a cleaner, healthier air quality, making steam humidifiers a preferred choice for maintaining optimal indoor comfort and health.
Types of steam humidifiers:
| Type | Description |
|---|---|
| Console humidifiers | Free-standing units with an internal reservoir, heating element, and fan to distribute steam. |
| Electrode humidifiers | Use electrodes in the water that boil the water to produce steam. |
| Canister humidifiers | Portable units with a removable water tank. |

| Feature | Steam Humidifier | Evaporative Humidifier | Ultrasonic Humidifier |
|---|---|---|---|
| Humidity Control | High precision | Moderate | Varies |
| Coverage | Whole house | Single room to whole house | Single room |
| Water Purification | Boiling process | Wick filter | None |
| Maintenance Frequency | Lower | Higher | Moderate |
| Operation Noise | Quiet | Can be noisy | Very quiet |
| Mineral Dust Production | None | Possible | Possible |
| Ideal Use | Large, integrated systems | Individual rooms or smaller homes | Individual rooms |
Steam humidifiers excel in large-scale applications, offering precise control and efficient performance without the drawbacks of mineral dust or frequent maintenance. Their quiet operation and ability to integrate into existing HVAC systems make them an ideal choice for comprehensive home humidification solutions.
Who can benefit from a steam humidifier?
A steam humidifier, particularly the whole-house variety that integrates with a home’s HVAC system, is best suited for specific circumstances where its unique advantages can be fully leveraged:
- Large Homes or Spaces: Given its capacity to distribute moisture evenly throughout extensive areas, a steam humidifier is ideal for larger homes where maintaining consistent humidity levels in every room is challenging.
- High Demand for Precise Humidity Control: In environments where maintaining an exact humidity level is crucial, such as homes with sensitive woodwork, artwork, or musical instruments, the precise control offered by steam humidifiers is invaluable.
- Cold Climates with Heavy Heating Use: In areas where the heating system is frequently used, indoor air can become extremely dry. Steam humidifiers can effectively counteract this by integrating with the heating system to provide necessary moisture.
- Health-Related Needs: For households with occupants who have severe respiratory issues, allergies, or skin conditions aggravated by dry air, the clean and consistent moisture output of a steam humidifier can provide significant relief.
- Integration with Smart Home Systems: For homeowners who prioritize smart home technology and seek seamless integration with existing HVAC systems for centralized control, steam humidifiers are an excellent fit due to their compatibility and efficiency.
- Areas with Hard Water: The boiling process of steam humidifiers can help minimize issues related to mineral buildup, making them a suitable option in regions with hard water, where other types of humidifiers might struggle or require frequent maintenance.
In these scenarios, the unique features of a steam humidifier—such as its ability to provide rapid, consistent, and controlled humidification over large areas—make it an optimal choice for effective whole-house humidity management.
Is it true that steam humidifiers are the best for avoiding the dangers of humidifiers mold and bacteria?
Like we briefly touched on before, there are some advantages to steam humidifiers when it comes to avoiding mold and bacteria, but they are not completely immune to these issues:
Steam humidifiers boil water, which can help kill mold spores and bacteria that might be in the water. However, this is only effective if the water reservoirs are cleaned regularly.
Steam humidifiers don’t require wicks or filters that can trap mineral deposits and microbes. However, the steam outlet and any surfaces the steam touches can still allow mold growth if not cleaned.
Steam humidifiers add dry steam to the air rather than cool mist, which is less likely to promote surface condensation that can lead to mold.
However, steam humidifiers still require proper maintenance to prevent mold and bacteria:
1.The water reservoir should be cleaned regularly with a disinfectant to kill any mold or bacteria.
2.Any surfaces the steam comes into contact with should be cleaned to prevent microbial growth.
Steam humidifiers, like other types, can spread microbes in the air if the water reservoir contains any contaminants. Always use clean water.
Are Steam Whole House Humidifiers better at avoiding mold and bacteria than the other types of whole house humidifiers?
Yes, in general steam humidifiers are better at avoiding mold and bacteria growth compared to other types of whole house humidifiers:
1.Evaporative humidifiers require wicks and filters that can promote mold growth if not cleaned regularly. The standing water is also prone to bacterial growth.
2.Ultrasonic and impeller humidifiers produce cool mists that can condense on surfaces and promote mold.
By contrast, steam humidifiers boil the water, killing many microbes. And they don’t require wicks or filters.
However, steam humidifiers are not foolproof:
If not cleaned regularly, mineral deposits can accumulate in the water reservoir and provide an environment for microbial growth.
Steam can condense on humidifier surfaces, allowing mold if not cleaned.
Adding steam to air can make dust particles and allergens airborne.
So while steam humidifiers have an advantage, proper maintenance is still crucial
Do You Need A Boiler Present?
Steam humidifiers do have higher energy demands compared to other types of humidifiers, which can make them more expensive to operate, especially if a boiler is not already present.
Here are some factors to consider regarding the costs of steam humidifiers:
Steam humidifiers require heating water to boiling temperatures, which uses more electricity than cool mist options. This can drive up energy bills.
Installing a steam humidifier without an existing boiler/furnace can require running new steam lines, condensed water returns, and installing a water heater to generate steam. This significantly increases upfront costs.
Without a boiler, standalone electric steam humidifier units are available, but energy costs may still be high depending on humidification needs.
Ongoing costs are higher as mineral deposits in hard water can cause scaling in steam humidifiers, requiring frequent maintenance and part replacement.
However, in a large home a steam humidifier may be the only option capable of properly humidifying the whole space. Their higher output can justify the costs.
In summary, for homes without an existing steam system/boiler, the costs of installing and operating a steam humidifier are often prohibitive.
Cool mist and evaporative options are more affordable.
But steam systems make sense for larger homes if the initial investment can be accommodated. As with any system, considering long term costs and benefits is advisable.
FAQ
How do steam humidifiers increase humidity?
Steam humidifiers boil water in a reservoir to produce water vapor or steam. This steam is dispersed into the air through a built-in fan or existing HVAC system ducts. As the steam evaporates in the air, it raises the humidity level.
What maintenance is required for steam humidifiers?
To avoid mineral deposits and microbial growth, steam humidifiers require:
– Daily water changes
– Regular cleaning/disinfecting of tanks
– Descaling agents to remove mineral deposits
– Replacement of filters, wicks, and gaskets
How often do steam humidifier filters need replacement?
Most manufacturers recommend replacing steam humidifier filters every 1-2 months of use. Hard water and frequent operation may require more frequent filter replacements.
Can steam humidifiers lead to mold growth?
Yes, steam humidifiers can promote mold growth if not properly maintained. Mold can grow in mineral deposits or on surfaces where steam condenses. Proper cleaning and disinfecting of tanks, filters, and surfaces is essential.
Are steam humidifiers safe for pets?
Steam humidifiers are generally safe for pets as long as hot surfaces are out of reach to avoid burns. The steam itself is not hazardous. Proper maintenance is key to avoid mold and bacteria that could pose a health risk.
How often should the water tank be cleaned in a steam humidifier?
The water tank or reservoir in a steam humidifier should be drained, cleaned and disinfected daily to help prevent mineral deposits and bacteria growth. Weekly deep cleanings are also recommended.
Can I use a steam humidifier in a bedroom?
Yes, steam humidifiers can be used in bedrooms, but precautions should be taken. Avoid very hot steam emissions. Place the unit far from beds and aim steam away from sleeping areas. Monitor humidity levels to avoid condensation.
Are steam humidifiers energy efficient?
No, steam humidifiers require boiling water so they typically use more energy than other types of humidifiers. Their energy efficiency can be improved by insulating steam lines, proper sizing, and using energy efficient models.
Does water quality affect a steam humidifier?
Yes, hard water with high mineral content can cause scale buildup in steam humidifiers. This requires more frequent maintenance. Using filtered or distilled water can help reduce deposits.
How can I prevent white dust from my steam humidifier?
White dust is caused by mineral deposits from hard water. Change water daily, use distilled or filtered water, clean scale buildup regularly, and replace filters as needed to prevent white dust.
Can I install a steam humidifier myself?
Steam humidifier installation is complex, especially if steam lines need to be run. Hiring a qualified HVAC technician is highly recommended unless you have expertise in steam system installation.

Basement Window Air Conditioning- What are the Options?
Solutions for Basement window air conditioning
Basement air conditioning options include portable AC units, window AC units, and ductless mini-split systems, each providing efficient cooling by utilizing refrigerant cycles to transfer heat from the interior to the exterior.
For integrated solutions, central air systems can be extended to basements, using ductwork to circulate cool air, optimizing thermal exchange through a centralized compressor and evaporator system.
Main Options for Window AC in Basement
| AC Type | Cooling Capacity (BTUs) | Installation Complexity | Noise Level (dB) | Features |
|---|---|---|---|---|
| Portable AC | 5,000 – 14,000 | Low | 50 – 65 | Mobility, dehumidification, no permanent installation |
| Evaporative Air Cooler | Not measured in BTUs | Low | 40 – 60 | Adds humidity, energy-efficient, best in dry climates |
| Ductless Mini-Split | 9,000 – 36,000 | Moderate to High | 19 – 34 | Quiet operation, efficient, no ductwork required |
| Central AC Extension | Varies by system | High | Varies by system | Integrated with existing HVAC, consistent cooling |
Introduction
Putting a window air conditioner in the basement seems like it would be easy proposition. Go down to the local hardware store, buy a window AC, pop it in the window, and call it a day.
But as it turns out, basement window air conditioners are not exactly an item you can find very easily, if at all.
What’s more is the issue of the window being one of the only ways to ventilate the basement and the fact that basements tend to be a high concentration zone of airborne molds and bacteria.
Not exactly something you want recycling through your air conditioner and in the air you breathe.
And this..
Having something obstructing the only opening in and out of the basement in case of a fire blocking the door is another issue you have to consider when you’re talking about using window there is a air conditioning point in the basement.
So what are the cooling options for a basement?

What is the Best way to air condition a basement?
Consider this..
Basements, being that they are underground are usually not that prone to excessive temperatures.
And in most cases suffer from being stuffy from the high level of humidity and musty atmosphere created by the level of toxins associated with moldy basements.
And even if you could find a window air conditioner that would fit in a hobbit window, you would still have the problem of the air conditioner recirculating the moldy room air.
The point is..
The comfort level in the basement might very well be more of a case of ventilation and dehumidification.
1. Portable air conditioner
This is the easiest alternative to a window air conditioner is a Portable AC. Its because portable air conditioners and window air conditioners are basically the same thing.
The only difference is, one sits in a window and exhaust outside. The other one is meant to be more portable and a hose to exhaust from. Yet the hose still needs to have a window to exhaust too.
Since basement windows or Hobbit Windows as they are also called are typically narrow, attaching the hose from a portable AC is an obvious alternative to a window AC.
Some augmentation and DIY ingenuity will probably be needed to outfit the window to make a sealed opening for the hose.
2. Mini split air conditioner.
A mini split air conditioner is also a perfect alternative to a window air conditioner in the basement because you just need a wall to place it.
The whole unit is like a miniature central heat and air system that cools and heats inside and and a separate compressor that sits outside.
The price of a mini split system maybe a little more than a portable AC but in the end, probably worth it.
Not only for the superior cooling and heating capacity, but also for the finished look.
A tidy looking ac unit compared to a unit on wheels that has a bulky looking hose. You would be much happier with the look of a mini split system.
The installation of a mini split system is is a little more tricky. It requires some through the wall hole making. And some connecting that a lot of people may not be too comfortable trying themselves. A heating and air professional can be brought into handle this.
3.Ventless AC
A ventless air conditioner is another way of saying Evaporative cooler. Also called the swamp cooler.
Though it might seem like a great idea when you first hear it because it doesn’t require any type of venting, putting in the ventless cooler in the basement is actually riddled with problems.
First
The first issue is, they require water. Lots of it.
That means a permanent hookup or carrying a lot of water down stairs. Over and over.
Second.
The basement is already a problem area for excessive humidity.
Placing a swamp cooler in a basement will only add to the problem and help exasperate the issues with mold and bacteria.
Thirdly
Evaporative coolers aren’t very effective in areas with high humidity.
Exception:
There is always exceptions to the rule. If you already have a ventilation and dehumidifier system in place, a portable evaporator cooler could be a great option for helping cool down the basement.
4. New HVAC zone
 4. New HVAC zone
If you’re home is already outfitted with central heat and air, then there is the possibility that your unit has enough power to set up a new zone to your basement.
Running vents off of your already existing system is a great way to get cooling to your basement.
But remember that just adding a couple of more ducts and vents it’s not necessarily going to suffice.
You are going to need a professional to come in and set up a new zone for your basement in order to get even cooling in the basement and not diminish the cooling in another area.
5. DIY basement window air conditioning
If you already have a window air conditioner that you were trying to figure out how to use in the basement, then you already know that just putting the air conditioner in the room with you is not going to work.
If you haven’t tried it, here is the reason.
Window air conditioners exhaust heat out the back side.
Just placing a window air conditioner in the room with you will create cooling out of the face, but create heat out of the back.
So basically canceling each other out.
But…
if you had a way of engineering something DIY style, you could use the window air conditioner as long as you had a way venting the heat expelled from the rear of the AC.
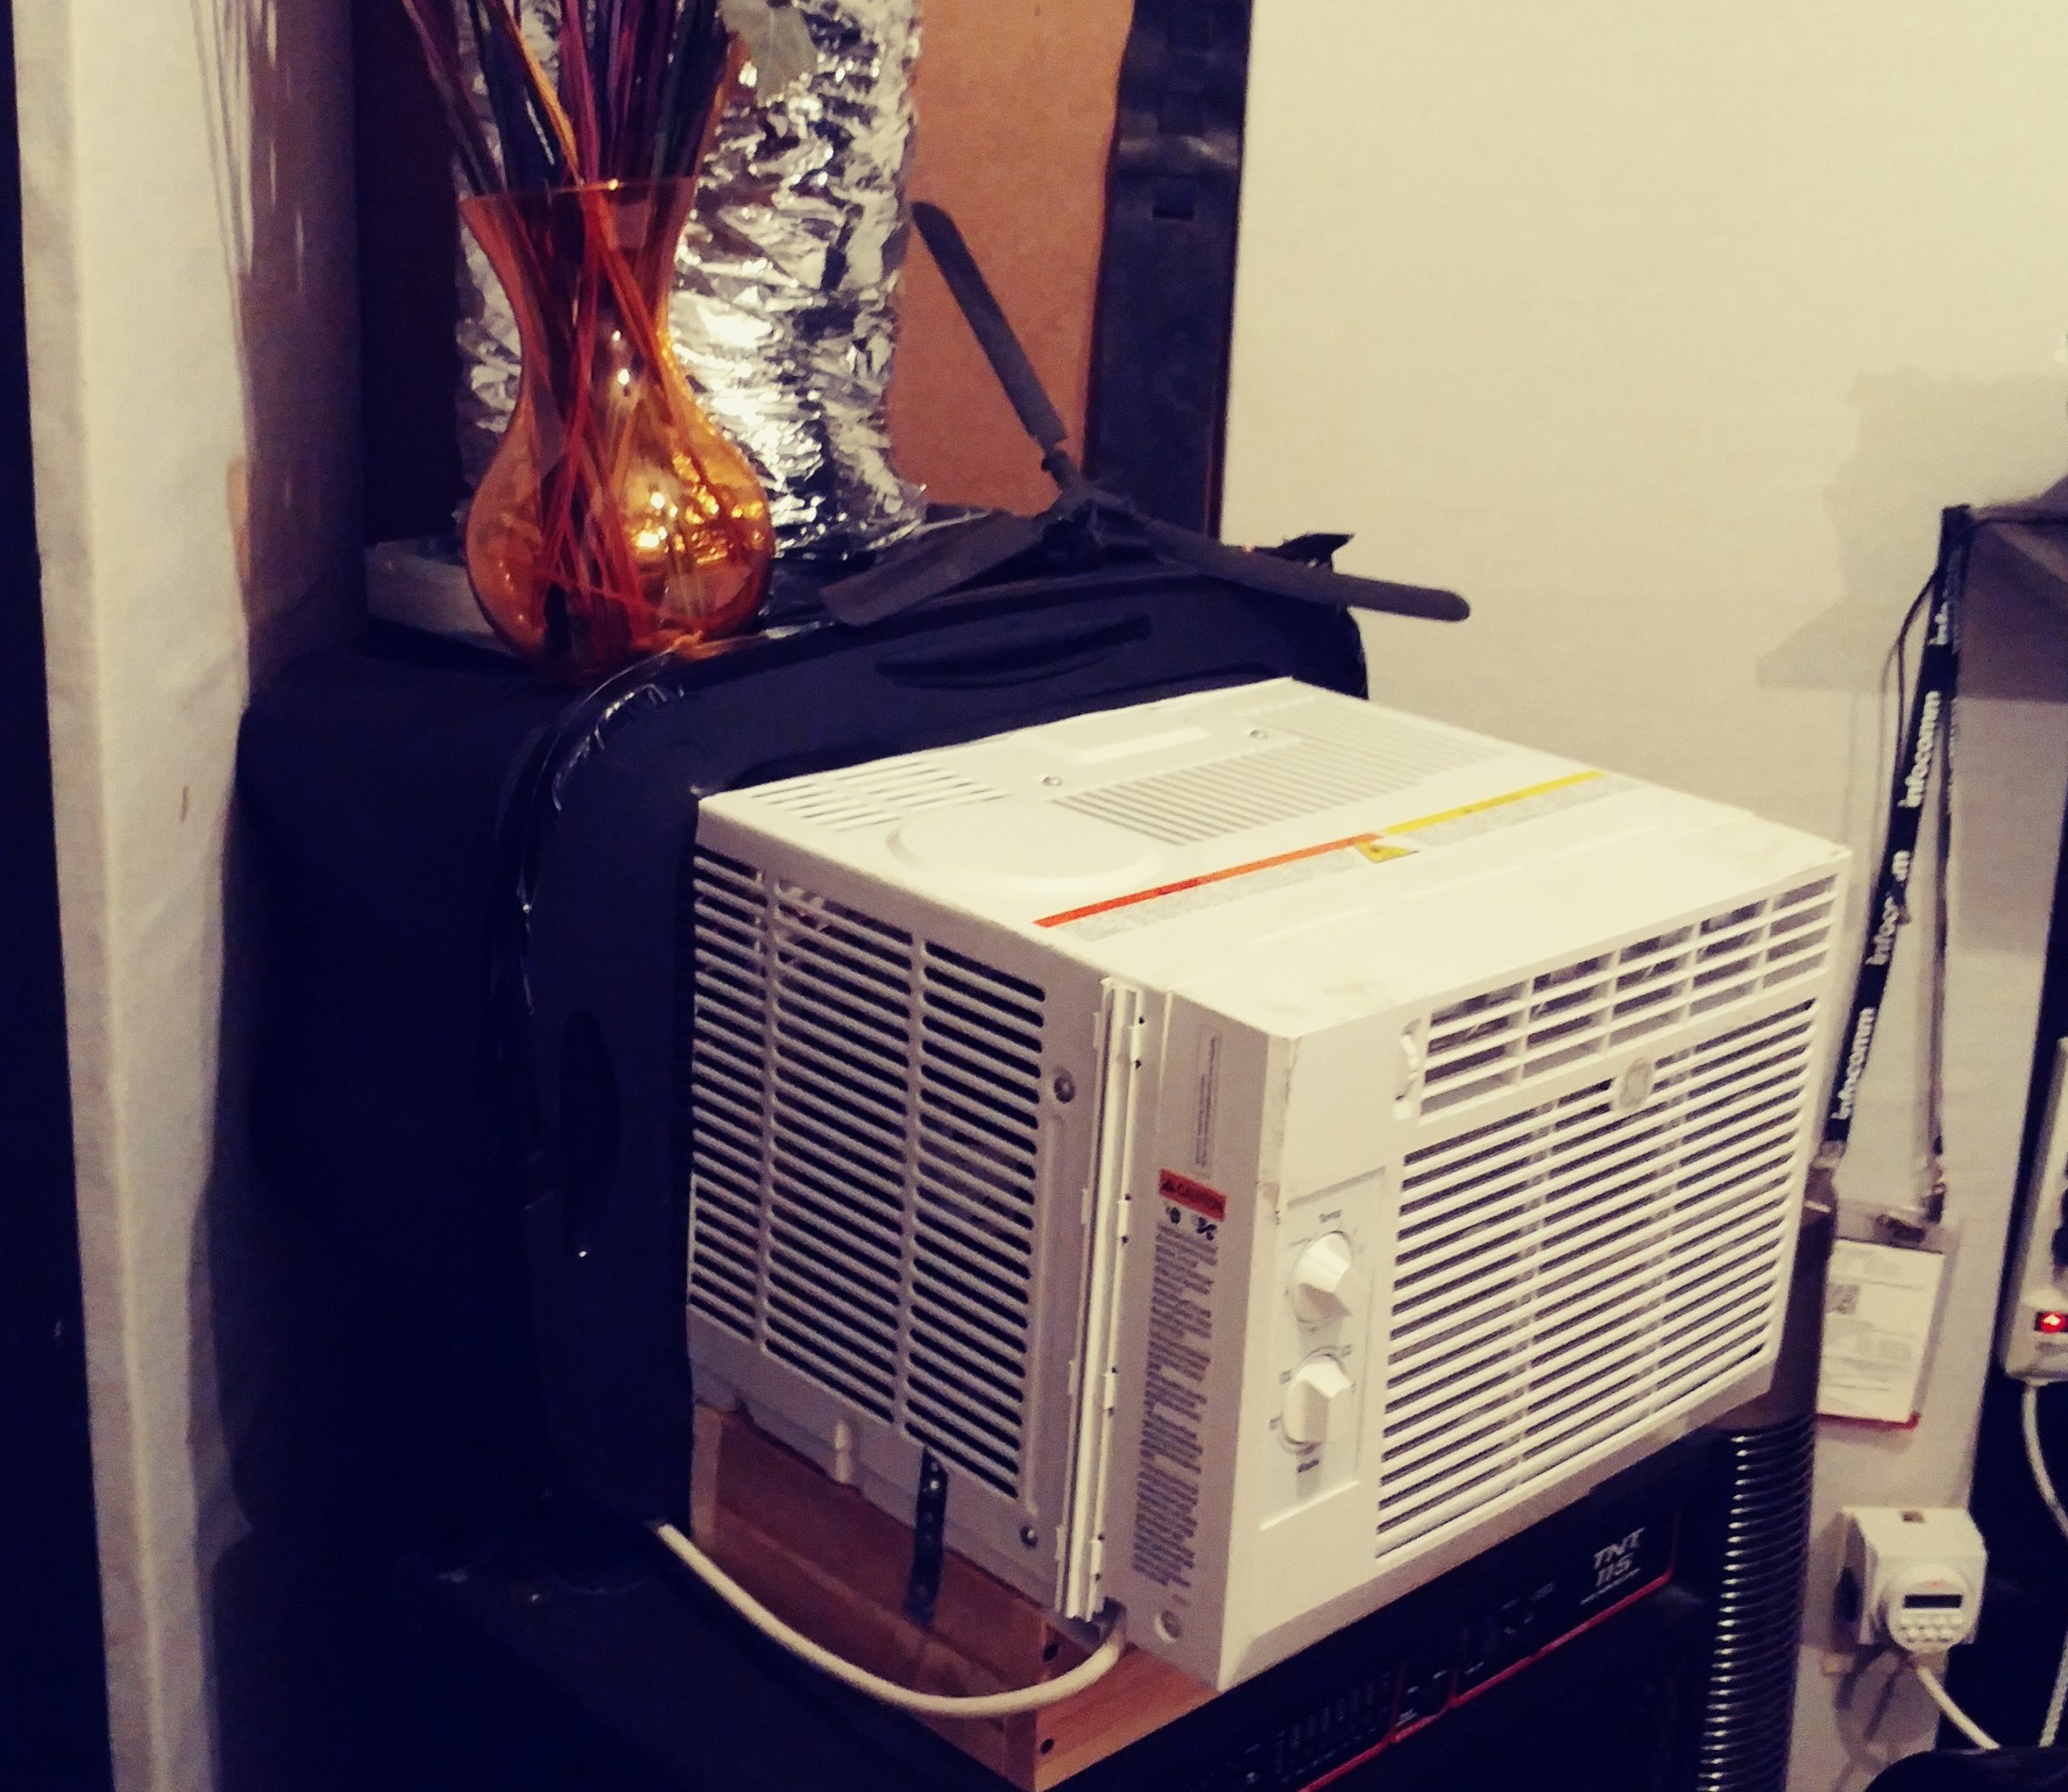
Here’s an example of a do-it-yourself window air conditioner turned mobile that could work in the basement as long as you have a hobbit window handy.
Here’s a more detailed look at it.
The whole idea is to take a large storage tub complete with lid and exhaust the heat from the air conditioner into the storage container which is ducted into the small Hobbit basement window.
Though it’s not the prettiest, it can be utilized and would work well for basements that are primarily used as shops, crafting rooms, so forth.
And one of the advantages is that refrigerated air conditioners, be it window or portable, dehumidify as part of the cooling process.
And since basements are notorious for high humidity, having a refrigerated air like a portable or a DIY window air conditioner can be very beneficial.
Wrap up
The ideal of putting a window air conditioner in your basement get shot down pretty quickly when you find out that they’re or actually very few if any window ACS that will actually accommodate the small basement window.
But if you are willing to think outside of the box, there is more than one way to skin a cat.
In this article we shared a few ideals on how to use existing products like ventilation fans and mini split air conditioning units as well as portable ACs to get air conditioning to your basement.
We also spoke about the possibility of using your window AC inside the basement but only adding a DIY twist to it.
Whether you are the DIY type or whether you are looking for something that is much nicer then you can get out of a do-it-yourself project, we hope that the suggestions we presented have sparked some of your own ideals to get air conditioning into your basement.

Do I Need a Humidifier or Dehumidifier for a Stuffy Nose?
Stuffy Nose Solutions: Choosing Between a Humidifier and Dehumidifier

When dealing with a stuffy nose, the choice between a humidifier and a dehumidifier hinges on your home’s current humidity levels.
A humidifier is beneficial in adding moisture to the air when indoor humidity is below the optimal range of 40-60%, often during dry winter months or in arid climates.
Conversely, a dehumidifier is useful for reducing moisture in overly humid conditions, which can be common in hot, damp climates or during rainy seasons, to mitigate allergens like dust mites and mold that thrive in high humidity and can exacerbate nasal congestion.
Here’s a table to help you decide:
| Condition | Humidity Level | Recommended Device | Reason |
|---|---|---|---|
| Dry Indoor Air | Below 40% | Humidifier | To add moisture and alleviate dryness-induced stuffiness |
| Excessively Humid Air | Above 60% | Dehumidifier | To reduce moisture and control allergens causing congestion |
Do you have a stuffy nose? Is Congestion stopping you from thinking great thoughts? Oh the humanity… or is it the humidity?
The humidity outside and inside seems to have a lot to do with a lot of things. But what things? That’s not always too clear.
Stuffy Nose Dilemma: To Humidify or Dehumidify?
It depends.
Is the humidity in your home too high or too low?
A humidifier is to add humidity to a room or space when the relative humidity is too low.
A dehumidifier extracts humidity from the air when the humidity level is too high.
Another way to put it..
Is it winter outside and the house is dried out from the heater being on?
Or is it hot and humid outside and you’ve got a frizzy hairdo to go with your stuffy nose?
Stuffy Noses can happen when the humidity is too high and when the humidity is too low.
Dry air can cause you to feel stopped up and humid air can also cause cold-like symptoms because of dust mites and mold spores, along with other allergens.
What Should the Humidity be Set at?
According to NIH “The majority of adverse health effects caused by relative humidity would be minimized by maintaining indoor levels between 40 and 60%”.
So if your hygrometer is sitting at 50%, the relative humidity in your home is good.
But if you’re below 40%, using a humidifier to add moisture back into the air is the device that will help you correct your humidity and hopefully get you breathing through your nose better again.
If the relative humidity according to your hygrometer is sitting above the 60% mark, then your stuffiness may be due to allergens and dust mites which can be found in the air, when the humidity is too high.
Keeping your Humidity Copacetic (steady as she goes)

Humidity levels inside your home can often be corrected by doing a few things to keep the good in and stop the bad from getting in.
Excessive Humidity
Windows and doors are an easy place to start. Moisture can find its way indoors through the smallest of cracks. And when your windows have not been resealed for a long time, excessive humidity around the windows can cause the seals to warp and rot.
Ceiling of the windows with some caulking and weather stripping can help even out your relative humidity.
Extraction fans or another easy fix.
Those houses come equipped with extraction fans in the bathroom and kitchen and some even have them in the washroom.
Extraction fans are fairly inexpensive and can be put into the ceiling quickly.
Anytime you’re cooking with boiling water or taking a steamy shower or just washing the clothes, using your extraction fans will pull moisture out of the house and into the Attic.
Leaking pipes?
Other sources of humidity in the house can be coming from places or things more undesirable.
For instance if you have plumbing problems or a broken pipe that is leaking inside the house, you are going to be experiencing excessive humidity especially in the area where the pipe is broken.
Leaks not only cause humidity, they cause mold. And mold that has gone unchecked for very long can turn into a big problem fast.
And if you have mold allergies, you may have discovered why you were suffering with a stuffy nose in the process.
Water under the house.
Any water that gets underneath the house can cause humidification to rise from under the floor. This can also be a source of mold and affect your air quality to the point of suffering from allergy symptoms.
Sometimes water under the house can be corrected by stopping any type of ravine that has been maybe etched out by watering the grass. Putting a barrier in front of the water runoff will help it to keep from running beneath your home.
Crawl space encapsulation is a big process that entails putting a plastic barrier between the ground and your house.
Broken and stopped up gutters can also direct water to flow beneath the house.
Fixing these items can often keep the humidity down inside of your home.
Run the air conditioner.
Many times, we forget that the air conditioner works as a dehumidifier to reduce moisture in the air as it cools the air down.
Most modern air conditioners have a dehumidifier setting ready available so that you don’t have to have the cool setting running at the same time.
Basement Dampness
Basements tend to be damp and humid by nature. Since the walls are typically concrete that are built against the moist ground, moisture has a way of working itself into the basement through the concrete.
Sealing up any cracks in the concrete wall is a must to keep moisture out.
The excessive humidity in the basement makes it a less than desirable spot to hang out or sleep. The air quality in the basement can also be responsible for allergy symptoms.
Low Humidity Remedies
Some of the easiest low humidity remedies for your home can be found in the same place that you’re trying to keep the humidity out of in the hot and humid season.
Shower
One of the easiest ways to add some humidity back into your room is to take a long hot shower and leave the doors open. That will allow the steam to migrate into the adjoining rooms as well.
Taking more baths than showers?
Leaving the bathwater in the bath after you bathed will help humidify the area around the bathroom as well.
Dry air pulls humidity from anywhere I can. That’s why dry and cracking skin is such a huge symptom of low humidity.
Cups of water around the house.
Simply leaving some containers of water open around the house can help alleviate some of the dry air. But remember stagnant water can develop bacteria fairly quickly and cause other types of problems. So don’t fill up a 5 gallon bucket so you don’t have to mess with it later.
Boiling water.
This is an old trick I remember from growing up. Mom always had water simmering and boiling in the kitchen and on the heater vents that used to be part of the floor back when.
She often put Vicks and other essential oils in the water to disseminate throughout the house.
Leave the washroom door open.
This may be a little bit on the iffy side if you have any type of allergies to detergents that can make it into your airstream if you leave the washroom door open.
But if you don’t, leaving the washroom door open while you’re washing clothes can invite humidity into the surrounding area.
Leave the dishwasher.
Another one is as simple as leaving the bathwater. Let the dishwater sit after you’re done washing the pots and pans and let the water naturally condense into your Air.H
 Recap.
Should you use a humidifier or a dehumidifier when you have a stuffy nose?
The answer depends on whether humidity is too low or too high at the moment.
Low humidity can cause raw stuffy noses, where high humidity can be full of dust mites and bacteria that equates to having a stuffy nose.
A hygrometer is an inexpensive tool that can measure your humidity and tell you exactly or near exactly what your relative humidity is sitting at.
If it is below 40%, then your air is too dry and you need a humidifier to raise the moisture level.
If the humidity is above the 60% mark, then you need a dehumidifier to reduce the humidity.
And the humidifiers and dehumidifiers can be awesome tools, they are not always needed.
There are many things you can do around the house to lower and raise your humidity without purchasing any type of device.
Shutting the bathroom door or leaving the bathroom door open depending on the season is an easy way to add and diminish some of the humidity in the house.