Do You Really Need a UV Light in Your HVAC System? Here’s How to Tell

The idea of killing germs and mold with UV light inside your HVAC system sounds like something out of science fiction—but it’s real, and it’s available for homeowners. UV-C lights are marketed as powerful tools to improve indoor air quality, eliminate odors, and keep your HVAC system clean.

🎯 Read the full guide here:

Pros and Cons of UV Light in HVAC – Are the Benefits Worth the Cost?

But here’s the truth: UV light isn’t a magic cure-all, and it’s not right for every home.

If you’ve seen UV systems advertised and are wondering if they’re worth it, this article will help you decide. We’ll break down what these systems really do, when they’re most helpful, and when your money might be better spent elsewhere.

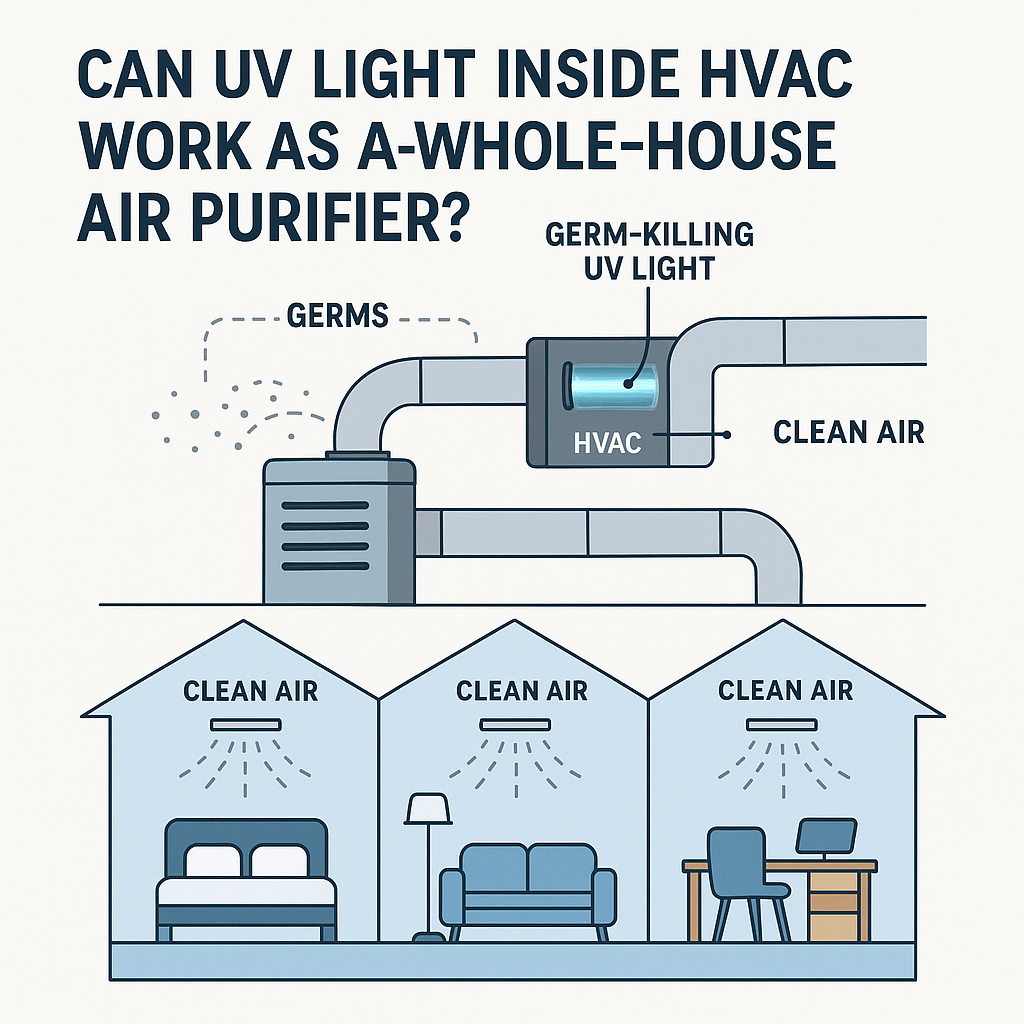
A UV light in your HVAC system may be necessary if your home experiences mold growth, musty odors, or indoor air quality issues. These systems use UV-C light to kill mold, bacteria, and viruses that can grow inside your air handler and be circulated through your ductwork. They don’t replace filters but can reduce microbial contaminants and improve HVAC efficiency when installed correctly.”

If you’re comparing different types of systems, see how UV lights differ from UV air purifiers before you decide which fits your home.

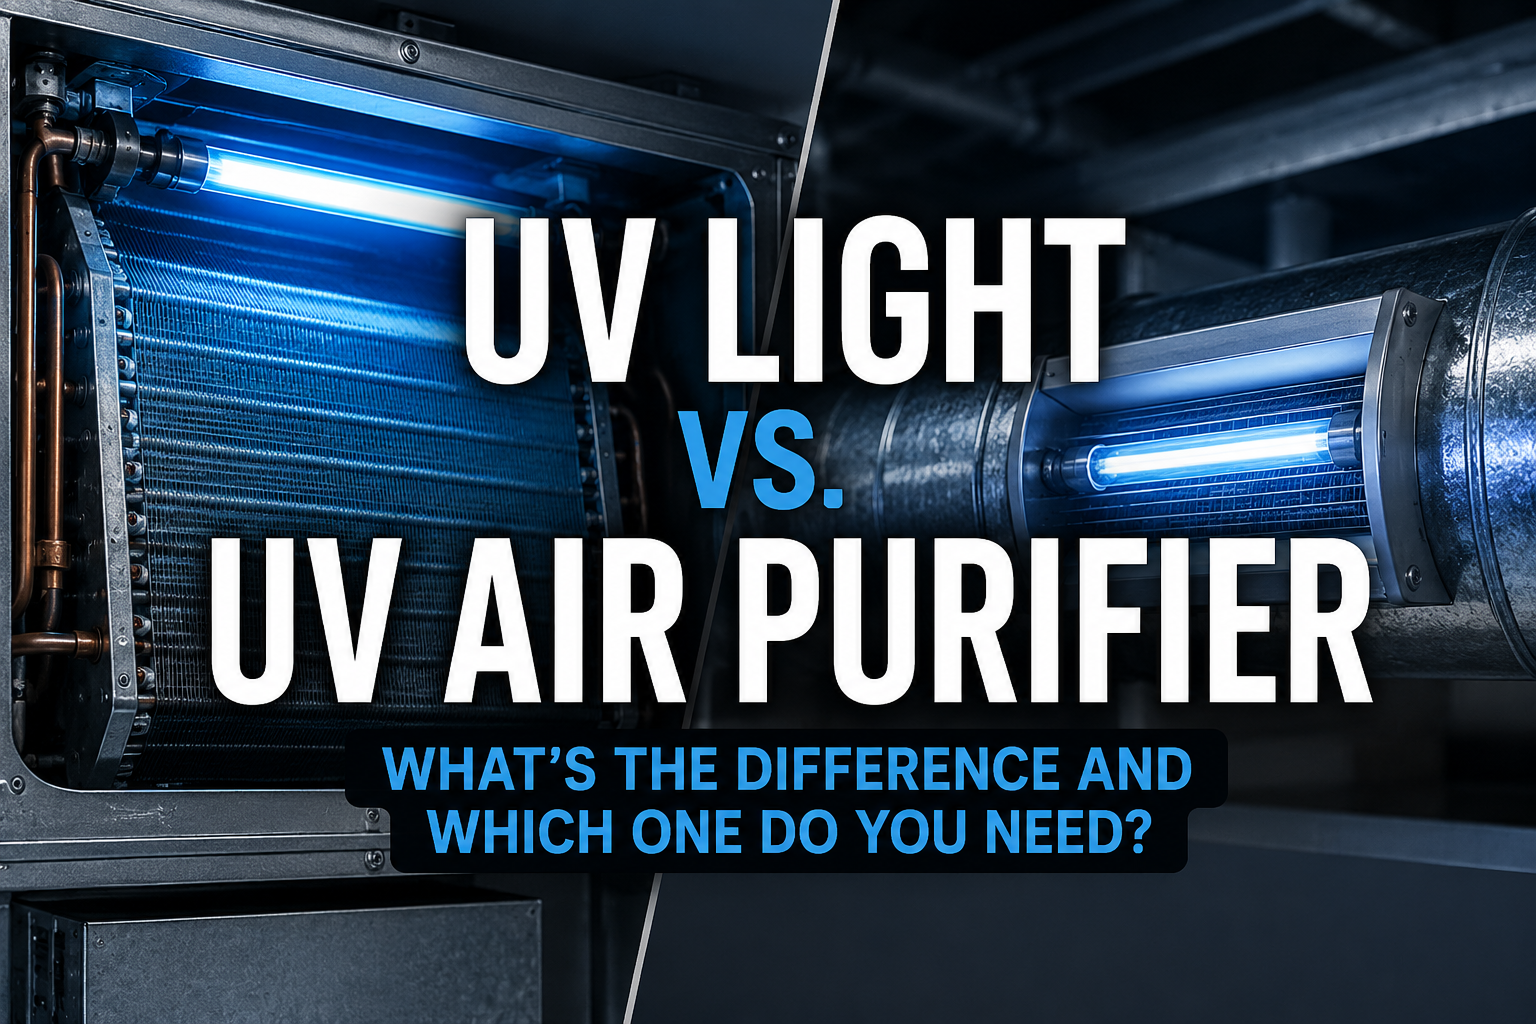
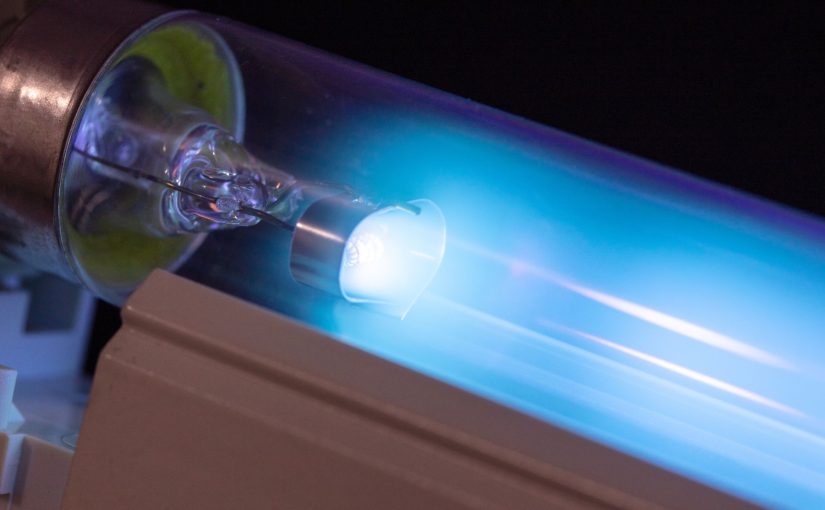
A bright purple and Blue UV light.Why Your HVAC System May Need a UV Light

Some homes have mold problems you can see—and others have mold you don’t notice until you smell it in the air or feel it in your lungs. The HVAC system, as it turns out, can be a perfect place for that mold to grow.

Here’s why:

  • Moisture is always present. During cooling cycles, warm air hits the cold evaporator coil, causing condensation. That moisture collects and drips into a drain pan—but even small blockages can cause standing water.
  • It’s dark and enclosed. Mold doesn’t need sunlight—it thrives in the dark, and the inside of your air handler and ductwork is basically a year-round mold resort.
  • There’s organic material to feed on. Dust, skin cells, pollen, and pet dander all get sucked into the system and settle onto coils and drain pans, feeding microbial growth.

When all three conditions are met, mold and bacteria start multiplying—and the HVAC system begins circulating spores throughout your home. One homeowner described it as “a dirty sock smell that just wouldn’t go away no matter how much we cleaned.” It turned out the problem wasn’t the house—it was the air system.

Then It Becomes a Delivery System

The trouble isn’t just mold growth—it’s the **spread**. Air moving over a contaminated coil picks up spores, and that air goes to every room with a vent. People often don’t realize it, but if the mold is in the HVAC, it’s *everywhere.*

UV lights are typically installed near the coil and drain pan to stop this cycle at the source. If installed properly, they help prevent the growth of mold and bacteria right where it starts.

For a deeper look at how UV light actually destroys mold and bacteria inside HVAC systems, see our mold control guide here.

Think of UV as a disinfectant—not a vacuum or filter.

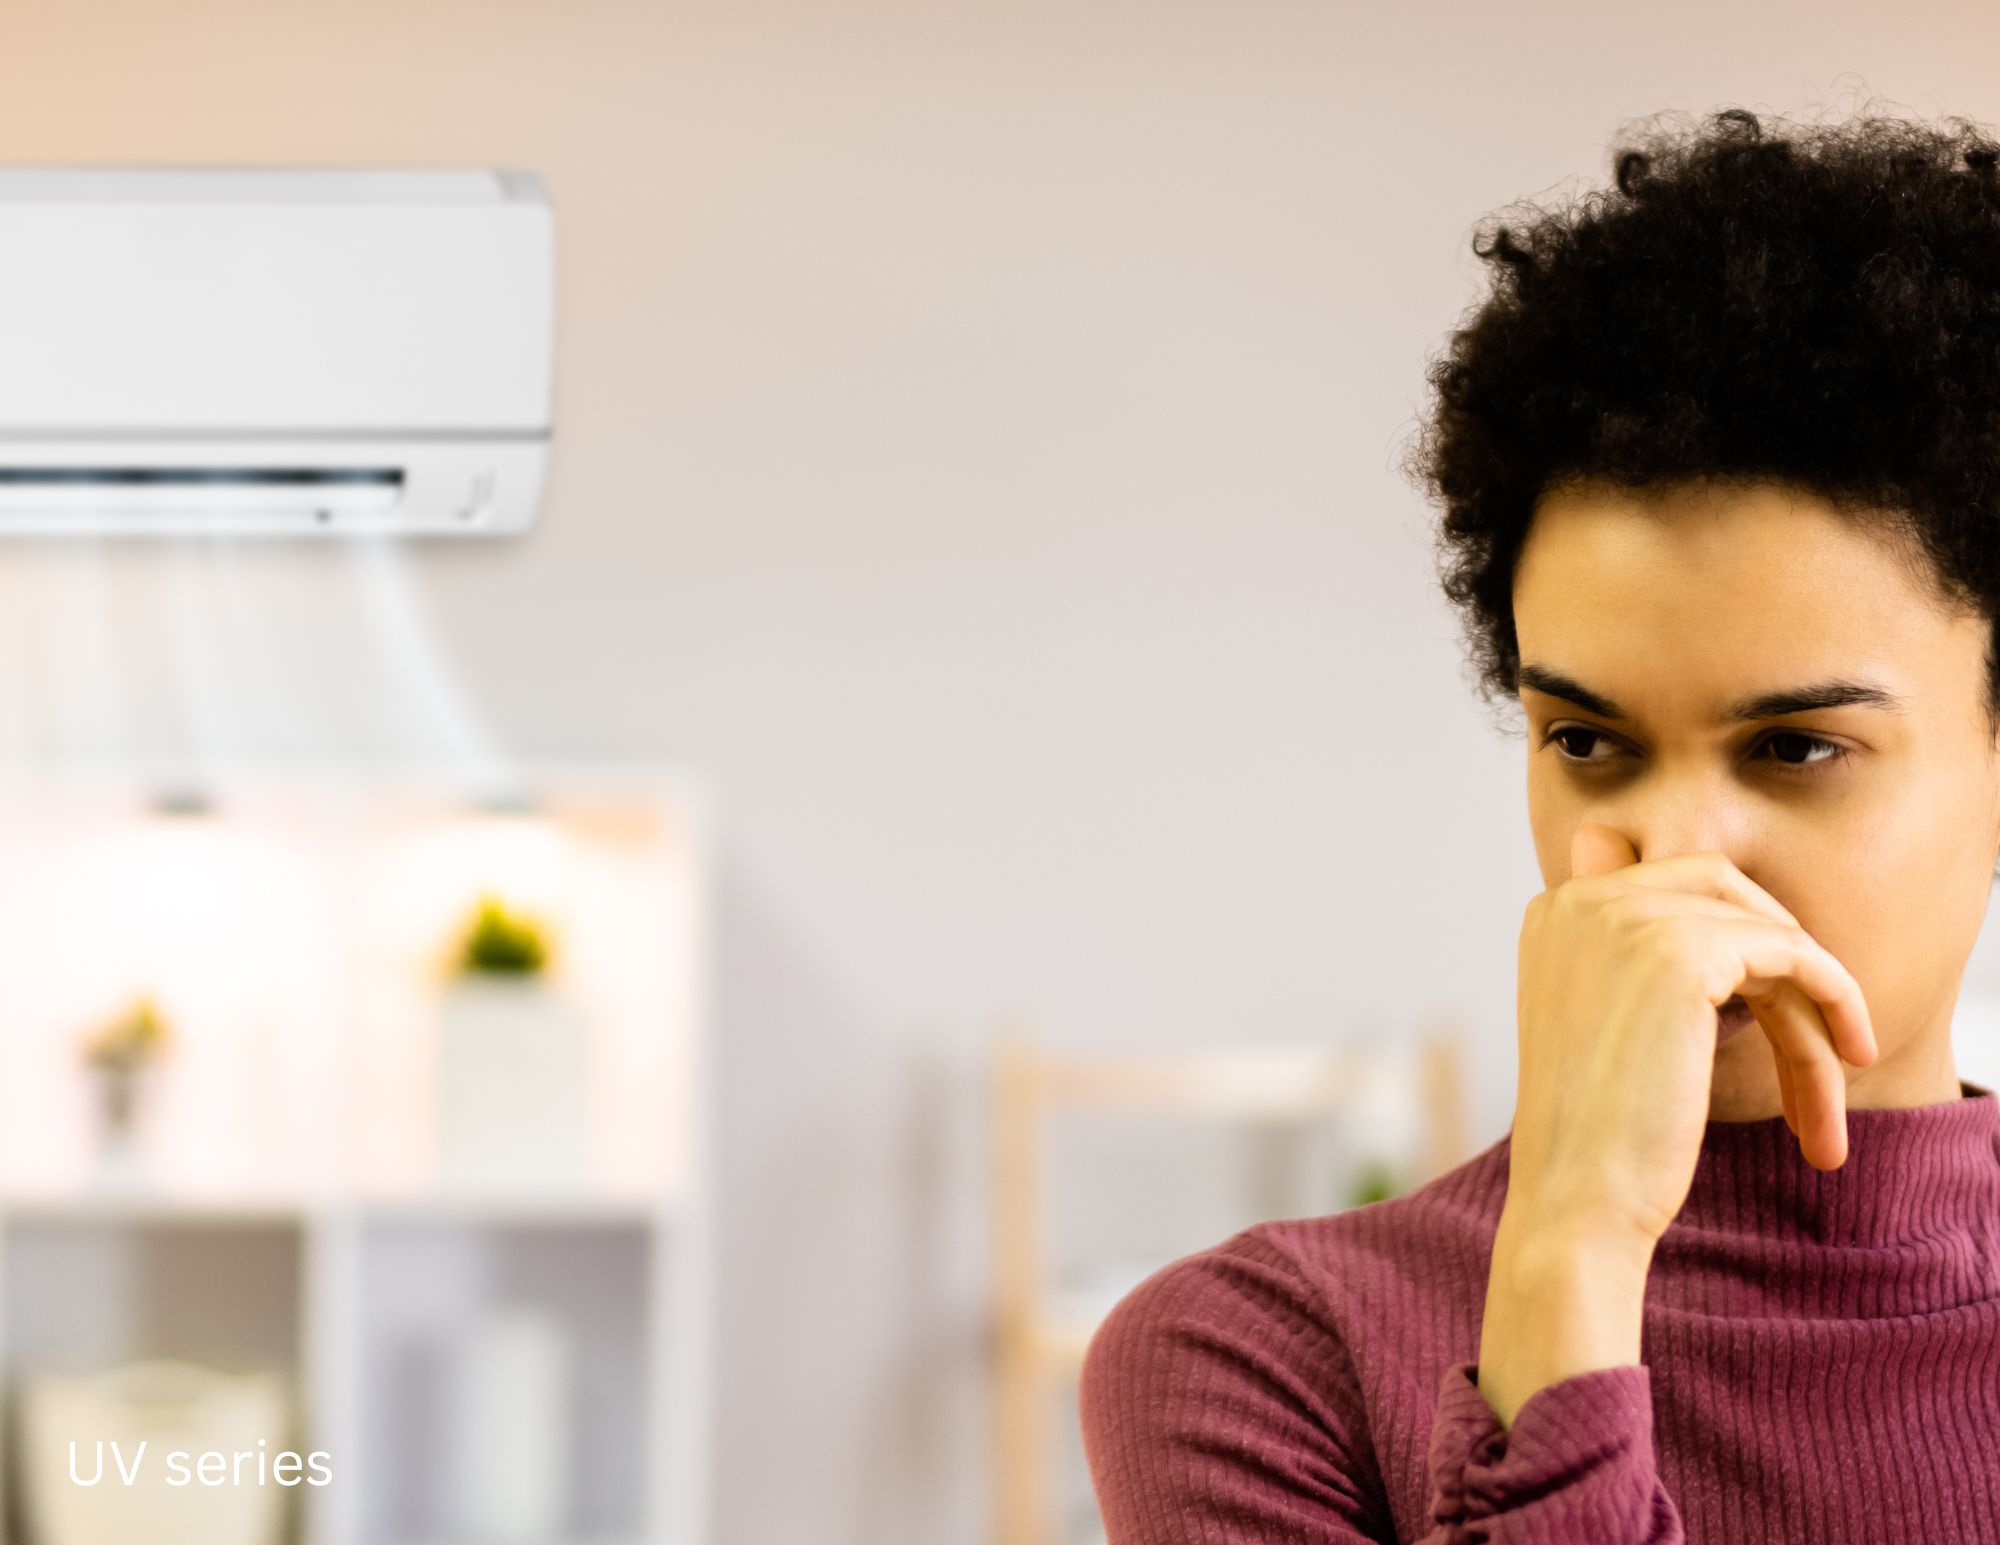
A girl sneezing because of dirty air coming from the AC.Signs You Might Benefit from a UV Light in Your HVAC

Sometimes it’s obvious that your home’s air could be cleaner. Other times, it’s subtle—just a faint odor or a cough that won’t go away. Here are some real-world situations where homeowners found UV lights made a noticeable difference:

  • You smell mustiness when the HVAC kicks on.

If you’ve ever walked into your home and caught that “wet basement” smell—especially after the air conditioner starts—you might be smelling mold inside your system. One homeowner in Tennessee described it as “a musty whiff every time the air came on, like old gym clothes.” After installing a UV light above their coil, the smell was gone within a few days.

  • Your home has a history of mold, moisture, or water damage.

Homes with basements, crawl spaces, or poor ventilation are often high-risk for mold. One couple in Florida had no idea mold had started growing on their HVAC coils until a technician opened it up and found a layer of black growth. A UV lamp helped stop further mold from forming and made their air feel noticeably fresher.

  • Someone in your home has asthma or immune issues.

UV systems are often recommended for households with high-risk individuals. By neutralizing airborne microbes like bacteria and mold spores, UV light may help reduce triggers for allergies, asthma, or respiratory infections.

  • You’re battling fine airborne particles or odors.

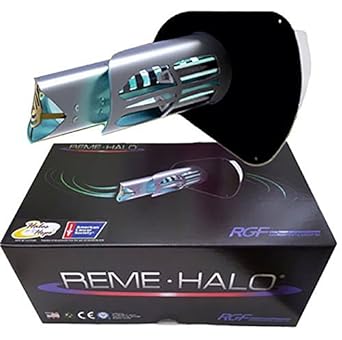
While UV doesn’t trap particles, advanced systems like the REME HALO use ionization to clump small particles together, making them easier for your filter to catch. This can help reduce odors, smoke, and invisible airborne dust.

  • You want better long-term performance from your HVAC system.

Even if your air seems fine, microbial buildup on coils can silently drag down efficiency. One HVAC tech mentioned a client whose energy bill dropped after UV was installed—not because the light was magic, but because the coil was finally staying clean.

Before buying, go through this 8-question checklist to make sure the system you’re looking at matches your goals and home setup.

When a UV Light Might Not Be Necessary

On the flip side, there are situations where a UV light may not give you the results you’re hoping for. Here are a few examples where it may not be worth the investment:

  • Your main problem is dust or pet hair—UV won’t fix that.

These are physical particles, and UV doesn’t remove them. You’ll get better results by upgrading your air filter to a high-efficiency MERV or HEPA option.

  • You don’t have a central HVAC system.

If you use baseboard heaters, window AC units, or mini-splits, UV systems designed for ductwork won’t apply. Portable purifiers may be the better solution.

  • Your HVAC is dry and has no mold history.

If a technician has checked and your coil is clean, with no sign of moisture buildup or mold, UV might be an unnecessary expense.

  • You’re highly sensitive to ozone.

Some older or cheaper UV systems may emit trace amounts of ozone. If you have respiratory issues, be sure to choose ozone-free models—or skip UV altogether.

  • You’re looking for a no-maintenance solution.

UV lights require annual bulb changes and occasional cleanings. If you want a “set it and forget it” fix, a passive filter system might better fit your lifestyle.

Safety: Do You Really Want UV Light in Your HVAC?

Before you decide you “need” a UV light, it’s worth checking how it will behave in a real home—not just in a brochure. Most modern systems are designed to be safe when installed correctly, but there are a few details homeowners should understand up front.

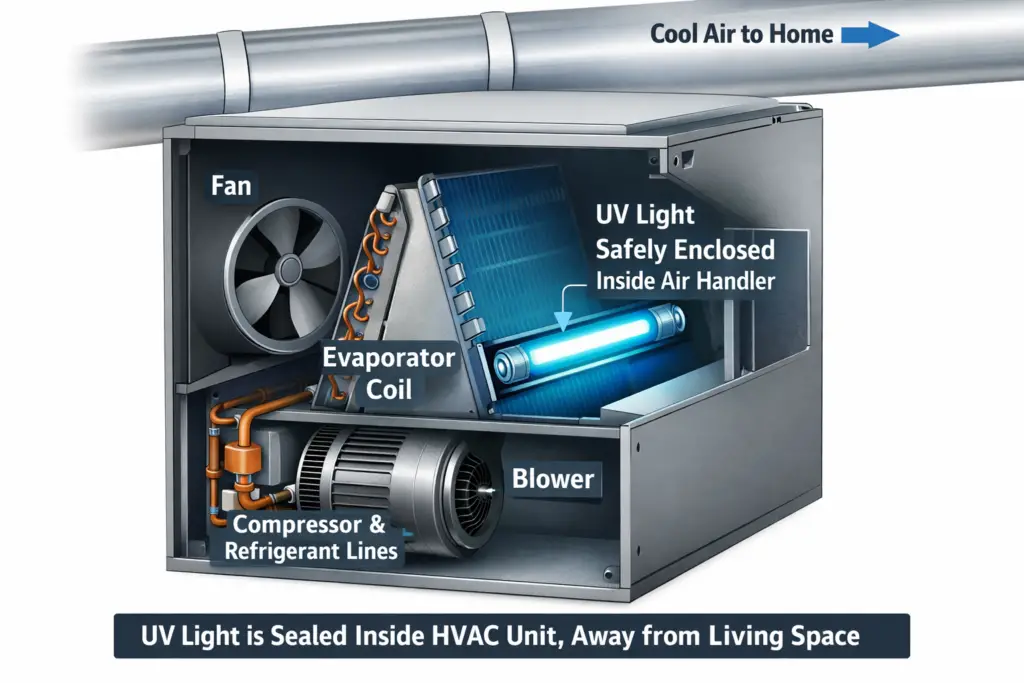
  • UV stays inside the cabinet. In a proper install, the UV-C lamp is mounted inside the air handler or ductwork, with light aimed at coils, pans, or the airstream—not into the room. You should never see bare UV light shining out of a vent.
  • The biggest risk is direct exposure during service. Looking directly at a live UV-C bulb can irritate eyes and skin. That’s why panels should only be opened with power shut off and, ideally, by a tech wearing basic eye protection.
  • Some systems can create trace ozone. Many newer units are designed as “ozone-free” or “low ozone,” but it’s still smart to ask—especially if anyone in your home has asthma, COPD, or chemical sensitivities.
  • UV and materials don’t always mix. Long-term UV exposure can fade some plastics or wire jackets if the lamp shines on them directly. A good installer will aim the bulb at coils and pans, not flex duct or wiring.
  • Simple habits keep things safe. Make sure the breaker is off before anyone opens the air handler, don’t stare at the bulb, and follow the manufacturer’s instructions for cleaning and bulb changes.

If your installer can clearly explain how the lamp is shielded, how to shut it off, and what “ozone-free” really means, you’ll know the safety side is being taken seriously—not just the sales pitch.

Diagram showing safe UV light placement inside an HVAC cabinet away from people and sensitive materials

Cost: When Is a UV Light Actually Worth the Money?

Needing a UV light and feeling good about the price are two different questions. A well-chosen system can be a smart long-term fix—but only if the upfront and ongoing costs match what you’re trying to solve.

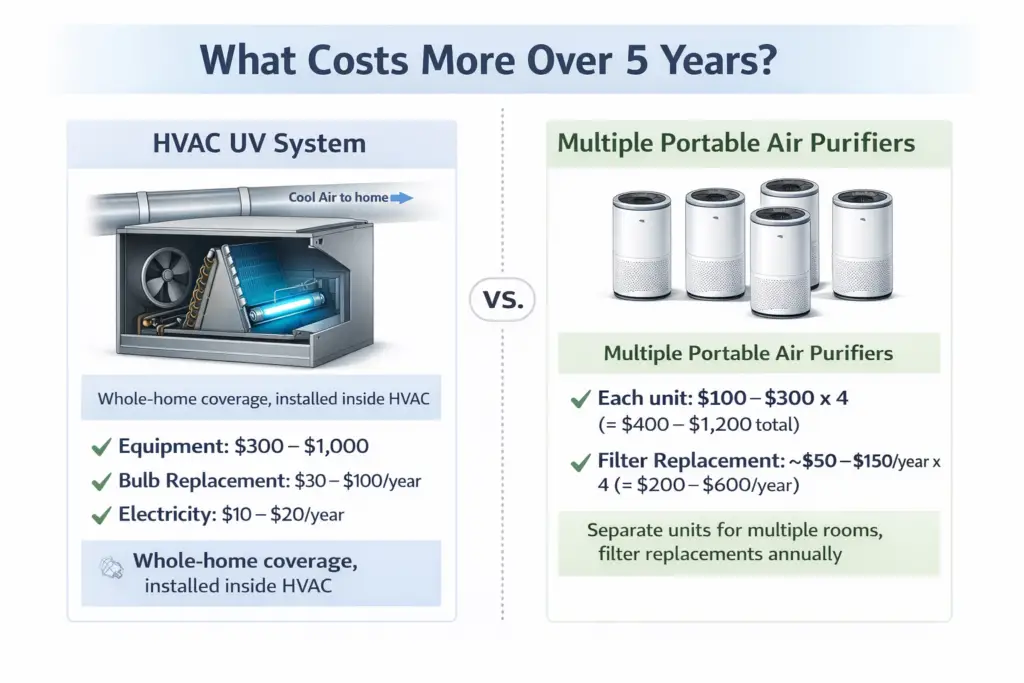
  • Upfront equipment: Basic coil UV kits usually run in the $150–$400 range. Whole-home UV purifiers and advanced PCO units often land between $500–$1,200, depending on brand and features.
  • Installation: Professional install typically adds $100–$350, more if new electrical work, switches, or access panels are needed.
  • Bulb or cell replacement: UV-C bulbs lose strength over time and often need replacement every 9–12 months. Replacement bulbs or cells usually cost $30–$100+, depending on the system.
  • Electricity use: Most UV lamps draw only 15–30 watts, so the yearly power cost is small—often comparable to running a small light bulb.
  • Compare to your “do nothing” cost: If you’re dealing with repeated coil cleanings, mold remediation, or constant complaints about musty air, the long-term cost of not fixing the problem can easily exceed the price of a UV system.

A simple rule of thumb: if you’ve never had mold issues, odors, or respiratory complaints tied to your HVAC, a UV light is more of a “nice-to-have.” If you’re already fighting those problems, it can move into the “saves us money and headaches over time” category.

Illustration comparing the long-term cost of HVAC UV lights versus repeated cleanings and portable air purifiers

How UV Compares to Other Air Quality Solutions

UV lights are just one piece of the puzzle when it comes to cleaner indoor air. Here’s how they compare to other popular solutions homeowners use to tackle air quality issues:

Solution What It Targets Coverage Best For
UV Light Germs, mold, viruses Whole-house Microbial control in ductwork
MERV/HEPA Filter Dust, pollen, dander Whole-house Allergen and particle removal
Air Purifier Particles, some odors Single room Bedrooms, offices
Dehumidifier Moisture Room or whole-home Mold prevention, comfort
Ionizer Particles, some odors Room or whole-home Boosts filter performance

Each option has pros and cons—including UV. See the full breakdown of costs, lifespan, and benefits here.

A vent showing how UV trated air travels into a house.Final Thoughts: Should You Get a UV Light in Your HVAC System?

By now, you’ve got a full picture—not just of what UV systems do, but who they really help. If you’ve noticed moldy smells, have family members with allergies, or just want to protect your system from microbial buildup, a UV light could be a smart next step.

That said, UV lights aren’t a silver bullet. They don’t filter dust. They don’t eliminate odors on their own. And they work best when combined with a good filter and proper maintenance.

One HVAC installer summed it up perfectly: “It’s not going to clean your whole house—but it’ll clean the part of the air system where most of the trouble starts.”

Bottom line: A UV system can be a valuable investment—but only when paired with good airflow, proper filtration, and a real need for microbial control.

Next step: Read the 8 smart questions to ask before buying a UV light for your HVAC

Quick Takeaway: Do You Need a UV Light in Your HVAC?

  • Best for: Killing mold, bacteria, and viruses inside your HVAC system
  • Won’t do: Remove dust, pet hair, or odors on its own
  • Works well when: You’ve had mold problems or respiratory concerns
  • Skip it if: You don’t have central air or mold issues
  • Pro tip: Combine UV lights with high-quality filters for best results

What to Read Next

Does UV Light Really Kill Mold in HVAC?

strong>Yes, UV light in HVAC systems can kill mold by disrupting its DNA, preventing growth and reproduction. UV-C light is especially effective at neutralizing mold on surfaces like evaporator coils and drain pans, though its effectiveness depends on placement, intensity, and exposure time.

🎯 Read the full guide here:

Pros and Cons of UV Light in HVAC – Are the Benefits Worth the Cost?


How UV Light Fights Mold in Your HVAC System

Ultraviolet (UV) light, particularly UV-C, is increasingly used in HVAC systems to combat mold growth and improve indoor air quality. But how exactly does it work—and how effective is it?

If you’ve already read our article on the Pros and Cons of UV Light in HVAC, this deeper dive explains how UV-C light targets mold, what it can and can’t do, and how to get the most out of your installation.

How UV-C Light Targets Mold

UV-C light operates at a wavelength of around 254 nanometers—just the right range to penetrate and damage the DNA of microorganisms like mold and bacteria. When UV-C light shines on mold:

  • It breaks the mold’s DNA, rendering it unable to reproduce.
  • It kills active spores on exposed surfaces.
  • It halts further growth by sterilizing key moisture zones like coils and pans.

Think of it like a silent air guardian, constantly sterilizing the darkest, dampest corners of your HVAC system where mold would otherwise thrive.

Choosing between a simple coil UV light and a whole-home UV purifier? Before you decide, compare how each works and when to pick one over the other.

Diagram of common mold growth areas inside HVAC systems like coils and drain pans

Where Mold Hides in Your HVAC System

Mold doesn’t grow just anywhere—it needs moisture, darkness, and stagnant air. Unfortunately, your HVAC system provides the perfect recipe in a few key places:

  • Evaporator coils: Constantly damp and cool—prime territory for mold.
  • Drain pans: Collect moisture, especially if clogged or uncleaned.
  • Ductwork and filters: Dust buildup + moisture = mold habitat.

Close-up of UV light mounted above HVAC evaporator coil for mold control

What the Research Says About Mold & UV

Studies from institutions like the CDC and Journal of Applied and Environmental Microbiology have shown that UV-C light can significantly reduce microbial contamination in HVAC systems—especially when used in hospitals and commercial buildings where cleanliness is crucial.

Results vary depending on exposure time and installation quality, but with proper setup, UV-C can reduce mold and bacterial growth by up to 90% on coils and interior surfaces.

Realistic Expectations: What UV Can and Can’t Do

UV light is powerful, but it’s not a miracle worker. Here’s a quick comparison:

✅ What UV Can Do ⚠️ What UV Can’t Do
Kill mold on coils and exposed surfaces Remove mold from hidden ductwork or walls
Prevent mold regrowth when left on 24/7 Disinfect through dust, insulation, or buildup
Improve air quality and HVAC efficiency Replace cleaning, maintenance, or filter changes

Smiling family enjoying clean indoor air from improved HVAC air quality

Case Example: UV Light Made a Long-Term Difference

A homeowner in Arizona noticed a musty odor coming from their vents. A local HVAC technician inspected the system and discovered mold buildup on the evaporator coil and in the drain pan. They cleaned the affected components and installed a UV-C light directed at the coil.

Three months later, a follow-up inspection showed zero mold regrowth. The odor was gone, and the homeowner reported fewer respiratory issues in the house.

Best Practices to Maximize UV Effectiveness

Best Practices to Maximize UV Effectiveness

UV systems only work if they’re installed and maintained properly. Here’s how to make sure you’re getting the most out of yours:

  • Install near the evaporator coil—that’s the prime mold zone.
  • Use a system rated for 24/7 operation—intermittent UV exposure is less effective.
  • Keep the surfaces clean—dirt and debris block UV penetration.
  • Change the bulb every 12 months—UV intensity fades over time.
  • Consider dual-bulb systems—some cover both coil and air stream.
  • Pair with routine filter changes and duct cleaning to maintain optimal airflow and hygiene.

Is UV Mold Treatment in HVAC Safe?

For most homes, a coil-mounted UV light is designed to be “out of sight and out of reach,” safely working inside sealed HVAC equipment. The UV-C lamp shines on coils and pans—not into your living space—so family and pets are not exposed during normal operation.

  • Turn off power before opening panels: Anyone inspecting the air handler should shut off the system first so the UV light switches off before the door opens.
  • Avoid direct eye and skin exposure: UV-C is similar to a welding arc or a tiny tanning bed—safe when contained, but harsh on unprotected eyes and skin at close range.
  • Clean and remove mold safely: If there’s heavy, visible mold, have a pro clean coils and pans first so you’re not scraping or brushing spores into the air without proper protection.
  • Watch for ozone-producing devices: Many modern coil lights are “no ozone,” which is ideal in tight, well-sealed homes or for anyone with asthma or lung issues.
  • Protect nearby plastics and wiring: A good installer will aim the lamp so it bathes the coil—not flex duct or wire insulation—reducing the chance of long-term UV degradation.

In short, UV is very safe when it’s enclosed, correctly positioned, and serviced with basic protective gear. Most safety problems come from DIY installs or working around a live bulb without turning the power off first.

Diagram showing a UV light safely enclosed near an HVAC coil, away from people in the living space

Avoid These Mistakes When Using UV Light in HVAC

    • Installing in the wrong location: Bulbs mounted far from the coil won’t be effective against mold.
    • Not replacing bulbs regularly: Most UV-C bulbs lose effectiveness after 9–12 months even if they still glow.
    • Skipping coil cleaning before install: UV can’t shine through grime or buildup—always clean first.
    • Thinking UV replaces filters: UV only kills microorganisms. It doesn’t remove dust, allergens, or pet hair.

Still unsure if UV is even the right fix for your home? Use our quick decision guide to find out.

How to Choose the Right UV Light for Your System

Not all UV-C systems are created equal. Here’s what to look for:

    • High-output bulbs: Especially important for large or high-humidity homes.
    • Coil-targeted design: Units designed to shine directly on the evaporator coil are most effective.
    • Continuous-operation support: Make sure your system is meant to run 24/7.
    • Easy bulb replacement: Consider systems with accessible bulb access and affordable replacements.
    • Warranty and support: Look for at least a one-year warranty and tech support availability.
    • Run a quick pre-buy checklist: Questions to Ask Before Buying a UV Light so you don’t waste money on the wrong unit.

What Does UV Mold Control Cost in HVAC?

When you’re focused specifically on mold control, most of the cost comes from a coil-targeted UV stick plus any cleaning that needs to happen first.

  • Coil UV light equipment: Simple single-bulb kits typically run about $150–$400 depending on brand and output.
  • Installation: Professional install for a standard residential air handler is often in the $150–$350 range, especially if a new power tap or service switch is needed.
  • Bulb replacement: Plan on a new bulb every 9–12 months at roughly $30–$100 each, depending on the model.
  • Pre-cleaning heavy mold: If coils and pans are badly contaminated, a one-time cleaning or light remediation visit may add $100–$400+ to the project, but UV then helps prevent it from coming back.
  • Ongoing operating cost: Most bulbs draw less power than a standard light bulb, so electricity usually lands in the $10–$20 per year range.

Compared to repeated “emergency” cleanings and lingering musty odors, a properly installed UV system is often a one-time upgrade with predictable yearly bulb costs. In homes that stay dry and mold-free, the payoff is smaller; in homes with recurring coil slime or pan mold, UV can be the difference between a one-time fix and an annual headache.

Chart showing the typical cost breakdown for UV mold control in an HVAC system over several years

FAQ: What People Ask About UV and Mold

Does UV light kill mold spores in the air?

Yes, but only if the spores pass directly through the UV light’s coverage area. Most systems are more effective on surface mold than airborne spores.

How long does it take UV light to kill mold?

It can take a few minutes to several hours depending on the intensity, distance, and exposure time. Continuous operation provides the best results.

Is UV light safe for HVAC systems?

Yes. UV systems are installed inside the air handler and do not emit radiation outside the HVAC cabinet. Just avoid looking at the bulb directly.

Can UV light damage HVAC components?

Not typically. When installed correctly, UV-C light does not harm metal, plastic, or wiring. However, prolonged direct exposure to certain plastics or filters may cause fading or brittleness over time—this is rare with modern systems.

Do UV lights help with allergies or asthma?

They can. By reducing mold, bacteria, and some airborne pathogens, UV lights can improve overall air quality. This may ease symptoms for people sensitive to microbial pollutants, though UV light doesn’t remove dust, pollen, or pet dander.

What maintenance does a UV system need?

The main task is replacing the bulb once a year. Even if it still glows, UV-C effectiveness fades after 9–12 months. It’s also smart to clean the surrounding area to keep dust from blocking the light.

Can I install a UV light in my HVAC system myself?

Some homeowners with experience can install coil-mounted UV kits, but professional installation is recommended. Proper placement, electrical safety, and UV shielding are important for safe and effective operation.

If whole-home relief is the goal, compare UV lights with UV air purifiers to see which fits your symptoms.

Final Thoughts: Is UV Light Worth It for Mold Control?

If mold is a concern in your home—or you simply want to keep your HVAC system cleaner—UV light is a strong long-term investment. It complements your air filter, reduces microbial buildup, and can improve your home’s overall air quality.

Headline image asking if UV light in HVAC really kills mold on coils

It’s not a mold remover, but it’s an excellent mold preventer when used correctly. Combined with proper maintenance, UV light can make a noticeable difference in comfort, odor control, and even health.

What to read next


Mold in Air Conditioning Units: Causes, Health Effects, and Prevention


Yes — mold can grow inside air conditioning units, and it’s more than just a bad smell.
Moisture, dust, and poor airflow allow spores to multiply, and once they take hold,
mold can circulate through your ducts, reduce system efficiency, and trigger health issues
for both people and pets.

Diagram showing mold hotspots in an AC unit, including evaporator coils, condensate drain pan, air filter, and ductwork.
Picture this:
you switch on the AC to cool off, but instead of a refreshing breeze,
a musty odor fills the room. That smell is often the first warning sign that mold has
found a home inside your air conditioner. What starts as a little condensation or a clogged
drain can quickly turn your cooling system into a breeding ground for spores that spread
throughout your home.

In this guide, we’ll explain why mold grows in AC units, the health effects you should
know about, and the most effective ways to prevent and remove it — including modern upgrades
like UV lights and induct air purifiers that go beyond basic maintenance.

What Causes Mold to Grow in AC Units?

Mold spores are present everywhere in the environment. When conditions are right, these spores multiply quickly to form mold colonies. The typical conditions that encourage mold growth in air conditioning units include:

  • Moisture – High humidity and condensation provide the moisture mold needs to thrive.
  • Standing water – Clogged AC drains allow water to pool and stagnate.
  • Dust buildup – Dust particles provide a food source for mold.
  • Poor airflow – Stagnant air encourages mold growth.

Health Risks of Mold in AC Units

Breathing in mold spores and particles can trigger allergic reactions and asthma symptoms. Other potential health effects include:

  • Wheezing, coughing, and chest tightness
  • Irritated eyes, nose, throat, and skin
  • Headaches, fatigue, and memory problems
  • In rare cases, a serious fungal infection in lungs or sinuses

People with asthma, allergies, or compromised immune systems are most vulnerable to the effects of mold. But even healthy people may have reactions after repeated exposure.

A woman smiling because she is learning the truth about mold in Air conditioning and how to clean and prevent it.Preventing Mold Growth in AC Units

Here are some tips to help prevent mold in air conditioners:

    • Change filters regularly to allow proper airflow.
    • Inspect drain lines for clogs and clear them as needed.
    • Keep coils and fins free of dust and debris.
    • Ensure condensate pans drain properly.
    • Seal ductwork to prevent leaks and condensation.
    • Install a dehumidifier to control indoor humidity.
    • Consider using DampRid, which absorbs excess moisture in air.

Mold Prevention Add‑Ons: UV Lights, Whole‑Home Dehumidifiers & Induct Air Purifiers

Standard maintenance (filters, drains, coil cleaning) keeps mold at bay — but if you’ve had repeat issues
or someone at home is allergy‑sensitive, these upgrades provide continuous, set‑and‑forget protection.

UV Coil Lights

      • What they do: Shine UV‑C on the evaporator coil to sterilize mold and biofilm where they typically form.
      • Why it helps: Keeps the coil surface clean between services, preventing musty odors and spore release.
      • Good fit for: Homes with past mold growth, high humidity, or long cooling seasons.

Whole‑Home Dehumidifiers

      • What they do: Tie into the HVAC to maintain indoor humidity in the 40–50% range consistently.
      • Why it helps: Mold needs moisture. Lowering RH makes your entire home less hospitable to growth.
      • Good fit for: Humid climates, basements, and homes with condensation issues.

Reme Halo Induct Air PurifierInduct Air Purifiers

      • What they do: Install inside ductwork to treat air as it circulates, often using
        UV‑C, bipolar ionization, and/or photocatalytic oxidation (PCO).
      • Why it helps: Targets spores, microbes, and odors before they distribute through supply vents.
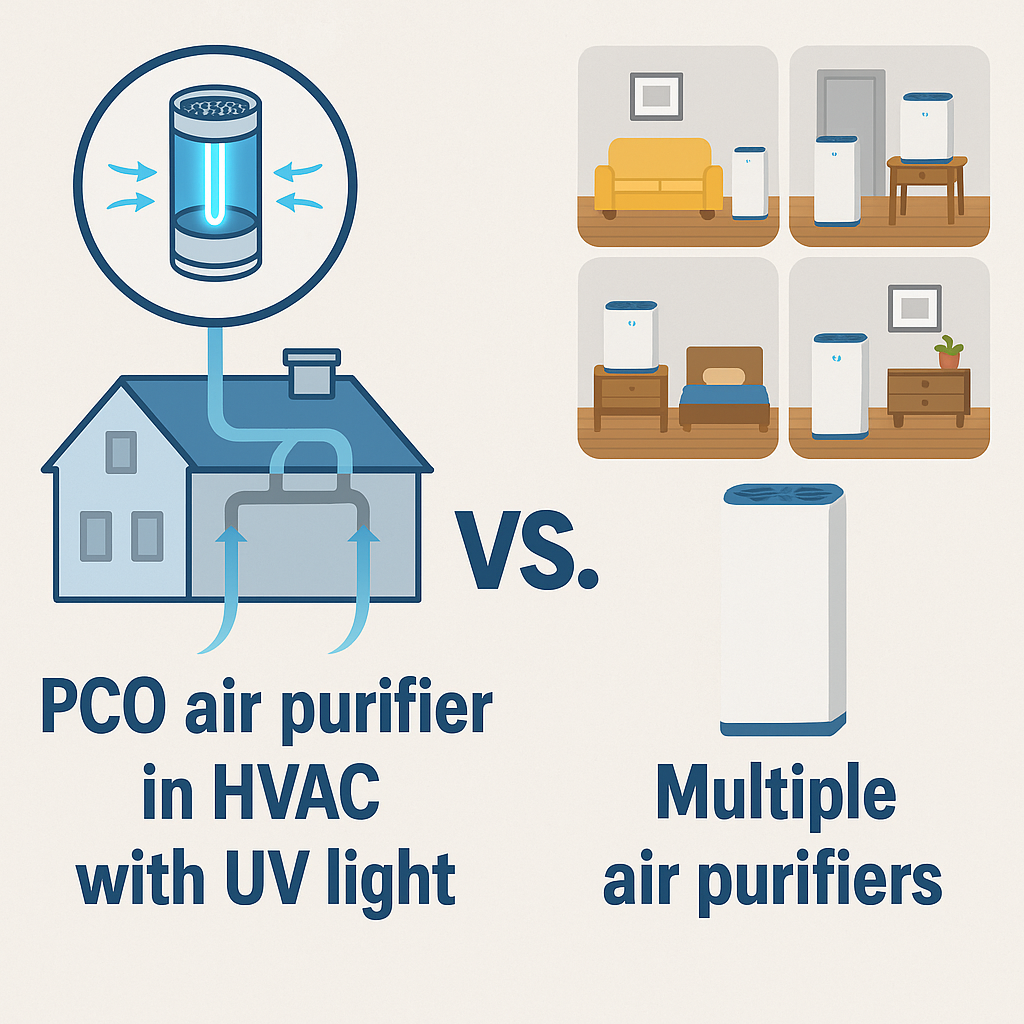
      • Good fit for: Whole‑home protection vs. room‑by‑room portables; families with allergies/asthma.
Note: Avoid using ozone‑producing devices in occupied spaces. UV coil lights and many induct systems
are designed to work without introducing ozone; always check product specifications. See REME HALO

When Sneezing Starts Only When the AC Runs

Mold isn’t always visible. If you get sneezing fits, itchy eyes, or headaches when the AC is on — but feel better
when it’s off — spores may be hitching a ride on airflow from hidden spots like the coil, drain pan, or duct liner.

Early Clues Most People Miss

  • On‑again, off‑again symptoms: You feel worse when the AC cycles, better when it rests.
  • Musty odor on startup: A brief “dirty sock” smell when the fan kicks on.
  • Clean filter, persistent symptoms: Points to growth past the filter (coil/pan/ducts).

Quick Self‑Check

  • Inspect the condensate pan and drain for standing water or sludge.
  • Shine a light at the evaporator coil (front side) for discoloration or slimy film.
  • Look for water stains around the air handler or duct connections.

If symptoms track with AC runtime and you see any of the signs above, address maintenance immediately
(drain clear, coil clean) and consider a UV coil light or induct purifier to stop recurrence.

Infographic comparing mold exposure symptoms in people and pets, including sneezing, itchy eyes, headaches, scratching, and sensitive lungs.
Can AC Mold Affect Pets?

Yes. Pets can react to moldy air just like people — sometimes more. Watch for sneezing, coughing,
watery eyes, scratching, skin irritation, or “hot spots”
that flare up when the AC is running.
Birds are especially sensitive due to delicate respiratory systems.

What to Do if You Suspect AC Mold Is Bothering Your Pet

  • Run a deep clean: drain line, pan, and coils; replace the filter.
  • Keep indoor humidity in the 40–50% range; use a whole‑home dehumidifier if needed.
  • Consider UV coil lights or an induct purifier to reduce spores in circulation.
  • Discuss symptoms with your veterinarian, especially for birds or pets with asthma/allergies.

If your dog seems fine outside but starts sneezing when the AC kicks on — or your cat avoids certain rooms —
your HVAC may be spreading spores. Fixing the source protects the whole family.

Infographic showing prevention tips for mold in AC units: change filters, clean coils, ensure proper drainage, and use a dehumidifier.Removing Mold from AC Units

If mold is already present, follow these steps for safe removal:

  1. Turn off and unplug the AC unit.
  2. Wear gloves, goggles, and a respirator for protection.
  3. Clean coils and fins with a coil cleaner like Arm & Hammer Coil Cleaner.
  4. Scrub away surface mold on other components with detergent and water.
  5. To kill mold, spray a solution of 1 part bleach to 10 parts water.
  6. Once cleaned, dry all components thoroughly before turning AC back on.

For severe mold contamination, replacement of insulation or other components may be necessary. It’s also a good idea to have HVAC professionals inspect and sanitize ductwork.

Frequently Asked Questions

What are some early signs of mold growth in an AC unit?

Some early signs include musty odors, visible mold growth around vents or filters, increased humidity/condensation, and health symptoms when the AC runs.

Should I have my AC ducts cleaned if there is mold?

Yes, HVAC professionals should thoroughly clean moldy ductwork using vacuuming, brushing, and sanitizing methods.

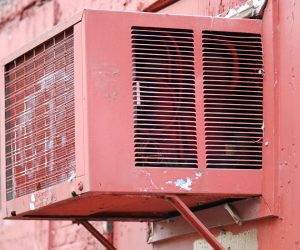
Can window AC units get mold too?

Yes, mold can grow in window units, especially in the condensate drain area. Follow the same preventive and cleaning steps.

Is it safe to spray bleach directly on AC coils?

Bleach should be diluted 10:1 with water first. Check the manufacturer’s cleaning guidelines before applying any chemicals.

What is the black stuff I see in my AC drain line?

Black substance in drains is usually mold growth, which indicates standing water. Unclog the drain and sanitize to remove it.

Should I replace my AC unit if there is extensive mold?

If mold contamination is severe, replacement may be the best option. An HVAC professional can assess whether the unit can be sufficiently cleaned.

Can poor air quality from AC mold make pets sick too?

Yes, the allergens and toxins from AC mold can also affect pets. It’s best to address the issue promptly.

The Bottom Line

Mold growth is common in air conditioning systems due to the presence of moisture, dust, and condensation. But left unchecked, AC mold can degrade indoor air quality and lead to potential health issues when spores are inhaled. By staying vigilant about maintenance, quickly addressing any mold issues, and having regular professional cleanings, you can help keep your AC system mold-free and your air healthy.

AC Dehumidifier(Dry) Mode- What and When Do You Use It?

What is Dehumidifier (Dry) Mode in AC?

High Humidity is the number one cause of mildew and mold growth in the home.  It is also responsible for increased Allergy symptoms and sinuses and can be a trigger for an Asthma attack.

Dehumidifier mode, also called Dry Mode,  on an AC is the setting that turns on the dehumidifying function of an air conditioner to reduce excess humidity in the air.

When there is too much humidity in the air, the temperature can seem hotter than what it actually is.
Using the dehumidifier/ dry mode on the AC will help reduce the moisture in the air and restore comfortability back to your home.

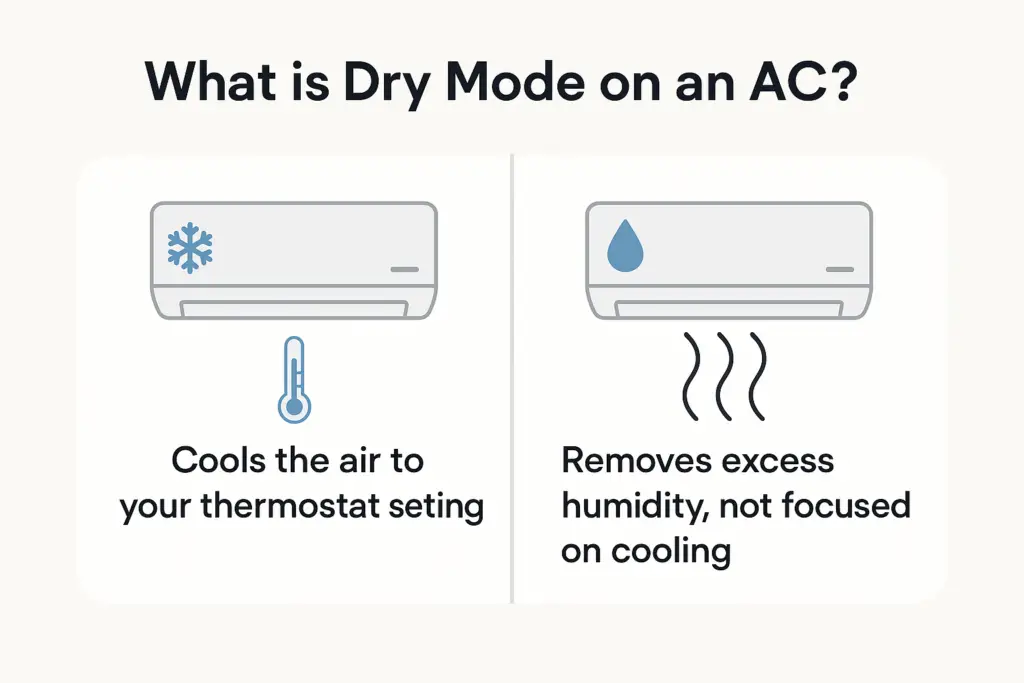
Graphic comparing AC cool mode and dehumidifier dry mode, showing cool mode lowers temperature while dry mode reduces humidity without cooling

What is the function of dry mode in AC?

Dry mode in an AC functions like a dehumidifier. Dehumidifiers and air conditioners are actually very similar in the way they work. They both drag air across a set of cooling coils that causes the air to condense.

User Guidelines for AC Dehumidifier (Dry) Mode

Condition Dry Mode Usage Recommended Settings Notes
High Humidity, Mild Temperature Yes Moderate fan speed Ideal for reducing humidity without overcooling the room.
High Humidity, High Temperature Optional Combine with cool mode at a higher temperature setting Helps in maintaining comfort without excessive cooling.
Moderate Humidity, High Temperature No Use cool mode instead Dry mode is less effective and unnecessary.
Continuous High Humidity Yes, intermittently Use periodically to maintain comfort Prevents overuse and maintains energy efficiency.
Night Time or Low Activity Yes Lower fan speed, higher temperature Reduces noise and maintains comfort during less active hours.

AC Dehumidifier Dry ModeAir conditioner dry mode vs. dehumidifier

The difference is that air conditioners move the air across the cooling coils to cool off the air where is a dehumidifier moves the air across the cooling coils to condense the air but then reheats the air to repeat the process.

Dry mode vs. cool mode

Dry mode on your AC is the air conditioning setting that turns on the dehumidification function of the AC to reduce the humidity in the air.

Cool mode is the setting that cools down the air. Cool mode is the most common setting on an AC. It is the mood of the air conditioner that cools down the room to the temperature that you set the thermostat to.


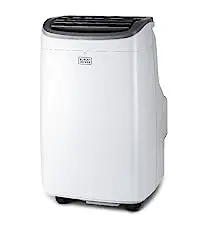
black and Decker portable air coolerBLACK+DECKER 10,000 BTU Portable Air Conditioner

3-in-1: Air Conditioner/Dehumidifier/Fan, Remote Control, Dehumidifier
More Info Here


Air conditioner dehumidifier mode

Humidity, especially the excessive humidity that tends to hit in the hottest months can be a real enemy to your air conditioning.

When the relative humidity gets to a certain level, you can feel like the air conditioner is not even on.

And usually what happens is that you run to turn the thermostat down cooler.

But with so much moisture in the air and adding more power to the air conditioner, the results of turning the air conditioner thermostat down usually leads to the unit freezing over.

Then there is no cool air coming from it at all.

Another reason that humidity threatens your AC unit is that your system has to run on overdrive to keep up with the extra demand that the humidity places on it.

But you may be sitting on an air conditioner that has a function to help in those situations. And you might not have even known it.

The function I’m talking about is the air conditioner dehumidifier mode.

The air conditioner dehumidifier mode is usually represented by a raindrop symbol on the thermostat. It is also called the dry mode if you have an air conditioner with this function but it does not say dehumidifier.

what is dry mode in ac

Does an air conditioner dehumidify?

When your AC is in dehumidifier mode,
It turns off the cooling function and slows down the fan so that the air conditioning functions as a dehumidifier to reduce the moisture in the air.

Does air conditioning dry out the air?

By reducing the moisture in the air, you can regain comfortability without even having the cool mode running.

Not only will that save you money on energy, it will help save you in the long run by not overworking your air conditioning system.

Best temperature for dry mode

The best temperature to use dry mode is when the humidity is excessive but the actual temperature is not that hot.

The ideal of turning the AC on dry mode is to reduce the moisture level in the air and restore the comfortability of the area without using the cool air mode of the AC.

The function of Dry mode on an AC is to lower the humidity in the room so that the air feels cooler. It does not actually control or utilize the thermostat to achieve a designated temperature.

Dry mode vs. Cool mode power consumption

ACs are one of the biggest energy hogs in your house. Everyone knows how much the utility bill can skyrocket in the summer months because of the power that an air conditioning system uses.

The different modes on an air conditioning unit or not only to help provide you with the most comfort possible in terms of climate control but also in financial terms.

The cool mode on an air conditioner is easily the most expensive to run. And it is the setting that most people tend to use exclusively.

But there are different times when using the cool mode on an air conditioner is not only more expensive, it can’t get the job done as well.

Dry mode on an air conditioner can actually lower your energy bill provided the climate dictates it.

When the humidity is so high that it is overcoming the air conditioning,

Turning the AC dry mode will not only help reduce the humidity in the air and make the air feel more comfortable, it will turn off certain features on the air conditioner that are causing the energy bill to be more expensive.

When the dry mode is functioning, it turns down the cool air and it slows the fan way down.

Which means the power consumption of the air conditioner is way down.

In other words, less power, more money in your pocket.

Not only does humidity cause your air conditioner make it feel like it’s doing less than an adequate job, it also makes your air conditioner overcompensate to try to get the temperature in the room down to a comfortable level.

That means the power consumption in cool mode during times of excessive humidity will actually cost you more.

Air conditioner dry mode in winter.

The dry mode on an air conditioner, though it works like a dehumidifier to a certain point.
But at the end of the day they do not have the full function of a dehumidifier.

A dehumidifier compared to a air conditioner not only condenses the water to capture the humidity, it reheats the air that is released.

An air conditioner simply does not have this capacity.

Even most dehumidifiers call for the temperature to be at least 60 degrees.
Which makes them obsolete during the winter.

Using an air conditioning as a dehumidifier during the winter will not work for that intention, it will most likely cause damage to your unit.Woman confused about AC dry mode versus dehumidifier mode

Limitations and Considerations

While the dry mode in AC units can mitigate humidity to some extent, it may not match the efficacy of specialized devices like standalone dehumidifiers.

For instance, the Vellgoo Dehumidifier, acclaimed for its performance in large spaces, comes with user-friendly features such as a washable air filter and an automated pump for water drainage, offering a more tailored approach to humidity control.

Considering such a product could enhance moisture management, especially in highly humid environments, providing a more comprehensive solution than AC dry mode alone.

Does Air Conditioning Use Water? Understanding How Your AC Unit Works

Do Air Conditioners Use Water?

Air conditioners primarily use refrigerants to cool and dehumidify indoor air. During this process, condensation occurs, resulting in water formation.

This condensate is then safely drained away from the unit. In contrast, air coolers, or evaporative coolers, actively use water as part of their cooling process.

 These coolers employ a water pump to moisten a cooling pad. As air moves through the wet pad, water evaporates, reducing the air temperature and providing a cooling effect.

Introduction

Air conditioning is an essential part of our daily life, especially in hot and humid areas.

It helps us to keep our indoor environment comfortable and pleasant by regulating the temperature and humidity.

One of the common questions people ask about air conditioning is whether it uses water or not.

In this article, we will discuss this topic in detail and try to answer some of the common questions related to it.

Why Is There Water Around My AC Unit?

If you have ever noticed water around your AC unit, you might be wondering where it comes from.

The answer is simple; air conditioning units produce water as a byproduct of the cooling process.

When warm and humid air passes over the evaporator coil, it condenses into water droplets, which then fall into the drain pan and flow out of the unit through a drain line.

This process helps to reduce the humidity level in the indoor environment and makes it more comfortable.

What Types of AC Cooling Uses Water?

There are three types of air conditioning systems that use water for cooling: evaporative cooling , refrigerated air, and absorption cooling.

1. Evaporative cooling systems

use water to cool the air by evaporating it. These systems are commonly used in dry and arid regions, where humidity levels are low.

2. Refrigerated AC

(HVAC, heating, ventilation, and air conditioning) uses water to cool and dehumidify the air.

This water is produced as condensation when warm, moist air is circulated over the unit’s cold evaporator coil, causing the moisture in the air to condense on the coil.

The water is then collected in a drip pan and drained out of the unit through a drain line.

3. Absorption cooling systems

use water and other chemicals to create a cooling effect. These systems are commonly used in commercial buildings and industries.


Aspect Evaporative Cooling Systems Refrigerated AC (HVAC) Absorption Cooling Systems
Basic Function Utilize water to cool air through evaporation. Use refrigerants to cool and dehumidify air, producing water as a byproduct. Employ water and chemicals to generate a cooling effect.
Water Usage Actively use water as part of the cooling process. Do not use water actively; water is a byproduct of the cooling process. Use water in the chemical process for cooling but do not produce water as a byproduct.
Ideal Environment Best in dry, arid regions due to reliance on water evaporation. Suitable for various climates, especially where dehumidification is needed. Commonly used in commercial buildings and industries, not dependent on external climate.
Water Production Does not produce water as a byproduct; water must be added to the system. Can produce 2 to 5 gallons of water per day as condensation from humid air. Does not produce water as a byproduct.
Water Safety Water used can be safe to drink if properly filtered and treated. Water produced is not suitable for drinking due to contaminants. Not applicable, as water is part of the chemical process and not produced as a byproduct.
Maintenance Concerns Requires regular water supply and can be affected by water quality. Potential for water leaks due to clogged drain lines or malfunctioning parts; regular maintenance needed. Complex systems that may require specialized maintenance, particularly related to the chemical process and water handling.
Impact of Shutting off Water Direct impact on cooling efficiency; the system cannot function without a water supply. No direct impact, as water is not actively used for the cooling process. Depending on the specific design, shutting off water could impact the chemical process and cooling efficiency.

Do window ac units use water?

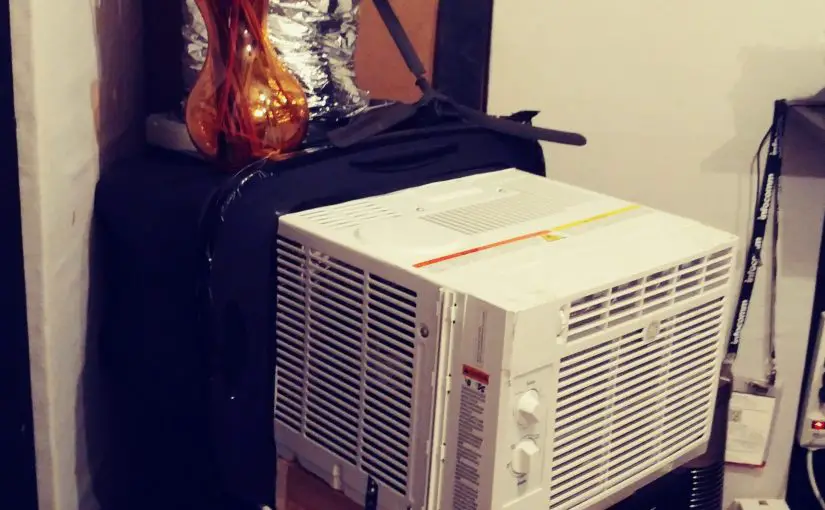
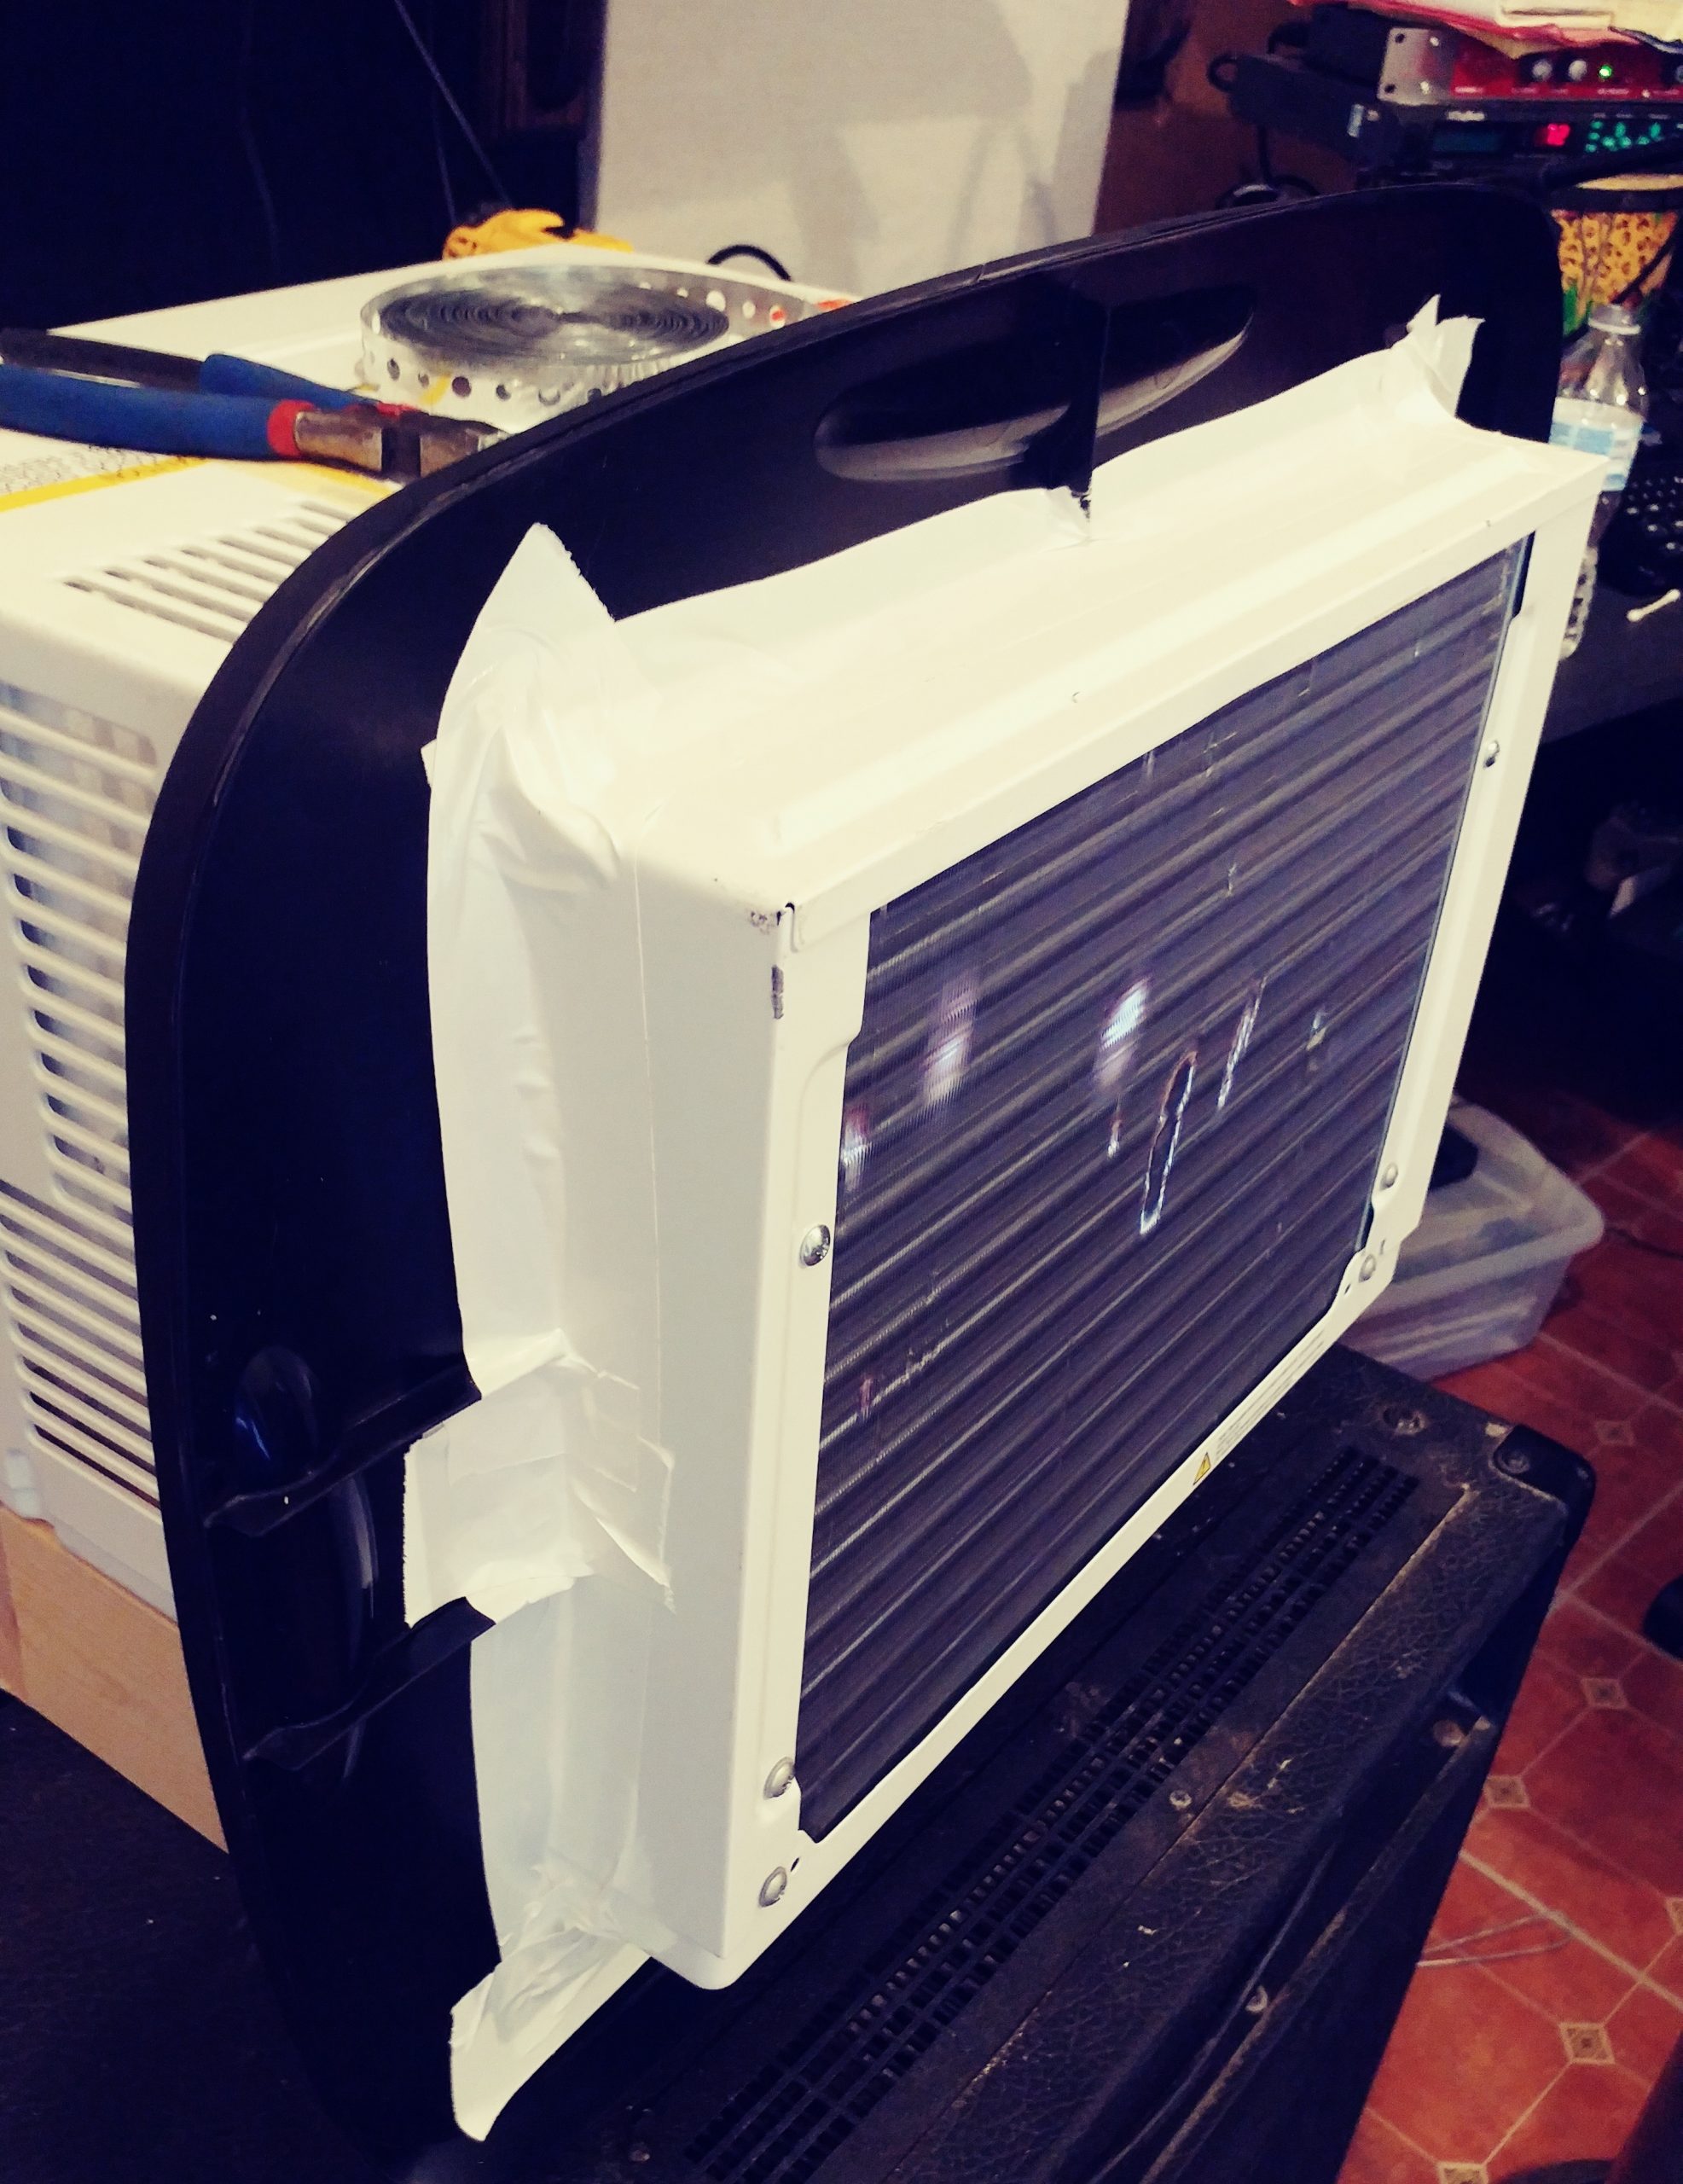
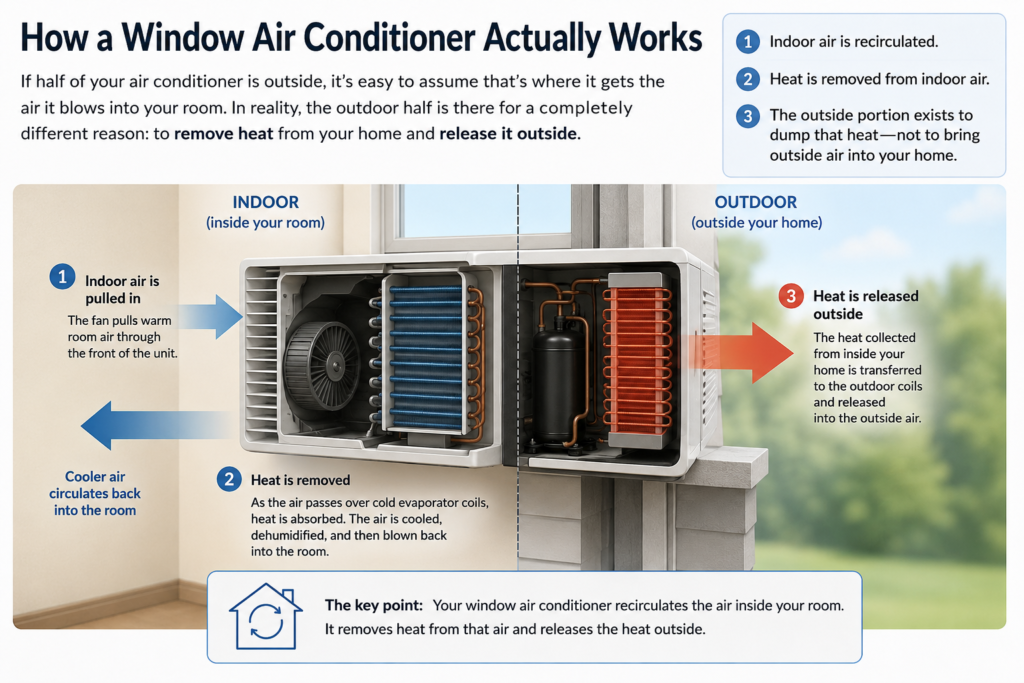
Yes, a window AC unit also uses water to cool and dehumidify the air.

Like central air conditioners, window units dehumidify air and  produce condensate, which needs to be drained.

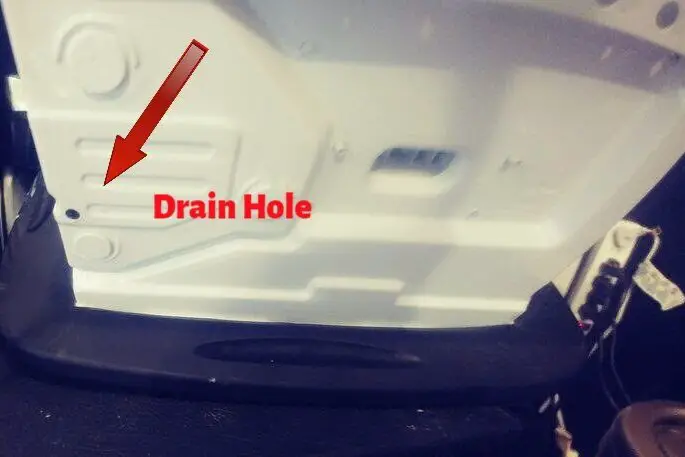
Window ACs have a hole on the bottom that is used for drainage,

How Much Water Does an Air Cooler Use?

The amount of water an air cooler uses depends on several factors, such as the size of the unit, the humidity level, and the operating conditions.

Generally, a typical residential air conditioning unit can produce between 2 to 5 gallons of water per day.

However, this amount can vary depending on the size of the unit and the climate conditions.

Is Water from an Air Conditioner Safe to Drink?

The water produced by an air conditioning unit is not suitable for drinking as it contains bacteria, dirt, and other contaminants.
It is also acidic and can damage your plumbing system.

However, water from an air cooler, which is a different type of cooling system that uses water to cool the air, can be safe to drink if it is properly filtered and treated.

Why Do Residential AC Units Leak Water?

If you notice water leaking from your residential AC unit, it could be due to several reasons, such as a clogged drain line, a dirty air filter, or a malfunctioning condensate pump.

It is important to address the issue as soon as possible to avoid any damage to your unit or your property.

Does Shutting off Water Affect AC?

For Air Coolers.

Shutting off the water supply to your Air cooler can affect its performance as it needs water to cool the air.

If the water supply is shut off, the unit may continue to run, but it will not cool the air as efficiently.

It is important to keep the water supply on to ensure the proper functioning of your AC unit.

For HVAC

HVAC cooling on the hand creates water as a by product of the condensation that it is pulling from the air.

This type of Air conditioning does not require water to be added and turning off the water will not effect it.

In conclusion, Does air conditioning use water?

 HVAC and other refrigerated type air conditioning units, like window air ACs and Portable ACs do use water, but only as a byproduct of the cooling process.

The amount of water used depends on several factors, such as the size of the unit and the humidity level.

Air Coolers require water to be added as a way to use water to cool down the air. It is also important to keep the water supply on to ensure the proper functioning of your Air cooler.

Water produced by an AC is not suitable for drinking, and it is important to address any water leaks as soon as possible.

FAQs

Can I drink water from an air conditioning unit?

No, water produced by an air conditioning unit is not safe for drinking as it contains contaminants.

How can I prevent water leaks from my AC unit?

Regular maintenance and cleaning of your AC unit can prevent water leaks. It is also important to address any issues promptly.

How much water does an AC unit produce in a day?

A typical residential AC unit can produce between 2 to 5 gallons of water per day, but this can vary depending on the size of the unit and the climate conditions.

What should I do if my AC unit is leaking water?

If you notice water leaks from your AC unit, it is important to address the issue promptly.

You can try cleaning the drain line or replacing the air filter. If the issue persists, it is recommended to seek professional help.

Can I turn off the water supply to my AC unit?

It is not recommended to turn off the water supply to your AC unit as it needs water to cool the air efficiently.

Turning off the water supply can affect its performance and may cause damage to the unit.

Can air conditioning units use recycled water?

Some AC units can use recycled water, but it depends on the type of unit and its design.

It is best to consult with a professional to determine if your unit is capable of using recycled water.

What should I do if my AC unit is not producing any water?

If your AC unit is not producing any water, it could indicate a problem with the unit’s drainage system.

You should contact a professional to diagnose and fix the issue.

Is it normal for my AC unit to produce a lot of water?

While some water production is normal for AC units, an excessive amount of water could indicate an abnormal amount of humidity in the air.

How often should I check my AC unit’s water levels?

You do not need to check your AC unit’s water levels regularly.

However, if you notice any leaks or changes in performance, it is important to address the issue promptly.

Can I use the water produced by my AC unit for watering plants or other purposes?

The water produced by your AC unit is not recommended for consumption or for use in watering plants.

It may contain impurities or chemicals that can be harmful to plants or people.

How to Clean AC Coils Without Removing the Unit – No Tools Needed

How to Clean AC Coils Without Removing the Unit – No Tools Needed

Cleaning your AC coils is essential for maintaining efficiency and preventing breakdowns, but you don’t need special tools or technical skills to do it. With simple household items and these easy methods, you can clean both indoor and outdoor AC coils without removing any parts. This guide is perfect for renters, beginners, or anyone who wants to maintain their AC without professional help.

graphic showing how to clean ac coils without removing anythingWhy Clean Your AC Coils Without Disassembly?

Many people avoid cleaning their AC coils because they think it requires dismantling the unit. The truth is you can effectively clean most coils without removing them or using special tools. Regular cleaning improves cooling performance, reduces energy bills, and extends your AC’s lifespan.

If you’re not sure whether your coils need cleaning, check out our guide on how to tell if your AC coils are dirty for common symptoms to watch for.

Safety First: Precautions Before Cleaning

✔️ Turn Off Power to the Unit

Always turn off power at the breaker before cleaning. This simple step prevents electrical shocks and protects your AC system.

✔️ Wear Protective Gloves

Coils have sharp edges that can cut skin. A pair of rubber gloves protects your hands while cleaning.

✔️ Avoid Pressure Washers

High-pressure water can bend delicate coil fins. Stick to gentle spraying or wiping methods instead.

Tool-Free Methods for Cleaning Indoor Coils

1. The Vinegar Spray Method

White vinegar is a natural cleaner that dissolves dirt and kills mold. This is one of the safest and most effective methods for indoor coils.

  1. Mix equal parts white vinegar and water in a spray bottle
  2. Remove the access panel (usually held by simple clips)
  3. Lightly spray the solution onto the coils
  4. Let sit for 5-10 minutes
  5. Wipe away loosened dirt with a soft cloth

2. Soapy Water Wipe Down

For light dirt buildup, mild soap works perfectly. This gentle method won’t damage sensitive components.

  1. Mix a few drops of dish soap with warm water
  2. Dip a soft cloth or sponge in the solution
  3. Gently wipe the coil surfaces
  4. Use a dry cloth to remove excess moisture

Easy Outdoor Coil Cleaning Without Tools

1. Garden Hose Rinse Technique

Your garden hose can clean outdoor coils if used correctly. Always spray at an angle to avoid bending the fins.

  1. Remove loose debris by hand first
  2. Set hose nozzle to “shower” or gentle spray
  3. Spray from the inside out at a 45-degree angle
  4. Let the unit dry completely before restarting

2. Hydrogen Peroxide Deep Clean

For stubborn grime on outdoor units, hydrogen peroxide works wonders. It’s more powerful than vinegar but still safe for coils.

  1. Mix 1 part 3% hydrogen peroxide with 2 parts water
  2. Spray onto coils and let bubble for 5 minutes
  3. Rinse gently with your hose

Natural Cleaning Solutions to Try

You don’t need harsh chemicals to clean AC coils effectively. These DIY solutions work great and are safe for your home environment. For more options, see our homemade AC coil cleaner recipes.

Cleaner Best For Mixing Ratio
White vinegar Indoor coils, mold 1:1 with water
Dish soap Light dirt Few drops per gallon
Hydrogen peroxide Stubborn grime 1:2 with water
Baking soda Odor removal 2 tbsp per cup water

After Cleaning: Important Next Steps

✔️ Let the Unit Dry Completely

Moisture can cause electrical issues. Wait at least 30 minutes before restoring power.

✔️ Replace the Air Filter

A clean filter prevents quick recontamination. This simple step extends your cleaning results.

✔️ Monitor Performance

Notice if cooling improves after cleaning. This helps you determine your ideal cleaning schedule.

When to Consider Professional Help

While these methods work for most routine cleaning, sometimes you need more advanced care. Call a professional if you notice any of these issues:

  • Bent or damaged coil fins
  • Ice buildup after cleaning
  • Strange noises when the unit runs
  • No improvement after cleaning

For more thorough cleaning, you might want to explore the best AC coil cleaning brushes and tools for future maintenance.

Maintenance Tips to Keep Coils Clean Longer

✔️ Regular Filter Changes

A clean filter prevents dust from reaching coils. Change filters every 1-3 months during cooling season.

✔️ Keep the Area Clear

For outdoor units, maintain 2 feet of clearance. This improves airflow and reduces debris accumulation.

✔️ Schedule Annual Cleaning

Mark your calendar for seasonal maintenance. Twice-yearly cleaning prevents major buildup.

Final Thoughts

Cleaning your AC coils doesn’t require special tools or technical expertise. With these simple methods, anyone can maintain their air conditioner’s performance and efficiency. Regular cleaning with safe, homemade solutions keeps your cooling costs down and extends your unit’s lifespan.

For more detailed cleaning recipes, visit our guide to easy coil cleaning recipes using common household ingredients.


Best AC Coil Cleaning Brushes and Tools

Best AC Coil Cleaning Brushes and Tools for DIY Maintenance

Proper AC maintenance requires the right tools for the job. Investing in quality coil cleaning tools can save you hundreds in repair costs and keep your system running efficiently for years. Whether you’re tackling indoor evaporator coils or outdoor condenser units, these essential tools make DIY cleaning easier and more effective.

Essential AC Coil Cleaning Tools

example of a flexible coil cleaning brush1. Flexible Coil Cleaning Brush

The backbone of any DIY coil cleaning toolkit, a good brush removes debris without damaging delicate fins. Look for one with soft, flexible bristles specifically designed for AC coils.

Pros:

  • Reaches tight spaces between fins
  • Gentler than metal tools
  • Works for both indoor and outdoor units

Cons:

  • May require multiple passes for heavy buildup
  • Needs occasional cleaning to maintain effectiveness

A picture of a fin comb used to clean AC Coils2. Fin Comb

Bent fins reduce airflow and efficiency. A fin comb straightens aluminum fins to restore proper airflow in seconds.

Pros:

  • Quickly fixes airflow issues
  • Prevents further damage
  • Multiple sizes for different fin spacing

Cons:

  • Only works on aluminum fins
  • Requires careful handling

3. Chemical Sprayer or Pump Sprayer

A quality sprayer helps apply cleaning solutions evenly without oversaturating components. Choose one with adjustable nozzles for different spray patterns.

Pros:

Cons:

  • Requires proper cleaning after use
  • Can be messy if not used carefully

4. Garden Hose Nozzle with Adjustable Settings

For outdoor units, water pressure matters. A nozzle with “shower” setting cleans effectively without bending fins.

Pros:

  • Gentler than pressure washers
  • Adjustable for different cleaning needs
  • Inexpensive and widely available

Cons:

  • Still requires caution with water pressure
  • Not for indoor use

5. Coil Cleaning Foam

Specialized foam clings to vertical surfaces. This professional-grade solution breaks down stubborn grime with minimal effort.

Pros:

  • Penetrates deep into coil stacks
  • Reduces scrubbing needed
  • Works on both evaporator and condenser coils

Cons:

  • More expensive than homemade cleaners
  • Requires proper rinsing

6. Inspection Mirror and Flashlight

Seeing problem areas is half the battle in effective coil cleaning. A good inspection setup helps identify hidden buildup.

Pros:

  • Reveals hidden dirt accumulation
  • Helps verify cleaning results
  • Useful for other home maintenance

Cons:

  • Additional tool to purchase
  • Requires proper lighting conditions

Tool Safety Tips

✔️ Power Off Before Cleaning

Always turn off power at the breaker before working on any AC components. This prevents electrical shock and protects your system.

✔️ Mind the Fins

Aluminum fins bend easily. Always brush parallel to the fins, never across them.

✔️ Avoid Oversaturation

Too much moisture can damage electrical components. Use cleaners sparingly and allow proper drying time.

✔️ Wear Protective Gear

Gloves and eye protection are essential. Coil cleaners can irritate skin and eyes.

diagram showing proper AC coil cleaning tools vs what not to useChoosing the Right Tools for Your Needs

Your ideal toolkit depends on your specific situation. For basic maintenance, start with a coil brush, fin comb, and spray bottle. If you’re dealing with heavy outdoor buildup, add a garden hose nozzle and cleaning foam.

Not sure if your coils need cleaning? Check our guide on how to tell if your AC coils are dirty for common symptoms.

Tool Maintenance and Care

✔️ Clean Brushes After Use

Dirty brushes spread grime. Rinse bristles thoroughly and allow to dry before storage.

✔️ Store Properly

Keep tools in a dry place. Moisture causes rust and reduces tool lifespan.

✔️ Replace Worn Items

Bent fin combs or frayed brushes can cause damage. Inspect tools regularly and replace when worn.

When to Combine Tools With Other Methods

For optimal results, use these tools alongside other cleaning methods. Our guide on how to clean AC coils without removing the unit shows effective techniques that work with these tools.

Tool Best Used With Frequency of Use
Coil Brush All-purpose cleaning Every 3-6 months
Fin Comb Visible fin damage As needed
Sprayer homemade recipes that work with these tools With each cleaning
Hose Nozzle Outdoor unit rinsing Seasonally

Final Recommendations

Building your AC maintenance toolkit doesn’t require expensive professional equipment. With these essential tools and proper technique, you can maintain your system as effectively as many HVAC professionals. Regular cleaning with the right tools improves efficiency, prevents breakdowns, and extends your AC’s lifespan.

For best results, combine these tools with proper cleaning solutions and techniques. Whether you’re maintaining a window unit or central air system, the right tools make all the difference in your DIY maintenance success.


Signs of Dirty AC Coils and What to Do About Them

How to Tell If Your AC Coils Are Dirty

A well-functioning air conditioner is essential for staying comfortable during hot weather. However, dirty AC coils can reduce efficiency, increase energy bills, and even lead to costly repairs. The key to maintaining your AC’s performance is recognizing the signs of dirty coils early.

In this guide, we’ll walk you through the most common symptoms of dirty AC coils, complete with pictures and practical tips. Whether you’re a homeowner or a renter, these insights will help you keep your cooling system running smoothly.

What Are AC Coils and Why Do They Get Dirty?

Your air conditioner has two main types of coils:

  1. Evaporator coils – Located inside your home (usually near the air handler), these absorb heat from indoor air.
  2. Condenser coils – Found in the outdoor unit, these release absorbed heat outside.

Both types of coils are prone to dirt buildup from dust, pollen, pet hair, and debris. Over time, this grime acts as insulation, preventing proper heat exchange and forcing your AC to work harder.

Regular cleaning can prevent these issues. If you’re looking for safe and effective solutions, check out our guide on homemade AC coil cleaner recipes.

6 Signs Your AC Coils Are Dirty

1. Weak or Reduced Airflow

If your AC is running but the airflow feels weak, dirty evaporator coils could be the culprit. Clogged coils restrict airflow, making it harder for your system to cool your home effectively.

  • Check your vents—if some rooms feel cooler than others, your coils may need cleaning.
  • Compare airflow before and after turning on the AC (a significant drop indicates a problem).

picture of a hand demonstrating that dirty coils in an Air conditioner causes weak airflow

2. Rising Energy Bills

A sudden spike in your electricity bill without increased usage often points to an inefficient AC. Dirty coils force your system to run longer, consuming more power.

  • Monitor your energy bills—if they climb during peak cooling months, inspect your coils.
  • A professional HVAC tune-up can identify hidden efficiency issues.

3. Frost or Ice Buildup on Coils

If you notice ice forming on your indoor unit, dirty evaporator coils are likely restricting refrigerant flow. Frost buildup is a clear warning sign that your AC isn’t functioning properly.

  • Turn off the AC to let the ice melt before inspecting the coils.
  • If frost returns after cleaning, you may have a refrigerant leak.

pic showing frost build up on dirty ac coils

4. Musty or Moldy Odors

A foul smell when your AC runs usually means mold or mildew is growing on damp, dirty coils. This not only affects air quality but can also trigger allergies.

  • If you detect a musty odor, clean the coils and replace the air filter.
  • Persistent smells may require professional duct cleaning.

5. AC Struggling to Cool Your Home

If your air conditioner runs constantly but doesn’t cool your home, dirty coils may be preventing proper heat transfer. Your system is working overtime but failing to lower the temperature.

6. Visible Dirt and Debris on Coils

A simple visual inspection can reveal dirty coils. If you see layers of dust, grime, or debris, it’s time for cleaning.

  • For outdoor condenser coils, look for dirt, leaves, or grass clippings.
  • Indoor evaporator coils may have dust and mold buildup.

picture showing the difference between clean and dirty AC coils

How to Prevent Dirty AC Coils

Preventive maintenance keeps your AC running efficiently and extends its lifespan. Here’s how:

✔️ Change Air Filters Regularly

  • A clogged filter allows dust to reach the coils. Replace it every 1-3 months.

✔️ Keep the Outdoor Unit Clear

  • Trim plants and remove debris around the condenser to ensure proper airflow.

✔️ Schedule Annual HVAC Maintenance

  • A professional tune-up includes coil cleaning and system checks.

✔️ Use the Right Cleaning Tools

When to Call a Professional

While DIY cleaning helps, some situations require expert attention:

  • Persistent cooling issues after cleaning
  • Refrigerant leaks (indicated by hissing sounds or ice buildup)
  • Electrical problems (e.g., tripped breakers or faulty wiring)

Final Thoughts

Dirty AC coils reduce efficiency, increase energy costs, and shorten your system’s life. By recognizing the signs early, you can take action before major problems arise.

For a simple, cost-effective cleaning solution, try our DIY coil cleaning solutions. And if you’re unsure about tackling the job yourself, don’t hesitate to call an HVAC professional.

Stay cool and breathe easier with a well-maintained air conditioner!

Need more help? Check out our related guides:


BTU Calculator for Air Conditioners: Instantly Size Your Room

How Many BTUs Do You Need?

Use our free BTU calculator to quickly find out how much cooling power your space requires. Just enter your room size and a few details about your setup — no guesswork needed!

Room BTU Calculator


📎 Share This Tool

Want to share this calculator on your own blog or website? Just copy and paste the code below:

Infographic showing how to use the BTU calculator in 7 steps including measuring room size, entering square footage, choosing insulation level, and reviewing cooling needs

How to Use the BTU Calculator

Not sure where to start? Follow these simple steps to get an accurate BTU estimate for your space:

  1. Measure your room: Use a tape measure to find the length and width of the room. Multiply them to get the square footage (e.g., 12 ft × 15 ft = 180 sq. ft.).
  2. Enter your room size: Plug in the square footage where indicated in the calculator.
  3. Choose insulation level: If your room has good insulation and energy-efficient windows, you may need fewer BTUs. Poor insulation means you’ll need more.
  4. Select ceiling height: Higher ceilings mean more air to cool, which raises the BTU requirement.
  5. Note sun exposure: Rooms that get a lot of direct sunlight will need extra cooling power. Mark your room as “sunny” if it faces south or west or has large windows.
  6. Adjust for people or appliances: If the room is regularly occupied by 2+ people or has heat-generating electronics (TVs, computers), add a few hundred BTUs to the result.
  7. Review your results: The calculator will give you a recommended BTU range. Use this to choose the right size AC unit for your room.

Tip: It’s better to size your AC unit slightly above the minimum recommendation than to go too small. Too big, however, can lead to poor humidity control and energy waste.

What Is a BTU and Why Does It Matter?

BTU stands for British Thermal Unit, and it’s a way to measure heat. When it comes to air conditioning, it tells you how much cooling power an AC unit has. If you choose a system with too few BTUs, it won’t cool the room efficiently. Too many, and it could waste energy or cool unevenly.

What Affects the Number of BTUs You Need?

  • Room Size: The bigger the room, the more BTUs required.
  • Sun Exposure: Bright, sunny rooms need more cooling power.
  • Insulation: Poorly insulated spaces lose cold air faster.
  • Ceiling Height: Higher ceilings = more air to cool.
  • Number of Occupants: More people = more body heat.

Our calculator accounts for all of these to give you an accurate estimate.

BTU Chart by Room Size

Room Size (sq. ft.) Recommended BTUs
100–150 5,000
150–250 6,000
250–300 7,000
300–350 8,000
350–400 9,000
400–450 10,000
450–550 12,000
550–700 14,000

Frequently Asked Questions

Can I use this calculator for heating too?

While it’s primarily for cooling, the same BTU principles apply to heating — but factors like furnace type and humidity matter more for heating calculations.

What size AC unit do I need for a 12×12 room?

A 12×12 room is 144 sq. ft., which usually needs about 5,000–6,000 BTUs, depending on sunlight and insulation.

Is more BTU always better?

No. An oversized unit will cycle too quickly, failing to dehumidify the air properly and driving up energy bills.

From Snow to Sleet: How Do You Protect an Air Conditioner in Winter Weather?

Air conditioning units are a significant investment, and it’s important to take steps to protect them during the winter months.

Extreme cold weather can cause damage to your AC unit, leading to costly repairs or replacements.

In this article, we’ll cover the best ways to protect your air conditioner during winter and ensure its longevity and functionality.

Why should you consider winterizing your AC for Winter?

Winterizing your air conditioner is an essential step in protecting your investment and ensuring that it continues to operate efficiently. Here are some reasons why it is important to winterize your air conditioner.

1. Protect your unit from damage:

During the winter months, your air conditioner is exposed to harsh elements such as snow, ice, and debris.

If left unprotected, these elements can cause damage to the unit, which may result in costly repairs or even the need for a full replacement.

By winterizing your air conditioner, you can prevent these potential issues and extend the life of your unit.

2. Avoid pest infestations

Winterizing your air conditioner also helps to prevent rodents and other pests from nesting inside the unit.

Once these pests take up residence in your air conditioner, they can cause damage to the unit’s internal components, resulting in costly repairs.

By winterizing your air conditioner and covering it with a waterproof cover and vinyl tie-downs, you can keep pests out and protect your investment.

3. Save energy

If you don’t winterize your air conditioner, cold air can seep in through the unit, causing your home to lose heat and leading to higher energy bills.

By properly winterizing your air conditioner and covering it with an outdoor AC cover, you can prevent this heat loss and save energy during the winter months.

Methods to Protect Your AC Unit in Winter

Method Description
Cover Your AC Unit Use a breathable cover or tarp, supplemented with plywood and a brick on top to shield from snow, ice, and debris.
Build a Dedicated Structure Construct a protective structure with a roof to keep snow and ice at bay, ensuring ample space for airflow.
Schedule a Professional Maintenance Check Have a professional clean, inspect, and test the unit to address potential issues before the cold sets in.
Regular Cleaning Clean the unit’s exterior and surroundings to maintain efficiency and prevent damage from accumulated debris.
Turn Off Your AC Power down and unplug the unit to save energy and reduce the risk of winter damage.

How Do You Protect an Air Conditioner in Winter Weather?

1. Cover Your AC Unit

Covering your AC unit can provide protection from winter elements like snow, ice, and freezing rain.

However, it’s important to avoid covering the entire unit with non-breathable material, as condensation may build up inside the condenser.

Instead, use a breathable cover or tarp, and make sure to cover the top with a slab of plywood and a brick to prevent leaves, sticks, and icicles from falling in .

AC Covering Options and Considerations

Covering Option Pros Cons Additional Tips
Breathable Cover Allows moisture to escape. May not be as durable as non-breathable materials. Pair with a plywood slab for extra protection.
Tarp Offers sturdy protection. Can trap moisture, leading to condensation. Ensure it’s loosely fitted to allow airflow.

2. Build a Dedicated Structure

Building a dedicated structure for your AC unit can offer additional protection from winter elements and provide a convenient storage space for gardening tools and other supplies.

The structure can be made of wood or other materials and should have a roof to prevent snow and ice buildup.

Make sure to leave enough space around the unit for proper airflow.

3. Schedule a Professional Maintenance Check

Before winter arrives, schedule a professional maintenance check for your AC unit.

This check should entail a thorough cleaning of the unit, inspection of all components, and testing of the system to ensure it’s working properly.

This can help identify any potential issues and ensure your unit is in good condition for the cold weather.

Winter Maintenance Checklist

Checklist Item Importance
Cleaning Removes dirt and debris, preventing airflow blockages and component damage.
Inspection Identifies wear, tear, or damage early to avoid costly repairs.
System Testing Ensures the unit operates efficiently and is ready for the next season.


4. Regular Cleaning

Regularly cleaning your AC unit can help maintain its efficiency and prevent damage.

Start by turning off the power to the unit and cleaning the exterior with a hose or soft cloth.

 Remove any debris that may have accumulated on or around the unit, including leaves, grass, and dirt.

Clean or replace the air filter as needed to ensure proper airflow.

DIY Winter Cleaning Guide

Step Action Frequency
Exterior Cleaning Use a hose or soft cloth to clean the unit’s casing. Before covering
Debris Removal Clear leaves, grass, and dirt from around the unit. Monthly
Filter Maintenance Clean or replace the air filter to maintain airflow. As needed

5. Turn Off Your AC

Finally, consider turning off your AC unit during the winter to save on energy costs and prevent potential damage.

Make sure to turn off the power to the unit and unplug it from the electrical outlet.

This can help prolong the life of your AC unit and save you money on your energy bill .

Conclusion: How Do You Protect an Air Conditioner in Winter Weather?

Protecting your air conditioner during winter is crucial for ensuring its longevity and functionality.

Covering your unit, building a dedicated structure, scheduling a professional maintenance check, regularly cleaning your unit, and turning off your AC unit can all help prevent damage and save you money in the long run.

By following these tips, you can ensure your AC unit is ready for winter and continue to enjoy its benefits for years to come.

FAQ

Why is it important to winterize my air conditioner?

Winterizing your air conditioner helps protect it from the harsh winter elements and prolong its lifespan.

Cold weather can damage internal parts, and snow and ice can cause blockages and other issues.

How do I cover my air conditioner in a window?

First, turn off the power to your unit. Then, measure your air conditioner and purchase a cover that fits.

Use bungee cords or vinyl tie-downs to secure the cover in place, making sure it’s tight enough to prevent snow and ice from getting in, but not too tight that it restricts airflow.

How do I cover my AC unit inside?

If you have a wall-mounted air conditioner, you may not need to cover it at all.

However, if you do, make sure to use a cover specifically designed for indoor use, as outdoor covers may not be suitable for indoor environments.

Can I use a tarp to cover my air conditioner?

While a tarp can provide some protection, it’s not recommended as it can trap moisture and condensation, causing damage to your unit.

Should I completely cover my air conditioner or leave some parts exposed?

It’s best to only cover the top and sides of your air conditioner, leaving the bottom exposed for airflow. This will prevent moisture buildup and allow for proper ventilation.

Do I need to clean my air conditioner before covering it?

Yes, it’s important to clean your air conditioner before covering it to prevent dirt and debris from accumulating and potentially causing damage.

How often should I check my air conditioner during the winter?

You should periodically check your air conditioner throughout the winter season, especially after snow or ice storms, to make sure there is no buildup of snow or ice on the unit.

Can I leave my air conditioner uncovered if I live in a mild climate?

If you live in a mild climate, you may not need to cover your air conditioner, but it’s still a good idea to regularly check and clean it to ensure optimal performance.

How do I safely turn off my air conditioner for the winter?

First, turn off the power to your unit. Then, unplug it from the outlet and cover it with a waterproof cover.

Can I use a DIY cover for my air conditioner?

While some DIY covers may provide protection, it’s recommended to use a cover specifically designed for your air conditioner to ensure the best fit and protection.

Look for covers made of breathable material that will allow for proper airflow.

In conclusion, winterizing and covering your air conditioner is an important step in protecting your investment and ensuring its longevity.

Make sure to follow these tips and guidelines to properly cover and maintain your unit during the winter months.