
Can I Use a Humidifier With Well Water?

Quick Answer:

You can use well water in a humidifier, but whether you should depends mostly on the humidifier. Ultrasonic and impeller models can send minerals from the water into the room as white dust, so distilled water is usually the better choice. Evaporative and warm-mist models keep most of those minerals inside the machine, but you will have more wick changes or scale to clean.

Most people assume the question comes down to whether well water is “safe” or “unsafe.” The more useful question is simpler: Where do the minerals go when the humidifier runs?

In some humidifiers, they land on the wick or heating element. In others, they leave the machine with the mist and settle across your dresser, nightstand, and other surfaces as fine white dust. That difference should determine what water you use.

Educational graphic showing how hard water affects different humidifier types, including white dust from cool mist humidifiers, mineral buildup in ultrasonic units, scale on warm mist heaters, and wick damage in evaporative humidifiers.

Start With the Type of Humidifier You Own

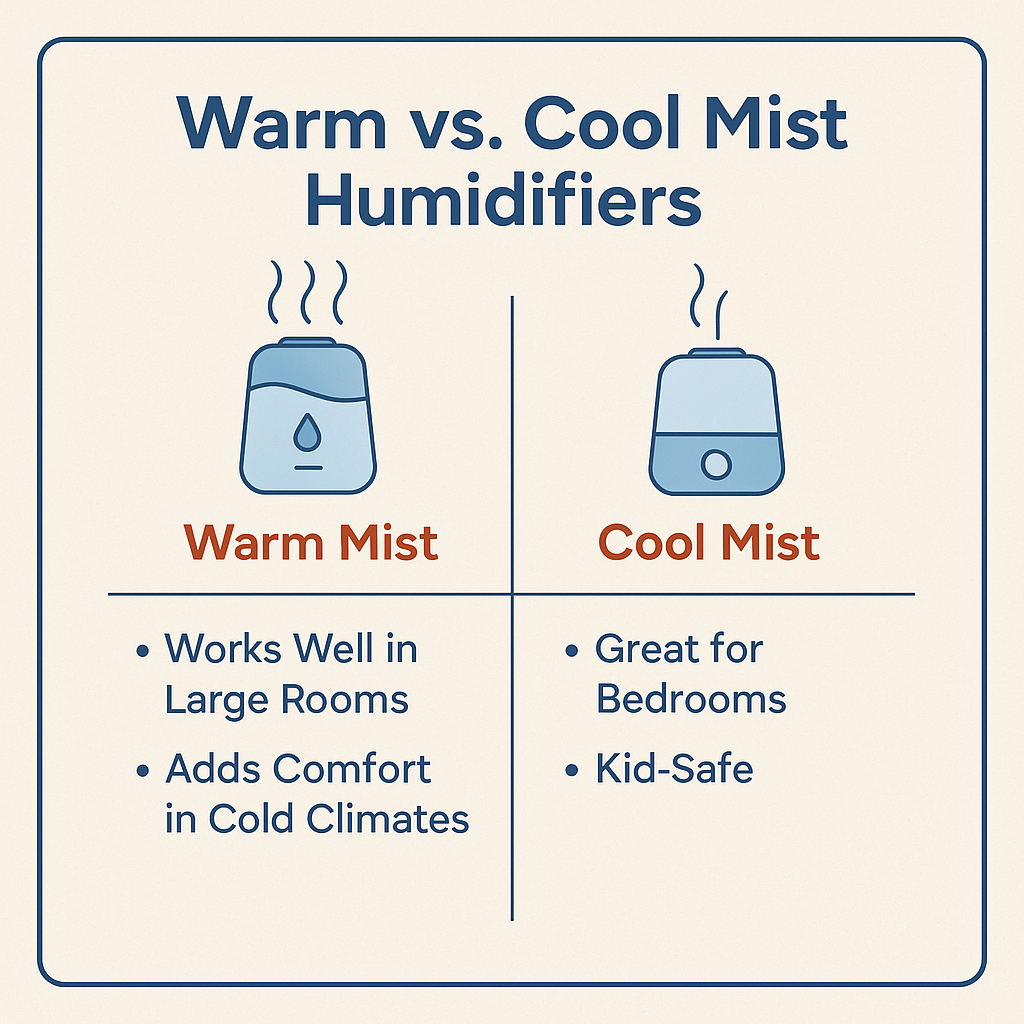
If you are not sure what kind you have, watch it while it runs. An ultrasonic or impeller unit produces a visible cool mist. An evaporative model uses a fan and a replaceable wick, and its moisture is usually invisible. A warm-mist unit heats the water and releases steam.

Humidifier type What well-water minerals do Best starting choice
Ultrasonic or impeller Can leave the tank with the mist and become white dust Use distilled water
Evaporative Collect mostly in the wick Well water may work; expect more wick changes
Warm mist Build up inside the tank and on the heating element Well water may work; expect regular descaling

Read Our Complete Guide : The Complete Humidifier Guide: Types, Benefits, Usage Tips and Safety

If You Have an Ultrasonic or Impeller Humidifier

This is where untreated well water causes the biggest indoor-air concern. These models turn tank water into tiny airborne droplets. When those droplets evaporate, dissolved minerals can remain behind as particles.

The first thing I would check is the furniture near the humidifier. Run a finger across a dark dresser, television stand, or glass tabletop. If it picks up a pale powder that returns after cleaning, the water is supplying more minerals than the machine can keep inside.

The U.S. Environmental Protection Agency recommends using low-mineral water, such as distilled water, to reduce mineral buildup and dispersal. The agency also notes that ultrasonic and impeller humidifiers are the types most likely to disperse minerals from their tanks into indoor air.

Important:

Do not treat white dust as only a cleaning nuisance. It means material from the water is entering the room. Switch to distilled water, use a manufacturer-approved demineralization cartridge, or change to an evaporative humidifier.

A demineralization cartridge can help, but it is a compromise rather than a permanent fix. Very hard water can exhaust a small cartridge quickly. If the dust returns, replace the cartridge or move to distilled water.

If You Have an Evaporative Humidifier

An evaporative humidifier is usually the most practical choice for someone who wants to use well water without buying gallon jugs all winter.

The fan pulls room air through a wet wick. Water evaporates from the wick, while most calcium, magnesium, and other minerals stay behind. That greatly reduces the white-dust problem, but the minerals do not disappear. They harden the wick instead.

Most homeowners notice the change before the machine completely stops working. The wick turns stiff or crusty, the fan keeps running, and the room no longer reaches the humidity level it did before. At that point, cleaning the tank will not restore a worn-out wick. Replace it.

Practical Tip:

Keep one replacement wick on hand. Hard well water can shorten wick life, and discovering that during a dry spell usually means waiting several days for a replacement.

If You Have a Warm-Mist Humidifier

Warm-mist humidifiers boil water, so they generally do not disperse substantial amounts of minerals into the air. Instead, the minerals stay behind on the heating element and the bottom of the reservoir.

You will see the problem rather than dust it from the furniture: a rough white or tan crust develops inside the unit. As that layer thickens, the humidifier may heat more slowly, make more noise, or produce less steam.

Well water can be workable in this type of machine if you are willing to descale it regularly. Follow the owner’s manual. Vinegar is commonly recommended for mineral scale, but it should only be used when the manufacturer allows it and must be rinsed away thoroughly.

Is Your Well Water Actually Hard?

Well water is often described as hard water, but that is not automatically true. Mineral levels vary from one well to another. One home may develop a crust around its faucets within a week, while a nearby home sees very little scale.

Look for the ordinary clues first:

  • White or tan crust around faucets and showerheads
  • Cloudy spots on clean drinking glasses
  • Scale inside a kettle or coffee maker
  • Humidifier wicks that become stiff quickly
  • White dust near an ultrasonic humidifier

A hardness test gives you a better answer than guessing. But hardness only measures part of the water-quality picture. It does not prove that a private well is free of microorganisms or other contaminants.

What this means:

A clean-looking tank and soft-feeling water do not guarantee that the water is the best choice for a mist-producing humidifier. If the well’s quality is uncertain, distilled water removes the guesswork.

Distilled, Filtered, and Softened Water Are Not the Same

This is where people often spend money without solving the right problem.

Water option What it changes Best use
Distilled water Removes nearly all dissolved minerals Best simple choice for ultrasonic and impeller models
Demineralization cartridge Reduces minerals before mist is produced Useful when approved for the humidifier and replaced on time
Ordinary drinking-water filter Varies by filter; many do not remove hardness minerals Use only if its specifications address the minerals in question
Softened water Exchanges calcium and magnesium for sodium or potassium May reduce scale, but is not the same as distilled water

A whole-house softener can make scale easier to manage, but it does not produce mineral-free water. I would not install one solely to supply a small portable humidifier. If an ultrasonic unit is leaving dust, distilled water or a suitable demineralization system is the more direct solution.

2 Women talking about using well water in a humidifier

Cleaning Solves a Different Problem

Descaling removes mineral crust. Cleaning also helps prevent film and microorganisms from building up in standing water. Neither one changes what untreated mineral-heavy water releases while an ultrasonic or impeller humidifier is operating.

The EPA recommends emptying, wiping, and refilling portable humidifiers daily and cleaning them every third day. The Centers for Disease Control and Prevention also advises emptying humidifiers every day, cleaning them according to the manufacturer’s directions, and allowing them to air-dry after cleaning.

  1. Unplug and empty the humidifier. Do not keep topping off yesterday’s water.
  2. Clean it according to the manual. Remove scale or film from every surface that contacts water.
  3. Rinse thoroughly. Cleaner left in the tank can be released into the room when the unit runs.
  4. Let the parts dry. Do this before storage and whenever the humidifier will sit unused.
  5. Inspect the working parts. Replace a crusted wick, exhausted cartridge, or damaged component instead of trying to clean it indefinitely.

Important:

Do not add water-softener salt, essential oils, disinfectants, or scale-treatment chemicals unless the humidifier manufacturer specifically approves them for the tank. Preventing a mineral from sticking does not necessarily prevent the humidifier from sending it into the air.

When Should You Stop Using the Well Water?

You do not need to abandon well water because you find a little scale inside an evaporative or warm-mist unit. That is a maintenance issue. Clean the scale or replace the wick and watch how quickly it returns.

I would change the water or the humidifier when:

  • An ultrasonic or impeller model leaves recurring white dust
  • Scale returns so quickly that cleaning becomes impractical
  • Replacement wicks clog much sooner than expected
  • The humidifier develops slime, film, or an unpleasant odor
  • The well’s water quality is unknown or there is reason to suspect contamination

The simplest fix depends on the machine. Switch an ultrasonic or impeller model to distilled water. With an evaporative unit, decide whether more frequent wick replacements are worth the cost. With a warm-mist model, decide whether regular descaling fits your routine.

The Bottom Line

Yes, a humidifier can run on well water. That does not mean every humidifier handles it well.

If your machine sends visible cool mist into the room, I would start with distilled water. If it uses a wick or boils the water, your well water may be perfectly workable as long as you keep up with wick changes or mineral scale.

Watch where the minerals end up. Once you know that, the right water choice becomes much easier.

Does HEPA Filters Remove Asbestos? Common Questions

Does HEPA Filters Remove Asbestos?

The answer Yes and No.

And asbestos air scrubber or air purifier uses HEPA filters but consumers are warned that an air purifier can have leaks that do not qualify it to be a proper asbestos abatement tool.

Professionals use HEPA as part of there bestest abatement process but as a homeowner the best HEPA asbestos air purifier should be left as a precautionary after the abatement is finished.


Asbestos is a scary subject as well as it should be.

Long-term exposure to asbestos can cause serious health problems including cancers like mesothelioma.

  But since it is such a ominous subject that many people deal with, and there is a lot of misconceptions and questions people have when they think they have asbestos or have come in contact with it.

Avoid using paper mask as asbestos fibers or much too small for a paper mask to offer protection

We created a small hit list of common questions.


Does a HEPA Filter Remove Asbestos?

Yes a HEPA filter will remove asbestos. HEPA filters are engineered to capture particles as small as .3 microns.

Asbestos micron sizes or in the .7 to 90 length and size.

A HEPA filter for asbestos is usually found in the form of an asbestos respirator.

A HEPA respirator should always be used doing with asbestos dust.

Respirators with a p100 rating render the greatest amount of protection.


Does Asbestos stay in the air?

Asbestos can stay in the air up to 72 hours and longer when there are currants carrying it around.

Can you Vacuum Asbestos?

No you should never vacuum asbestos. Sweeping and vacuuming asbestos dust will only aggravate it and push it into the air stream where you can breathe it in.

Is Asbestos Dangerous When Wet?

Keeping asbestos wet is one way of keeping the particles stable but they do not enter the Airstream.

In fact asbestos when it is in water is not found to be dangerous and can even be swallowed without it becoming hazardous.

How long do you have to be exposed to asbestos for it to be harmful?

Low exposure to asbestos seldom causes disease. One brief Exposure does not cause a big risk.

But multiple brief exposures can add up to a significant amount of asbestos fiber being breathed.

Asbestos can be harmful to breathe in small amounts, and if you have been exposed to asbestos, it is best to tell your doctor before any breathing related issues arise.

   There is clearly a difference between someone who has come into brief contact with it compared to someone who has worked with it in construction for a long time.

Long-term exposure to asbestos and pre-existing lung diseases as well as how long you were exposed and how much of it was in the air all have a factor and how harmful it can be.

Are Asbestos Risk Overblown?

Long-term exposure to asbestos causes lung disease and mesothelioma.
That’s about as serious as it gets. These diseases can significantly shorten your life span and cause your life to be a living hell dealing with the cancer.

Short-term risk may be considered by some to be overblown because of the majority of people who suffer from asbestos-related diseases we’re exposed too heavy amounts of asbestos dust for a long period Of time.

Remember that working with asbestos is not the only way you can be exposed to it. Whenever it is Disturbed, it poses a hazard. For this reason it is important to know are you have Building Products that use asbestos in your home.

Can you smell asbestos? Is asbestos odorless?

Asbestos does not have an odor.

Can you Taste Asbestos?

No asbestos does not have a taste either.

Can you See Asbestos?

Asbestos fibers or not visible to the naked eye.

Will Asbestos Make Your Skin Itch.

No asbestos will not make your skin itchy like fiberglass.

If you are dealing with an older home, looking for asbestos is as practical as considering the building materials used at the time.

For instance ceiling tiles were the rage back then but they were typically made out of asbestos materials.

As were vinyl floor tiles. Cement sheets were used for outdoor siding which also contained asbestos.

If you have a home that was built before the 1980s , there is a good chance that you have some materials that have asbestos in them. Having your home tested is a good ideal.

Should I Test for Asbestos?

Short answer, no. You should contact a professional if you think you have asbestos in your home. Remember that insurance will not cover the cost if you not go through the proper channels.

Popcorn Asbestos

If you have a popcorn ceiling that you believe with chance of containing asbestos, it is best to have it tested.

As stated before, doing your own test or remediation can cause you to be up a Creek with no paddle when it comes to getting help from your insurance company.

Most insurance will not cover any type of do it yourself asbestos testing or handiwork.

As long as asbestos is not disturbed, it is not dangerous.

An Asbestos  ceiling can be sprayed with vinyl paint to keep it from crumbling.

It won’t change the look of the ceiling but it will help avoid the cost of having the ceiling completely removed by a professional.

If it’s safety issue where the ceiling is in danger of being scraped, a professional can place gypsum board over the asbestos ceiling to keep it from being disturbed and removing the dated look of the popcorn texture.

What Kind of Cancer Does Asbestos Cause?
1. Mesothelioma.
2. Ovarian Cancer
3. Laryngeal Cancer
4. Lung Cancerv

Can you get Mesothelioma from one exposure?

Asbestos cancer or mesothelioma occurs primarily in people who have had long term, high levels of exposure.

One exposure does not pose of developing Mesothelioma.

Asbestos on Shoes.

Getting asbestos on your shoes and clothing will provide a means of travel for the dust. Second hand exposure to asbestos can happen by the transfer of asbestos on your clothes and shoes.

The fears connected to asbestos come from the long-term heavy exposure because of the building materials that Carpenters and laymen were using daily
before the 1980s. But the fear of cancer should not concern you if you happened to come across asbestos. It takes much more than just a one-off incident.

Clothing and shoes are really not an issue anymore as for working with asbestos because companies are required to carry the proper protective wear. When you are done working, you simply leave the clothing behind.

Why Central Heating Causes Dry Coughs and How to Prevent Them

Why is My Central Heat Making Me Cough?

If you find yourself coughing more often when the central heating is on, you’re not alone. Central heating can dry out the air and irritate respiratory passages, leading to coughing for some people. However, it’s not just the dry air that could be causing discomfort. Mold in HVAC systems can also contribute to respiratory issues, including coughing. Thankfully, there are steps you can take to mitigate these effects and keep your airways calm.

Why Central Heating Causes Dry Air

Central heating works by warming air and distributing it throughout your home via vents and ducts. However, this heated air lacks moisture. As it circulates, the dry air evaporates moisture from surfaces like your skin, nasal passages, throat, and lungs, which can make tissues dry, irritated, and inflamed, triggering coughing.

Colder outdoor air holds less moisture than warm indoor air. So when you heat up cold outdoor air, its relative humidity drops dramatically. Central heating systems also lack a humidification component to add moisture back into the air.

dirty ductThe Hidden Hazards of Dirty Ducts

 Dirty ducts can significantly compromise your indoor air quality and the efficiency of your HVAC system.
Accumulated dust, pollen, pet dander, and other pollutants in the ducts can circulate contaminated air throughout your home, exacerbating allergies, respiratory problems, and asthma symptoms. Moreover, this buildup can restrict airflow, forcing your system to work harder and leading to increased energy consumption and decreased system efficiency.2

Recognizing the signs of dirty ducts is key to maintaining a healthy indoor environment.
Indicators such as visible dust buildup around vents, unusual odors when the HVAC system is running, and an increase in respiratory issues or allergic reactions can signal the need for professional duct cleaning. Ensuring your ductwork is clean not only enhances air quality but also contributes to the overall efficiency and longevity of your HVAC system.1

Ventilation and Air Circulation

Before we delve into advanced air purification technologies like UV light solutions, it’s essential to understand the foundational role of ventilation and air circulation in maintaining indoor air quality. Proper ventilation is key to ensuring a healthy living environment, especially during the heating season when homes are sealed tight against the cold.

Why Ventilation Matters

Ventilation involves the exchange of indoor air with fresh outdoor air, which helps to reduce the accumulation of indoor air pollutants, including dust, allergens, and volatile organic compounds (VOCs). Good ventilation practices can also help mitigate the drying effect of central heating by introducing air with a higher moisture content from outside, particularly in areas with relatively humid outdoor climates.

Strategies for Improved Air Circulation

  • Natural Ventilation: Simply opening windows and doors for short periods can significantly improve air quality, even in cold weather. This allows stale, dry air to escape and fresh, moist air to enter.
  • Mechanical Ventilation: For homes in extreme climates or those with poor natural ventilation, mechanical systems such as Heat Recovery Ventilators (HRVs) or Energy Recovery Ventilators (ERVs) can provide controlled ventilation without significant heat loss.
  • Ceiling and Exhaust Fans: Utilizing ceiling fans can help circulate heated air more evenly throughout your home, reducing hot and cold spots and improving comfort. Exhaust fans, especially in kitchens and bathrooms, are crucial for removing excess moisture and odors and preventing mold growth.

The Role of Air Circulation

In addition to bringing in fresh air, ensuring that the air inside your home moves effectively can prevent the accumulation of airborne pollutants. Air circulation can be enhanced with strategic use of fans, ensuring that air filters are clean and unobstructed, and making sure that furniture does not block air vents.

hvac coughMold in HVAC Systems

In addition to drying out the air, central heating systems can harbor mold, which exacerbates respiratory issues. Mold thrives in moist environments, and when it grows in the ductwork or on other HVAC components, spores can spread throughout your home. Inhaling these spores can cause allergic reactions, exacerbate asthma, and provoke coughing.

Regular HVAC maintenance is crucial to prevent mold growth. This includes cleaning or replacing air filters, ensuring proper drainage, and inspecting ductwork for signs of moisture or mold. If mold is detected, professional cleaning may be necessary to remove it and prevent future growth.

Comparison of Indoor Air Quality Issues

Issue Cause Effects on Health Common Solutions
Dry Air Central heating systems heating cold outdoor air Dry and irritated respiratory passages, leading to coughing Humidifiers, hydration stations, steamy showers
Mold Moisture buildup in HVAC systems and ducts Allergic reactions, asthma exacerbation, coughing Regular HVAC maintenance, professional cleaning, UV light purifiers
Bacteria/Viruses Circulation of contaminated air through HVAC systems Respiratory infections, worsening of health conditions UV light purifiers, improved filtration systems, regular cleaning

Harnessing UV Light to Combat Mold in HVAC Systems

While addressing humidity and ensuring regular maintenance are critical steps in preventing mold growth in your HVAC system, another innovative solution is the use of Ultraviolet (UV) light technology. UV light, particularly in the UV-C spectrum, is known for its germicidal properties, effectively inactivating a wide range of microorganisms, including mold spores and bacteria.

How UV Light Works Against Mold

When installed within your HVAC system, UV lights work continuously to purify the air, targeting mold spores and bacteria before they have a chance to circulate throughout your home. The UV-C light disrupts the DNA of these microorganisms, preventing them from replicating and ultimately leading to their destruction. This not only helps to keep the ductwork clean but also improves the overall air quality in your home, reducing the potential triggers for coughs and other respiratory issues.

Implementing UV Light Solutions among the leading solutions in this space is the REME HALO® by RGF, a whole-home in-duct air purifier that transcends traditional UV lamp capabilities.

Innovative Air Purification with REME HALO

The REME HALO® stands out with its unique approach to air purification, utilizing RGF’s proprietary technology to produce low levels of hydrogen peroxide in the air that circulates through your air-conditioning system. This proactive method effectively reduces airborne and surface bacteria, viruses, odors, and mold spores, enhancing the quality of the air you breathe. The device’s ability to replicate nature’s air purification process indoors makes it an exceptional addition to any HVAC system, aiming to create a healthier living environment. Click Here For More Info

REME HALO: A Step Further in Air Purification

For those particularly concerned about ozone emissions, the REME HALO offers a solution that is verified as Zero Ozone to the UL 2998 standard. Utilizing the advanced aGHP-Cell™ technology, this model introduces Gaseous Hydrogen Peroxide into the air, targeting pollutants at their source without contributing to indoor ozone levels. This ensures that the air purification process is both effective and environmentally friendly, meeting the strict emissions limits set by CARB certification.

Safety Considerations

It’s worth noting that direct exposure to UV-C light can be harmful to humans and pets, potentially causing skin and eye irritation. Therefore, UV lights should be installed in parts of the HVAC system that are not directly accessible during normal use to ensure safety.

FAQ on Central Heating and Indoor Air Quality

Q1: How does central heating affect indoor air quality?
A1: Central heating can reduce indoor humidity levels, leading to dry air which can irritate the respiratory system and skin. It may also circulate dust, allergens, and other pollutants if not properly maintained.

Q2: Why does my house feel so dry in the winter?
A2: In winter, the cold air outside holds less moisture than warm air. When this cold air is heated indoors without adding moisture, it leads to dry indoor conditions.

Q3: Can dry indoor air cause health issues?
A3: Yes, dry indoor air can lead to dry cough, irritated sinuses, itchy skin, and can exacerbate respiratory conditions such as asthma and allergies.3

Q4: How can I improve humidity levels in my home during the heating season?
A4: Using humidifiers, placing bowls of water around the house, and keeping indoor plants are effective ways to add moisture back into the air.

Q5: What are the signs of mold in HVAC systems?
A5: Musty odors, visible mold growth around vents and drip pans, and increased allergy symptoms can indicate mold presence in HVAC systems.

Q6: How can UV light purifiers help improve indoor air quality?
A6: UV light purifiers can kill or deactivate microorganisms like bacteria, viruses, and mold spores, reducing their presence in the air circulated by the HVAC system.

Q7: Is it necessary to have my ductwork cleaned regularly?
A7: Regular duct cleaning can help remove dust, debris, and potential mold growth, improving the efficiency of your HVAC system and the quality of indoor air.

Q8: Can ventilation help with indoor air quality during the heating season?
A8: Yes, proper ventilation can introduce fresh air and reduce pollutant levels indoors. Opening windows briefly or using ventilation systems can help.

Q9: What humidity level should I maintain indoors during winter?
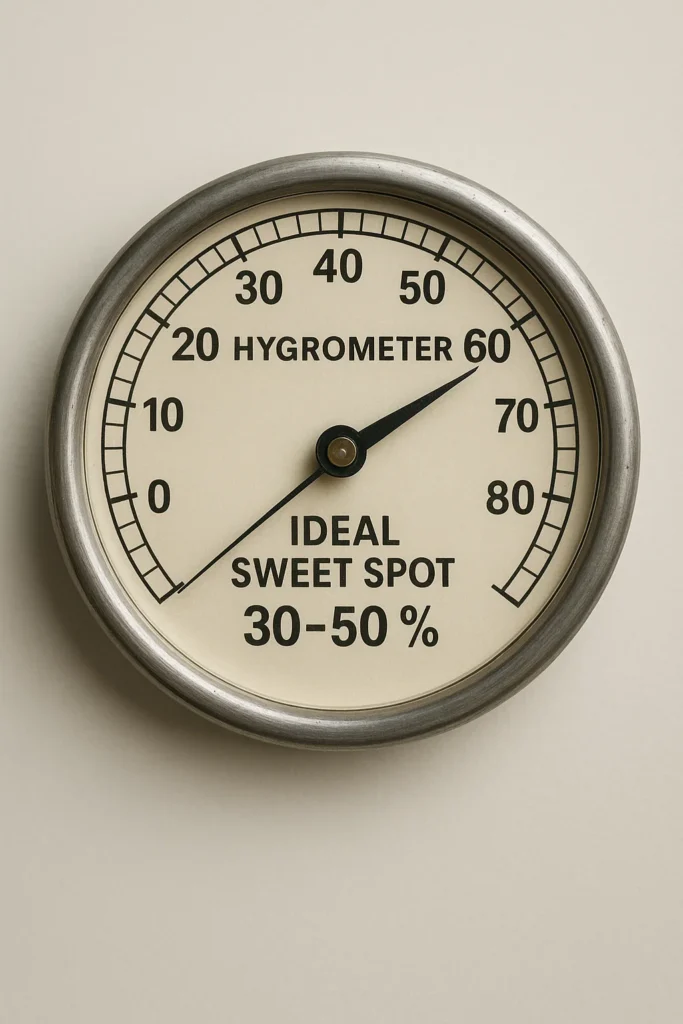
A9: Indoor humidity levels between 30-50% are considered optimal for comfort and health during the winter months.

Q10: Should I see a professional if I suspect my HVAC system is affecting my health?
A10: Yes, if you experience persistent health issues like coughing, allergies, or asthma that you suspect are linked to your HVAC system, consult a professional for an inspection and potential solutions.


Can You Use a Humidifier Without a Filter? The Surprising Truth

Can I use a humidifier without a filter?

Yes, you can use a humidifier without a filter. Filters in humidifiers primarily trap dust and airborne particles, but they are not essential for the basic function of emitting moisture. However, operating without a filter may require more frequent cleaning to maintain optimal performance and hygiene.

Introduction

Navigating the world of humidifiers can often lead to a common query: Is it necessary to use a filter in a humidifier?

While many assume that a filter is an indispensable component, the reality is more nuanced.

In this article, we delve into the role of filters in humidifiers, explore different types of humidifiers and their requirements, and discuss how the choice of using a filter—or not—impacts the overall function and maintenance of your humidifier.

Whether you’re considering a new purchase or seeking to optimize your current humidifier, understanding these aspects is key to ensuring a healthy, humidified environment in your home. See our full guide.

filterless humidifierThe purpose of a filter on a humidifier is:

  • Trapping Particulates: The filter catches dust, pet dander, and other airborne particles from the air that is drawn into the humidifier. This helps to prevent these particulates from being dispersed into the room with the mist.
  • Preventing Microbial Growth: It can help to reduce the growth of mold, bacteria, and algae within the humidifier itself, which can otherwise proliferate in the moist environment of the humidifier’s reservoir.

It is not a type of water filter that will filter the minerals out of hard water. Water is not meant to pass through the filter whatsoever.

If that were the case, there would be no need for using distilled water in a humidifier.

If you have ever taken a filter out of a humidifier after it’s been used for a while, you will notice that it is more of a grimy dust. You’ll often see white dust forming around a humidifier; the air filter is responsible for reducing that as well.

The filter will help keep those particles from the air out of your humidifier, which will lengthen the life of the humidifier and keep you from inhaling those particles.2

Like I said, it is not ideal to run your humidifier without a filter, but if you have a humidifier that doesn’t have a filter, it’s not going to hurt anything to run it until you are able to get a filter or a humidifier that has a filter.

The humidifier will still do the job of humidifying without the filter.

Filterless Humidifiers

Not all humidifiers have filters.

If you have a humidifier that doesn’t have a filter, or one that you’re not familiar with, it would be worth the search to see if your humidifier actually calls for a filter.

For instance, ultrasonic humidifiers are one of the most popular types of humidifiers sold, and ultrasonic humidifiers do not use filters.

Comparison of Different Types of Humidifiers

Humidifier Type Filter Required Mist Type Noise Level Key Features
Ultrasonic Humidifier No Warm/Cool Mist Quiet Uses ultrasonic vibrations to produce mist, ideal for quiet environments.
Warm Mist Humidifier No Warm Mist Moderate Boils water to produce steam, good for reducing germs and bacteria.
Impeller Humidifier No Cool Mist Moderate Uses rotating disks to produce mist, effective in smaller areas.
Evaporative Humidifier Yes Cool Mist Louder Uses a wick filter to evaporate water, self-regulating moisture output.
Cool Mist Humidifier Yes (Some Types) Cool Mist Varies Either ultrasonic or evaporative, offers cool moisture, good for large areas.

Here’s a list of portable humidifiers that don’t use filters:

  • Ultrasonic Humidifiers: These use ultrasonic vibrations to produce mist. They are known for being quiet and can come in both warm and cool mist versions.
  • Warm Mist (Steam Vaporizers): These humidifiers boil water to produce steam, which is then cooled slightly before being released into the air. Because of the boiling process, they don’t generally need filters.
  • Impeller Humidifiers: These create mist using a rotating disk that flings water at a diffuser, breaking the water into fine droplets. They usually do not require a filter.

Here’s a list of humidifiers that do use filters:

  • Evaporative Humidifiers: These are the most common type that use a filter. They work by blowing air through a wet wick or filter to evaporate water into the air.
  • Cool Mist Humidifiers: Some cool mist humidifiers are evaporative and use a wick filter to absorb water from the tank and release it into the air as a cool mist.

Cleaning Maintenance

The filter on a humidifier is not meant to take the place of regular cleanings.

Humidifiers need to be cleaned often because of the risk of bacteria growing inside of the water. This is especially true when the humidifier has had standing water in it for any length of time.

The bacteria that grows on water and becomes airborne can be very hazardous to your health.1

Legionnaires’ disease and Pontiac fever are illnesses that are a direct result from inhaling airborne bacteria that has grown on water. Definitely not something you want to risk.

When to Replace Humidifier Filters Signs & Maintenance TipsOther Preventative Solutions Besides Filters:

Product Name Type Suitable for Humidifier Type Usage Frequency Key Benefits
Demineralization Cartridges Cartridge Ultrasonic Varies Reduces mineral buildup and white dust from hard water.
Humidifier Cleaner Solution Liquid Cleaner All Types As needed Cleanses and disinfects, preventing mold and bacteria growth.
Hard Water Filters for Faucets Water Filter Attachment All Types Continuous Filters minerals before they enter the humidifier, reducing buildup.
Distilled Water Water All Types Continuous Prevents mineral deposits and microbial growth in the humidifier.
Antimicrobial Silver Ion Balls Water Treatment Accessory All Types Varies Releases silver ions to prevent microbial growth in the water.
Vinegar (for Cleaning) Natural Cleaning Agent All Types As needed Natural and effective for descaling and cleaning humidifiers.

Use Distilled Water: Water with a heavy mineral content is not good for humidifiers. The minerals that these waters contain can be a source of food for mold and bacteria to start growing faster

Water Distiller: You can purchase distilled water by the gallon or can
consider other alternatives to constantly purchasing distilled water for your humidifier, one practical solution is investing in a water distiller.

Not only does this provide a steady supply for your humidifier, but it also has various household applications.

For instance, distilled water is ideal for use in CPAP machines, preventing mineral buildup in steam irons, and maintaining automotive cooling systems.

It’s also beneficial in preparing solutions for sensitive plants, ensuring purity in cosmetics and skincare, and even in cooking and baking for recipes where water quality impacts the result. Here’s a good one.

Hard water filters are also a fairly inexpensive item that you can attach to your faucet to help remove minerals from tap water.  Distilled water is still the better option.

Demineralization cartridges are a type of humidifier cleaner can be dropped right into the water of the humidifier. These can take the place of using distilled water, but you may have to replace them more often for especially hard water. The other downside of demineralization cartridges is that they are primarily for ultrasonic humidifiers.

Recap

Can you use a humidifier without a filter?

The removal filters that come in humidifiers are not necessary for the humidifier to moisturize the air.
They are primarily air filters to keep dust particles from mucking up your unit, and they are not water filters.
Water is not meant to run through the filters whatsoever.
There are plenty of humidifiers available that don’t use filters at all, such as ultrasonic, impeller, and vaporizers.

FAQs: Using Humidifiers Without Filters

  1. Can I use a humidifier without a filter?
    Yes, it’s possible to use a humidifier without a filter. The main function of a filter in a humidifier is to trap dust and airborne particles, not to emit moisture.
  2. What are the consequences of using a humidifier without a filter?
    Using a humidifier without a filter can increase the frequency of cleaning required, as dust and particles are more likely to enter the humidifier, potentially leading to quicker buildup of residues and microbial growth.
  3. Do all types of humidifiers come with filters?
    Not all humidifiers have filters. Types like ultrasonic, warm mist, and impeller humidifiers typically operate without filters.
  4. Is it safe to use tap water in a humidifier without a filter?
    While tap water can be used, it may lead to mineral buildup and the emission of white dust. Using distilled or demineralized water is recommended, especially in humidifiers without filters.
  5. How can I maintain a humidifier without a filter?
    Regular cleaning is crucial for a filterless humidifier. Ensure to empty, clean, and dry the water tank regularly, and follow the manufacturer’s guidelines for maintenance to prevent bacteria and mold growth.

Homemade AC Coil Cleaner- 5 DIY Recipes

What’s the best homemade AC coil cleaner?
A simple mix of vinegar and water is one of the safest and most effective homemade AC coil cleaners. For deeper cleaning, adding baking soda or using hydrogen peroxide diluted in water can help remove grime, mold, and bacteria without damaging your unit.

Not sure which homemade cleaner to try? Here’s how they compare at a glance.

Homemade AC Coil Cleaner Recipes That Really Work

Comparison Table: Homemade AC Coil Cleaners

Cleaner Type Ingredients Best For Notes
Vinegar & Water Vinegar + Water Mold, Mildew Eco-friendly, mild odor
Baking Soda Mix Dish Soap + Baking Soda Grease, Stuck Dirt Mild abrasive, safe for most coils
Hydrogen Peroxide 1 part H₂O₂ + 4 parts Water Mold, Bacteria Disinfecting, antifungal/antibacterial
Bleach + Water 3 parts Water + 1 part Bleach Heavy Mold, Mildew Powerful but has strong fumes


Should You Even Clean Your AC Coils Yourself?

Cleaning your air conditioner coils might sound like a pro-level job — but with the right info and a little confidence, it’s something many homeowners can do themselves. While it’s true that anything labeled “HVAC” often feels intimidating or expensive, cleaning your coils is a simple task that can have a big impact on your AC’s performance and your energy bill.

Your air conditioner has two coils: the evaporator coil (inside your home) and the condenser coil (outside). The evaporator coil pulls heat out of the air indoors, while the condenser coil releases that heat outdoors. When dirt, grease, and dust build up on either one, your system has to work harder — and that means higher energy bills and less cooling power.

Even if your filters are clean, the coils can still gather grime from pet dander, pollen, cooking oils, or outdoor debris. Over time, this buildup acts like insulation, trapping heat in the system and reducing efficiency by as much as 40% according to the U.S. Department of Energy [source].

So should you do it yourself or call in a pro? If your coils are easy to access and you can safely shut off the power to your unit, a gentle cleaning with household ingredients is perfectly reasonable. But if your evaporator coil is buried behind sealed panels or you’re dealing with thick mold or corrosion, it’s smart to call a technician. You can always take over maintenance afterward using homemade cleaners.

The recipes below are designed for both beginners and seasoned DIYers — using ingredients like vinegar, baking soda, and hydrogen peroxide that are safe, affordable, and often already in your home. Whether you’re working on a mini-split, a central air unit, or just your outdoor condenser coil, these simple solutions can help restore airflow, fight mold, and lower your cooling costs.

ac coil cleaner alternative

What Are AC Coils — and Why Do They Get So Dirty?

AC coils are the workhorses of your air conditioner — they handle the heat exchange that makes cool air possible. There are two types: the evaporator coil (inside your home) and the condenser coil (outside). Together, they allow your AC system to pull warm air from inside, cool it down, and release the heat outdoors.

The evaporator coil sits inside your indoor unit, often near the furnace or air handler. It pulls heat and moisture from the air inside your home. The condenser coil lives outside and releases that heat into the outside air. Both are made up of tightly packed metal fins that need free airflow to do their job.

So what’s the problem? Those tightly packed fins are magnets for dust, grime, and mold. If you have pets, cook often, smoke indoors, or live in a dusty area, the coils can clog up faster. Even in clean homes, regular airflow pulls in microscopic debris that builds up over time.

When coils get dirty, your AC can’t transfer heat effectively. That means it runs longer, cools less, and drives up your energy bill. In some cases, the system may freeze up, overheat, or shut down completely. Regular coil cleaning is a small job that prevents big repairs.

Keeping your coils clean isn’t just about efficiency — it’s also about air quality. Mold, mildew, and bacteria can thrive in the damp, dirty environment around a neglected coil. Cleaning helps stop smells, allergens, and spores from blowing through your vents and into your home.

Homemade AC Coil Cleaner Recipes That Really Work

These simple recipes use everyday ingredients to safely clean your evaporator or condenser coils without damaging your system. Whether you’re tackling grease, mold, or general grime, there’s a DIY cleaner here that fits the job.

1. Vinegar and Alcohol Cleaner

Ingredients:

  • ½ cup white vinegar
  • ½ cup rubbing alcohol
  • 1–2 tablespoons baking soda (optional)

This cleaner acts as a degreaser and natural disinfectant, perfect for coils with sticky buildup or musty smells. The alcohol helps moisture evaporate quickly while dissolving residue, and the vinegar cuts through mineral deposits and mold.

To use: Mix ingredients in a spray bottle, shake well, and spray directly on coils. Let sit for 5–10 minutes, then wipe or rinse. Add baking soda for extra scrubbing power on stubborn spots.

2. Soapy Water and Baking Soda

Ingredients:

  • 1 bucket of warm water
  • 2–3 drops of dish soap (like Dawn)
  • 2 tablespoons baking soda

This is one of the safest and most budget-friendly coil cleaners for general maintenance. Dawn or similar dish soap cuts through grease and oily residue, while baking soda gently loosens stuck dirt from the coil fins.

To use: Mix everything in a spray bottle or bucket. Apply generously to the coils, let sit 5–10 minutes, then scrub gently with a soft brush or coil comb. Rinse thoroughly with water. Avoid using hard bristles that can damage the coil fins.

A picture of a spray bottle containing a homemade AC Coiler cleaner of bleach and water3. Bleach and Water

Ingredients:

  • 1 part bleach
  • 3 parts water

This heavy-duty cleaner is best for coils with visible mold, mildew, or biofilm buildup. Bleach disinfects and destroys organic growth quickly but must be used with caution.

To use: Spray diluted mixture onto affected coils, allow 5–7 minutes to sit, then rinse thoroughly. Use in a well-ventilated area and never mix with other cleaners.

4. Vinegar and Water

Ingredients:

  • 1 part white vinegar
  • 1 part water

This mild, eco-friendly cleaner is great for regular upkeep and preventing coil grime buildup. Vinegar naturally kills mold and breaks down mineral residue without harming metal components.

To use: Mix in a spray bottle, apply to coils, wait 10–15 minutes, then wipe clean or rinse. You can add a few drops of essential oil to reduce vinegar smell.

5. Homemade Enzyme Cleaner

Ingredients:

  • 2–3 citrus peels or small citrus fruits (like lemons or oranges)
  • 1 cup sugar
  • 4 cups water

This natural enzymatic cleaner breaks down organic material like grease, grime, and mold — without chemicals. It takes time to ferment but produces a powerful, non-toxic solution ideal for allergy-sensitive homes.

To use: Combine all ingredients in a plastic bottle or mason jar. Loosely seal and let ferment for 2–3 weeks, shaking daily. Once ready, strain and dilute 1:1 with water, then spray onto coils as needed. No rinse required.

6. Hydrogen Peroxide Cleaner

Ingredients:

  • 1 part hydrogen peroxide (3%)
  • 4 parts water

This cleaner works well for coils affected by bacteria, mildew, or musty odors. Hydrogen peroxide is a strong disinfectant that cleans through oxidation, but must be used safely.

To use: Mix in a spray bottle and apply to coils. Let sit 5–10 minutes, then rinse with clean water. Wear gloves and ventilate the area when spraying.

A picture of a man cleaning the coils in a mini split AC with homemade AC coil cleaner7. Mini-Split Coil Cleaner (Indoor Units)

Mini-split systems require a gentler approach — especially for cleaning the blower and indoor coils. A mild solution is safer for the more compact, electrical-heavy indoor components.

To use: Mix half-and-half vinegar and water, or use a light solution of soapy water with a few drops of dish soap (Dawn works great). Spray gently on the coils and blower wheel (avoiding electronics), then wipe or rinse carefully with a soft brush or cloth.

Application Method Comparison: DIY AC Coil Cleaners

Cleaner Type Application Method Rinse Required Safe for Indoor Coils Safe for Outdoor Coils
Vinegar & Water Spray or Soak Optional
Baking Soda Mix Brush or Scrub Yes
Hydrogen Peroxide Spray and Wait Yes ✅ (Ventilate)
Bleach & Water Spray Only Yes ⚠️ (Strong Fumes)
Enzyme Cleaner Spray and Soak No

Maintenance Schedule

For an effective AC maintenance schedule, consider the following guidelines based on your environment:

In dusty areas or homes with pets, clean the AC coils every 3 months to prevent buildup.

In less dusty environments, a bi-annual cleaning in spring and fall is sufficient.

Always ensure to replace or clean filters regularly, ideally every month, for optimal air quality and efficiency.

Safety Precautions

When using homemade AC coil cleaners, it’s crucial to prioritize safety.

Handle all chemicals, especially bleach, with care, using gloves and eye protection.

Ensure proper ventilation to avoid inhaling fumes.

When accessing outdoor units, use stable ladders and have someone spot you to prevent falls.

Always follow manufacturer guidelines for your AC unit to avoid damaging components.

Faq

  1. Can I use these cleaners on all types of AC units?

    Most homemade solutions are safe for various AC units, but check manufacturer guidelines.

  2. How often should I clean my AC coils?

    Clean coils every 3-6 months, depending on usage and environmental factors.

  3. Can homemade solutions damage my AC unit?

    If used correctly, they’re generally safe, but always test on a small area first.

  4. What are the signs my AC coils need cleaning?

    Reduced efficiency, higher energy bills, and poor cooling performance indicate dirty coils.

  5. Are there safety precautions for using homemade cleaners?

    Wear gloves and ensure good ventilation, especially when using solutions with vinegar or hydrogen peroxide.

  6. Can cleaning improve energy efficiency?

    Yes, regular cleaning can maintain optimal efficiency and lower energy costs.

  7. How to ensure cleaner safety for specific AC models?

    Consult your AC’s manual or contact the manufacturer for recommendations.

  8. Is rinsing required after cleaning with homemade solutions?

    Yes, to prevent residue buildup and potential damage.

  9. Can I clean the outdoor unit with homemade solutions?

    Yes, but be cautious of electrical components and water-sensitive areas.

Can I use Dawn dish soap to clean AC coils?

Yes — Dawn dish soap is a great option for breaking down greasy buildup and stuck-on grime. Just mix a few drops with water and apply it to your coils using a spray bottle or sponge. For extra cleaning power, combine it with baking soda. Always rinse thoroughly with water to avoid leaving any residue on the coils.

What’s the best homemade AC coil cleaner?
A simple mix of vinegar and water is one of the safest and most effective homemade AC coil cleaners. For deeper cleaning, adding baking soda or using hydrogen peroxide diluted in water can help remove grime, mold, and bacteria without damaging your unit.

Not sure which homemade cleaner to try? Here’s how they compare at a glance.

Homemade AC Coil Cleaner Recipes That Really Work

Comparison Table: Homemade AC Coil Cleaners

Cleaner Type Ingredients Best For Notes
Vinegar & Water Vinegar + Water Mold, Mildew Eco-friendly, mild odor
Baking Soda Mix Dish Soap + Baking Soda Grease, Stuck Dirt Mild abrasive, safe for most coils
Hydrogen Peroxide 1 part H₂O₂ + 4 parts Water Mold, Bacteria Disinfecting, antifungal/antibacterial
Bleach + Water 3 parts Water + 1 part Bleach Heavy Mold, Mildew Powerful but has strong fumes


Should You Even Clean Your AC Coils Yourself?

Cleaning your air conditioner coils might sound like a pro-level job — but with the right info and a little confidence, it’s something many homeowners can do themselves. While it’s true that anything labeled “HVAC” often feels intimidating or expensive, cleaning your coils is a simple task that can have a big impact on your AC’s performance and your energy bill.

Your air conditioner has two coils: the evaporator coil (inside your home) and the condenser coil (outside). The evaporator coil pulls heat out of the air indoors, while the condenser coil releases that heat outdoors. When dirt, grease, and dust build up on either one, your system has to work harder — and that means higher energy bills and less cooling power.

Even if your filters are clean, the coils can still gather grime from pet dander, pollen, cooking oils, or outdoor debris. Over time, this buildup acts like insulation, trapping heat in the system and reducing efficiency by as much as 40% according to the U.S. Department of Energy [source].

So should you do it yourself or call in a pro? If your coils are easy to access and you can safely shut off the power to your unit, a gentle cleaning with household ingredients is perfectly reasonable. But if your evaporator coil is buried behind sealed panels or you’re dealing with thick mold or corrosion, it’s smart to call a technician. You can always take over maintenance afterward using homemade cleaners.

The recipes below are designed for both beginners and seasoned DIYers — using ingredients like vinegar, baking soda, and hydrogen peroxide that are safe, affordable, and often already in your home. Whether you’re working on a mini-split, a central air unit, or just your outdoor condenser coil, these simple solutions can help restore airflow, fight mold, and lower your cooling costs.

ac coil cleaner alternative

What Are AC Coils — and Why Do They Get So Dirty?

AC coils are the workhorses of your air conditioner — they handle the heat exchange that makes cool air possible. There are two types: the evaporator coil (inside your home) and the condenser coil (outside). Together, they allow your AC system to pull warm air from inside, cool it down, and release the heat outdoors.

The evaporator coil sits inside your indoor unit, often near the furnace or air handler. It pulls heat and moisture from the air inside your home. The condenser coil lives outside and releases that heat into the outside air. Both are made up of tightly packed metal fins that need free airflow to do their job.

So what’s the problem? Those tightly packed fins are magnets for dust, grime, and mold. If you have pets, cook often, smoke indoors, or live in a dusty area, the coils can clog up faster. Even in clean homes, regular airflow pulls in microscopic debris that builds up over time.

When coils get dirty, your AC can’t transfer heat effectively. That means it runs longer, cools less, and drives up your energy bill. In some cases, the system may freeze up, overheat, or shut down completely. Regular coil cleaning is a small job that prevents big repairs.

Keeping your coils clean isn’t just about efficiency — it’s also about air quality. Mold, mildew, and bacteria can thrive in the damp, dirty environment around a neglected coil. Cleaning helps stop smells, allergens, and spores from blowing through your vents and into your home.

Homemade AC Coil Cleaner Recipes That Really Work

These simple recipes use everyday ingredients to safely clean your evaporator or condenser coils without damaging your system. Whether you’re tackling grease, mold, or general grime, there’s a DIY cleaner here that fits the job.

1. Vinegar and Alcohol Cleaner

Ingredients:

  • ½ cup white vinegar
  • ½ cup rubbing alcohol
  • 1–2 tablespoons baking soda (optional)

This cleaner acts as a degreaser and natural disinfectant, perfect for coils with sticky buildup or musty smells. The alcohol helps moisture evaporate quickly while dissolving residue, and the vinegar cuts through mineral deposits and mold.

To use: Mix ingredients in a spray bottle, shake well, and spray directly on coils. Let sit for 5–10 minutes, then wipe or rinse. Add baking soda for extra scrubbing power on stubborn spots.

2. Soapy Water and Baking Soda

Ingredients:

  • 1 bucket of warm water
  • 2–3 drops of dish soap (like Dawn)
  • 2 tablespoons baking soda

This is one of the safest and most budget-friendly coil cleaners for general maintenance. Dawn or similar dish soap cuts through grease and oily residue, while baking soda gently loosens stuck dirt from the coil fins.

To use: Mix everything in a spray bottle or bucket. Apply generously to the coils, let sit 5–10 minutes, then scrub gently with a soft brush or coil comb. Rinse thoroughly with water. Avoid using hard bristles that can damage the coil fins.

A picture of a spray bottle containing a homemade AC Coiler cleaner of bleach and water3. Bleach and Water

Ingredients:

  • 1 part bleach
  • 3 parts water

This heavy-duty cleaner is best for coils with visible mold, mildew, or biofilm buildup. Bleach disinfects and destroys organic growth quickly but must be used with caution.

To use: Spray diluted mixture onto affected coils, allow 5–7 minutes to sit, then rinse thoroughly. Use in a well-ventilated area and never mix with other cleaners.

4. Vinegar and Water

Ingredients:

  • 1 part white vinegar
  • 1 part water

This mild, eco-friendly cleaner is great for regular upkeep and preventing coil grime buildup. Vinegar naturally kills mold and breaks down mineral residue without harming metal components.

To use: Mix in a spray bottle, apply to coils, wait 10–15 minutes, then wipe clean or rinse. You can add a few drops of essential oil to reduce vinegar smell.

5. Homemade Enzyme Cleaner

Ingredients:

  • 2–3 citrus peels or small citrus fruits (like lemons or oranges)
  • 1 cup sugar
  • 4 cups water

This natural enzymatic cleaner breaks down organic material like grease, grime, and mold — without chemicals. It takes time to ferment but produces a powerful, non-toxic solution ideal for allergy-sensitive homes.

To use: Combine all ingredients in a plastic bottle or mason jar. Loosely seal and let ferment for 2–3 weeks, shaking daily. Once ready, strain and dilute 1:1 with water, then spray onto coils as needed. No rinse required.

6. Hydrogen Peroxide Cleaner

Ingredients:

  • 1 part hydrogen peroxide (3%)
  • 4 parts water

This cleaner works well for coils affected by bacteria, mildew, or musty odors. Hydrogen peroxide is a strong disinfectant that cleans through oxidation, but must be used safely.

To use: Mix in a spray bottle and apply to coils. Let sit 5–10 minutes, then rinse with clean water. Wear gloves and ventilate the area when spraying.

A picture of a man cleaning the coils in a mini split AC with homemade AC coil cleaner7. Mini-Split Coil Cleaner (Indoor Units)

Mini-split systems require a gentler approach — especially for cleaning the blower and indoor coils. A mild solution is safer for the more compact, electrical-heavy indoor components.

To use: Mix half-and-half vinegar and water, or use a light solution of soapy water with a few drops of dish soap (Dawn works great). Spray gently on the coils and blower wheel (avoiding electronics), then wipe or rinse carefully with a soft brush or cloth.

Application Method Comparison: DIY AC Coil Cleaners

Cleaner Type Application Method Rinse Required Safe for Indoor Coils Safe for Outdoor Coils
Vinegar & Water Spray or Soak Optional
Baking Soda Mix Brush or Scrub Yes
Hydrogen Peroxide Spray and Wait Yes ✅ (Ventilate)
Bleach & Water Spray Only Yes ⚠️ (Strong Fumes)
Enzyme Cleaner Spray and Soak No

Maintenance Schedule

For an effective AC maintenance schedule, consider the following guidelines based on your environment:

In dusty areas or homes with pets, clean the AC coils every 3 months to prevent buildup.

In less dusty environments, a bi-annual cleaning in spring and fall is sufficient.

Always ensure to replace or clean filters regularly, ideally every month, for optimal air quality and efficiency.

Safety Precautions

When using homemade AC coil cleaners, it’s crucial to prioritize safety.

Handle all chemicals, especially bleach, with care, using gloves and eye protection.

Ensure proper ventilation to avoid inhaling fumes.

When accessing outdoor units, use stable ladders and have someone spot you to prevent falls.

Always follow manufacturer guidelines for your AC unit to avoid damaging components.

Faq

  1. Can I use these cleaners on all types of AC units?

    Most homemade solutions are safe for various AC units, but check manufacturer guidelines.

  2. How often should I clean my AC coils?

    Clean coils every 3-6 months, depending on usage and environmental factors.

  3. Can homemade solutions damage my AC unit?

    If used correctly, they’re generally safe, but always test on a small area first.

  4. What are the signs my AC coils need cleaning?

    Reduced efficiency, higher energy bills, and poor cooling performance indicate dirty coils.

  5. Are there safety precautions for using homemade cleaners?

    Wear gloves and ensure good ventilation, especially when using solutions with vinegar or hydrogen peroxide.

  6. Can cleaning improve energy efficiency?

    Yes, regular cleaning can maintain optimal efficiency and lower energy costs.

  7. How to ensure cleaner safety for specific AC models?

    Consult your AC’s manual or contact the manufacturer for recommendations.

  8. Is rinsing required after cleaning with homemade solutions?

    Yes, to prevent residue buildup and potential damage.

  9. Can I clean the outdoor unit with homemade solutions?

    Yes, but be cautious of electrical components and water-sensitive areas.

Can I use Dawn dish soap to clean AC coils?

Yes — Dawn dish soap is a great option for breaking down greasy buildup and stuck-on grime. Just mix a few drops with water and apply it to your coils using a spray bottle or sponge. For extra cleaning power, combine it with baking soda. Always rinse thoroughly with water to avoid leaving any residue on the coils.

What Do the Numbers on a Dehumidifier Mean?-11 Question Set

What the Numbers on a Dehumidifier Mean

The most important number on a dehumidifier display is the relative humidity percentage inside the room. This is the number you are trying to control.

  • 60% – Air is very humid; mold and musty odors are more likely
  • 50% – Comfortable for most homes and everyday living
  • 45% – Ideal for basements, allergy control, and moisture prevention
  • 35–40% – Dry side; may cause dry skin or static in winter

When you lower the set number, the dehumidifier removes more moisture from the air. When the room reaches the target humidity, the unit shuts off automatically.

Common Dehumidifier Buttons and Symbols Explained

Most dehumidifiers use similar buttons and icons, even if the layout looks different.

  • ▲ / ▼ Arrows – Adjust the target humidity level (usually in 5% steps)
  • Fan Speed (Low / High or 1–3) – Controls airflow speed, not humidity level
  • Timer (2 / 4 / 8 / 12 hrs) – Sets how long the unit runs before shutting off
  • Bucket / Water Drop Icon – Water tank is full or not seated correctly
  • Continuous / CO Mode – Runs nonstop and ignores humidity numbers
  • Auto / Comfort Mode – The unit chooses fan speed and humidity automatically
  • Snowflake / Defrost Icon – Appears when the room is too cold for normal operation

If your dehumidifier won’t turn on or shuts off unexpectedly, one of these icons is usually the reason.

Infographic explaining what the numbers on a dehumidifier mean, including humidity percentage ranges, comfort levels, and common control buttons
Dehumidifiers can be a mysterious thing when you first begin to mess with one.
The different settings and symbols and not to mention the numbers can be confusing.

The main number that appears illuminated on a dehumidifier is the relative humidity inside of the room where you have the device.

It’s the number that you are attempting to lower by using a dehumidifier.

According to the national library of medicine-PubMed, 40 to 60% relative humidity is the Ideal moisture level to avoid problems with either high or low humidity.

Are dehumidifiers safe to leave on?

Dehumidifiers are safe to leave on because they almost exclusively come with an auto shut-off that turns the machine off when the bucket or the basin is full of water.

That means you’re not going to come home to a floor full of water if you happen to leave the house with your humidifier running.

Should I run a fan with a dehumidifier?

Running a fan and a dehumidifier at the same time can be advantageous because both the fan and a dehumidifier have a drying effect on the air.

After all, if you have done a recent painting project that you need to dry  faster you would probably put a fan blowing on it to help it do so.

The same goes for drying your hair, if you want to dry it faster, you can sit in front of a fan or better yet use a hair dryer. Which is essentially a hot fan.

A fan will also help move the humid air in a room towards the dehumidifier where it can do its job better.

And the entire purpose of a dehumidifier is to extract moisture from the air to dry it.

Not to mention that the two can be purchased together in one unit.

So there is no conflict in using a fan and a humidifier at the same time.

Should I run a dehumidifier with an air conditioner?

Using a dehumidifier at the same time as an air conditioner can actually help reduce the wear and tear on your air conditioner because even though an air conditioner dehumidifies as it cools,
It has to work harder when the air is extra humid.

Running a dehumidifier can’t take the strain off of an air conditioner and help it cool easier.

But, remember dehumidifiers operate much like a window air conditioner that exhaust heat out of the rear. Which helps with the humidification process but tends to make the room feel a little swampy.

So if you’re using a portable dehumidifier, the room that you place the dehumidifier on is not exactly going to feel cooler even though the air conditioning may be working better.

How to know if you need a humidifier or dehumidifier?

If you live in an area that is typically dry, then higher humidity is easy to identify. Your skin is clammy and your hair is frizzy.

But if you’re used to living in an area where high humidity is part of the climate, you may not even be aware that your humidity is spiking.

A hygrometer is a gauge that is designed to tell you what the relative humidity is inside of a room or your house.

If the humidity inside your home is above 60%, then running a dehumidifier is needed to bring that number down below the 60% mark.

Is it okay to sleep in a room with a dehumidifier?

Sleeping in the same room as a dehumidifier doesn’t have any adverse effects health wise, there is no threat of dehydration or anything that will harm you but..

Dehumidifiers can be compared to running a window air conditioner. If you’ve ever walked behind a window air conditioner, you probably remember feeling the heat coming off of the rear of the machine.

Dehumidifier works much the same only the heat that comes off the rear of it does not expel outside but inside of the room.

Dehumidifiers are also not the quietest of devices.

Technically there’s no problem with sleeping with a dehumidifier in the same room,

But you may be looking at a swampy feeling, loud night.

What’s better: a dehumidifier or an air purifier?

Dehumidifiers and air purifiers both reduce allergens.

Dehumidifiers reduce humidity problems like high dust mite populations and mold growth which results in high populations of mold spores.

These devices, by reducing the humidity, reduce the allergens caused by the humidity.

Air purifiers reduce allergens by filtering them out of the air.

And they do so regardless of whether the humidity is high or low.

Air purifiers are not dependent on the humidity being at a certain level for them to do their job whereas a dehumidifier is useless when the air is dry. Which is about half the year.

Which is better? A dehumidifier or an air purifier? An air purifier is more useful throughout the year than a dehumidifier.

But it is definitely better to own both and use a dehumidifier when needed.

When should you not use a dehumidifierWhen should you not use a dehumidifier?

Dehumidifiers or devices meant to extract moisture out of the air when the humidity level is too high inside of a house.

If the humidity in the home is already at the optimal level of between 40 and 60%, then you should not use a dehumidifier.

Another issue that can interfere with a dehumidifier that can keep you from using it is lower temperatures.

As you probably will know if you have read the rest of this article, dehumidifiers run very similarly to window air conditioners that use refrigerant to condense the humidity out of the air.

Just like on an air conditioner, if the temperature is too cold, the condenser coils on a dehumidifier will freeze over.

There are many dehumidifiers that come with a defrost setting for this very problem.

There are also dehumidifiers called desiccant dehumidifiers that do not use a compressor at all. Though not as powerful at removing moisture from the air, it can be a good alternative if your primary issue with humidity is during the cold season.

How long should you leave a dehumidifier on?

40 to 60% humidity is the optimal humidity inside of a home or building according to the national library of medicine.

If you are using a dehumidifier to bring down the moisture level inside of your house, then you should be prepared to leave it on till you have reached the relative humidity of 60% and below.

Do humidifiers make the room colder?

Dehumidifiers can have a cooling effect on a room when the temperature is not too hot and humidity is the main thing that is making the room uncomfortable.

But unlike an air conditioner or a fan, the dehumidifier is better left to run before you are planning on using the room.

Even though in theory, you are lowering the humidity which is the main threat to your comfort, The heat that expels from a dehumidifier will have the opposite effect of making a room cold while the dehumidifier is running.

Should a dehumidifier run constantly?

There are times when the humidity is so high that a dehumidifier may seem like it constantly runs and never turns off.

For instance, running a dehumidifier in a crawl space or a humid basement will require a humidifier to run much longer to reduce which is essentially an everlasting problem.

On the other hand, if the humidity level in a room does not warrant the use of a dehumidifier, then the dehumidifier may run constantly because it can’t extract enough humidity to ever reach the point where it shuts off.

That also answers the question of why your dehumidifier may not be collecting any water. There is simply not enough humidity for it to do so.

But if the relative humidity is high, and your dehumidifier is not collecting any water, you have definitely ruled out the relative humidity being a problem, and can focus on the issue being a mechanical problem with the device.

Do You Have to Use Distilled Water in a Humidifier? Really?

Do You Have to Use Distilled Water in a Humidifier?

Infographic comparing distilled water vs tap water in a humidifier, showing mineral buildup, white dust, and why distilled water is recommended

Introduction:

What is the problem with not using distilled water in a humidifier? The truth is you can get away with using tap water in a humidifier or a CPAP machine for a while. But eventually the mineral content will become a problem for your humidifier or CPAP machine.

CPAP machine water chamber clogged from minerals when using tap water instead of distilled waterThis is true story:

Recently my wife had an issue with her CPAP machine. if you’re not familiar with what a CPAP machine is, it’s a device that helps you breathe while you sleep. It comes with a mask that you put on, that basically pushes oxygen into your lungs.

And just like a humidifier they are required to be filled with water.

As the story goes, this specific CPAP machine that my wife was using stopped working.

With some aggravation, She immediately she got a hold of the manufacturer who agreed that they would send a shipping label for her to send it in to get it fixed.

And just like they promised, the whole transaction went smoothly and they repaired the device and send it right back.

The invoice that was included in the package specified the problem:

“unit was clogged up, thoroughly cleaned and working properly again. Solution, switch to distilled water”

A lot of hassle and money to get a CPAP machine repaired to find out that she was using tap water to fill it, and the minerals in the water had eventually stopped up the machine where it would not function.

So do you have to use distilled water in a humidifier? No it will work with tap water, But eventually you may wish you would have.

If you’ve run out of distilled water: using tap or bottled water once or twice usually won’t cause immediate damage. The bigger issues tend to show up over time — mineral buildup inside the unit and fine residue settling around the room.

If you notice a chalky film on surfaces or dust forming near your humidifier, that’s often the first sign minerals are being dispersed into the air. We explain exactly why this happens — and what to do about it — in our guide to white dust from humidifiers.

Water Types for Humidifiers

Water Type Mineral Content Potential Impact on Humidifier Suitability for Humidifiers Maintenance Tips
Distilled Water Very Low Minimal scaling and buildup Highly Recommended Regular cleaning with less effort
Tap Water High Increased scaling, potential for clogging Not Recommended Frequent deep cleaning required
Bottled Water Variable Possible scaling depending on mineral content Better than tap, worse than distilled Regular cleaning recommended
Boiled Water Reduced Less scaling than tap water, but some minerals remain Better than tap, not as ideal as distilled Regular cleaning with attention to mineral buildup

Distilled Water For Humidifiers? Why is it Best?

If you don’t already keep distilled water on hand, many people simply add a few gallons of distilled water for humidifiers to their regular household shopping. It’s inexpensive and helps avoid mineral buildup from the start.

Distilled water is the best water to use in a humidifier because of its low mineral content. Because of the process it goes through, it has the lowest mineral content of any type of water.

This is important for a few reasons:

1.The mineral content in most drinking water will eventually shorten the life of your humidifier and lower the output by stopping it up.

2. The minerals in most water are what is responsible for the dust that you see gathering around your humidifier.

Since dust is one of the primary reasons that your skin gets dried out in dry weather, using water with a lot of mineral content in a humidifier can produce the opposite effect than intended.

3. The higher the mineral content in the water that you use in a humidifier, the more likely, the growth of mold and bacteria in the water.

Can you use regular tap water in a humidifier

Can I Use Regular Water in a Humidifier?

Is it dangerous to use regular tap water in a humidifier. No.

Now more so than drinking tap water.

And though most of us probably drink bottled water more regularly than tap water, anytime you purchase tea or coffee from a restaurant, it’s going to be made with tap water.

So whether we believe that tap water is good to drink or not, most of us are most likely consuming it on a regular basis.

The issue with tap water being used in a humidifier are primarily about the high mineral content in tap water.

The higher the mineral content in the water that you use in a humidifier, the more likely to get stopped up and not work properly.

And it’s the mineral content in the water that creates the white dust that accumulates on the humidifier and around it.

Since dry skin is one of the primary reasons people purchase humidifiers and dust is one of the primary things that pulls the moisture out of your skin,
operating a humidifier that is creating more dust by using tap water somewhat counterproductive.

Another issue with tap water is that the minerals in the water have more of a chance to become food for mold to be able to take root inside of a humidifier.

Finally, tap water has a whole list of chemicals that are there “for our own good apparently” that you do not necessarily want to breathe in as part of the moisture content in your air.

So even though tap water is definitely not the best option for a humidifier, the issues with it are not immediately harmful or dangerous. And if that’s all you have at your disposal, you know the risk,

And it’s not like you can’t clean your humidifier extra well after you use tap water in it. And as for the dust, keep it wiped up.

Many ultrasonic humidifiers — including popular models from Levoit and Honeywell — will still run on tap water, but mineral buildup and white dust tend to appear much faster compared to using distilled water.

Quick note: ultrasonic humidifiers show the “white dust” problem the most

If you have an ultrasonic humidifier, it can aerosolize minerals in hard tap water, which is why you may notice white dust on furniture. Evaporative/wick humidifiers usually have less of that issue, but they still get mineral buildup over time.

bottled water for humidifierWhat other water besides distilled can you use in a humidifier?

Bottled?

Bottled water has a lot of minerals in it that could be an eventual problem for your humidifier. Even the water that is produced by using reverse osmosis has the disclaimer on it that minerals are added back to make it more consumable.

It’s a better option than tap water but it still has its fall backs.

Boiled water?

Boiling water causes the minerals in the water to settle. So if you had a way to separate the settlement so that it did not make it into the humidifier with the rest of the water, it would make a great choice.
The problem is, making that happen. Not exactly easy to do.


warning-dirty humidifier water ahead

But there is absolutely one type of water you should never run your humidifier with.

Stagnant water

Water that has been allowed to sit inside of your humidifier is going to be moldy and full of germs and bacteria.

And when you turn that humidifier on with that stagnant water still in it, the germs and bacteria in that water will become part of the air that you are breathing.

Now talk about having the opposite effect than you intended, the humidifier that was supposed to make you feel better, has basically become a weapon of germ warfare.

Legionnaires’ disease and humidifier lung are harsh reminders of what can happen when humidifiers and evaporative coolers are allowed to sit with moldy water.
You can easily look up the symptoms of mold allergies and discover that they look very closely like the symptoms of the flu.

So if you think that the humidifier in your house may be making you sick, you may be right. And you should take it seriously.

Fortunately, Humidifiers have become pretty sophisticated devices and many of them have ways of helping control mold growth.

If you’re in the market for a new humidifier, it’s well worth it to look into some of the features that can help reduce the chance mold and bacteria growing in your humidifier and becoming part of the air you’re breathing.

There are additives that you can place in your humidifier that can reduce the chances of a humidifier developing bacteria too.

Maintenance Tips for Humidifiers

Proper maintenance is crucial for ensuring your humidifier operates efficiently and safely, extending its lifespan and improving indoor air quality. Regardless of the water type you choose, here are some essential maintenance tips to keep your humidifier in top condition:

  • Regular Cleaning: Clean your humidifier regularly to prevent the buildup of minerals and the growth of mold and bacteria. Depending on usage, a thorough cleaning every 1-2 weeks is recommended.
    • Empty the water tank, dismantle the parts, and clean them with mild soap and warm water.
    • Use a soft-bristled brush to scrub away any mineral deposits or buildup.
  • Use Distilled Water When Possible: While not always necessary, using distilled water can significantly reduce mineral buildup and the need for frequent descaling, making regular maintenance easier.Some humidifiers also support optional demineralization cartridges, which can help reduce white dust when distilled water isn’t available — though regular cleaning is still important.
  • Descale and Disinfect: Even with distilled water, it’s important to descale and disinfect your humidifier to remove any mineral deposits and kill germs that could be harmful.
    • Descale the humidifier by using a mixture of white vinegar and water. Let it sit for at least 30 minutes, then rinse thoroughly.
    • Disinfect the water tank and other parts by using a diluted bleach solution (1 teaspoon of bleach per gallon of water) or hydrogen peroxide. Rinse all parts thoroughly after disinfection to ensure no chemicals remain.
  • Change Filters Regularly: If your humidifier has a filter, follow the manufacturer’s recommendations for changing it. Filters can harbor mold and bacteria, reducing air quality and humidifier efficiency.
  • Dry Before Storing: If you plan to store the humidifier for an extended period, ensure it is completely dry to prevent mold and bacteria growth. Disassemble the parts, clean them thoroughly, and let them air dry before storing.
  • Monitor Humidity Levels: Use a hygrometer to monitor room humidity levels, maintaining them within a comfortable range of 30-50%. This helps prevent problems associated with over-humidification, such as mold growth and condensation on windows.
  • Check for Leaks and Damages: Regularly inspect your humidifier for any signs of leaks or damage. Addressing these issues promptly can prevent further damage and potential water damage to your surroundings.

Pros and Cons of Using Distilled Water in Humidifiers

Pros Cons
Minimizes Mineral Deposit Buildup: Cost:
Using distilled water reduces the accumulation of mineral deposits inside the humidifier, thereby extending its lifespan and maintaining its efficiency. Regularly purchasing distilled water can be more expensive than using tap water.
Less Maintenance Required: Accessibility:
Due to fewer mineral deposits, humidifiers operating with distilled water require less frequent cleaning and maintenance. Distilled water may not be as readily available as tap water, requiring extra trips to the store or the need to distill water at home.
Reduces White Dust Formation: Environmental Impact:
The low mineral content of distilled water minimizes the white dust that often accumulates around humidifiers using tap or hard water, leading to cleaner air and surfaces. Buying distilled water in plastic bottles can increase plastic waste, contributing to environmental concerns.
Prevents Microbial Growth: Not Always Necessary:
Distilled water is less likely to harbor bacteria and mold because it lacks the minerals and impurities that feed microbial growth in humidifier tanks. For some humidifiers, especially those with built-in filters or demineralization cartridges, the benefits of using distilled water might be less significant.

Summary


Do you have to put distilled water in a humidifier?

No. Even though distilled water is the best water to keep your machine from stopping up and extending the life of your humidifier,
A humidifier will work without it.

If mineral residue or dust starts appearing, that’s usually the point where switching water types or adding filtration makes the biggest difference.

And though everyone agrees that tap water is the worst water you want to use in a humidifier, you can use it without having to worry about it being dangerous to you.

The main issue with tap water is that it is filled with minerals that can stop up your humidifier. And those minerals can and will produce humidifier dust on your unit and around it.

If tap water is what you have available, then do your best to keep your humidifier clean with vinegar and keep the dust around the humidifier wiped up so it does not become part of the air quality.

Arguably, The most important thing to remember when using a humidifier is to never run it with stagnant moldy water in it.

Mold in your air can produce very similar symptoms to the flu. Pneumonia, humidifier lung, and legionnaires are harsh reminders of what can happen when mold is allowed to grow in water unchecked.

We cover all the common questions and solutions in our full humidifier guide.

Where to Put a Humidifier When You’re Sick


correct placement of a cool mist humidifier near the bed when sick showing 3 to 5 feet distance and ideal humidity levels

Where to Put a Humidifier When You’re Sick

Experts recommend cool mist humidifiers near your bed (avoiding direct mist) for congestion & dry coughs. Read on for specifics!

According to the Mayo Clinic, a cool mist humidifier works by increasing moisture in the air, which can soothe irritated respiratory passages and make it easier to expel mucus. The moist air also prevents tissues in your nose and throat from drying out, which can worsen coughs and sore throats.
best place to put a humidifier when sick near the bed

When you’re battling a cold, cough, or congestion, using a humidifier can be a game-changer for your comfort and recovery. Here’s everything you need to know about choosing and using a humidifier to ease your symptoms.

What Type of Humidifier Is Best for Coughing and Congestion?

For coughing and congestion, cool mist humidifiers are generally recommended. They add moisture to the air without heating it, making them safer around children and during sleep. Cool mist options like ultrasonic or evaporative humidifiers are ideal for easing respiratory symptoms.

What to Set Your Humidifier At When Sick

The ideal humidity level in your room should be between 30-50%. Higher levels can promote mold and dust mites, while lower levels might not provide enough relief. Use a hygrometer to monitor and adjust your humidifier accordingly, aiming for the higher end of this range when dealing with congestion.
safe indoor humidity levels when sick showing ideal 30 to 50 percent range with warnings for mold and condensation

How Close Should a Humidifier Be to Your Face?

It’s best to place the humidifier about 3-5 feet away from your bed. This distance allows the mist to disperse evenly throughout the room without directly impacting your face, which can cause discomfort or excessive moisture.

Does Sleeping with a Humidifier Help a Cold?

Yes, sleeping with a humidifier can help alleviate cold symptoms. The added moisture in the air can soothe irritated tissues in your throat and nasal passages, making it easier to breathe and promoting better sleep.

When running a humidifier overnight, water quality and humidity level matter just as much as placement. Using mineral-heavy water or letting humidity climb too high can lead to residue, irritation, or discomfort by morning — especially when you’re already sick.

If symptoms seem worse after overnight use, it’s often tied to water choice or buildup rather than the humidifier itself. We explain when distilled water really makes a difference (and when tap water is usually okay) in our guide to using distilled water in a humidifier.

Does Sleeping with a Humidifier Help with Congestion?

Absolutely. A humidifier can help loosen mucus, making it easier to clear congestion. The moist air also prevents the drying out of nasal passages, reducing the stuffy feeling that comes with a cold or flu.

Best Humidifier for Coughing at Night

When choosing a humidifier for nighttime cough relief, look for:

  • Quiet operation: Ensures your sleep isn’t disturbed.
  • Cool mist feature: Safer and more comfortable for continuous use.
  • Adjustable settings: Allows you to control the output for optimal comfort.
  • Easy maintenance: Reduces the risk of bacteria and mold growth.

Ultrasonic cool mist humidifiers are often favored for their quiet operation and fine mist, making them excellent for use during sleep.


Best Humidifiers for Your Bedroom

Best Overall:

Honeywell HCM-350 Cool Moisture Humidifier

For overall effectiveness and peace of mind, the Honeywell HCM-350 Cool Moisture Humidifier stands out.
This evaporative humidifier combines whisper-quiet operation with a large tank for extended runtime, ensuring uninterrupted relief throughout the night.

Plus, the built-in UV light provides an extra layer of protection against bacteria and mold, giving you peace of mind as you breathe easy. While its footprint might be slightly larger, its comprehensive features cater to those seeking maximum relief and long-lasting comfort.

Key features:

  • Quiet operation: Evaporative design minimizes noise for undisturbed sleep.
  • Large 1.1-gallon tank: Provides up to 24 hours of runtime on low setting.
  • Three fan settings: Customize mist output for your comfort level.
  • Built-in UV light: Kills bacteria and mold for cleaner air.

Considerations: Slightly larger footprint compared to other options.

Check HoneyWell Price Here


Runner Up:

Levoit 6L Cool Mist Top Fill Essential Oil Diffuser

If you prioritize extended performance and a touch of luxury, the Levoit Humidifiers for Bedroom Large Room Home is a strong contender.

This feature-packed model boasts an impressive 6-liter tank for long-lasting use, coupled with multiple mist settings for precise control over the airflow.

What’s more, the built-in aromatherapy diffuser allows you to add essential oils for an extra touch of relaxation.
While it comes at a slightly higher price tag, the extended runtime and spa-like features might be worth it for those seeking ultimate comfort.

Key features:

  • Large 6-liter tank: Offers up to 60 hours of runtime on low setting.
  • Four mist settings: Precise control over mist output for optimal comfort.
  • Built-in aromatherapy diffuser: Add essential oils for enhanced relaxation.
  • Optional night light: Provides a soft glow for a calming ambiance.

Considerations: Slightly pricier than other options.

Check Levoit Price Here


Best Value:
Pure Enrichment MistAire Ultrasonic Cool Mist Humidifier


On a budget? The Pure Enrichment MistAire Ultrasonic Cool Mist Humidifier delivers effective relief without breaking the bank. This compact and affordable option offers quiet operation, a decent 1.5-liter tank capacity, and a 360-degree mist nozzle for even distribution. While its tank size is smaller than the others, it remains a great value choice for basic yet effective cough relief.
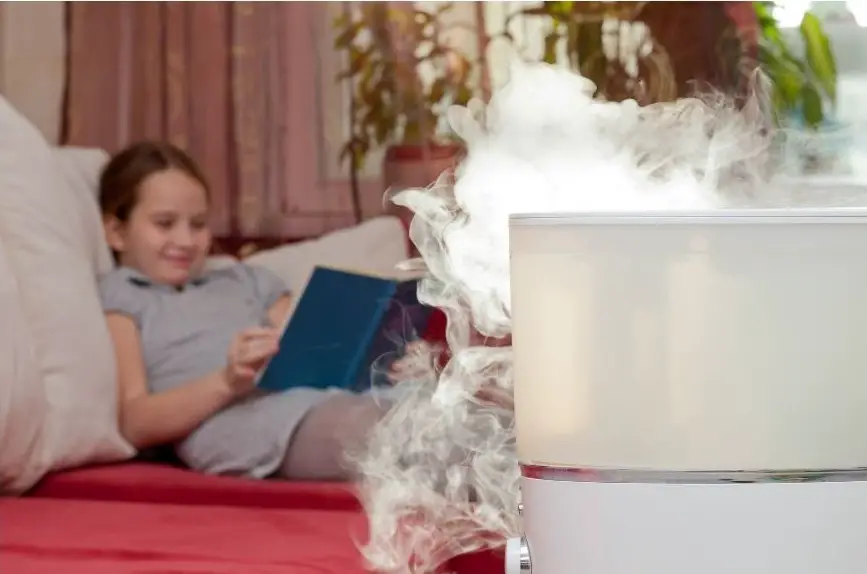
Key features:

  • Affordable price: Budget-friendly option for basic needs.
  • Compact design: Takes up minimal space on your nightstand.
  • Quiet operation: Doesn’t disrupt your sleep.
  • 1.5-liter tank: Provides up to 25 hours of runtime on low setting.
  • 360-degree mist nozzle: Ensures even distribution of moisture.

Considerations: Smaller tank capacity compared to other options.

Check Pure Enrichment Price Here

where should a humidifier go when your sick

Frequently Asked Questions (FAQ) About Using a Humidifier When Sick

Q1: What are the benefits of using a humidifier when I’m sick?
A1: A humidifier increases the moisture level in the air, which can help soothe irritated tissues in the nose and throat, ease coughing, relieve congestion, and improve overall comfort when you’re sick.

Q2: Cool mist vs. warm mist humidifiers: Which is better for colds and congestion?
A2: Cool mist humidifiers are generally recommended for colds and congestion because they emit moisture at room temperature, making them safer and more comfortable, especially during sleep.

Q3: How does a humidifier help with coughing and sore throat?
A3: By adding moisture to the air, a humidifier can prevent the drying out of respiratory passages, reducing irritation that leads to coughing and sore throats.

Q4: What is the ideal humidity level for a room when using a humidifier while sick?
A4: The ideal indoor humidity level is between 30-50%. This range helps relieve respiratory symptoms without promoting the growth of mold and dust mites.

Q5: Can using a humidifier reduce the spread of airborne viruses?
A5: Proper humidity levels can reduce the survival of certain viruses in the air, potentially lowering the risk of infection, but it should not be solely relied upon for virus control.

Q6: How close should I place the humidifier to my bed?
A6: Place the humidifier about 3-5 feet away from your bed. This ensures even moisture distribution without making the area around your bed too damp.

Q7: Is it safe to use tap water in my humidifier?
A7: Using distilled or demineralized water is recommended to avoid the buildup of minerals and the release of white dust into the air, which can occur with tap water.

Q8: How often should I clean my humidifier, and why is it important?
A8: Clean your humidifier at least once a week to prevent mold, bacteria, and mineral buildup, which can be released into the air and potentially worsen health issues.

Q9: Can I use essential oils in my humidifier for additional relief?
A9: Some humidifiers are designed to work with essential oils. Check your humidifier’s specifications first, as oils can damage certain types of humidifiers and void warranties.

Q10: Are there any risks associated with using a humidifier?
A10: If not maintained properly, humidifiers can promote the growth of mold and bacteria. Overuse can also lead to excessive humidity, potentially causing respiratory issues and discomfort.

Q11: What features should I look for when choosing a humidifier for cold and flu symptoms?
A11: Look for features such as quiet operation, adjustable mist settings, ease of cleaning, automatic shut-off, and the capacity to run throughout the night.

Q12: How can I tell if my room is too humid or not humid enough?
A12: Use a hygrometer to measure the room’s humidity level. Signs of low humidity include dry skin and static electricity, while high humidity may cause condensation on windows and damp surfaces.

Q13: Can sleeping with a humidifier help prevent getting sick?
A13: While a humidifier can alleviate symptoms and improve comfort, it’s not a standalone prevention method for illnesses. Maintaining clean hands and a healthy environment are crucial for preventing sickness.

We cover all the common questions and solutions in our full humidifier guide.

Boiling Water as a DIY Humidifier (a few other cool ones too)

How Boiling Water Works as a DIY Humidifier

To use boiling water as a humidifier, simply boil water on your stove or use an electric kettle, then carefully transfer the hot water to a heat-resistant bowl or pot. Place it in a safe location in your desired room. As the water cools and evaporates, it will add moisture to the air, acting as a simple and effective DIY humidifier.

Introduction

Did you know that you can use boiling water as a humidifier? As a kid growing up in the country of the plains of Texas, and although I didn’t know it then, I was privy to a lot of homegrown methods of getting things done, that even in my lifetime have gone to the wayside.

One of those methods that has kind of got forgotten but I remember quite well is the art of using boiling water as a DIY humidifier.

The old house that my grandparents owned had the furnace style that was kept beneath the floor and worked by sending heat into the house through metal vents that looked like a 2 x 3 grill.

I remember if you stood on it too long, it would melt your shoes.

I also remember my grandmother putting a pot of water on that furnace grill.

I didn’t know what that pot of water was nor did I have any interest in that as a kid.

But now I know she was using that pot of water as a humidifier. The furnace underneath the house was so hot that it was not only melting shoes, it was drying out the air and causing all kinds of havoc with dried out noses, throats, and lips. Putting a pot of water on the furnace was a way of offsetting the dryness in the air and relieving those symptoms.
See our full humidifier guide.

pot of boiling water

Boiling water as a DIY humidifier

is a trick that is as old as the hills you might say.

If you were to compare it to today’s humidifiers, the method of boiling water as a humidifier would be considered a vaporizer if you were to buy it at a big box store.

Vaporizers boil water to moisturize the air with steam. Boiling water on the stove is the exact same thing.

The only difference is the vaporizers usually come with some sort of medicinal additive like Vicks to help with congestion and breaking up phlegm.

Important Side Note: Boiling Water and Your Humidifier

As we explore various DIY humidifier methods, it’s crucial to clarify a common misconception. While boiling water can be used as a makeshift humidifier in the ways described above, it is not advisable to pour boiling water directly into a standard humidifier.

Humidifiers are designed to operate safely within specific parameters, and introducing boiling water can damage the unit, void warranties, and pose serious safety risks, including the potential for burns or causing the humidifier to malfunction.

Add Some Essential Oils

But there’s nothing saying that you can’t add essential oils to your boiling water and get a similar, if not better breathing effect.

Some of the most common essential oils for adding to a vaporizer, Diffuser, or a DIY humidifier are:

  • Eucalyptus
  • Peppermint
  • Lavender
  • Clove
  • Rosemary
  • Oregano
  • Ginger

1.Eucalyptus oil

Next to putting Vicks rub all over your chest, eucalyptus oil is one of the most popular ways of combating breathing problems. It is known for its anti-inflammatory agents that help minimize respiratory flare-ups including bronchitis and asthma.

2.Peppermint oil

Peppermint is a lot like eucalyptus, it not only has a similar smell, it also has many of the antimicrobial properties that help ward off bacteria and viruses that eucalyptus oil has.

3.Lavender oil

If you ever do any research on what kind of things you can do to help you relax, lavender essential oils usually appear at the top. Lavender oil is known for its ability to reduce anxiety and promote a sense of calmness. Lavender oil is an excellent addition to your do-it-yourself humidifier.

4.Clove oil

Clover oil is another essential oil that is known for its benefits related to respiratory conditions. When inhaled, clove oil is a deterrent to allergy and asthma triggers.

5.Rosemary

Rosemary oil has a very unique smell that is great to add to your homemade vaporizer. Not only does it smell great, it contains an ingredient called “Cineole”

According to the US National Library of Medicine, Cineole reduces cough frequency after 4 days.

5.Oregano

Oregano oil in your homemade humidifier will help fight off a cold bug. It’s true. Oregano oil contains three ingredients that are known to fight off bacteria. Carvacrol, Thymol, and Rosmarinic acid, all found in oregano oil, create a natural antibiotic and fungicide.

6.Ginger

Ginger oil has been shown to effectively decrease the symptoms of a cold. If you got the sniffles, adding Ginger oil to your boiling water humidifier is an excellent way to open up your airways and make it easier to breathe in general.
A bowl of water in front of a fan

Alternative DIY Humidification Methods

A bowl of water in front of a fan

You can get a good DIY cool mist humidifier effect by placing a bowl of water in front of a fan.

That is essentially what an evaporative cooler does. It blows a fan across water to add cool air to the house.

By

putting a bowl of water in front of a fan, the fan helps evaporate the water and moisturize the air and give you a cool breeze off the water at the same time.

Although it’s not going to be as effective as buying a cool mist humidifier, it’s still a very good option if you do not have a humidifier.

Humidify a room with a bowl of water

When you think about it, water evaporates. And though it may not evaporate at the rate that can give you instant relief, just leaving bowls of water around the house is a humidifier because the water will evaporate and add the moisture to the air.

Leave the water in the bath

One of the easiest ways to have a huge DIY humidifier is to run a bath and leave the water to evaporate instead of draining it out.

Take a shower for humidity

Leaving the doors open when you shower so that the moisture from the shower gets into the rest of the house is also an adequate do-it-yourself humidifier.

Air dry your clothes

I’m old enough to remember when dryers were much less popular and people dried their clothes on clothes lines in the backyard.

They also draw their clothes on clothes lines inside of the house when the weather is not permitting.

It may have taken a lot of door spaces up but nevertheless it increased the humidity inside of the home.

diy dryer hose humidifier

DIY Dryer hose humidifier

Dryers are hooked up to the wall with a hose that expels the heat and humidity outside when it is working.

Unhooking the hose so that the heat and humidity is expelled inside is a do it yourself humidifier that will actually do the job of a warm mist humidifier.

Get some fish

A fish tank is basically the same concept as leaving bowls of water around the house to evaporate.

Your aquarium serves the same purpose and it makes for an excellent hobby.

There are also fish tank/ humidifier combination devices being sold on Amazon. Might be worth checking out.

flowers in a vase diy humidifier

Flowers in a vase

Another way to keep containers of water around the house is to put flowers out in vases.

Same concept as leaving bowls of water around the house, only with the beautiful addition of flowers to help humidify the home.

House plant sweat

House plants can actually be a good source of indoor humidity because of the little known fact of House plant sweat.

It’s actually called plant transpiration. It’s the process where moisture passes through a plant’s stomata or pores and releases water into the air through their foliage.

This is one of the main reasons for keeping your plants clean. To ensure that their pores are not clogged.

Some plants make better humidifying plants than others though.

Spider Plant humidifier

Spider plants are really easy to grow and they increase the humidity indoors.
They are also on NASA’s big list of air purifying plants which gives them a double bang.

English ivy is another easy plant that has a high humidity increasing rate.

It also is good for reducing the carbon monoxide in the air.

Rubber Plant humidifier

Rubber plants are one of the coolest house plants you can own that also have a high transpiring rate.

They are also on NASA’s list of natural indoor air purifying plants.

Rubber plants also have huge leaves which aids in the humidifying process immensely.

Dwarf Date Palm

Also a cool looking plant to have in the house that is great for increasing the humidity in the home is the dwarf date palm.

Basically a miniature palm tree that can get pretty tall on its own.

Super easy to grow and keep healthy too.

diy houseplant humidifier

Recap:

Boiling water as a humidifier maybe an old trick but it is one that still works as well as it ever did. It is not only a great way to add moisture to the air, it is also ready to add essential oils to help you breathe better or relax if you want to.

Other DIY tricks people use to increase the humidity in their home is to place bowls of water around the house to evaporate. Good one.

Keep flowers out in vases, same concept, also a good one.

Unhook the dryer hose. You will definitely get some humidity with this trick.

Humidifier plants.

Putting the right plants in your home will not only increase the humidity but will also increase oxygen and decrease indoor air pollution. Win. Win.

Check out the Levoit “everything you could need in a humidifier”  if you want to skip the do-it-yourself route.

Other Resources: Vaporizer or Humidifier


Hydrogen Peroxide in Humidifier – What’s the Controversy?

Have You Heard of Putting Hydrogen Peroxide in a Humidifier?

The idea might sound harmless — maybe even comforting. Hydrogen peroxide has been in our medicine cabinets for as long as most of us can remember. I can still picture my mom reaching for the brown bottle anytime I scraped my knee, the fizzing bubbles dancing on the wound like a little science experiment. It felt like part of growing up — as normal as band-aids and hugs.

That’s probably why it caught me off guard when I first heard there was controversy around it. It never occurred to me that something so ordinary, so tied to childhood memories and first-aid kits, could become the center of a heated debate.

And yet here we are. People are talking about putting hydrogen peroxide in humidifiers — not just to clean them, but to purify the air, or even to inhale the mist for health benefits. That’s where things get complicated.

So let’s take a closer look at the controversy. What are the claims, what do the experts say, and what’s the real risk in adding this familiar liquid to your humidifier?

see our complete humidifier guide

Medical-style diagram showing mist inhalation from a humidifier and the risk of lung irritation and damage from hydrogen peroxide vapor.Hydrogen Peroxide in Humidifiers: Why It’s So Controversial

Hydrogen peroxide has been a household staple for generations — from treating scrapes to cleaning surfaces. But lately, it’s found its way into a controversial discussion: should it be added to your humidifier?

This debate isn’t just about cleaning. It touches on health, air quality, and even the fine line between science and alternative medicine. Let’s unpack the arguments — and the risks — behind putting hydrogen peroxide in a humidifier.

Why Some People Use Hydrogen Peroxide in a Humidifier

1. Inhaling Hydrogen Peroxide for Respiratory Relief

Some people believe that inhaling the mist from hydrogen peroxide can relieve respiratory symptoms like congestion, cough, or even viral infections. It’s easy to see the appeal: hydrogen peroxide is known for killing germs on surfaces, so why not in the lungs?

The reality: Health professionals strongly caution against inhaling hydrogen peroxide. Even at low concentrations, the mist can irritate or harm sensitive lung tissue. There’s no reliable evidence proving it helps, and the risk of lung damage is real.

2. Disinfecting the Air

Another claim is that hydrogen peroxide mist cleans the air by neutralizing viruses and bacteria. After all, some hospitals use hydrogen peroxide vapor systems to disinfect rooms — so why not replicate that at home?

The problem: Hospital-grade disinfection systems use highly controlled vapor concentrations and specialized equipment — not a home humidifier. Regular humidifiers can’t achieve the proper output, contact time, or safety controls for air disinfection using hydrogen peroxide.

Yes, hydrogen peroxide vapor *can* disinfect surfaces — this study shows it worked against viruses. But that doesn’t mean the same results are possible in your living room with a tabletop humidifier.

3. Keeping the Humidifier Clean

Some people add a splash of hydrogen peroxide to prevent mold or bacterial buildup inside the tank. This might seem like a smart shortcut, but it’s not without consequences.

Hydrogen peroxide can corrode the humidifier’s internal parts over time, especially if it’s a plastic unit. That damage can shorten the device’s lifespan — and potentially release harmful particles into the air.

Can You Use Hydrogen Peroxide to Clean a Humidifier?

You can — but with caution. If you’re disassembling the humidifier and rinsing thoroughly afterward, hydrogen peroxide can help remove microbial buildup. However, white vinegar or diluted bleach are usually safer and more effective choices for cleaning without damage.

The Other Side of the Story: Alternative Health Perspectives

Despite expert warnings, many alternative health advocates believe diluted hydrogen peroxide vapor has healing properties. They say it can clear nasal passages, kill airborne pathogens, and even help reduce viral loads during illness.

Supporters often reference anecdotal success — people who say this is the only thing that helped them recover from illness. There’s also research suggesting low-concentration hydrogen peroxide is safe on mucous membranes, like in this PubMed article used in ENT (ear, nose, and throat) medicine.

Still, this doesn’t mean it’s safe to use in a humidifier. These procedures are usually done under medical supervision and in precise concentrations — not poured into a consumer appliance and inhaled for hours.

 Illustration showing a person gargling and another performing nasal irrigation with hydrogen peroxide solution, highlighting claimed respiratory benefits and risks.What About Gargling with Hydrogen Peroxide?

This is another popular alternative practice. Many use a diluted 1.5% solution to gargle or rinse nasal passages during cold and flu season. And while it’s unrelated to humidifiers, it’s part of the same overall movement toward hydrogen peroxide as a DIY remedy.

Just be aware: Even gargling hydrogen peroxide has risks if not done properly. Don’t exceed recommended concentrations, and always avoid swallowing it.

Infographic comparing expert warnings against hydrogen peroxide inhalation with alternative medicine claims of effective respiratory treatment.So… Should You Put Hydrogen Peroxide in Your Humidifier?

Experts say no. Whether your goal is to disinfect air, relieve respiratory symptoms, or clean your humidifier, the risks of using hydrogen peroxide in this way usually outweigh the rewards.

Hydrogen peroxide can damage your lungs when inhaled, corrode your humidifier, and possibly create unexpected chemical reactions when mixed with minerals or additives in tap water.

But not everyone agrees. Proponents of natural and alternative medicine argue that low-dilution use is safe and beneficial. They point to personal stories and niche studies to support their case.

BreatheBetterAir.org is an informational website — we’re not doctors, and we don’t encourage or discourage medical practices. But we do encourage safety first. If you’re considering trying this, talk to a medical professional and make sure you understand all the risks.

Safety Warning

  • Never use undiluted hydrogen peroxide in a humidifier.
  • 3% hydrogen peroxide should be diluted by at least 50% before use (though it’s still not recommended).
  • Food-grade hydrogen peroxide (35%) is highly corrosive and must be diluted 10:1 or more — and handled with gloves and protective clothing.

Bottom line: The controversy exists because there are passionate opinions on both sides. But until more safety data is available, it’s best to approach this method with extreme caution — or skip it altogether.

Final Thoughts: Just Because It Feels Familiar, Doesn’t Mean It’s Safe

It’s easy to trust something we’ve known all our lives. That little brown bottle of hydrogen peroxide feels almost nostalgic — like part of a simpler time when first-aid meant a sting, a hug, and maybe a lollipop. But the comfort of familiarity can be misleading, especially when we start using something in ways it was never really meant for.

Putting hydrogen peroxide in a humidifier may sound like a harmless DIY trick — but it carries real risks. Inhaling it can harm your lungs, it can damage your device, and the supposed benefits often come from anecdotal stories rather than solid science.

That’s not to say the people who swear by it are wrong — but it does mean that if you’re thinking about trying it, you should do your homework, talk to a medical professional, and weigh the risks carefully.

There are safer, proven ways to clean your air, your humidifier, and your lungs. And while hydrogen peroxide still deserves a spot in your medicine cabinet, maybe it’s best to keep it there — and not in your vapor stream.

Sometimes, the old remedies really are the best. Other times, they’re best left in the past.