
Standalone vs Whole House Humidifiers: A Complete Buying Guide
Maintaining proper indoor humidity levels between 30-50% is important for health, comfort and protecting your home. Humidifiers raise moisture levels to alleviate issues caused by excessively dry air. 1
There are two main types – standalone humidifiers designed for single room use, and whole house humidifiers integrated into a home’s HVAC system to humidify the entire space.
 Standalone humidifiers are compact, self-contained units that can be moved room to room. They contain water tanks requiring manual refills and cleaning. Whole house units are installed by HVAC professionals and have automated features to humidify throughout a home.
This guide covers the key differences between standalone and whole house humidifiers to help you choose the best system.
Don’t miss our complete in-depth Humidifier Guide.
Key Differences at a Glance
| Coverage | Standalone | Whole House |
| Cost | $30-$200 | $500+ installation |
| Maintenance | Manual refilling and cleaning | Automated |
| Convenience | Portable, targeted use | Set and forget |
| Installation | Plug into outlet | Professional HVAC integration |
How Humidifiers Work
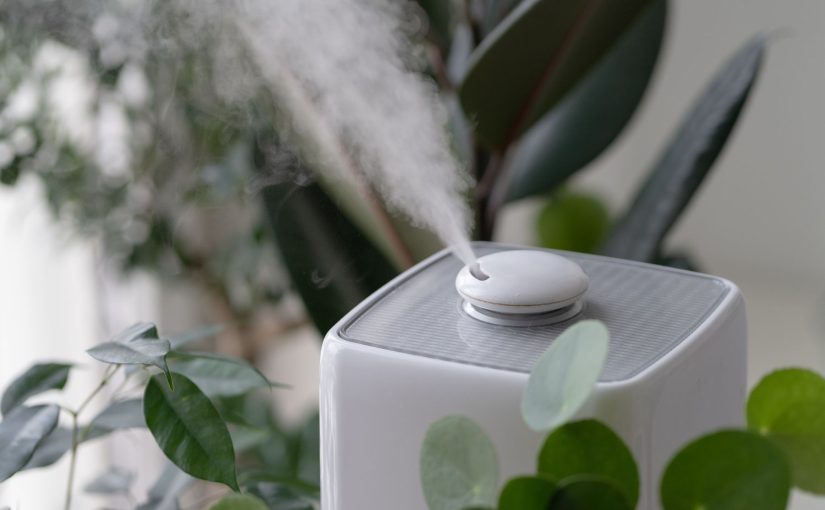
Humidifiers contain reservoirs that are filled with water, which is dispersed into the air to increase humidity. Standalone units use internal fans to circulate moisture. Whole house systems integrate with existing ductwork to humidify through vents. The added moisture helps alleviate issues caused by dry air.
Standalone Room Humidifiers
Standalone humidifiers are designed for use in single rooms or spaces up to 500 square feet. They contain tanks/reservoirs ranging from 1-5 gallons that requires manually refilling with water when empty. Types of standalone humidifiers include:
- Cool mist – Absorbs water into a wick filter to humidify. Does not heat water.
- Warm mist – Heats water to produce visible steam vapor. Provides soothing humidification.
- Ultrasonic – Uses high-frequency vibrations to create microfine water droplets.
- Evaporative – Fan blows air through a wet wick to add moisture.
Benefits of Standalone Units
- Compact and portable design allows use in any room based on need. Great for bedrooms and nurseries.
- Affordable price point between $30-$200 makes them accessible to most homeowners.
- Variety of cool/warm mist options suit different preferences and rooms. Some have aromatherapy features.
- Can target problem areas in a home rather than humidifying empty rooms. Uses less energy.
Drawbacks of Standalone Units
- Small tank capacity requires frequent manual refilling every 1-2 days. Ongoing daily maintenance.
- Only humidifies the room it is placed in. Not effective for whole home coverage.
- Ultrasonic and warm mist models consume more electricity.
- Evaporative types require regular replacement of wick filters.
Standalone Humidifier Pros and Cons
| Pros | Cons |
| Compact and portable design | Small tank capacity requires frequent refilling |
| Affordable price point $30-$200 | Only humidifies room they are in |
| Variety of warm/cool mist options | Some models use more energy |
| Can target problem areas selectively | Evaporative options require filter replacement |
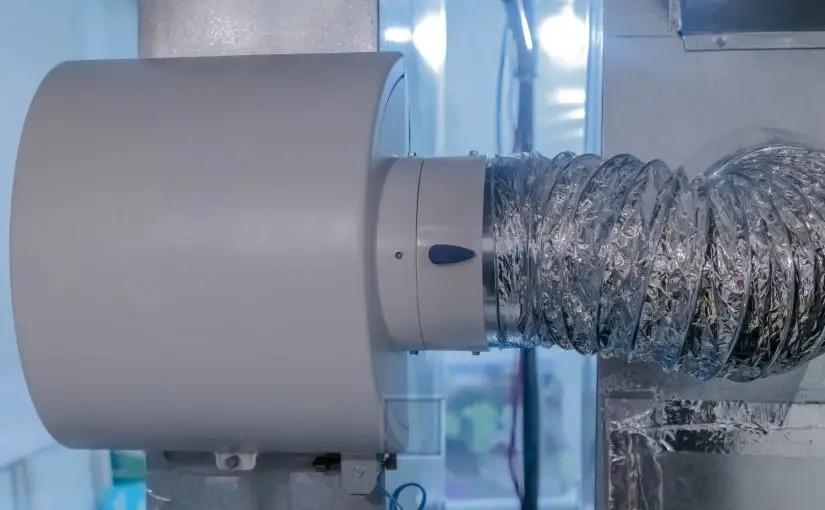
Whole House Humidifier Systems
Whole house humidifiers integrate with a home’s forced air heating and cooling system to humidify the entire space.
Models include:
- Bypass – Installed on supply ductwork with a bypass duct to humidify air.
- Fan Powered – Has internal fan to distribute moisture into air ducts. Allows precise humidity control.
- Steam – Generates steam to humidify air. Provides even coverage in all weather.
- Ultrasonic – Uses high-frequency vibration to create water droplets to distribute.
- Flow Through – Mounted inline on supply ducts with wetted media that humidifies passing air.
Benefits of Whole House Units
- Provides balanced humidity throughout the home by integrating with existing ductwork.
- Convenience of set and forget automated operation. Less daily maintenance than standalone models.
- Single unit can humidify a large multi-room home of any size and layout.
- Steam types increase efficiency of home heating systems.
- Reduce need for frequent refilling compared to portable humidifiers.
Drawbacks of Whole House Units
- Higher upfront equipment and professional installation costs.
- Ongoing maintenance like replacing pads/filters has higher labor costs.
- Not as customizable as portable models – can’t adjust room-by-room.
- Risk of leaks and overflow if not properly maintained.
- Ultrasonic types may produce white dust requiring drain line cleaning.
Whole House Humidifier Pros and Cons
| Pros | Cons |
| Provides balanced humidity throughout home | Higher upfront installation cost $500+ |
| Set and forget automated operation | Higher maintenance costs and labor |
| Single unit can humidify large homes | Not as customizable room-by-room |
| Some types increase heating efficiency | Can cause HVAC issues if not maintained |
| Reduce need for frequent refilling | Ultrasonic models produce white dust |
Key Factors in Choosing a Humidifier
There are several factors to help determine if a standalone or whole house humidifier is right for your situation:
- Home size – Standalone units suited for smaller spaces up to 1,500 sq ft. Whole house models better for larger homes.
- Number of levels – Multi-level homes benefit more from whole house systems for even floor-by-floor coverage.
- Problem rooms – If only need to humidify 1-2 rooms, a standalone can selectively target those spaces.
- Allergies and health issues – Whole house models provide complete air quality control for issues like asthma.
- Dry climate – In arid regions, whole house integration necessary to combat very low baseline humidity.
- Existing HVAC system – Age and capacity of heating/cooling system affects whether it can accommodate a whole house humidifier.
- DIY installation – Some whole house models like drum or flow-through types are feasible for handy homeowners to self-install.2
Recommended Humidifier Products
Here are some top humidifier models to consider:


Standalone Humidifiers

- Levoit LV600HH Hybrid Ultrasonic Humidifier ($100)
- Crane Drop Ultrasonic Cool Mist Humidifier ($50)
- Vicks Warm Mist Humidifier ($40)
- Honeywell HEV685W Cool Moisture Console Humidifier ($128)


Whole House Humidifier Systems

- Aprilaire 600 Whole House Humidifier ($275)
- Honeywell HE280A Whole House Humidifier ($220)
 Whole House Humidifier Installation

Installing a whole house system requires hiring an HVAC professional to integrate the unit into your existing ductwork. Costs average $800-$1200 including labor for a 2-4 hour install. Ongoing maintenance like replacing filters and water panels is also required annually, around $100-250 per service call.
DIY installation is possible depending on model but requires HVAC expertise and care working on ducts. Bypass, flow-through, drum and some ultrasonic humidifiers are the most DIY-friendly options.
Sizing Your Humidifier Properly
To size your humidifier, measure current moisture levels in your home using a hygrometer. Calculate the recommended moisture output for your square footage at 30-50% relative humidity. Also factor in features like runtime, tank output, coverage area and automatic controls when selecting a model. Undersizing and oversizing are common problems that lead to poor humidity control and higher energy costs.
Conclusion
Choosing between a standalone and whole house humidifier depends on your specific needs and home details. Evaluate your humidity goals, layout, problem rooms, climate and budget. Standalone humidifiers provide affordable, targeted room solutions. Whole house models are an investment but deliver convenience and whole home coverage. With proper selection and maintenance, you can enjoy ideal humidity levels year-round.
Frequently Asked Questions
Q: How often do you need to change humidifier filters?
A: Standalone humidifiers need weekly cleaning. Whole house replace filters 6-12 months.
Q: Where is the best place to install a whole house humidifier?
A: They are typically installed on a home’s supply plenum or ductwork to humidify air before circulation.
Q: What humidity level is best for my home?
A: Ideal indoor humidity is 30-50%. Use a hygrometer to measure and adjust humidistat accordingly.
Q: Can I install a humidifier myself?
A: Some standalone and whole house models allow DIY install if you have HVAC expertise. Otherwise hire a pro.
Q: How do I know if my HVAC system can accommodate a whole house humidifier?
A: Consult an HVAC technician to assess your existing system capacity and design to see if it is compatible.
Q: Should I run a humidifier 24/7?
A: Most should run constantly during dry months to maintain humidity. Adjust the humidistat to desired range.
Q: What causes white dust from my humidifier?
A: Ultrasonic and evaporative models can spread mineral deposits. Change filters regularly and use distilled water.
Q: How often does a whole house humidifier need maintenance?
A: Annual service by an HVAC technician is recommended to check, clean, and replace parts as needed.
Q: Can too much humidity cause issues?
A: Yes, mold and mildew growth can occur if humidity exceeds 60%. Keep levels 30-50%.
Q: Can I install a whole house humidifier myself?
A: Some DIY-friendly models like drum, flow-through, and bypass humidifiers allow self-installation with HVAC expertise. But professional installation is recommended for optimal performance.
Q: Do whole house humidifiers cause mold?
A: If humidity levels exceed 60%, it can lead to mold growth. Proper maintenance to keep 30-50% humidity prevents mold issues.
Q: Are there types of whole house humidifiers that don’t cause mold and bacteria?
A: Steam humidifiers that boil water before dispersing moisture minimize mold/bacteria concerns. Models with UV lights also help.
Q: Does a whole house humidifier work off the regular thermostat or do I need a separate thermostat for it?
A: Most whole house humidifiers have a built-in humidistat. Some can connect to a Nest or smart thermostat to integrate humidity and temperature control.
Q: Does having a whole house humidifier raise the value of the house?
A: Yes, whole home humidification systems can increase property value 1-4% by appealing to buyers and being flagged on home inspections.


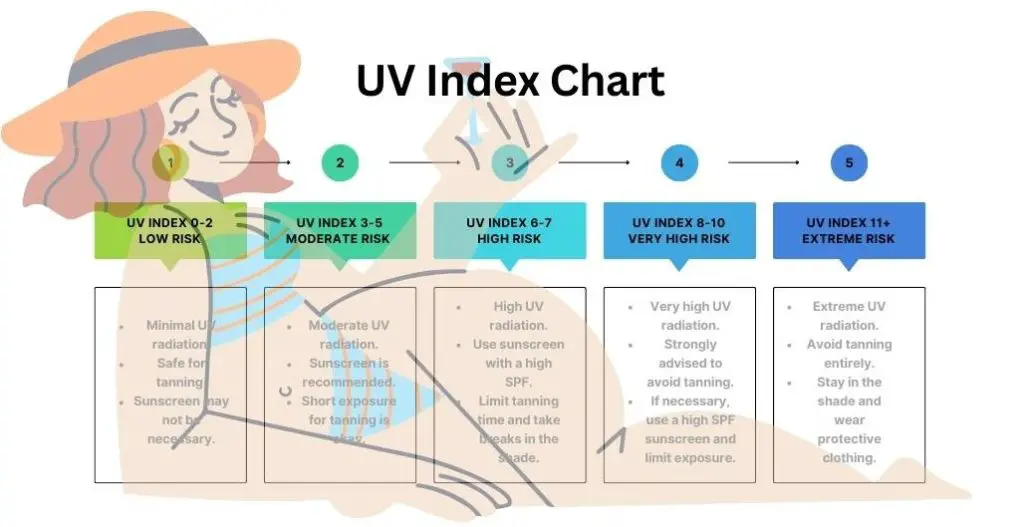
 Avoid UV Indexes 8-10
 The Takeaway
 Tips for Choosing an Air Purifier for Cat Allergy Relief


 How to troubleshoot humidifier issues


 Fleas are one of the most irritating and problematic pests that I can think of that any pet owner has to do with from time to time.


 Choosing the Right Large Room Humidifier
 Key Features for Open Floor Plan Humidifiers