
Can an Ozone Generator Get Rid of Cigarette Smoke?

Quick Answer: Yes, ozone generators can effectively eliminate cigarette smoke odors by chemically breaking down odor molecules in the air and porous surfaces.

However, they won’t remove nicotine stains or residue, and require proper safety precautions as ozone can be harmful to breathe.

That moment when you first walk into your “new” apartment and realize the previous tenant must have smoked like a chimney? Or when you buy a used car that smells like it hosted poker nights for a 1950s detective?

Cigarette smoke doesn’t just linger – it moves in, unpacks its bags, and refuses to leave. No amount of Febreze seems to make a dent in that stubborn, stale tobacco smell that clings to everything.

Why Cigarette Smoke is the Worst Houseguest

Cigarette smoke is the ultimate squatter of odors. Unlike cooking smells or pet odors that fade, tobacco smoke contains sticky tar and chemical compounds that chemically bond to surfaces. The nicotine and other VOCs in smoke penetrate deep into fabrics, drywall, and even wood, creating odor reservoirs that keep releasing that distinctive smell long after the last cigarette was extinguished.

I’ll never forget helping my cousin clean her inherited family cabin – despite years of vacancy, the curtains still smelled like her grandfather’s pipe tobacco. Traditional cleaning methods only address surface-level smells, which is why so many people turn to ozone generators as a last resort.

How Ozone Fights Cigarette Odors at the Molecular Level

Ozone generators work differently than air fresheners or purifiers. They produce ozone (O₃), an unstable molecule that aggressively oxidizes and destroys odor compounds. Here’s the science behind why it works so well on cigarette smoke:

  • Chemical breakdown: Ozone molecules attack and dismantle the volatile organic compounds (VOCs) that cause tobacco odors at the molecular level
  • Deep penetration: The gas reaches places cleaning can’t – inside walls, between floorboards, deep in upholstery fibers
  • Complete neutralization: Unlike masking agents, ozone actually eliminates the odor compounds rather than covering them up

Important note: While ozone is incredibly effective against odors, it’s not a cleaning product. Those yellow nicotine stains on walls or that sticky film on windows will still need elbow grease and proper cleaners.

a man smoking a cigarette in a cluttered roomWhat Ozone Can and Can’t Do for Cigarette Smoke

Ozone Can Ozone Can’t
Neutralize airborne smoke odors completely Remove nicotine stains or discoloration
Penetrate deep into fabrics and porous materials Be used while people or pets are present
Reach inaccessible areas like air ducts and inside walls Replace the need for deep cleaning surfaces first
Provide longer-lasting results than masking sprays Work effectively if heavy smoke residue remains

Ozone Safety: Critical Precautions You Must Take

While ozone is powerful against odors, it’s not something to use casually. Ozone is a lung irritant that can cause serious respiratory issues with exposure. Follow these safety rules religiously:

  • Never occupy the space during treatment – no people, pets, or even plants
  • Remove all living things and seal food items before running the generator
  • Ventilate thoroughly afterward – open windows and run fans for at least 1-2 hours
  • Use proper timing – more ozone isn’t better; follow manufacturer guidelines strictly

Warning: Those inexpensive “ionizing” air purifiers claiming ozone benefits typically produce negligible amounts that won’t impact smoke odors. For serious odor removal, you need a proper ozone generator. Learn more about how ozone machines actually work before purchasing.

Step-by-Step Guide to Using Ozone for Smoke Removal

For Homes and Rooms:

  1. Prep the space: Remove all living things, clean surfaces thoroughly, and close all windows/doors
  2. Position the generator: Place it centrally and set the timer (typically 2-4 hours for moderate odors)
  3. Wait it out: After treatment, leave the room closed for 2 more hours to let ozone work
  4. Air it out: Open windows and ventilate thoroughly for at least 1-2 hours before re-entering

ozone removing cigarette smoke in a carFor Vehicles:

  1. Deep clean first: Vacuum and wipe all surfaces with an enzymatic cleaner or vinegar solution
  2. Run the ozone machine: Place it inside with windows up (engine off) for 30-60 minutes
  3. Ventilate: Open all doors and let it air out for at least an hour before driving

Pro tip: For severe cases, you may need 2-3 treatments over several days. Between ozone sessions, sprinkle baking soda on upholstery to absorb more odor, then vacuum it up.

Other Effective Ways to Combat Smoke Odors

If ozone isn’t right for your situation, try these alternatives:

  1. Activated charcoal bags: Excellent for maintaining freshness in cars or closets after ozone treatment
  2. HEPA air purifiers with carbon filters: Helpful for capturing remaining smoke particles and odors
  3. Deep cleaning solutions: TSP cleaner for walls, steam cleaning for carpets, odor-blocking primer for painting
  4. Natural odor absorbers: Bowls of white vinegar or coffee grounds can help between treatments

For best results: Combine methods. Deep clean first, use ozone for the stubborn odors, then maintain with air purifiers or charcoal bags. It’s a comprehensive approach that actually works.

The Final Verdict on Ozone for Cigarette Smoke

Ozone generators can be miracle workers for eliminating cigarette odors, but they’re not magic bullets. Consider ozone treatment when:

  • You’ve already cleaned surfaces but the smell persists
  • You can properly vacate the space during treatment
  • You’re dealing with embedded odors in fabrics or hard-to-reach areas

For mild cases, start with thorough cleaning and air purifiers. For serious smoke damage, ozone can be your nuclear option – just always prioritize safety and proper ventilation above all else.
If you have completed your deep cleaning and are ready to select a machine, you can compare our recommended high-output ozone machines for smoke to find a model that fits your square footage.
While ozone clears smoke odors, it fails for infestations like bed bugs. See the ozone and bed bug guide here.

Still fighting stubborn smoke smells? Check out our guide on removing smoke odor from cars for more targeted solutions to this persistent problem.

Frequently Asked Questions

Will ozone get rid of cigarette smoke completely?

Ozone is highly effective at eliminating the smell of cigarette smoke, but it doesn’t remove all traces of smoking. It can neutralize the odor-causing molecules that linger in the air and porous materials, but tar, nicotine stains, and yellowing of surfaces will still require traditional cleaning methods. Think of ozone as the final step — not the only step.

How long should I run an ozone generator for cigarette smoke removal?

For a single room with moderate smoke odor, 2–4 hours is usually sufficient. For entire homes or deeply embedded smells, sessions may need to run for 6–8 hours or be repeated across multiple days. Always follow your machine’s safety and timing guidelines, and never stay in the area during treatment.

Can I use an ozone generator in a house I currently live in?

Yes, but you must vacate the area while the generator is running and during the dissipation period afterward. No people, pets, or plants should be inside while ozone is present. Many users treat one room at a time to make it manageable, especially if relocating temporarily isn’t an option.

What’s better for cigarette smoke: ozone or UV light in HVAC systems?

They serve different purposes. Ozone neutralizes odors by breaking down molecules directly, whereas UV lights in HVAC systems disinfect air passing through the system, killing mold, bacteria, and viruses but not eliminating existing odors. If you’re tackling lingering smells, ozone is the better choice — but if you’re focused on keeping your air clean long-term, UV light can be a helpful addition.
👉 Learn more about the pros and cons of UV lights in HVAC systems.

Do ozone treatments damage electronics or furniture?

Generally, no. Short-term ozone use doesn’t harm most materials, but long-term or frequent treatments may degrade rubber seals or certain plastics over time. If you’re concerned, remove delicate electronics or cover them before treatment. Leather furniture is usually fine, but some users prefer to condition it afterward to be safe.

How can I tell if the ozone treatment worked?

Once the room is safe to enter and fully aired out, use your nose — the lingering cigarette smell should be gone. There may be a faint “clean” or slightly metallic ozone scent at first, which fades with ventilation. If the tobacco odor remains, it may indicate that more ozone is needed or that additional cleaning is required on surfaces.

Can ozone remove smoke smell from clothes?

Yes, but it’s tricky. You can treat clothes by hanging them in a closed room or closet with a small ozone machine — just make sure the items are spaced out for airflow and that the space is unoccupied during treatment. Afterward, wash the clothes to remove any residue. Ozone won’t damage fabrics with occasional use, but delicate materials should be handled with care.

Read More About Ozone Generators

If you’re researching ozone generators, ozone safety, or ozone treatments for homes and vehicles, these articles may be helpful:

What Does Ozone Smell Like? Why Some Ozone Odors Shouldn’t Be Ignored

Quick Answer

Ozone has a sharp electrical smell that people commonly compare to chlorine bleach, static electricity, burnt electronics, warm metal, or the air around a thunderstorm.

But those smells do not all mean the same thing.

A brief outdoor electrical smell around a storm may have a natural explanation. The same smell inside your home could come from an ozone generator, an ionizing air purifier, a power tool, or an electrical problem that should not be ignored. The location and timing of the odor can usually help you identify the source.

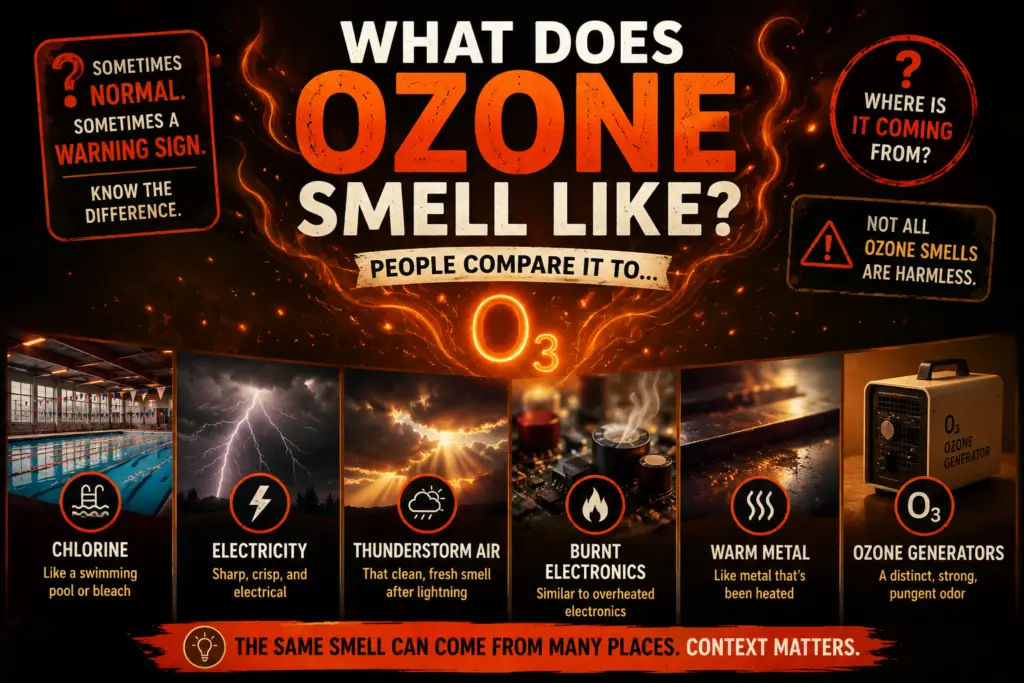
Most people describe ozone as smelling like chlorine bleach, electricity, static, or the air around a thunderstorm.

That answers the basic question—but it does not tell you whether the odor is expected, whether an appliance is producing it, or whether something electrical may be going wrong.

The most useful question is not simply, “Does this smell like ozone?” It is, “Where is the smell coming from?”

If you have identified an ozone generator as the source and are unfamiliar with the equipment, begin with our Ozone Generator Starter Guide. It explains what ozone generators do, when they may be appropriate, and why rooms and vehicles must remain unoccupied during treatment.

What Do People Say Ozone Smells Like?

What does ozone smell like infographic showing ozone compared to chlorine, electricity, thunderstorms, burnt electronics, and warm metal

Common Description What People Usually Mean
Chlorine or bleach A sharp, clean, chemical odor
Air around a thunderstorm A fresh but noticeably electrical outdoor smell
Electricity or static A crisp smell associated with sparks or high-voltage equipment
Burnt electronics Ozone mixed with heated plastic, dust, wiring, or electrical components
Warm metal A smell noticed near motors, power tools, printers, or electrical equipment
Sweet or sour chemical odor Stronger ozone or ozone reacting with materials and existing odors

Why People Describe the Same Gas Differently

One of the most interesting things about ozone is that people often describe the same gas in completely different ways.

Some people say it smells fresh and clean. Others compare it to burnt electronics, sour lightning, chlorine, bleach, or hot metal.

The difference usually comes down to:

  • How concentrated the ozone is
  • Whether it is indoors or outdoors
  • What materials the ozone is reacting with
  • How sensitive the person is to the odor
  • Whether heat, smoke, plastic, dust, or electrical components are also involved

The chlorine or bleach comparison is probably the most recognizable. If you have ever entered an indoor swimming pool and noticed a sharp chemical smell, that is close to how many people describe ozone.

Others notice an electrical quality instead. They compare it to the air near a spark, a laser printer, an old copy machine, an electric motor, or a lightning strike.

At higher concentrations, particularly after an ozone treatment in a room or vehicle, the smell can become harsher, more metallic, or more chemical.

Ozone can also react with smoke residue, carpeting, upholstery, oils, rubber, plastic, and other materials. Those reactions may create additional odors that people describe as sweet, sour, rubbery, stale, or unpleasant.

Once you have smelled ozone clearly, its sharp electrical quality often becomes easier to recognize in the future.

Why Does Ozone Smell Like a Thunderstorm?

Close-up lightning strike during a thunderstorm, one of the natural ways ozone is created in the atmosphere

One of the most common descriptions of ozone is that it smells like the air before or after a thunderstorm.

That comparison has a scientific basis.

When lightning passes through the atmosphere, the electrical discharge can split oxygen molecules apart. Some of those oxygen atoms then recombine to form ozone, which contains three oxygen atoms instead of the usual two.

Storm winds and downdrafts may carry ozone-containing air toward ground level, where some people notice a sharp electrical smell.

However, ozone is only one part of what people call the “smell of rain.” Wet soil, plant oils, moisture, and a compound called geosmin also contribute to the familiar outdoor scent around storms.

Important:

Smell alone cannot tell you how much ozone is present. An outdoor electrical smell around a storm may have a natural source, but your nose is not an ozone meter and should not be used to judge exposure levels.

Why Does Ozone Smell Stronger Indoors?

The biggest difference is concentration and ventilation.

Outdoors, ozone is diluted through an enormous volume of moving air. It may also be mixed with rain, soil odors, plants, and changing weather conditions.

Indoors, ozone can become much more noticeable because it is contained within a room, basement, vehicle, workshop, or other enclosed area.

An ozone generator, for example, is specifically designed to produce ozone. When it operates inside a closed room or car, the gas is not immediately diluted by outdoor air.

This is why people often describe outdoor ozone as fresh or electrical but describe indoor ozone as:

  • Harsh
  • Chemical
  • Metallic
  • Chlorine-like
  • Acrid
  • Unpleasant

Think of it this way:

A faint outdoor ozone smell can be like briefly noticing chlorine while walking past a swimming pool.

Ozone inside a confined room or vehicle may smell much stronger because it is concentrated and reacting with materials inside the space.

Ozone does not simply sit in the air. It reacts with smoke residue, fragrances, oils, carpeting, upholstery, rubber, plastic, and other compounds.

Those reactions can change the odor and sometimes explain why a room or vehicle smells strange even after the most obvious ozone scent has begun to fade.

When Can an Ozone Smell Be a Warning Sign?

An unexpected sharp electrical smell indoors should not be ignored until you identify its source.

The odor may come from an ozone generator, ionizer, printer, copier, or power tool. But it can also be produced by electrical arcing, overheating components, loose connections, damaged wiring, or failing equipment.

Pay Attention If:

  • The odor is strongest near an outlet or switch.
  • You notice it around a breaker panel.
  • The smell appears near HVAC equipment or an electric motor.
  • The ozone-like odor is mixed with a burning smell.
  • You hear buzzing, popping, crackling, or sparking.
  • An appliance feels unusually hot.
  • The smell suddenly appears with no known source.

Ozone itself may not be the only concern. Sometimes the smell is a clue that electricity is jumping across a gap, a process called electrical arcing.

Loose wiring, worn motor brushes, damaged insulation, failing switches, overloaded components, and defective appliances can sometimes create ozone along with heat or a burning odor.

If You Suspect an Electrical Source:

  • Do not ignore a burning or ozone-like smell.
  • Determine whether the odor is strongest near a specific outlet, switch, appliance, motor, or electrical panel.
  • Listen for buzzing, crackling, popping, or sparking.
  • Turn off and unplug suspect equipment if it is safe to do so.
  • Avoid touching damaged, hot, smoking, or sparking equipment.
  • Contact a qualified electrician when the source cannot be safely identified.

The good news is that many ozone-like smells are produced by ordinary equipment rather than a dangerous wiring problem.

The key is identifying the source instead of assuming that every sharp electrical odor is harmless—or that every odor is ozone.

If the smell is damp, earthy, stale, or similar to wet carpet rather than sharp and electrical, ozone may not be the cause. Use our musty room diagnostic guide to check humidity, carpet padding, HVAC moisture, closets, and hidden leaks.

What Commonly Produces the Smell of Ozone?

Common sources of ozone smell including copy machines, printers, electrical equipment, and power tools

If you notice an ozone smell, a relatively small number of sources account for most situations.

Thunderstorms and Lightning

Lightning and electrical activity can contribute to the sharp outdoor smell people associate with storms.

Remember that rain, soil, plants, and other compounds also contribute to the familiar thunderstorm smell, so the odor is not necessarily pure ozone.

Ozone Generators

Ozone generators are designed specifically to produce ozone for odor treatment and restoration work.

They usually create the strongest ozone smell people encounter indoors because they are operated inside enclosed spaces.

People, pets, and plants should not remain inside an area while it is being treated with an ozone generator. After treatment, the space should remain unoccupied for the required waiting period and then be thoroughly ventilated before normal use resumes.

For a broader explanation of treatment precautions, see Ozoning a House: Do’s and Don’ts.

If a treated room or vehicle still smells strongly of ozone, do not rely on your nose to decide that the area is safe. Follow the machine manufacturer’s instructions, allow adequate waiting time, and ventilate the area thoroughly.

Ionizers and Some Air Purifiers

Some ionizers, electrostatic air cleaners, and electronic air purifiers can produce ozone as a byproduct.

This is one reason people sometimes notice a faint chlorine-like or electrical odor while an air-cleaning device is running.

If the smell begins only when the device operates, turn it off and check the product manual. Determine whether the unit intentionally produces ions or ozone and whether it is approved for use in occupied spaces.

Laser Printers and Copy Machines

Printers and copiers contain high-voltage components that can produce small amounts of ozone during operation.

The smell is often described as warm electronics, static electricity, hot paper, or a faint chlorine odor.

Good ventilation is especially important in small offices, copy rooms, or areas containing several machines.

Power Tools and Electric Motors

Power tools are another common place to notice an ozone-like smell.

Saws, grinders, routers, drills, shop vacuums, and other equipment with brushed electric motors may produce a sharp electrical odor as the brushes contact the motor’s commutator.

A mild electrical smell during normal operation may not indicate a serious problem.

However, stop using the tool if the odor becomes unusually strong or appears with:

  • Heavy sparking
  • Smoke
  • Excessive heat
  • A strong burning-plastic smell
  • Loss of power
  • Unusual noise

Those signs may indicate worn brushes, overheating, damaged wiring, or a failing motor.

Electrical Arcing and Faulty Equipment

Loose electrical connections, damaged wiring, failing switches, worn motor components, and malfunctioning equipment can sometimes produce ozone.

This is why a new or unexplained ozone smell near electrical equipment deserves investigation, particularly when accompanied by heat, buzzing, crackling, smoke, or a burning odor.

HVAC Equipment

Some HVAC systems include ionizers, electrostatic air cleaners, ultraviolet accessories, or other electronic air-treatment equipment that may produce ozone or an ozone-like odor.

Ozone may also be generated unintentionally by electrical arcing, a failing motor, damaged wiring, or another electrical fault inside the system.

If the smell appears only when the HVAC system starts, check whether any electronic air-cleaning accessories are installed. Turn the system off and request service if the odor is unusually strong, smells burnt, or is accompanied by abnormal sounds.

What Ozone Usually Does Not Smell Like

Ozone is generally described as sharp, electrical, metallic, or chlorine-like.

It is less likely to be the source when an odor smells like:

  • Wet carpet, earth, or a damp basement: Often related to humidity, moisture, mildew, or damp materials.
  • Rotten eggs: May indicate sewer gas, sulfur compounds, or a fuel-gas odorant.
  • Dead animal or rotting food: Usually biological decomposition rather than ozone.
  • Fishy or hot plastic: May indicate overheated electrical components.
  • Smoke or burnt dust: May come from heating equipment, wiring, motors, or accumulated dust.

When the smell does not match ozone’s sharp electrical character, investigate other household odor sources instead of assuming ozone is present.

Why Can Some People Smell Ozone Better Than Others?

One person may notice ozone immediately while another person standing nearby smells nothing unusual.

That does not necessarily mean either person is mistaken.

People vary considerably in their sensitivity to odors. Genetics, age, congestion, previous exposure, environmental conditions, and individual differences in smell perception can all affect how easily ozone is detected.

Important:

Some people can detect ozone at relatively low concentrations, while others may not notice it as easily. This is one reason professionals do not use smell alone to determine whether ozone remains in an area.

Repeated exposure can also make an odor seem less noticeable over time. This does not necessarily mean the ozone has disappeared.

If you smell ozone and someone else does not, your nose may simply be more sensitive—but smell should never replace proper treatment procedures, ventilation, manufacturer instructions, or testing.

Frequently Asked Questions About Ozone Smell

Why does ozone smell like bleach?

Many people compare ozone to chlorine bleach because both have a sharp, clean, chemical odor.

Ozone and bleach are different substances, but the smell can seem similar enough that chlorine is one of the most common comparisons.

Why does ozone smell like electricity?

Ozone can be produced by electrical discharges, sparks, lightning, electrical arcing, motors, printers, and certain air-cleaning devices.

Because ozone is often encountered around electrical activity, many people associate it with the smell of electricity or static in the air.

Does smelling ozone mean the air is dangerous?

Smell alone cannot tell you whether an ozone concentration is safe or unsafe.

A noticeable odor confirms that something deserves attention, but people differ in their ability to detect ozone and may become less aware of the smell over time.

When ozone is being produced intentionally, follow the equipment manufacturer’s safety, waiting, ventilation, and re-entry instructions rather than relying on smell.

Why does my air purifier smell like ozone?

Some ionizers, electrostatic cleaners, and electronic air purifiers produce ozone as a byproduct.

If a chlorine-like or electrical smell appears only while the unit is running, check whether the device uses ionization, electrostatic collection, or another electronic air-cleaning process.

How long does the smell of ozone last?

The noticeable odor may fade quickly outdoors.

After an ozone-generator treatment, the smell may remain for hours or longer depending on the amount produced, ventilation, room size, materials in the space, and how long the machine operated.

Do not treat the disappearance of the odor as proof that the area is ready for re-entry. Follow the manufacturer’s instructions and ventilate the space thoroughly.

Why does my house smell like ozone?

Possible sources include an ozone generator, ionizing air purifier, electrostatic cleaner, HVAC accessory, laser printer, copier, electric motor, power tool, nearby storm, or electrical problem.

If the source is unknown, identify where the odor is strongest and whether it begins when a particular device turns on.

What does ozone smell like in a car?

After an ozone treatment, people often describe the smell inside a vehicle as a combination of chlorine, electricity, fresh rain, warm plastic, or a strong chemical odor.

Because a vehicle is a small enclosed space, the odor may be much more noticeable than it would be outdoors.

Why does a room smell strange after an ozone treatment?

Ozone may react with smoke residue, fragrances, carpet, upholstery, rubber, plastics, oils, and other materials inside the space.

Those reactions can create odors that seem sweet, sour, stale, rubbery, or chemical even after the strongest ozone smell begins to fade.

Can some people smell ozone better than others?

Yes. Genetics, age, congestion, exposure history, and individual smell sensitivity all affect how easily ozone is detected.

One person may notice it immediately while another barely detects it.

Can I use smell to tell when ozone is gone?

No. Smell is not a reliable safety test.

People vary in sensitivity and may experience temporary odor fatigue. Always use the required waiting period, ventilation procedure, manufacturer instructions, and any appropriate monitoring method instead.

Read More About Ozone and Ozone Generators

If you are researching ozone generators, ozone safety, or odor treatment in homes and vehicles, these guides may be helpful:

  • Ozone Generators and Clothes: The Side Effect Nobody Talks About — Learn how ozone can affect fabrics, clothing, elastic, and household materials.
  • What Do You Do If You Breathe Ozone? — Immediate steps, possible symptoms, exposure risks, and prevention.
  • What Is an Ozone Machine? How Ozone Generators Work — A beginner-friendly explanation of how ozone generators produce ozone and treat odors.
  • Ozoning a House: Do’s and Don’ts — Practical precautions for preparing, treating, ventilating, and re-entering a home.
  • Can You Use Ozone for Bug Control? — What homeowners should understand before considering ozone for insects or pests.

Final Thoughts

What does ozone smell like?

Most people describe it as a combination of chlorine bleach, electricity, static, warm metal, burnt electronics, or the air around a thunderstorm.

But identifying the smell is only the beginning.

The same sharp electrical odor can come from a natural storm, an ozone generator, an air purifier, a laser printer, a power tool, an HVAC accessory, or an electrical problem.

Pay attention to where the smell is strongest, when it appears, and which equipment is operating at the time.

An expected odor from known equipment should still be handled according to the manufacturer’s safety instructions. An unexpected indoor ozone smell—especially one accompanied by heat, buzzing, crackling, smoke, or a burning odor—should be investigated promptly.

Ozone has a distinctive smell, but your nose cannot measure concentration or determine whether a space is safe. Use the odor as a clue to locate the source, not as the final safety test.

What Is an Ionizer Fan? What the Ion Button on Your Fan Actually Does

Quick Answer: An ionizer fan is a regular fan with a built-in negative ion generator. When you press the ION button, the fan releases negatively charged particles that attach to dust, pollen, pet dander, smoke particles, and other airborne contaminants. These particles become heavier and settle onto nearby surfaces instead of staying suspended in the air.


Here’s the part most people don’t expect:

Running the ion feature can trigger a strange phenomenon called Grey Wall Syndrome, where charged dust gradually collects on walls, ceilings, televisions, and other nearby surfaces instead of staying airborne.

Before leaving the ION mode on all day, it’s worth understanding why this happens—and how to prevent it.

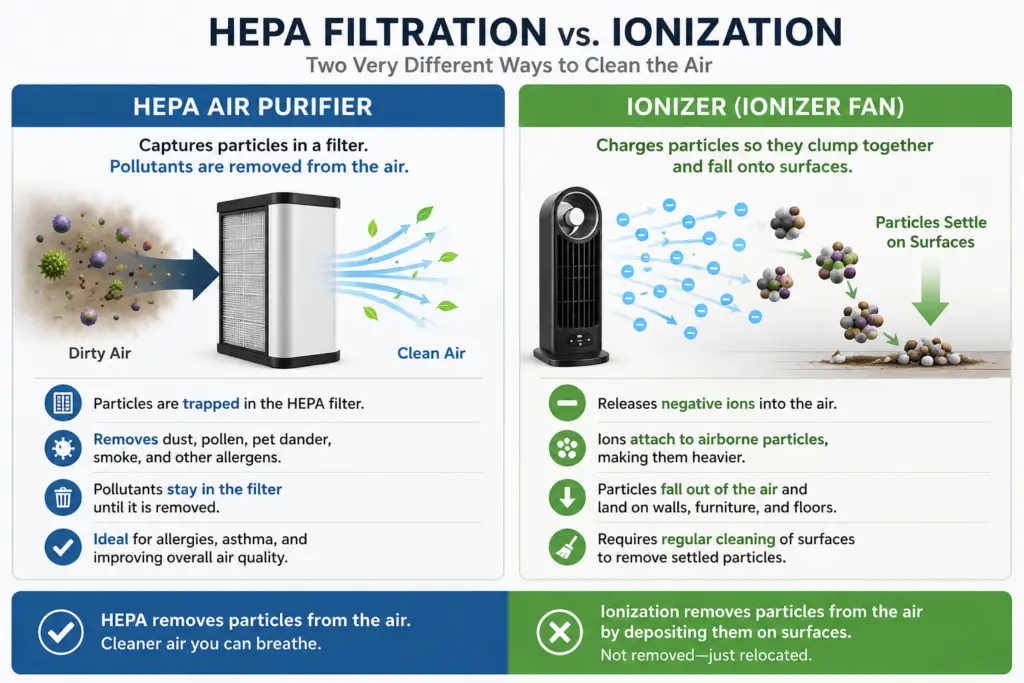
An ionizer fan can be useful in the right situation, but it is not the same thing as a HEPA air purifier. A HEPA purifier captures particles inside a filter. An ionizer fan usually causes particles to fall out of the air and land somewhere else in the room.

After years of working around air purification products, I have never been fully convinced that fans and ionizers belong together. A fan is designed to move air quickly. An ionizer works best when it can keep enough ions concentrated in the room. Those two goals do not always work well together.

Before you leave the ion feature on all day: While most people worry about safety or electricity costs, the absolute biggest issue with these fans is an unexpected surface side effect. If you want to keep your walls, paint, and nearby electronics clean, you need to understand how the airflow alters the dust in your room before flipping the switch.

What Does Ionizer Fan Mean?

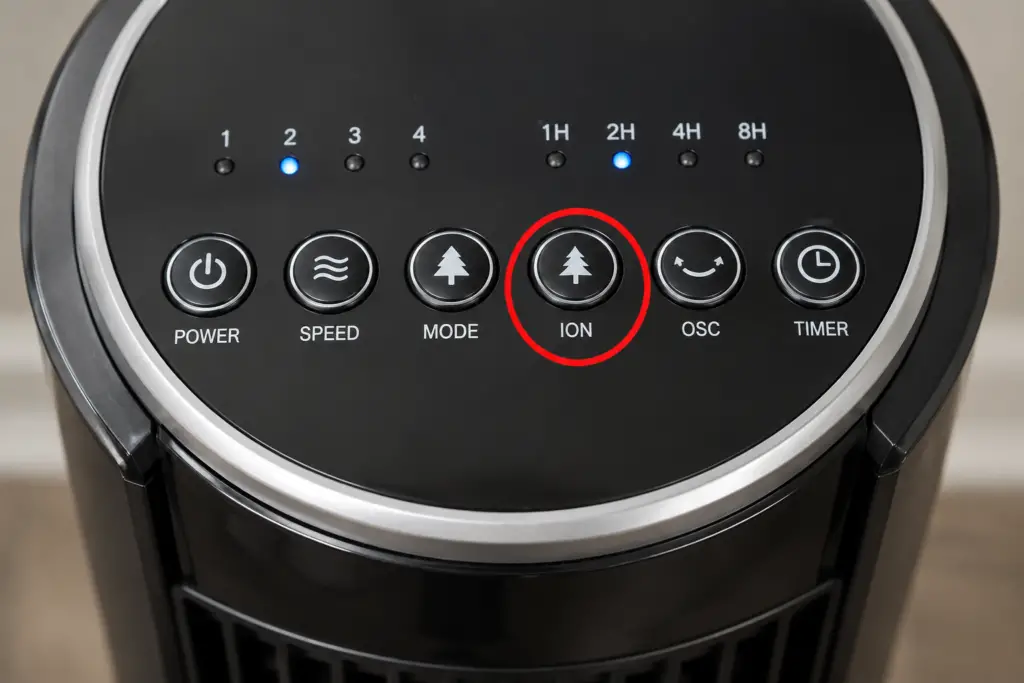
An ionizer fan is a standard fan that includes a built-in negative ion generator. Depending on the manufacturer, the feature may be labeled as ION, Ion Mode, Ionizer, or Negative Ion Generator.

When activated, the fan continues to circulate air while releasing negative ions into the room. These ions are designed to attach to airborne particles such as dust, pollen, pet dander, mold spores, and smoke residue.

The goal is to make those particles heavy enough to fall out of the air. While that can reduce the number of particles floating around your breathing zone, it is very different from how a HEPA air purifier works. Instead of capturing contaminants inside a filter, an ionizer fan usually causes them to settle onto nearby floors, furniture, walls, and electronics.

picture showing the ionizer button on a fanWhat Does the Ion Button on a Fan Do?

The ION button turns on the fan’s ionizer. Once activated, the fan releases negatively charged ions into the air while continuing to provide airflow and cooling.

The process works like this:

  • Negative ions attach to airborne particles.
  • The particles become heavier as they combine together.
  • The particles eventually fall onto nearby surfaces instead of remaining airborne.

Many manufacturers advertise ionizer fans as helping reduce dust, pollen, pet dander, and other allergens. While there is some truth to this claim, ionizer fans generally do not clean the air as effectively as a dedicated HEPA air purifier because the contaminants are not actually collected and removed from the room.

That difference matters. If dust falls onto your furniture, walls, television, or carpet, it has not disappeared. It has simply moved from the air onto a surface.

Is the Ion Setting on a Fan Safe?

For most people, the ion setting on a fan is considered safe for normal household use. Modern ionizer fans produce very small amounts of ozone compared to dedicated ozone generators, and the airflow from the fan helps disperse any ozone that is created.

That said, “safe” doesn’t necessarily mean “beneficial.” the ionizer feature can still create side effects that some people find annoying, and certain individuals may be more sensitive than others.

Do Ionizer Fans Produce Ozone?

Yes, most ionizers produce at least a trace amount of ozone as a byproduct of the ionization process. However, ionizer fans are not designed to generate ozone and typically produce far less than a dedicated ozone machine.

In normal use, the amount of ozone produced by a modern ionizer fan is generally considered too low to pose a health risk for most people.

If you notice a sharp, clean smell similar to the air after a thunderstorm, that may be the scent of ozone and negative ions being produced by the fan.

Related: If you are mainly worried about ozone, respiratory irritation, or dust buildup, read our full guide to air purifier ionizer side effects.

Who Should Be Careful With Ionizer Fans?

While most healthy adults can use ionizer fans without problems, some people may prefer to leave the ion feature turned off.

  • People with asthma or respiratory sensitivities
  • Individuals who are sensitive to ozone
  • Anyone who notices coughing, throat irritation, or headaches while using the feature
  • Owners of birds and other exotic pets

Are Ionizer Fans Safe for Birds?

Bird owners should use extra caution with any device that produces ozone, even in very small amounts. Birds have extremely sensitive respiratory systems and can be affected by airborne contaminants much more easily than humans.

If you keep parrots, cockatiels, finches, canaries, or other pet birds, it is generally best to avoid running an ionizer fan in the same room.

Should You Leave the Ion Feature On All the Time?

The ionizer feature itself uses very little electricity, often less than a few watts. However, running it continuously can increase dust accumulation on nearby walls, furniture, televisions, and computer monitors.

Many homeowners only use the ion setting when they feel the room is particularly dusty or during allergy season.

But you have to wonder: can an ionizer really function properly with a fan constantly blowing the ions away?

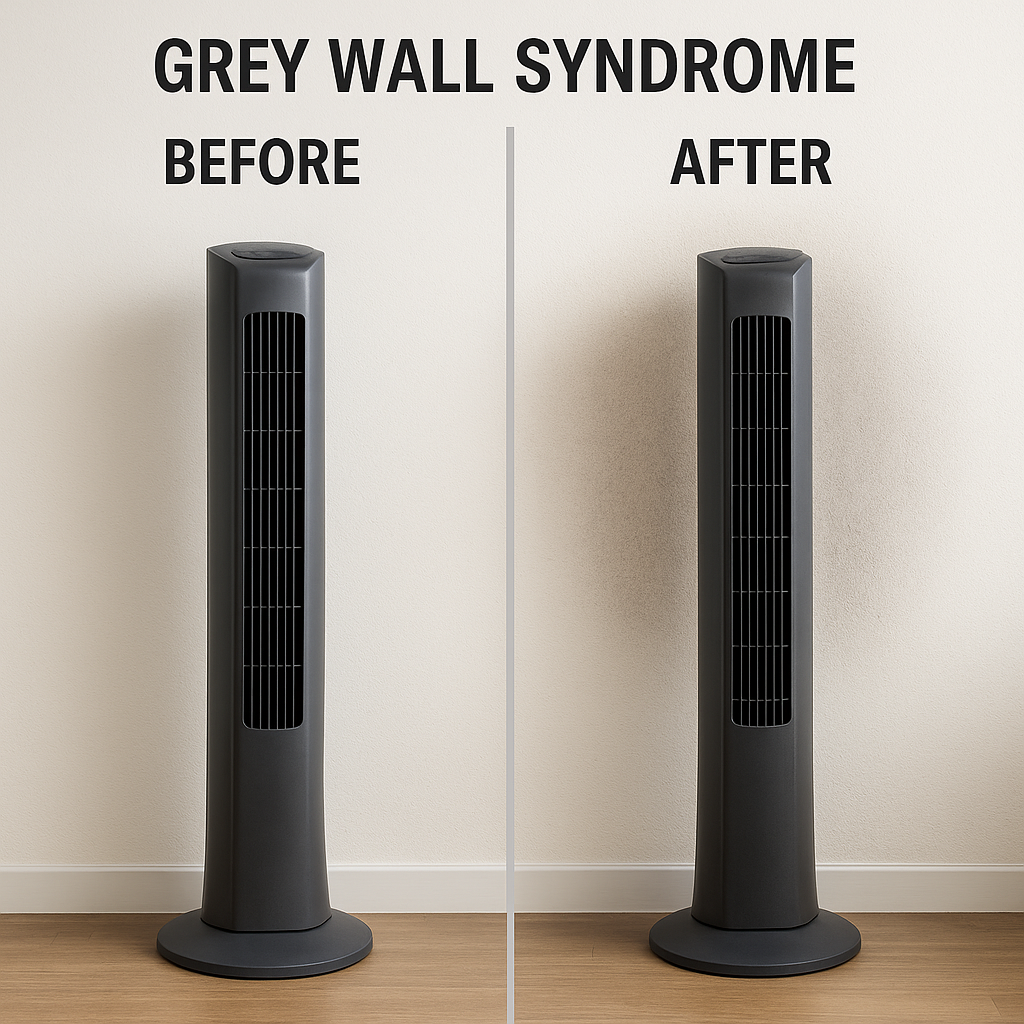
Dust buildup on walls caused by ionizer fan – Grey Wall Syndrome exampleWhat Is Grey Wall Syndrome?

Grey Wall Syndrome sometimes spelled Gray Wall Syndrome is one of the most common complaints from people who use ionizers, including ionizer fans.

Many homeowners are surprised when they notice gray patches on walls, dusty television screens, or dark streaks on ceilings near the fan. In many cases, the ionizer feature is contributing to the problem.

The reason is simple: ionizers do not destroy dust or remove it from the room. Instead, they charge airborne particles and cause them to settle onto nearby surfaces.

  • Negative ions attach to dust, pollen, pet dander, smoke residue, and other airborne particles.
  • These charged particles become heavier and fall out of the air.
  • The particles are attracted to grounded or statically charged surfaces such as walls, ceilings, furniture, and electronics.
  • Over time, grayish patches, halos, or streaks can begin to appear.

Why Do Ionizer Fans Make Walls Look Dirty?

When an ionizer fan blows air toward the same wall day after day, the charged particles tend to accumulate in that area. What started as normal household dust becomes concentrated into a visible patch or discoloration.

This is especially noticeable on light-colored paint, textured walls, and ceilings where the dust buildup creates a gray or black halo effect.

Why Do TVs and Computer Monitors Attract More Dust?

Electronics are often the first place people notice Grey Wall Syndrome. Television screens, computer monitors, and other electronic devices naturally carry static electricity, making them attractive targets for charged dust particles.

As a result, screens can develop a hazy film or speckled appearance much faster than they would without an ionizer running nearby.

How To Reduce Grey Wall Syndrome

  • Avoid aiming the fan directly at one wall for long periods.
  • Keep ionizer fans away from televisions and computer monitors when possible.
  • Dust and vacuum regularly in the fan’s airflow path.
  • Use the ion feature only when needed instead of running it 24 hours a day.
  • Pair the fan with a HEPA air purifier to capture particles before they settle onto surfaces.

Grey Wall Syndrome does not mean the ionizer is creating dust. It simply makes airborne particles collect in visible locations instead of remaining suspended in the air.

graphic explaining HEPA air purification vs ionizationDo Ionizer Fans Actually Clean The Air?
The short answer is yes, but only to a limited extent.

Ionizer fans release negative ions into the air that attach to airborne particles such as dust, pollen, pet dander, smoke residue, and mold spores. As these particles become charged, they clump together and become heavier.

Eventually, the particles fall out of the air and settle onto nearby surfaces instead of continuing to float around the room.

This can reduce the number of airborne particles in your immediate breathing zone, which is why some users report fresher-feeling air when the ion feature is turned on.

However, there is an important difference between an ionizer fan and a HEPA air purifier.

  • Ionizer fans cause particles to settle onto surfaces.
  • HEPA air purifiers physically capture particles inside a filter.

Because the contaminants remain in the room, ionizer fans are generally considered less effective than HEPA filtration for improving overall indoor air quality.

In other words, the particles may no longer be floating in the air, but they have not actually been removed from your home.

My Opinion: Why Ionizers and Fans Don’t Belong Together

After years of working around air purification technology, I’ve never been convinced that an ionizer fan is an effective way to clean the air.

My reasoning is simple. Ionizers work best when they can continuously saturate a space with negative ions. As ions attach themselves to airborne particles and fall out of the air, the ionizer keeps producing more ions to replace them.

In other words, successful ionization depends on maintaining a high concentration of ions in the room.

A fan does the exact opposite. Its purpose is to move air as quickly as possible. The moment ions are generated, the fan begins dispersing them throughout the room.

One of the biggest lessons I learned while selling air purifiers was that ions don’t live very long. That’s why dedicated ionizers are designed to continuously flood an area with ions. If the ions dissipate too quickly, their ability to interact with airborne particles drops significantly.

That’s why I’ve always viewed ionizer fans as a compromise. The fan is trying to move air, while the ionizer is trying to maintain ion concentration. In my opinion, the two technologies are working against each other.

If my goal is cleaner air, I’d rather have a dedicated HEPA air purifier or a standalone ionizer. If my goal is cooling, I’d rather buy the best fan I can afford. Combining both functions into one machine sounds good on the box, but I’ve never found it to be the best solution for either job.

Still curious about ionizers?
If you’re wondering about ozone, dust buildup, respiratory concerns, and other potential drawbacks, read our detailed guide: Air Purifier With Ionizer – What Are The Side Effects?

Better Alternatives to Ionizer Fans

If you’re considering an ionizer fan because you want cleaner air, there are usually better options available. The best choice depends on whether your primary goal is cooling, air cleaning, or a combination of both.

Your Goal Best Choice Why
Maximum Cooling Traditional Fan Moves more air and typically costs less than combination units.
Cleaner Air HEPA Air Purifier Captures particles inside a filter instead of allowing them to settle on surfaces.
Cooling and Air Cleaning Bladeless HEPA Fan Filters the air before blowing it back into the room.
Lowest Initial Cost Ionizer Fan Adds basic ionization without the cost of a separate air purifier.

Why HEPA Air Purifiers Are More Effective

A HEPA air purifier physically captures dust, pollen, pet dander, and other airborne contaminants inside a filter. Once trapped, those particles are removed from circulation instead of being deposited onto nearby walls, furniture, and electronics.

This is why HEPA filtration remains the gold standard for improving indoor air quality in homes.

The Exception: Bladeless Fan Purifiers

Most fan-and-purifier combinations suffer from the same problem discussed earlier. They are trying to move air and clean air at the same time. However, bladeless fan purifiers use a different approach.

Instead of releasing ions into the room, they pull air through a HEPA filter first and then push the cleaned air back into the room. Because filtration happens before the air is circulated, the two functions work together rather than competing with each other.

If you truly want one machine that can both cool and clean the air, a quality bladeless fan purifier is usually a better choice than an ionizer fan.

Tips for Using an Ionizer Fan

If you already own an ionizer fan, there are a few simple ways to get the most from it while minimizing some of the common complaints associated with ionization.

Don’t Aim It Directly at a Wall

One of the easiest ways to reduce Grey Wall Syndrome is to avoid pointing the fan directly at the same wall for long periods. This can help prevent dust and other particles from accumulating in one location.

Keep It Away from Electronics

Televisions, computer monitors, gaming systems, and other electronics can attract charged particles. Positioning the fan away from these devices may help reduce dust buildup on screens and glossy surfaces.

Clean the Area Around the Fan Regularly

Because ionizers cause particles to settle out of the air, you’ll often find more dust collecting on nearby surfaces. Regular vacuuming and dusting can help keep this buildup under control.

Use the Ion Feature Only When Needed

Many owners leave the ionizer running continuously, but that isn’t always necessary. Running the ion feature periodically can help reduce dust accumulation while still allowing you to take advantage of the technology when desired.

Keep the Ionizer Clean

Most ionizers contain small emitter needles or collection points that can accumulate dust over time. Cleaning the unit according to the manufacturer’s instructions can help maintain performance.

Don’t Expect It to Replace an Air Purifier

Perhaps the most important tip is to understand what an ionizer fan can and cannot do. While it may reduce some airborne particles, it is not a substitute for a quality HEPA air purifier when air cleaning is the primary goal.

Frequently Asked Questions

Do ionizer fans really clean the air?

Yes, but only to a limited extent. Ionizer fans release negative ions that attach to airborne particles such as dust, pollen, and pet dander. These particles become heavier and settle onto nearby surfaces. Unlike a HEPA air purifier, an ionizer fan does not physically capture and remove contaminants from the room.

Do ionizer fans produce ozone?

Most modern ionizer fans produce only trace amounts of ozone as a byproduct of the ionization process. These levels are typically much lower than those produced by dedicated ozone generators and are generally considered safe for normal household use.

Can I leave the ion setting on all the time?

Yes, most ionizer fans are designed to operate continuously. However, running the ionizer all the time may increase dust accumulation on nearby walls, furniture, televisions, and computer monitors. Many homeowners choose to use the feature only when needed.

Why does my ionizer fan make a clicking or buzzing sound?

Some ionizers produce a faint clicking, crackling, or buzzing noise during operation. This is usually caused by the ion generation process and is considered normal. If the noise becomes loud or excessive, the unit may need cleaning or maintenance.

Why does my TV or computer monitor get dusty so quickly?

Electronics naturally attract charged particles due to static electricity. When an ionizer fan is running, dust and other airborne particles can become charged and collect more quickly on televisions, computer monitors, and other electronic devices.

What is Grey Wall Syndrome?

Grey Wall Syndrome is the buildup of dust and airborne particles on walls, ceilings, and other surfaces near an ionizer. The charged particles settle out of the air and vanish from your breathing zone, but they are magnetically attracted to your home’s surfaces, creating dark halos or films over time. Instead of destroying the dust, the machine simply deposits it where you can see it.

Bypass Humidifiers: The Complete Guide to Integrated Whole Home Humidification

Let’s find out how they help make your home more comfortable.

What is a Whole House Bypass Humidifier?


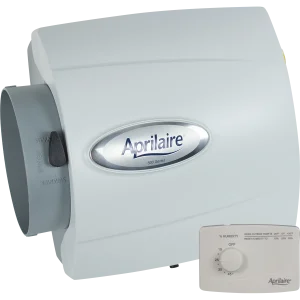
Aprilaire Bypass humidifier

A bypass whole house humidifier is a type of humidification system designed to work with your home’s existing heating and cooling system (HVAC) to maintain optimal humidity levels throughout the entire house.

It’s called “bypass” because it utilizes a bypass duct to circulate air through a water panel or pad, where the air picks up moisture before being redistributed throughout your home.

This process happens when the air inside your home is drier than what the humidistat, a device that measures humidity, determines is optimal.

Excess water from the humidification process is then directed back into the plenum (a central air distribution space for your HVAC system) via the bypass duct, avoiding over-humidification. This system is particularly effective in cold climates where indoor air tends to be dry, especially during winter months.

It is integrated into the home’s HVAC ductwork and typically installed near the furnace to leverage the existing airflow within the ducts to distribute humidified air.

What are the advantages of using a bypass whole house humidifier?

Using a bypass whole-house humidifier offers several advantages compared to other types of whole-house humidifiers like drum or steam humidifiers:

    1. Energy Efficiency: Bypass humidifiers are generally more energy-efficient than steam humidifiers because they don’t require electricity to generate steam. They utilize the airflow from your existing HVAC system to evaporate water on the humidifier pad, adding moisture to the air without additional energy consumption for evaporation.
    2. Lower Installation Cost: Compared to steam humidifiers, bypass humidifiers typically have lower initial installation costs. This is because they integrate more simply into existing HVAC systems without the need for independent electrical connections that steam humidifiers might require.
    3. Low Maintenance: While all humidifiers require maintenance, bypass humidifiers often have a straightforward maintenance routine compared to drum humidifiers. Drum humidifiers have a reservoir of water that can become a breeding ground for bacteria and mold if not cleaned regularly. Bypass humidifiers, which use a flowing water design rather than standing water, typically face fewer issues with microbial growth.
    4. Effective Humidification for Multi-level Homes: Due to their integration into the HVAC system, bypass humidifiers can effectively distribute humidified air throughout the entire home, including multi-level houses. This can be more efficient compared to portable units or single-room solutions.
    5. Water Conservation: Bypass humidifiers are designed to recirculate excess water back into the system rather than wasting it. This can be a more water-efficient solution compared to some steam humidifiers that might use more water to generate steam.
    6. Quiet Operation: Since bypass humidifiers use the air flow from the HVAC system and do not have their own fans or boiling elements, they tend to operate more quietly than steam humidifiers, which may produce noise during the boiling process.
    7. Compatibility with Existing Systems: Bypass humidifiers are typically compatible with a wide range of HVAC systems and can be a good option for homes with existing forced-air heating and cooling systems. This makes them a versatile choice for many homeowners.

Advantages of Bypass Humidifiers

Advantage Explanation
Energy Efficiency Uses existing airflow, no extra energy for evaporation
Lower Initial Cost Less complex than steam systems, so cheaper to install
Maintenance Simpler than drum, less frequent than steam systems
Effective for Multi-Level Homes Uses HVAC ducts to distribute humidity evenly
Water Conservation Recirculates excess water, minimal waste
Quiet Operation No fans or boiling sounds, quieter than steam humidifiers
Compatibility Works with most existing HVAC systems, versatile

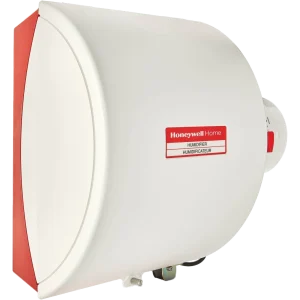
A picture of a Honeywell bypass humidifierHow does a Bypass humidifier differ from other types of whole house humidifiers?

Bypass humidifiers differ from other types of whole-house humidifiers mainly in their design and operation.
Here’s a comparison with the two other common types: drum and steam humidifiers.

Bypass Humidifiers

      • Operation: Uses the HVAC system’s air flow to move air through a water panel, adding moisture to the air.
      • Installation: Integrated into existing HVAC ductwork, often requires less space than steam systems.
      • Maintenance: Requires regular maintenance, including annual replacement of the water panel and cleaning.
      • Energy Efficiency: Does not require additional electricity to create humidity; it uses the air flow from the HVAC system, making it energy-efficient.
      • Cost: Generally lower installation costs compared to steam humidifiers but may be higher than drum systems.

Drum Humidifiers

      • Operation: Contains a rotating drum covered with a foam or fabric sleeve that picks up water from a reservoir and evaporates as air blows over it.
      • Installation: Installed in the HVAC ductwork similar to bypass but typically easier and cheaper due to fewer parts.
      • Maintenance: Higher maintenance due to the risk of mold and bacteria growth in the standing water of the drum.
      • Energy Efficiency: Similar to bypass humidifiers in terms of not needing extra electricity for evaporation.
      • Cost: Usually the least expensive option in terms of initial investment.

Steam Humidifiers

      • Operation: Electrically boils water to create steam, which is then introduced into the ductwork.
      • Installation: More complex and can be installed independently of the HVAC system’s operation cycle, making it versatile for different setups.
      • Maintenance: Typically less maintenance compared to drum humidifiers but more than bypass since it involves more complex components like heating elements.
      • Energy Efficiency: Less energy-efficient due to the electricity needed to boil water, but provides precise humidity control.
      • Cost: Higher initial and operational costs due to the complexity of the system and energy usage.

Each type of whole-house humidifier offers distinct advantages and potential drawbacks, depending on your home’s specific needs, the climate you live in, and your preferences for maintenance and operational efficiency.

Types of Whole House Humidifiers

Type Operation Installation Complexity Maintenance Requirements Energy Efficiency Cost Implications
Bypass Uses airflow from HVAC to evaporate water from a pad Moderate Annual pad replacement, regular cleaning High (no additional energy for evaporation) Lower installation cost, moderate maintenance cost
Drum Rotating drum absorbs water from a reservoir Easier Frequent cleaning due to standing water risks High (no additional energy for evaporation) Lower installation and maintenance cost
Steam Boils water to create steam More complex Less frequent (cleaning and descaling) Lower (energy used to boil water) Higher installation and operational cost

How Does a Whole House Bypass Humidifier Work?

  • Connection to Water Supply: The bypass humidifier is connected to your home’s water supply. This allows it to draw water as needed to add moisture to the air.
  • Water Panel or Pad: Inside the humidifier, there’s a component called a water panel or pad. This is like a sponge that absorbs water from the supply line.
  • Airflow Through the Water Panel: Your furnace or air handler pushes warm air through the water panel. As the air passes through, it picks up moisture from the wet panel.
  • Bypass Duct: A special duct called a ‘bypass duct’ is used to direct some of the air from the heating system into the humidifier. After the air picks up moisture from the water panel, it rejoins the main air flow and is distributed throughout your house.
  • Humidistat Control: The system includes a humidistat, which works like a thermostat but for humidity. You set it to your desired humidity level, and it tells the humidifier when to turn on and off to maintain that level.
  • Excess Water Drainage: Any water that isn’t evaporated and turned into moisture for the air flows down the panel and is drained away. This prevents too much humidity, which could lead to condensation problems.

So, in essence, a whole house bypass humidifier adds moisture to the air circulated by your HVAC system by passing it through a water-soaked panel, with the whole process regulated by a humidistat to keep indoor humidity at comfortable levels.

What type of maintenance am I looking at if I buy a whole house bypass humidifier?

Maintaining a whole house bypass humidifier is essential to ensure it operates efficiently and safely. Here’s what typical maintenance might involve:

    1. Replace the Water Panel or Pad: This is the core part of the humidifier where water evaporates into the air. It should be replaced annually, as it can become clogged with minerals from the water, reducing efficiency. Some environments or heavy usage may require more frequent changes.
    2. Clean the Water Supply Line: This line can also get clogged with mineral deposits. An annual inspection and cleaning can prevent blockages that might impair the humidifier’s performance.
    3. Inspect and Clean the Drain Line: Since excess water drains out of the humidifier, you’ll want to ensure this line is clear. It’s a good idea to check it twice a year for any clogs or leaks.
    4. Check the Steam Distribution System: For systems that include a method of distributing steam or moisture more directly into the ductwork, an annual inspection can ensure it’s working correctly.
    5. Clean the Humidistat: The humidistat controls the operation of the humidifier based on your desired humidity level. Cleaning it annually helps maintain its accuracy and responsiveness.
    6. Look for Leaks and Seal Them: Inspect where the humidifier connects to your plumbing and ductwork. Any leaks should be sealed to prevent water damage and maintain system efficiency.
    7. Check the Bypass Dampers: These regulate air flow through the humidifier during different seasons. Ensure they’re operating smoothly and positioned correctly for the season—open for winter (when you’re using the humidifier) and closed for summer.

Whole House Bypass Humidifier Maintenance

Maintenance Task Frequency Notes
Replace water panel/pad Annually Essential for efficient operation
Clean water supply line Annually Prevents blockages
Check and clean drain line Twice a year Ensures proper drainage, prevents water damage
Inspect steam distribution Annually For systems with direct steam distribution
Clean humidistat Annually Maintains accuracy and reliability
Inspect for leaks As needed Prevents water damage and maintains efficiency
Check bypass dampers Seasonally (twice) Ensures proper airflow and operation

Can I install a whole house bypass humidifier by myself or do I need a professional?

Whether you can install a whole house bypass humidifier by yourself largely depends on your comfort level with HVAC systems and your DIY skills. Here’s a breakdown to help you decide:

DIY Installation

      • Skills Required: You’ll need a basic understanding of your home’s heating and cooling system, as well as some experience with plumbing and electrical work.
      • Tools: Common tools for the job might include screwdrivers, a drill, tin snips for cutting into ductwork, a utility knife, and perhaps a pipe cutter for the water line.
      • Instructions: It’s crucial to thoroughly read and understand the installation manual for the specific humidifier model you have. This will guide you through the process step by step.
      • Considerations: Make sure you’re comfortable working with water lines (to avoid leaks) and electrical connections (to avoid shorts and other hazards). You’ll also need to cut into the existing ductwork, which requires care and precision to maintain the integrity of your HVAC system.

Professional Installation

      • Expertise: HVAC professionals have the experience and knowledge to ensure the humidifier is installed correctly and integrated seamlessly with your existing system.
      • Convenience: Hiring a professional can save you time and the hassle of figuring out complex installation steps.
      • Safety: Professionals are trained to handle the various challenges of working with HVAC systems, minimizing the risks of damage or injury.
      • Warranty: Some humidifier warranties might require professional installation or can be voided by improper installation.

Conclusion: If you’re confident in your DIY abilities and have some experience with similar projects, you might be able to install a bypass humidifier yourself, especially if you choose a model known for being DIY-friendly. However, if you’re unsure about any aspect of the installation or want the peace of mind that comes with professional work, it’s wise to hire a specialist. Stay ahead of the season with our comprehensive humidifier guide.

FAQ:

How does a bypass humidifier work?

Bypass humidifiers have a water panel installed in the supply plenum that adds moisture into the airstream when the humidistat reads that humidification is needed. Excess water gets channeled into a bypass duct so levels don’t get too high.

What does a bypass humidifier do in an HVAC system?

A bypass humidifier integrates into a home’s ductwork to add moisture during heating cycles based on the humidistat reading. This balances humidity levels in the living space.

Where is the best place to install a bypass humidifier?

Bypass humidifiers are typically installed high on the supply plenum or ductwork so gravity helps excess water flow into the bypass duct as designed.

What maintenance is required on a bypass humidifier?

You’ll need to replace the water panel or pad about every 1-2 years. Annual cleaning to flush out mineral deposits is also recommended.

Are bypass humidifiers energy efficient?

Yes, bypass technology only adds the specific amount of moisture needed, minimizing energy waste from over-humidifying.

How long does a bypass humidifier last?

With proper maintenance like replacing pads and cleaning, a bypass humidifier will typically last 5-10 years before needing full replacement.

What size bypass humidifier do I need?

Check manufacturer sizing guides based on square footage and desired humidity range. Also account for home construction, number of stories, and HVAC capacity.

How much does it cost to install a bypass humidifier?

Expect $500-$1500 total for the unit and professional installation. DIY installation can reduce costs but requires HVAC expertise.

Can I install a bypass humidifier myself?

Some DIY-friendly models from Aprilaire and Honeywell allow self-installation with proper HVAC knowledge. But specialized tools and skills are needed.

Do bypass humidifiers waste water?

Minimally. The bypass recirculates excess water rather than wasting it, and the humidistat only activates humidification when needed.

Can I Use a Humidifier With Well Water?

Quick Answer:

You can use well water in a humidifier, but whether you should depends mostly on the humidifier. Ultrasonic and impeller models can send minerals from the water into the room as white dust, so distilled water is usually the better choice. Evaporative and warm-mist models keep most of those minerals inside the machine, but you will have more wick changes or scale to clean.

Most people assume the question comes down to whether well water is “safe” or “unsafe.” The more useful question is simpler: Where do the minerals go when the humidifier runs?

In some humidifiers, they land on the wick or heating element. In others, they leave the machine with the mist and settle across your dresser, nightstand, and other surfaces as fine white dust. That difference should determine what water you use.

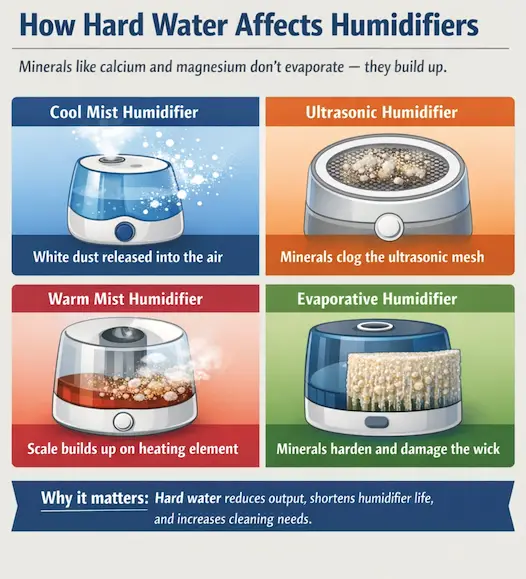
Educational graphic showing how hard water affects different humidifier types, including white dust from cool mist humidifiers, mineral buildup in ultrasonic units, scale on warm mist heaters, and wick damage in evaporative humidifiers.

Start With the Type of Humidifier You Own

If you are not sure what kind you have, watch it while it runs. An ultrasonic or impeller unit produces a visible cool mist. An evaporative model uses a fan and a replaceable wick, and its moisture is usually invisible. A warm-mist unit heats the water and releases steam.

Humidifier type What well-water minerals do Best starting choice
Ultrasonic or impeller Can leave the tank with the mist and become white dust Use distilled water
Evaporative Collect mostly in the wick Well water may work; expect more wick changes
Warm mist Build up inside the tank and on the heating element Well water may work; expect regular descaling

Read Our Complete Guide : The Complete Humidifier Guide: Types, Benefits, Usage Tips and Safety

If You Have an Ultrasonic or Impeller Humidifier

This is where untreated well water causes the biggest indoor-air concern. These models turn tank water into tiny airborne droplets. When those droplets evaporate, dissolved minerals can remain behind as particles.

The first thing I would check is the furniture near the humidifier. Run a finger across a dark dresser, television stand, or glass tabletop. If it picks up a pale powder that returns after cleaning, the water is supplying more minerals than the machine can keep inside.

The U.S. Environmental Protection Agency recommends using low-mineral water, such as distilled water, to reduce mineral buildup and dispersal. The agency also notes that ultrasonic and impeller humidifiers are the types most likely to disperse minerals from their tanks into indoor air.

Important:

Do not treat white dust as only a cleaning nuisance. It means material from the water is entering the room. Switch to distilled water, use a manufacturer-approved demineralization cartridge, or change to an evaporative humidifier.

A demineralization cartridge can help, but it is a compromise rather than a permanent fix. Very hard water can exhaust a small cartridge quickly. If the dust returns, replace the cartridge or move to distilled water.

If You Have an Evaporative Humidifier

An evaporative humidifier is usually the most practical choice for someone who wants to use well water without buying gallon jugs all winter.

The fan pulls room air through a wet wick. Water evaporates from the wick, while most calcium, magnesium, and other minerals stay behind. That greatly reduces the white-dust problem, but the minerals do not disappear. They harden the wick instead.

Most homeowners notice the change before the machine completely stops working. The wick turns stiff or crusty, the fan keeps running, and the room no longer reaches the humidity level it did before. At that point, cleaning the tank will not restore a worn-out wick. Replace it.

Practical Tip:

Keep one replacement wick on hand. Hard well water can shorten wick life, and discovering that during a dry spell usually means waiting several days for a replacement.

If You Have a Warm-Mist Humidifier

Warm-mist humidifiers boil water, so they generally do not disperse substantial amounts of minerals into the air. Instead, the minerals stay behind on the heating element and the bottom of the reservoir.

You will see the problem rather than dust it from the furniture: a rough white or tan crust develops inside the unit. As that layer thickens, the humidifier may heat more slowly, make more noise, or produce less steam.

Well water can be workable in this type of machine if you are willing to descale it regularly. Follow the owner’s manual. Vinegar is commonly recommended for mineral scale, but it should only be used when the manufacturer allows it and must be rinsed away thoroughly.

Is Your Well Water Actually Hard?

Well water is often described as hard water, but that is not automatically true. Mineral levels vary from one well to another. One home may develop a crust around its faucets within a week, while a nearby home sees very little scale.

Look for the ordinary clues first:

  • White or tan crust around faucets and showerheads
  • Cloudy spots on clean drinking glasses
  • Scale inside a kettle or coffee maker
  • Humidifier wicks that become stiff quickly
  • White dust near an ultrasonic humidifier

A hardness test gives you a better answer than guessing. But hardness only measures part of the water-quality picture. It does not prove that a private well is free of microorganisms or other contaminants.

What this means:

A clean-looking tank and soft-feeling water do not guarantee that the water is the best choice for a mist-producing humidifier. If the well’s quality is uncertain, distilled water removes the guesswork.

Distilled, Filtered, and Softened Water Are Not the Same

This is where people often spend money without solving the right problem.

Water option What it changes Best use
Distilled water Removes nearly all dissolved minerals Best simple choice for ultrasonic and impeller models
Demineralization cartridge Reduces minerals before mist is produced Useful when approved for the humidifier and replaced on time
Ordinary drinking-water filter Varies by filter; many do not remove hardness minerals Use only if its specifications address the minerals in question
Softened water Exchanges calcium and magnesium for sodium or potassium May reduce scale, but is not the same as distilled water

A whole-house softener can make scale easier to manage, but it does not produce mineral-free water. I would not install one solely to supply a small portable humidifier. If an ultrasonic unit is leaving dust, distilled water or a suitable demineralization system is the more direct solution.

2 Women talking about using well water in a humidifier

Cleaning Solves a Different Problem

Descaling removes mineral crust. Cleaning also helps prevent film and microorganisms from building up in standing water. Neither one changes what untreated mineral-heavy water releases while an ultrasonic or impeller humidifier is operating.

The EPA recommends emptying, wiping, and refilling portable humidifiers daily and cleaning them every third day. The Centers for Disease Control and Prevention also advises emptying humidifiers every day, cleaning them according to the manufacturer’s directions, and allowing them to air-dry after cleaning.

  1. Unplug and empty the humidifier. Do not keep topping off yesterday’s water.
  2. Clean it according to the manual. Remove scale or film from every surface that contacts water.
  3. Rinse thoroughly. Cleaner left in the tank can be released into the room when the unit runs.
  4. Let the parts dry. Do this before storage and whenever the humidifier will sit unused.
  5. Inspect the working parts. Replace a crusted wick, exhausted cartridge, or damaged component instead of trying to clean it indefinitely.

Important:

Do not add water-softener salt, essential oils, disinfectants, or scale-treatment chemicals unless the humidifier manufacturer specifically approves them for the tank. Preventing a mineral from sticking does not necessarily prevent the humidifier from sending it into the air.

When Should You Stop Using the Well Water?

You do not need to abandon well water because you find a little scale inside an evaporative or warm-mist unit. That is a maintenance issue. Clean the scale or replace the wick and watch how quickly it returns.

I would change the water or the humidifier when:

  • An ultrasonic or impeller model leaves recurring white dust
  • Scale returns so quickly that cleaning becomes impractical
  • Replacement wicks clog much sooner than expected
  • The humidifier develops slime, film, or an unpleasant odor
  • The well’s water quality is unknown or there is reason to suspect contamination

The simplest fix depends on the machine. Switch an ultrasonic or impeller model to distilled water. With an evaporative unit, decide whether more frequent wick replacements are worth the cost. With a warm-mist model, decide whether regular descaling fits your routine.

The Bottom Line

Yes, a humidifier can run on well water. That does not mean every humidifier handles it well.

If your machine sends visible cool mist into the room, I would start with distilled water. If it uses a wick or boils the water, your well water may be perfectly workable as long as you keep up with wick changes or mineral scale.

Watch where the minerals end up. Once you know that, the right water choice becomes much easier.

Why Central Heating Causes Dry Coughs and How to Prevent Them

Why is My Central Heat Making Me Cough?

If you find yourself coughing more often when the central heating is on, you’re not alone. Central heating can dry out the air and irritate respiratory passages, leading to coughing for some people. However, it’s not just the dry air that could be causing discomfort. Mold in HVAC systems can also contribute to respiratory issues, including coughing. Thankfully, there are steps you can take to mitigate these effects and keep your airways calm.

Why Central Heating Causes Dry Air

Central heating works by warming air and distributing it throughout your home via vents and ducts. However, this heated air lacks moisture. As it circulates, the dry air evaporates moisture from surfaces like your skin, nasal passages, throat, and lungs, which can make tissues dry, irritated, and inflamed, triggering coughing.

Colder outdoor air holds less moisture than warm indoor air. So when you heat up cold outdoor air, its relative humidity drops dramatically. Central heating systems also lack a humidification component to add moisture back into the air.

dirty ductThe Hidden Hazards of Dirty Ducts

 Dirty ducts can significantly compromise your indoor air quality and the efficiency of your HVAC system.
Accumulated dust, pollen, pet dander, and other pollutants in the ducts can circulate contaminated air throughout your home, exacerbating allergies, respiratory problems, and asthma symptoms. Moreover, this buildup can restrict airflow, forcing your system to work harder and leading to increased energy consumption and decreased system efficiency.2

Recognizing the signs of dirty ducts is key to maintaining a healthy indoor environment.
Indicators such as visible dust buildup around vents, unusual odors when the HVAC system is running, and an increase in respiratory issues or allergic reactions can signal the need for professional duct cleaning. Ensuring your ductwork is clean not only enhances air quality but also contributes to the overall efficiency and longevity of your HVAC system.1

Ventilation and Air Circulation

Before we delve into advanced air purification technologies like UV light solutions, it’s essential to understand the foundational role of ventilation and air circulation in maintaining indoor air quality. Proper ventilation is key to ensuring a healthy living environment, especially during the heating season when homes are sealed tight against the cold.

Why Ventilation Matters

Ventilation involves the exchange of indoor air with fresh outdoor air, which helps to reduce the accumulation of indoor air pollutants, including dust, allergens, and volatile organic compounds (VOCs). Good ventilation practices can also help mitigate the drying effect of central heating by introducing air with a higher moisture content from outside, particularly in areas with relatively humid outdoor climates.

Strategies for Improved Air Circulation

  • Natural Ventilation: Simply opening windows and doors for short periods can significantly improve air quality, even in cold weather. This allows stale, dry air to escape and fresh, moist air to enter.
  • Mechanical Ventilation: For homes in extreme climates or those with poor natural ventilation, mechanical systems such as Heat Recovery Ventilators (HRVs) or Energy Recovery Ventilators (ERVs) can provide controlled ventilation without significant heat loss.
  • Ceiling and Exhaust Fans: Utilizing ceiling fans can help circulate heated air more evenly throughout your home, reducing hot and cold spots and improving comfort. Exhaust fans, especially in kitchens and bathrooms, are crucial for removing excess moisture and odors and preventing mold growth.

The Role of Air Circulation

In addition to bringing in fresh air, ensuring that the air inside your home moves effectively can prevent the accumulation of airborne pollutants. Air circulation can be enhanced with strategic use of fans, ensuring that air filters are clean and unobstructed, and making sure that furniture does not block air vents.

hvac coughMold in HVAC Systems

In addition to drying out the air, central heating systems can harbor mold, which exacerbates respiratory issues. Mold thrives in moist environments, and when it grows in the ductwork or on other HVAC components, spores can spread throughout your home. Inhaling these spores can cause allergic reactions, exacerbate asthma, and provoke coughing.

Regular HVAC maintenance is crucial to prevent mold growth. This includes cleaning or replacing air filters, ensuring proper drainage, and inspecting ductwork for signs of moisture or mold. If mold is detected, professional cleaning may be necessary to remove it and prevent future growth.

Comparison of Indoor Air Quality Issues

Issue Cause Effects on Health Common Solutions
Dry Air Central heating systems heating cold outdoor air Dry and irritated respiratory passages, leading to coughing Humidifiers, hydration stations, steamy showers
Mold Moisture buildup in HVAC systems and ducts Allergic reactions, asthma exacerbation, coughing Regular HVAC maintenance, professional cleaning, UV light purifiers
Bacteria/Viruses Circulation of contaminated air through HVAC systems Respiratory infections, worsening of health conditions UV light purifiers, improved filtration systems, regular cleaning

Harnessing UV Light to Combat Mold in HVAC Systems

While addressing humidity and ensuring regular maintenance are critical steps in preventing mold growth in your HVAC system, another innovative solution is the use of Ultraviolet (UV) light technology. UV light, particularly in the UV-C spectrum, is known for its germicidal properties, effectively inactivating a wide range of microorganisms, including mold spores and bacteria.

How UV Light Works Against Mold

When installed within your HVAC system, UV lights work continuously to purify the air, targeting mold spores and bacteria before they have a chance to circulate throughout your home. The UV-C light disrupts the DNA of these microorganisms, preventing them from replicating and ultimately leading to their destruction. This not only helps to keep the ductwork clean but also improves the overall air quality in your home, reducing the potential triggers for coughs and other respiratory issues.

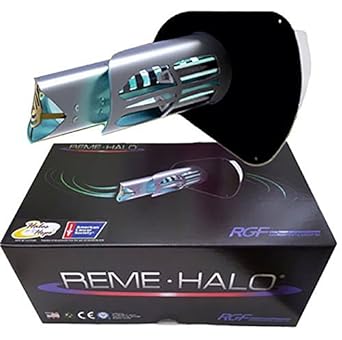
Implementing UV Light Solutions among the leading solutions in this space is the REME HALO® by RGF, a whole-home in-duct air purifier that transcends traditional UV lamp capabilities.

Innovative Air Purification with REME HALO

The REME HALO® stands out with its unique approach to air purification, utilizing RGF’s proprietary technology to produce low levels of hydrogen peroxide in the air that circulates through your air-conditioning system. This proactive method effectively reduces airborne and surface bacteria, viruses, odors, and mold spores, enhancing the quality of the air you breathe. The device’s ability to replicate nature’s air purification process indoors makes it an exceptional addition to any HVAC system, aiming to create a healthier living environment. Click Here For More Info

REME HALO: A Step Further in Air Purification

For those particularly concerned about ozone emissions, the REME HALO offers a solution that is verified as Zero Ozone to the UL 2998 standard. Utilizing the advanced aGHP-Cell™ technology, this model introduces Gaseous Hydrogen Peroxide into the air, targeting pollutants at their source without contributing to indoor ozone levels. This ensures that the air purification process is both effective and environmentally friendly, meeting the strict emissions limits set by CARB certification.

Safety Considerations

It’s worth noting that direct exposure to UV-C light can be harmful to humans and pets, potentially causing skin and eye irritation. Therefore, UV lights should be installed in parts of the HVAC system that are not directly accessible during normal use to ensure safety.

FAQ on Central Heating and Indoor Air Quality

Q1: How does central heating affect indoor air quality?
A1: Central heating can reduce indoor humidity levels, leading to dry air which can irritate the respiratory system and skin. It may also circulate dust, allergens, and other pollutants if not properly maintained.

Q2: Why does my house feel so dry in the winter?
A2: In winter, the cold air outside holds less moisture than warm air. When this cold air is heated indoors without adding moisture, it leads to dry indoor conditions.

Q3: Can dry indoor air cause health issues?
A3: Yes, dry indoor air can lead to dry cough, irritated sinuses, itchy skin, and can exacerbate respiratory conditions such as asthma and allergies.3

Q4: How can I improve humidity levels in my home during the heating season?
A4: Using humidifiers, placing bowls of water around the house, and keeping indoor plants are effective ways to add moisture back into the air.

Q5: What are the signs of mold in HVAC systems?
A5: Musty odors, visible mold growth around vents and drip pans, and increased allergy symptoms can indicate mold presence in HVAC systems.

Q6: How can UV light purifiers help improve indoor air quality?
A6: UV light purifiers can kill or deactivate microorganisms like bacteria, viruses, and mold spores, reducing their presence in the air circulated by the HVAC system.

Q7: Is it necessary to have my ductwork cleaned regularly?
A7: Regular duct cleaning can help remove dust, debris, and potential mold growth, improving the efficiency of your HVAC system and the quality of indoor air.

Q8: Can ventilation help with indoor air quality during the heating season?
A8: Yes, proper ventilation can introduce fresh air and reduce pollutant levels indoors. Opening windows briefly or using ventilation systems can help.

Q9: What humidity level should I maintain indoors during winter?
A9: Indoor humidity levels between 30-50% are considered optimal for comfort and health during the winter months.

Q10: Should I see a professional if I suspect my HVAC system is affecting my health?
A10: Yes, if you experience persistent health issues like coughing, allergies, or asthma that you suspect are linked to your HVAC system, consult a professional for an inspection and potential solutions.


Can You Use a Humidifier Without Aircon? (Yes — Here’s Why)

comparison chart showing the difference between a humidifier, air conditioner, and dehumidifier and how each affects indoor humidity Can I Use a Humidifier Without Aircon?

Yes. You can run a humidifier with no aircon at all — in winter, in mild weather, or anytime your indoor air feels dry.
A humidifier’s job is simple: add moisture to the air. It doesn’t need an air conditioner to “activate” it or make it work.

That said, this question is more common than you’d think, and it usually comes from a very understandable mix-up:
air conditioners remove humidity and many have a “Dry / Dehumidify” mode — so people assume there might be a “humidify” mode too.
There isn’t.

Why This Question Comes Up So Much

Most people aren’t thinking in technical terms — they’re thinking in buttons and results.
They know AC air feels dry, they see a “Dehumidify” option, and they start wondering if humidifying is something that only happens “with aircon.”

  • AC makes the air feel drier (because it removes moisture while it cools)
  • Many units have a Dry / Dehumidify setting
  • People hear “humidifier” and “dehumidifier” and assume they’re just settings on the same machine

So the real goal of this article is to clear up the confusion and help you use the right tool.

Quick Definitions: Humidifier vs Dehumidifier

Humidifier: adds moisture to the air (helps with dry air, dry skin, irritated sinuses, static, dry throat).

Dehumidifier: removes moisture from the air (helps with damp air, musty smells, basement humidity, mold risk).

They do opposite things — and air conditioners are naturally dehumidifiers when they run.

Important: Air Conditioners Dehumidify by Nature

When an air conditioner runs, it pulls warm air across a cold coil. Moisture in that warm air condenses on the coil (like water on a cold drink), then drains away.
That’s why AC air often feels “dry.”

So if you’re running aircon a lot, you may actually be more likely to want a humidifier — because the AC may be drying the air out.

What the “Dehumidify / Dry” Button on an Air Conditioner Actually Means

Many air conditioners have a “Dehumidify” or “Dry” mode, which adds to the confusion.
This setting does not add moisture to the air.
Instead, it removes humidity by running the cooling system in a way that pulls moisture out without lowering the temperature as much.

In other words: Dehumidify mode is still a drying function. It is not the opposite of a humidifier, and air conditioners do not have any setting that adds humidity back into the air.

So Can an Air Conditioner Ever Act Like a Humidifier?

No. Standard air conditioners (central AC, window units, portable ACs) are built to remove heat and remove moisture.
They do not generate mist or steam, and they don’t add water vapor to indoor air.

If your indoor air feels dry while using aircon, the solution isn’t an AC setting — it’s typically:

  • Reduce how low the thermostat is set (overcooling can increase dryness)
  • Run a humidifier to add moisture back
  • Monitor humidity with a simple hygrometer

Unless They Mean “Aircon” As in an Evaporative Cooler

In some regions, people use “aircon” to describe any machine that makes a room feel cooler — including evaporative coolers (often called swamp coolers).

Here’s the big distinction:

  • Air conditioner: cools AND dehumidifies (removes moisture)
  • Evaporative cooler: cools by adding moisture (works more like a humidifier)

So if someone says “aircon” but they really mean an evaporative cooler, then yes — that system can raise humidity.
But that’s not a normal AC.

When Using a Humidifier Without Aircon Makes Sense

  • Winter heating dries indoor air out fast
  • You live in a dry climate (high desert, cold dry regions)
  • You wake up with a dry throat, congestion, or nose irritation
  • You’re running a space heater or fireplace (both can dry air)

When a Humidifier Can Make Things Worse

A humidifier is great when the air is dry — but if your home is already humid, it can create problems.

  • You see condensation on windows
  • Your room smells musty
  • You’re in a humid climate and indoor humidity already runs high
  • You notice damp walls, damp bedding, or signs of mold

A simple goal range is 30–50% indoor humidity. If you’re already above that, a humidifier may not be the right move.

The Simple Way to Know If You Need a Humidifier

If you want the easiest answer: use a basic hygrometer (humidity meter).

  • Below 30%: air is dry — a humidifier often helps
  • 30–50%: comfortable range for most homes
  • Above 50%: caution — you may need moisture removal, not added moisture

If you don’t have a hygrometer, common “dry air” signs include static shocks, dry skin, nose irritation, and a dry throat at night.

Summary

Yes — you can use a humidifier without aircon. A humidifier works on its own by adding moisture to indoor air, and it’s commonly used in winter or dry climates when air conditioning isn’t running at all.
The confusion comes from two things: people mixing up humidifiers vs dehumidifiers, and the “Dry/Dehumidify” button on air conditioners — which removes moisture, not adds it.
If you’re unsure what you actually need, aim for 30–50% indoor humidity and use a simple hygrometer to confirm.

What Kind of Water Goes Into a CPAP Machine?
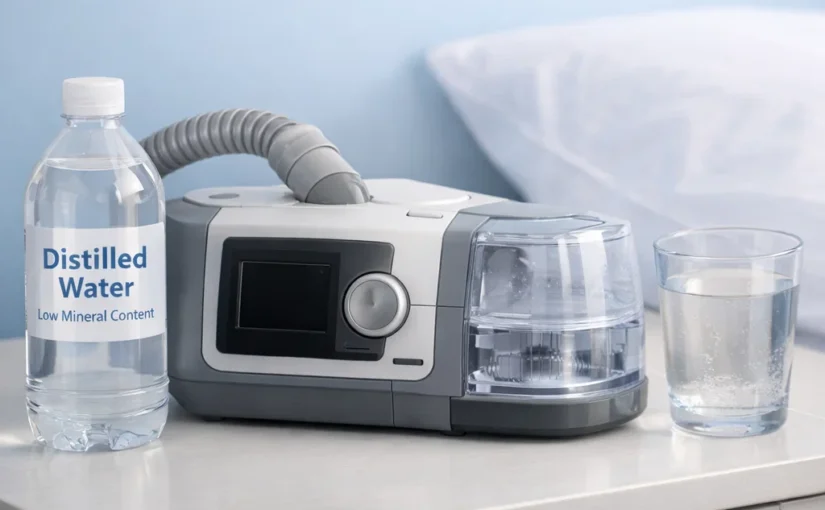
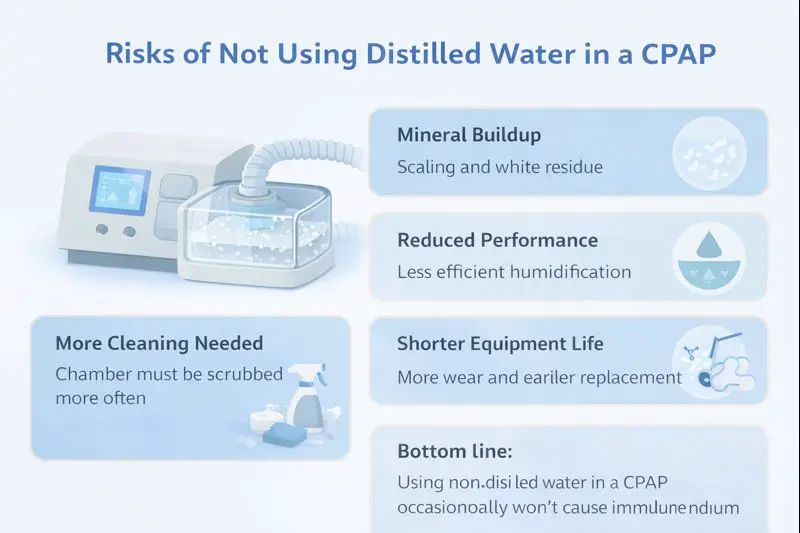
Emergency Travel Alternatives

Water Type Safe for Tonight? Long-Term Risk What to Do Tomorrow
Distilled Water 🟢 Yes (Best Option) None. Nothing! Enjoy clean, scale-free therapy.
Tap Water 🟡 Yes (In an Emergency) Heavy mineral scaling & white buildup. Empty, thoroughly rinse, and dry the chamber.
Bottled Water / RO 🟡 Yes (Temporary Use) Mild to moderate trace mineral buildup. Wash out the chamber with mild soap and warm water.
Boiled Tap Water 🟡 Yes (Microbiologically Safer) Still leaves full mineral scale behind. Rinse chamber out well to remove leftover deposits.

comparison of distilled water, reverse osmosis water, tap water, and bottled water for CPAP humidifiersWhat Kind of Water Goes Into a CPAP Machine?

If you use a CPAP machine, you already know the humidifier plays a big role in comfort. The question that trips up a lot of people is simple:

What water should you actually put in it?

The short answer is distilled water — but the full answer matters, especially if you ever run out or travel.

Let’s break it down clearly.

Why Distilled Water Is Recommended for CPAP Machines

Distilled water is the gold standard for CPAP use.

It’s recommended by manufacturers because it has almost all minerals and impurities removed. That matters for a few reasons:

  • Prevents mineral buildup inside the humidifier chamber
  • Reduces white scale and residue
  • Extends the life of the CPAP humidifier
  • Requires less frequent deep cleaning

CPAP humidifiers heat water nightly. When minerals are present, they don’t evaporate — they stay behind and slowly coat the chamber.

Over time, that buildup can interfere with performance or lead to odors and staining.

Need Distilled Water for Your CPAP?

If you need distilled water for your CPAP humidifier,
Pure Life distilled water is available by the gallon on Amazon.


See Pure Life Distilled Water on Amazon →

As an Amazon Associate, BreatheBetterAir.org earns from qualifying purchases.

Can You Use Reverse Osmosis (RO) Water in a CPAP?

Yes — reverse osmosis (RO) water is generally safe to use in a CPAP machine.
RO systems remove most minerals and contaminants, which makes the water much cleaner than standard tap water.

However, RO water is not always identical to distilled water. Some RO systems add small amounts of minerals back into the water for taste, which means trace mineral buildup can still occur over time.

If distilled water isn’t available, RO water is usually a better option than tap water — just be aware that it may still require more frequent cleaning of the humidifier chamber.

Can You Use Tap Water in a CPAP?

Yes — but it’s not ideal.

Tap water contains minerals like calcium and magnesium. Using it occasionally won’t harm you, but repeated use can cause:

  • Mineral scaling inside the water chamber
  • Cloudy residue or white film
  • More frequent cleaning requirements

From a health standpoint, using tap water in a CPAP is not dangerous in the short term. The issue is machine maintenance, not immediate risk.

If tap water is your only option temporarily, it’s better to use it than to skip humidification altogether.

Can I Use Tap Water in My CPAP Just This One Time?

Yes — you can use tap water in your CPAP just this once if you need to.
Doing so will not harm you or immediately damage your machine. The concern with tap water is mineral buildup over time, not a single use.

If you’re out of distilled water late at night, it’s better to use tap water than to skip CPAP therapy altogether. Just empty the humidifier chamber the next morning, rinse it, and switch back to distilled water when available.

Is Bottled Water Okay for CPAP Use?

Bottled water is a mixed bag.

Most bottled water contains minerals — sometimes even more than tap water. Even water labeled “purified” or “spring water” usually has minerals added back for taste.

That means bottled water is:

  • Better than hard tap water in some areas
  • Worse than distilled water overall
  • Still capable of leaving mineral residue

If you’re traveling and distilled water isn’t available, bottled water can be used short-term, but you should plan to clean the chamber afterward.

What About Boiled or Filtered Water?

Boiled water:
Boiling kills bacteria, but it does not remove minerals. Once cooled, boiled tap water still leaves scale behind. It’s safer microbiologically, but not better for the machine.

Filtered water:
Basic filters reduce chlorine and some particles, but they do not eliminate dissolved minerals. Filtered water is slightly better than straight tap water, but still inferior to distilled.

Water Types Ranked (Best to Worst)

Distilled water — best option

Filtered water — acceptable short-term

Bottled water — variable mineral content

Tap water — highest mineral buildup risk

What Water Should You Never Use in a CPAP?

Never use stagnant or previously used water.

Water that has sat in the humidifier chamber for days can grow bacteria and mold. When heated, that contaminated moisture can be delivered directly into your airway.

Always:

  • Empty the chamber daily if possible
  • Let it dry between uses
  • Clean it regularly

Why This Question Comes Up So Often

Most people don’t ask this question until one of these moments happens:

  • They run out of distilled water late at night
  • They’re traveling
  • They notice residue in the chamber
  • They worry they “did something wrong”

If that’s you, the good news is this:

Using the wrong water once or twice won’t ruin your CPAP.
It just means you’ll want to clean it and switch back to distilled when possible.

Maintenance Tip That Matters More Than Water Choice

Regardless of water type, regular cleaning matters more than perfection.

A CPAP using tap water that’s cleaned weekly is safer than a CPAP using distilled water that’s never cleaned.

Summary

What kind of water goes into a CPAP machine?

Distilled water is the best choice because it prevents mineral buildup and protects the humidifier. Tap, bottled, filtered, or boiled water can be used temporarily if needed, but they increase cleaning and long-term wear.

If you’re concerned because you already used the wrong water, we explain exactly what happens — and what to do next — in this follow-up guide:

⚠️ Did you already use tap water or bottled water? Don’t panic, but don’t let it sit there. Read our quick rescue guide on What Happens If You Don’t Use Distilled Water in a CPAP to see how to flush out the minerals before they harden.

What Happens If You Don’t Use Distilled Water in a CPAP?

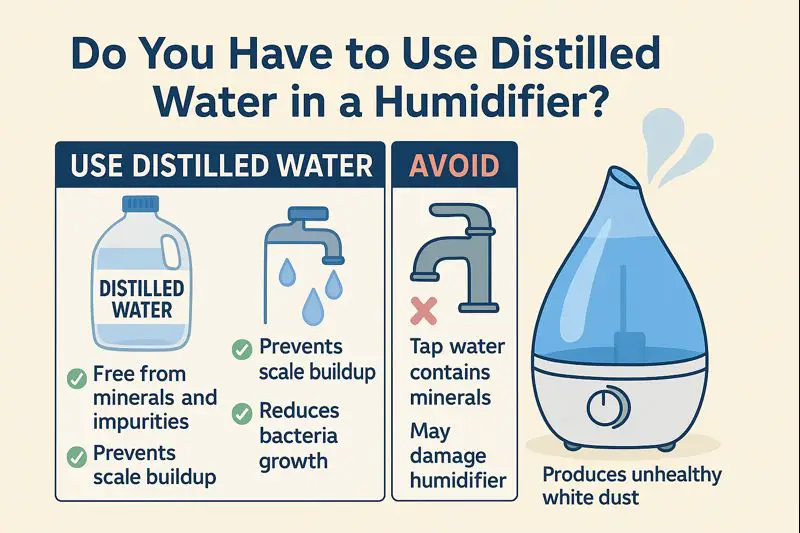
Comparison of distilled water, tap water, bottled water, and reverse osmosis water for use in a CPAP humidifier, showing mineral content and long-term effects What Happens If You Don’t Use Distilled Water in a CPAP?
If you use a CPAP machine, you’ve probably seen recommendations to use distilled water only. That advice isn’t about purity for breathing — it’s about protecting the machine itself.

When distilled water isn’t used, minerals and impurities left behind during evaporation can slowly build up inside the humidifier chamber and internal components.

For most people, the effects are gradual rather than immediate.

Mineral Buildup Inside the Humidifier

Tap water, bottled water, and even filtered water all contain minerals such as calcium and magnesium. When CPAP humidifiers heat water to add moisture to the air, the water evaporates — but the minerals do not.

Over time, this can lead to:

  • White or chalky residue in the water chamber
  • Scale buildup that becomes harder to clean
  • Reduced humidifier efficiency

This buildup doesn’t usually enter your lungs, but it does affect how well the humidifier works.

Does It Create Health Risks?

For most users, not using distilled water does not create an immediate health danger.

However, mineral deposits can make surfaces harder to clean properly. Over time, this increases the risk of bacteria or mold growth if the humidifier isn’t maintained regularly.

People with respiratory sensitivities, asthma, or allergies may notice irritation sooner if the system becomes contaminated due to poor cleaning.

What About Using Tap Water “Just This Once”?

Using tap water once — such as during travel or an emergency — is usually fine.

What matters more than the water choice is what happens afterward.

If you use non-distilled water:

  • Empty the water chamber the next morning
  • Rinse it thoroughly
  • Allow it to fully air dry

One or two uses won’t ruin your CPAP, but making it a habit will eventually cause problems.

Filtered Water vs Distilled Water

Filtered water removes some contaminants, but it does not remove dissolved minerals.

That means filtered water can still leave scale behind — just more slowly than tap water.

Distilled water is different because it has gone through a process that removes minerals entirely, leaving nothing behind when it evaporates.

What About Reverse Osmosis (RO) Water?

Reverse osmosis (RO) water is often very low in minerals, but it is not always mineral-free unless it is specifically labeled as such.

If RO water has minerals added back for taste, it can still cause buildup over time.

If distilled water isn’t available, RO water is usually a better short-term option than tap water — but it’s still not ideal for daily use.

How Mineral Buildup Affects CPAP Equipment Long-Term

Repeated use of non-distilled water can lead to:

  • Permanent staining or scaling of the humidifier chamber
  • Reduced humidity output
  • More frequent replacement of parts

These issues don’t happen overnight, but they do add up over months or years.

Best Practice for CPAP Water Use

For long-term reliability and minimal maintenance:

  • Use distilled water whenever possible
  • Clean the water chamber regularly
  • Do not let water sit unused for days

Distilled water isn’t about fear or safety alarms — it’s about preventing slow, avoidable wear on your equipment.

Bottom line: Using non-distilled water in a CPAP occasionally won’t cause immediate harm, but repeated use leads to mineral buildup, more cleaning, and shorter equipment life. Distilled water remains the simplest and safest long-term choice.

Read More:
What Kind Of Water Do You Use in a CPAP Machine?

Do You Have to Use Distilled Water in a Humidifier? Really?

Do You Have to Use Distilled Water in a Humidifier?

Infographic comparing distilled water vs tap water in a humidifier, showing mineral buildup, white dust, and why distilled water is recommended

Introduction:

What is the problem with not using distilled water in a humidifier? The truth is you can get away with using tap water in a humidifier or a CPAP machine for a while. But eventually the mineral content will become a problem for your humidifier or CPAP machine.

CPAP machine water chamber clogged from minerals when using tap water instead of distilled waterThis is true story:

Recently my wife had an issue with her CPAP machine. if you’re not familiar with what a CPAP machine is, it’s a device that helps you breathe while you sleep. It comes with a mask that you put on, that basically pushes oxygen into your lungs.

And just like a humidifier they are required to be filled with water.

As the story goes, this specific CPAP machine that my wife was using stopped working.

With some aggravation, She immediately she got a hold of the manufacturer who agreed that they would send a shipping label for her to send it in to get it fixed.

And just like they promised, the whole transaction went smoothly and they repaired the device and send it right back.

The invoice that was included in the package specified the problem:

“unit was clogged up, thoroughly cleaned and working properly again. Solution, switch to distilled water”

A lot of hassle and money to get a CPAP machine repaired to find out that she was using tap water to fill it, and the minerals in the water had eventually stopped up the machine where it would not function.

So do you have to use distilled water in a humidifier? No it will work with tap water, But eventually you may wish you would have.

If you’ve run out of distilled water: using tap or bottled water once or twice usually won’t cause immediate damage. The bigger issues tend to show up over time — mineral buildup inside the unit and fine residue settling around the room.

If you notice a chalky film on surfaces or dust forming near your humidifier, that’s often the first sign minerals are being dispersed into the air. We explain exactly why this happens — and what to do about it — in our guide to white dust from humidifiers.

Water Types for Humidifiers

Water Type Mineral Content Potential Impact on Humidifier Suitability for Humidifiers Maintenance Tips
Distilled Water Very Low Minimal scaling and buildup Highly Recommended Regular cleaning with less effort
Tap Water High Increased scaling, potential for clogging Not Recommended Frequent deep cleaning required
Bottled Water Variable Possible scaling depending on mineral content Better than tap, worse than distilled Regular cleaning recommended
Boiled Water Reduced Less scaling than tap water, but some minerals remain Better than tap, not as ideal as distilled Regular cleaning with attention to mineral buildup

Distilled Water For Humidifiers? Why is it Best?

If you don’t already keep distilled water on hand, many people simply add a few gallons of distilled water for humidifiers to their regular household shopping. It’s inexpensive and helps avoid mineral buildup from the start.

Distilled water is the best water to use in a humidifier because of its low mineral content. Because of the process it goes through, it has the lowest mineral content of any type of water.

This is important for a few reasons:

1.The mineral content in most drinking water will eventually shorten the life of your humidifier and lower the output by stopping it up.

2. The minerals in most water are what is responsible for the dust that you see gathering around your humidifier.

Since dust is one of the primary reasons that your skin gets dried out in dry weather, using water with a lot of mineral content in a humidifier can produce the opposite effect than intended.

3. The higher the mineral content in the water that you use in a humidifier, the more likely, the growth of mold and bacteria in the water.

Can you use regular tap water in a humidifier

Can I Use Regular Water in a Humidifier?

Is it dangerous to use regular tap water in a humidifier. No.

Now more so than drinking tap water.

And though most of us probably drink bottled water more regularly than tap water, anytime you purchase tea or coffee from a restaurant, it’s going to be made with tap water.

So whether we believe that tap water is good to drink or not, most of us are most likely consuming it on a regular basis.

The issue with tap water being used in a humidifier are primarily about the high mineral content in tap water.

The higher the mineral content in the water that you use in a humidifier, the more likely to get stopped up and not work properly.

And it’s the mineral content in the water that creates the white dust that accumulates on the humidifier and around it.

Since dry skin is one of the primary reasons people purchase humidifiers and dust is one of the primary things that pulls the moisture out of your skin,
operating a humidifier that is creating more dust by using tap water somewhat counterproductive.

Another issue with tap water is that the minerals in the water have more of a chance to become food for mold to be able to take root inside of a humidifier.

Finally, tap water has a whole list of chemicals that are there “for our own good apparently” that you do not necessarily want to breathe in as part of the moisture content in your air.

So even though tap water is definitely not the best option for a humidifier, the issues with it are not immediately harmful or dangerous. And if that’s all you have at your disposal, you know the risk,

And it’s not like you can’t clean your humidifier extra well after you use tap water in it. And as for the dust, keep it wiped up.

Many ultrasonic humidifiers — including popular models from Levoit and Honeywell — will still run on tap water, but mineral buildup and white dust tend to appear much faster compared to using distilled water.

Quick note: ultrasonic humidifiers show the “white dust” problem the most

If you have an ultrasonic humidifier, it can aerosolize minerals in hard tap water, which is why you may notice white dust on furniture. Evaporative/wick humidifiers usually have less of that issue, but they still get mineral buildup over time.

bottled water for humidifierWhat other water besides distilled can you use in a humidifier?

Bottled?

Bottled water has a lot of minerals in it that could be an eventual problem for your humidifier. Even the water that is produced by using reverse osmosis has the disclaimer on it that minerals are added back to make it more consumable.

It’s a better option than tap water but it still has its fall backs.

Boiled water?

Boiling water causes the minerals in the water to settle. So if you had a way to separate the settlement so that it did not make it into the humidifier with the rest of the water, it would make a great choice.
The problem is, making that happen. Not exactly easy to do.


warning-dirty humidifier water ahead

But there is absolutely one type of water you should never run your humidifier with.

Stagnant water

Water that has been allowed to sit inside of your humidifier is going to be moldy and full of germs and bacteria.

And when you turn that humidifier on with that stagnant water still in it, the germs and bacteria in that water will become part of the air that you are breathing.

Now talk about having the opposite effect than you intended, the humidifier that was supposed to make you feel better, has basically become a weapon of germ warfare.

Legionnaires’ disease and humidifier lung are harsh reminders of what can happen when humidifiers and evaporative coolers are allowed to sit with moldy water.
You can easily look up the symptoms of mold allergies and discover that they look very closely like the symptoms of the flu.

So if you think that the humidifier in your house may be making you sick, you may be right. And you should take it seriously.

Fortunately, Humidifiers have become pretty sophisticated devices and many of them have ways of helping control mold growth.

If you’re in the market for a new humidifier, it’s well worth it to look into some of the features that can help reduce the chance mold and bacteria growing in your humidifier and becoming part of the air you’re breathing.

There are additives that you can place in your humidifier that can reduce the chances of a humidifier developing bacteria too.

Maintenance Tips for Humidifiers

Proper maintenance is crucial for ensuring your humidifier operates efficiently and safely, extending its lifespan and improving indoor air quality. Regardless of the water type you choose, here are some essential maintenance tips to keep your humidifier in top condition:

  • Regular Cleaning: Clean your humidifier regularly to prevent the buildup of minerals and the growth of mold and bacteria. Depending on usage, a thorough cleaning every 1-2 weeks is recommended.
    • Empty the water tank, dismantle the parts, and clean them with mild soap and warm water.
    • Use a soft-bristled brush to scrub away any mineral deposits or buildup.
  • Use Distilled Water When Possible: While not always necessary, using distilled water can significantly reduce mineral buildup and the need for frequent descaling, making regular maintenance easier.Some humidifiers also support optional demineralization cartridges, which can help reduce white dust when distilled water isn’t available — though regular cleaning is still important.
  • Descale and Disinfect: Even with distilled water, it’s important to descale and disinfect your humidifier to remove any mineral deposits and kill germs that could be harmful.
    • Descale the humidifier by using a mixture of white vinegar and water. Let it sit for at least 30 minutes, then rinse thoroughly.
    • Disinfect the water tank and other parts by using a diluted bleach solution (1 teaspoon of bleach per gallon of water) or hydrogen peroxide. Rinse all parts thoroughly after disinfection to ensure no chemicals remain.
  • Change Filters Regularly: If your humidifier has a filter, follow the manufacturer’s recommendations for changing it. Filters can harbor mold and bacteria, reducing air quality and humidifier efficiency.
  • Dry Before Storing: If you plan to store the humidifier for an extended period, ensure it is completely dry to prevent mold and bacteria growth. Disassemble the parts, clean them thoroughly, and let them air dry before storing.
  • Monitor Humidity Levels: Use a hygrometer to monitor room humidity levels, maintaining them within a comfortable range of 30-50%. This helps prevent problems associated with over-humidification, such as mold growth and condensation on windows.
  • Check for Leaks and Damages: Regularly inspect your humidifier for any signs of leaks or damage. Addressing these issues promptly can prevent further damage and potential water damage to your surroundings.

Pros and Cons of Using Distilled Water in Humidifiers

Pros Cons
Minimizes Mineral Deposit Buildup: Cost:
Using distilled water reduces the accumulation of mineral deposits inside the humidifier, thereby extending its lifespan and maintaining its efficiency. Regularly purchasing distilled water can be more expensive than using tap water.
Less Maintenance Required: Accessibility:
Due to fewer mineral deposits, humidifiers operating with distilled water require less frequent cleaning and maintenance. Distilled water may not be as readily available as tap water, requiring extra trips to the store or the need to distill water at home.
Reduces White Dust Formation: Environmental Impact:
The low mineral content of distilled water minimizes the white dust that often accumulates around humidifiers using tap or hard water, leading to cleaner air and surfaces. Buying distilled water in plastic bottles can increase plastic waste, contributing to environmental concerns.
Prevents Microbial Growth: Not Always Necessary:
Distilled water is less likely to harbor bacteria and mold because it lacks the minerals and impurities that feed microbial growth in humidifier tanks. For some humidifiers, especially those with built-in filters or demineralization cartridges, the benefits of using distilled water might be less significant.

Summary


Do you have to put distilled water in a humidifier?

No. Even though distilled water is the best water to keep your machine from stopping up and extending the life of your humidifier,
A humidifier will work without it.

If mineral residue or dust starts appearing, that’s usually the point where switching water types or adding filtration makes the biggest difference.

And though everyone agrees that tap water is the worst water you want to use in a humidifier, you can use it without having to worry about it being dangerous to you.

The main issue with tap water is that it is filled with minerals that can stop up your humidifier. And those minerals can and will produce humidifier dust on your unit and around it.

If tap water is what you have available, then do your best to keep your humidifier clean with vinegar and keep the dust around the humidifier wiped up so it does not become part of the air quality.

Arguably, The most important thing to remember when using a humidifier is to never run it with stagnant moldy water in it.

Mold in your air can produce very similar symptoms to the flu. Pneumonia, humidifier lung, and legionnaires are harsh reminders of what can happen when mold is allowed to grow in water unchecked.

We cover all the common questions and solutions in our full humidifier guide.